
Can you use a circular saw as a beginner? Yes, absolutely! With proper knowledge and safety precautions, anyone can learn to use a circular saw effectively. This guide is designed to take you from knowing nothing about this powerful tool to confidently making cuts and understanding its capabilities. We’ll cover everything you need to know, from the basics of circular saw safety to choosing the right blade and mastering bevel cuts.
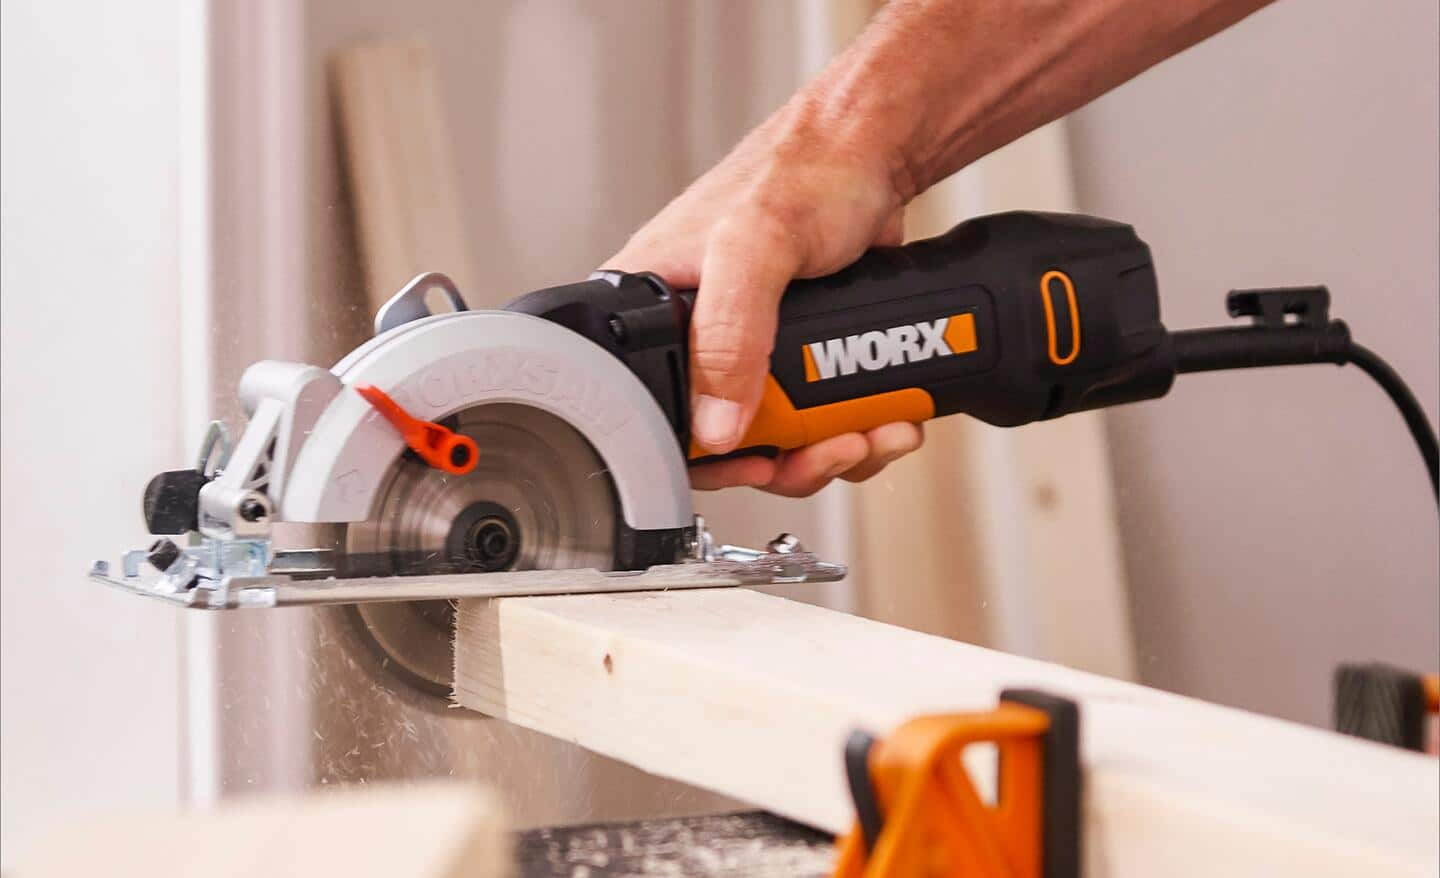
Image Source: dam.thdstatic.com
What is a Circular Saw?
A circular saw is a handheld power tool used for cutting various materials, primarily wood, but also plastics and metals with the appropriate blade. Its defining feature is a rotating circular blade that makes the cut. Think of it as a powerful, portable saw that can tackle a wide range of projects, from building a simple shelf to framing an entire house.
Types of Circular Saws: Corded vs. Cordless
The first decision you’ll make is choosing between a corded and a cordless circular saw. Both have their advantages and disadvantages, and the best choice for you depends on your typical work environment and project needs.
- Corded Circular Saws:
- Pros: Offer consistent power output, never run out of battery, generally less expensive, often more powerful than cordless models.
- Cons: Limited by cord length and accessibility to power outlets, cord can be a tripping hazard, tethered to one location.
- Cordless Circular Saws:
- Pros: Offer freedom of movement and portability, no cord to manage or trip over, great for working in remote locations or on ladders.
- Cons: Battery life limits runtime, batteries need recharging or replacement, can be more expensive, power output can sometimes be less consistent than corded models.
For beginners, a good best circular saw for beginners might lean towards a corded model if you primarily work in a workshop or garage with easy power access. This allows you to focus on learning the cutting techniques without worrying about battery management. If portability and freedom are paramount, a cordless model is an excellent choice.
Essential Circular Saw Safety
Circular saw safety is paramount. This tool is powerful and can cause serious injury if not handled with respect and care. Always prioritize safety.
Personal Protective Equipment (PPE)
Before you even think about plugging in or charging your saw, make sure you have the right PPE:
- Safety Glasses or Goggles: Essential to protect your eyes from flying sawdust and debris.
- Hearing Protection: Circular saws are loud. Earplugs or earmuffs will prevent hearing damage.
- Dust Mask: Sawdust can be harmful to inhale. A good quality dust mask is crucial.
- Work Gloves: While some prefer bare hands for better grip, gloves can protect against splinters and minor cuts.
- Sturdy Footwear: Closed-toe shoes, preferably with slip-resistant soles, are a must.
Safe Operating Practices
Beyond PPE, follow these critical circular saw safety guidelines:
- Read the Manual: Every saw is slightly different. Familiarize yourself with your specific model’s features, warnings, and operating instructions.
- Clear Your Work Area: Ensure your workspace is free of clutter, trip hazards (like cords!), and flammable materials.
- Secure Your Material: Always clamp your workpiece firmly to a workbench or saw horses. Never try to hold the material with your foot or free hand while cutting.
- Stand Properly: Maintain a stable stance with your feet shoulder-width apart. Avoid overreaching.
- Keep Guards in Place: The blade guard is a critical safety feature. Never remove or disable it. It automatically retracts as you cut and springs back to cover the blade when you lift the saw.
- Blade Engagement: Let the saw reach full speed before contacting the material.
- Control the Saw: Guide the saw smoothly through the material. Don’t force it. Let the blade do the work.
- Watch for Kickback: Circular saw kickback is a sudden, violent upward and backward thrust of the saw. It happens when the blade binds in the cut. We’ll discuss this in more detail.
- Turn Off and Unplug: Always turn off the saw and unplug it (or remove the battery) before making adjustments, changing blades, or leaving the tool unattended.
- Keep Hands Away from Blade: This might seem obvious, but it’s worth repeating. Always be aware of where your hands are in relation to the spinning blade.
- Inspect the Saw: Before each use, check the cord (if corded), battery (if cordless), blade condition, and guards for any damage.
Essential Circular Saw Components
Let’s break down the parts of a handheld circular saw you’ll interact with:
- Base Plate (or Shoe): The flat metal plate that rests on the material being cut. It helps stabilize the saw and guides the blade.
- Blade Guard: The metal or plastic cover that shields the blade. It has a spring-loaded lower guard that retracts as you cut.
- Arbor: The spindle that the blade mounts onto.
- Depth Adjustment Lever: Allows you to set how deep the blade cuts.
- Bevel Adjustment Lever: Allows you to tilt the base plate for angled (bevel) cuts.
- Trigger Lock-off Button: Prevents accidental starting of the saw.
- Handle: For gripping and controlling the saw.
Setting the Blade Depth: Circular Saw Depth Adjustment
Proper circular saw depth adjustment is crucial for both clean cuts and safety. The general rule of thumb is to set the blade depth so that it cuts about one-quarter to one-half inch deeper than the thickness of the material you are cutting.
Why is Proper Depth Adjustment Important?
- Cleaner Cuts: When the blade is set too deep, it can cause more tear-out (rough edges) on the back of the cut. Setting it just right minimizes this.
- Safety: A blade that is set too deep can increase the risk of circular saw kickback, as more of the blade is exposed to potentially bind in the material. It also means more blade is exposed if something goes wrong.
- Blade Wear: Cutting with the blade unnecessarily deep can lead to premature wear on the blade.
- Reduced Strain: A correctly set blade will cut more efficiently, requiring less force from you and the saw.
How to Adjust the Depth:
- Unplug or Remove Battery: Always ensure the saw is powered off and disconnected from its power source.
- Locate the Depth Adjustment Lever: This is typically a lever on the side of the saw near the base plate.
- Lift the Lever: Lift the lever to release the locking mechanism.
- Position the Base Plate: Rest the base plate on a flat surface. The blade will naturally fall to its deepest point.
- Adjust the Depth: Slide the base plate up or down to set the desired blade depth. You want to see about one to two “teeth” protruding below the material’s surface.
- Lock the Lever: Push the lever back down firmly to lock the base plate in its new position.
- Double Check: Ensure the lever is fully engaged and the depth is secure before powering on the saw.
Tip: It’s a good habit to perform this adjustment with a scrap piece of your material to get the feel for the correct depth.
Circular Saw Blade Types: Choosing the Right Blade for the Job
The blade is the business end of your circular saw. Using the wrong circular saw blade types can lead to poor cuts, damage to your material, and increased safety risks. Blades are distinguished by their diameter (e.g., 7-1/4 inch, 10 inch) and the number of teeth.
Key Blade Characteristics:
- Diameter: Must match your saw’s specifications. Common sizes are 7-1/4″ and 6-1/2″ for handheld saws.
- Number of Teeth (TPI – Teeth Per Inch): This is a crucial factor determining the type of cut.
- Low Tooth Count (e.g., 12-24 teeth): Designed for faster rip cuts (cutting with the grain of the wood). Fewer teeth mean larger gullets (spaces between teeth) to clear sawdust efficiently. These blades create a rougher cut.
- Medium Tooth Count (e.g., 24-40 teeth): Good all-purpose blades suitable for both rip and crosscuts (cutting across the grain). They offer a balance between cutting speed and cut quality.
- High Tooth Count (e.g., 40+ teeth): Produce smoother, cleaner cuts, ideal for crosscuts, fine woodworking, and materials like plywood or laminates where tear-out is a concern. They cut slower due to smaller gullets.
- Tooth Configuration (Grind): Different tooth shapes affect cutting performance.
- ATB (Alternate Top Bevel): The most common type for general-purpose cutting. Teeth alternate being ground on one side, then the other, which helps clear chips and reduces binding.
- FTG (Flat Top Grind): Primarily for rip cuts. These teeth are flat on top, making them more durable and efficient for cutting through wood with the grain.
- TCG (Triple Chip Grind): Features alternating trapezoidal and flat teeth. Very durable and excellent for cutting hard materials like plastics, laminates, and non-ferrous metals.
- Kerf: The width of the cut the blade makes.
- Full Kerf Blades: Thicker blades, more durable, and less prone to deflection.
- Thin Kerf Blades: Use less power and create less sawdust. Good for cordless saws where power conservation is important.
Common Circular Saw Blade Types and Their Uses:
| Blade Type | Teeth Count | Tooth Grind | Best For | Cut Quality | Speed |
|---|---|---|---|---|---|
| Rip Blade | 12-24 | FTG | Cutting wood with the grain (rip cuts), framing, rough construction | Rough | Fast |
| General Purpose | 24-40 | ATB | All-around use, both rip and crosscuts, general carpentry | Medium | Medium |
| Crosscut Blade | 40+ | ATB | Cutting wood across the grain (crosscuts), fine woodworking, plywood | Smooth | Slow |
| Plywood/Laminate | 60+ | ATB or TCG | Plywood, laminates, melamine, veneer panels, minimizing tear-out | Very Smooth | Slow |
| Metal Cutting Blade | Varies | TCG | Aluminum, brass, steel (ensure saw is rated for metal) | Varies | Slow |
| Masonry Blade | Diamond Grit | N/A | Brick, concrete, tile (use with caution and proper saw) | Rough | Slow |
Important Note: Always ensure the blade you choose is rated for the material you are cutting and is the correct diameter for your saw.
How to Cut Wood with a Circular Saw: Step-by-Step
Now that you’re familiar with safety and blades, let’s get to the practical part: how to cut wood with a circular saw.
Preparation:
- Select the Right Blade: Choose a blade appropriate for the type of cut and material.
- Set Blade Depth: Adjust the depth for optimal cutting and safety (1/4″ to 1/2″ deeper than the material).
- Mark Your Cut Line: Use a pencil and a straight edge (like a ruler or framing square) to draw a clear, crisp line on your workpiece.
- Position Your Material: Place the workpiece on a stable surface like sawhorses or a workbench. Ensure the cut-off piece will have adequate support and won’t fall and pinch the blade. For long cuts, you might need a second person to help support the offcut.
- Align the Saw: Position the circular saw so that the blade is aligned with your cut line. Most saws have a guide or indicator on the base plate that aligns with the blade. Remember to account for the “kerf” – the width of the material the blade removes. If your line is the exact cutting line, place the blade’s edge on your line. If your line indicates the waste side, position the blade to remove that waste.
- Secure the Workpiece: Clamp the material firmly to prevent it from moving during the cut.
Making the Cut:
- Put on Your PPE: Safety first!
- Grip the Saw: Hold the saw firmly with both hands. One hand on the main handle with the trigger, and the other on the front auxiliary handle.
- Engage the Blade Guard: Ensure the lower blade guard is free to move.
- Start the Saw: Depress the trigger to bring the blade up to full speed.
- Begin the Cut: Gently lower the spinning blade onto the edge of your workpiece, aligning the blade with your cut line.
- Advance the Saw: Once the blade has entered the material, smoothly and steadily advance the saw along the cut line. Let the saw do the work; don’t force it. Keep the base plate flat on the material throughout the cut.
- Maintain Control: Avoid twisting or turning the saw during the cut, as this can cause the blade to bind and lead to circular saw kickback.
- Complete the Cut: Continue pushing the saw until you have cut completely through the material.
- Retract the Saw: Once the cut is finished, lift the saw away from the workpiece while it’s still spinning. The guard will automatically close.
- Release the Trigger: Let the blade come to a complete stop before setting the saw down.
- Unplug/Remove Battery: Always power off and disconnect the saw when you are finished cutting.
Mastering Bevel Cuts: Circular Saw Bevel Cut
Circular saw bevel cuts are angled cuts used for joining boards at angles, creating decorative edges, or fitting pieces together precisely. Most circular saws have a mechanism for making bevel cuts.
How to Make a Bevel Cut:
- Identify the Bevel Adjustment: Locate the bevel adjustment lever or knob on your saw. This is usually near the front of the base plate.
- Loosen the Bevel Adjustment: Release the locking mechanism (lever or knob).
- Set the Bevel Angle: Most saws have a detent or scale indicating common angles (like 45 degrees). You can also use a protractor or angle finder to set a precise angle. Carefully adjust the base plate to your desired angle.
- Secure the Bevel Angle: Tighten the locking mechanism firmly to hold the base plate at the set angle.
- Check the Depth: Remember that when you tilt the blade, the effective depth of cut changes. You may need to re-adjust the circular saw depth adjustment to ensure the blade protrudes correctly below your material at the bevel angle.
- Mark Your Bevel Line: Draw a clear line on your material indicating where you want to cut. For bevel cuts, it’s often helpful to mark the line on the edge that will be the “show” side of your workpiece.
- Position the Saw: Align the blade with your marked bevel line, ensuring the base plate is flat against the material at the chosen angle.
- Make the Cut: Follow the same circular saw safety and cutting procedures as for a straight cut, ensuring you maintain control and a steady pace.
Tip: Practice bevel cuts on scrap wood before attempting them on your project. It takes a little getting used to the feel of the saw at an angle.
Understanding and Preventing Circular Saw Kickback
Circular saw kickback is perhaps the most significant danger associated with using these tools. It occurs when the spinning blade suddenly binds in the material being cut, causing the saw to lurch violently upward and backward toward the operator.
Causes of Kickback:
- Blade Binding:
- Pinching: The material closing in on the blade during a cut, often due to the workpiece sagging or shifting.
- Twisting: The operator twisting the saw in the cut.
- Hitting a Knot or Nail: Unexpected hardness can cause the blade to snag.
- Improper Blade Depth: A blade set too deep increases the contact area and risk of binding.
- Dull or Damaged Blade: A dull blade requires more force, increasing the chance of it binding.
- Bevel Cuts: Cutting at an angle can sometimes make the blade more susceptible to binding.
- Not Supporting the Workpiece: If the offcut is not supported, it can drop and pinch the blade.
How to Prevent Kickback:
- Use the Right Blade: Ensure the blade is sharp, clean, and appropriate for the material.
- Set Proper Blade Depth: Never let more than one or two teeth protrude below the material.
- Support Your Workpiece: Make sure both the main piece and the offcut are well-supported. Use sawhorses or clamps.
- Don’t Force the Saw: Let the blade do the cutting. A smooth, steady feed rate is key.
- Avoid Twisting the Saw: Keep the saw moving in a straight line along your cut.
- Be Aware of Binding Points: In some cuts, like cutting a sheet of plywood in half, you can anticipate where the material might sag and pinch. Place a support underneath to prevent this.
- Cut Materials Properly: When cutting long boards, position yourself so that you are not in the path of the saw if it kicks back.
- Keep the Blade Guard Operational: This is your first line of defense.
- Don’t Reach Through the Cut: Never reach across the blade’s path.
If you feel the saw start to bind, immediately release the trigger and let the blade stop spinning before trying to free it.
How to Change a Circular Saw Blade
Knowing how to change a circular saw blade is essential maintenance. Always remember to unplug the saw or remove the battery first!
Tools You’ll Likely Need:
- Spanner Wrench: Most circular saws come with a wrench specifically designed for their arbor nut.
- Safety Glasses: Always protect your eyes.
- Gloves: For a better grip and to keep your hands clean.
- Rag: To wipe down components.
Steps for Changing a Blade:
- Disconnect Power: Unplug the cord or remove the battery.
- Engage Arbor Lock (if available): Many saws have a button or lever that locks the arbor spindle, preventing it from turning. Find this mechanism and engage it.
- Loosen the Arbor Nut: Place the spanner wrench onto the arbor nut. Turn the nut counter-clockwise to loosen it. It might be quite tight.
- Remove the Outer Flange: Once the nut is off, remove the outer blade flange. This is the metal disc that the arbor nut screws onto.
- Remove the Old Blade: Carefully slide the old blade off the arbor. Note the direction of the teeth – the new blade needs to be installed the same way.
- Clean Components: While everything is apart, it’s a good time to wipe down the arbor, inner flange, and outer flange to remove dust and debris. Inspect them for damage.
- Install the New Blade: Place the new blade onto the arbor, ensuring the teeth are pointing in the correct direction (usually forward on the saw). The markings on the blade will often indicate the correct direction of rotation.
- Replace the Outer Flange: Place the outer flange back onto the arbor.
- Thread the Arbor Nut: Screw the arbor nut back on by hand, tightening it clockwise.
- Tighten the Arbor Nut: Use the spanner wrench to tighten the nut firmly. You don’t need to overtighten it, but it should be snug to prevent the blade from coming loose during operation.
- Release Arbor Lock: Disengage the arbor lock.
- Test Rotation: Spin the blade by hand to ensure it moves freely and doesn’t wobble.
Important: Always ensure the new blade is the correct diameter and arbor size for your saw. Never use a blade that is too large or too small.
Choosing the Best Circular Saw for Beginners
When you’re starting out, you want a tool that is reliable, easy to handle, and forgiving of initial learning mistakes. Here are some factors to consider when looking for the best circular saw for beginners:
- Power Source: As discussed, corded offers consistent power for workshop use, while cordless offers freedom. For a beginner focused on learning, a corded might be less complex.
- Weight and Balance: A lighter saw that feels balanced in your hands will be easier to control. Try to get a feel for different models in a store if possible.
- Ergonomics: Comfortable grips and well-placed controls can significantly improve your experience and safety.
- Blade Brake: Some saws have an electric brake that stops the blade very quickly after you release the trigger. This is an excellent safety feature for beginners.
- Ease of Depth and Bevel Adjustment: Look for saws with simple, intuitive adjustment levers that lock securely.
- Price: You don’t need the most expensive professional model to start. Many excellent entry-level saws are available.
- Brand Reputation: Stick with reputable brands known for producing reliable power tools.
Frequently Asked Questions (FAQ)
Q1: Can I use my circular saw to cut metal?
A1: You can cut metal with a circular saw, but you must use a blade specifically designed for cutting metal. These blades have a higher tooth count and are made of harder materials. You will also need to take additional safety precautions, as metal can create sparks and sharp fragments.
Q2: What’s the difference between a circular saw and a miter saw?
A2: A circular saw is a handheld circular saw that you guide along a cut line. A miter saw is a stationary tool designed for making precise angled crosscuts. They serve different purposes, though both are used for cutting wood.
Q3: How do I make a cut in the middle of a piece of wood?
A3: To make a cut that doesn’t start from an edge, you’ll need to make an “plunge cut.” This requires carefully lowering the spinning blade into the material. It’s a more advanced technique and carries a higher risk of circular saw kickback. It’s best to practice this on scrap wood and ensure the blade depth is set correctly and the saw is held very firmly. Some saws have a plunge-cutting mechanism.
Q4: My circular saw is smoking. What should I do?
A4: If your saw is smoking, stop immediately and turn it off. Unplug it or remove the battery. This could be due to a dull blade, too much pressure, or an internal motor issue. Check the blade for dullness or damage. If the problem persists, the saw may need servicing.
Q5: How sharp should my circular saw blade be?
A5: A sharp blade cuts cleanly and efficiently with minimal effort. Dull blades require more force, increase the risk of circular saw kickback, and produce rougher cuts. If you find yourself having to push hard or the cuts are ragged, it’s likely time for a new blade or to have your current one sharpened.
Learning to use a circular saw safely and effectively is a rewarding skill for any DIY enthusiast or tradesperson. By respecting the tool, understanding its components, and prioritizing safety at every step, you can confidently tackle a wide array of cutting tasks. Happy cutting!