
Can you drill a hole in tile safely? Yes, by using the right tools, techniques, and safety precautions, you can effectively and safely drill holes in tile.
Drilling a hole in tile might seem daunting, especially with delicate ceramic or tough porcelain. The fear of cracking or chipping the tile is a common one. However, with the proper approach and the right tile drill bits, making holes in tile for plumbing, fixtures, or decorative purposes becomes an achievable DIY task. This guide will walk you through the essential tile drilling techniques to ensure you can drill a hole in tile safely and successfully.
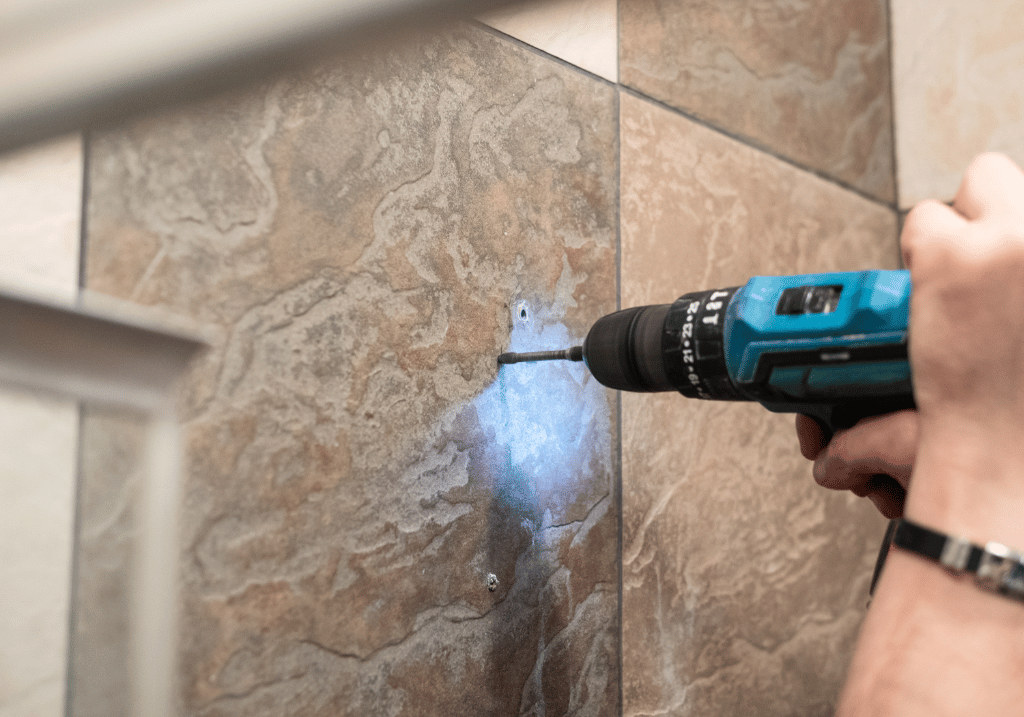
Image Source: ceramiccity.ie
Essential Tools for Tile Drilling
Having the correct tile drilling tools is paramount. Using standard drill bits on tile is a recipe for disaster, leading to broken bits and damaged tiles. The key lies in specialized drill bits designed for hard surfaces.
Choosing the Right Drill Bits
The selection of tile drill bits is the most critical factor. There are several types, each suited for different tile materials and applications.
Diamond Drill Bits for Tile
Diamond drill bits for tile are the gold standard for drilling through ceramic and porcelain tile. These bits have a tip coated or embedded with industrial diamonds, the hardest known material. The diamond’s abrasive quality grinds away at the tile material, rather than cutting it like a metal bit.
- How they work: Diamonds grind the tile into fine dust. This dust needs to be managed, often with water.
- Best for: All types of tile, including the hardest porcelain. They offer the cleanest cuts and the longest lifespan when used correctly.
- Types:
- Core Bits: These create larger holes by removing a disc of material. They are often used for plumbing or electrical conduit.
- Spear-Point or Bullet-Point Bits: These are good for smaller holes, like those needed for wall anchors or screw mounts. They have a sharp, pointed tip that starts the hole accurately.
Carbide-Tipped Drill Bits
Carbide-tipped bits are another option, particularly for softer ceramic tiles. They have a hardened steel shank with a carbide tip brazed onto the cutting edge.
- How they work: The carbide tip is much harder than standard steel, allowing it to penetrate tile.
- Best for: Glazed ceramic tile, softer quarry tiles, and sometimes thinner porcelain. They are less effective and wear out faster on very hard porcelain or natural stone.
- Considerations: They can generate more heat and may require more pressure, increasing the risk of cracking if not handled carefully.
Masonry Bits
While primarily designed for brick and concrete, some masonry bits with carbide tips can handle softer ceramic tiles in a pinch. However, they are not ideal for drilling ceramic tile or drilling porcelain tile where precision and a clean finish are desired.
Other Necessary Tools and Supplies
Beyond the drill bits, several other items are crucial for a safe and effective tile drilling process.
- Drill: A variable-speed drill is essential. A hammer drill is generally not recommended for making holes in tile as the hammering action can shatter the tile. A standard corded or cordless drill with adjustable speed settings is ideal.
- Water Source/Coolant: Wet drilling tile is highly recommended to keep the drill bit cool and reduce dust. This can be achieved with a spray bottle filled with water or by creating a small dam around the drill site.
- Safety Glasses: Protecting your eyes from flying tile shards and dust is non-negotiable.
- Gloves: Work gloves provide a better grip and protect your hands.
- Mask: A dust mask is vital to prevent inhaling fine tile dust.
- Center Punch or Masking Tape: To prevent the drill bit from wandering when you start drilling.
- Measuring Tape and Pencil/Marker: For accurate hole placement.
- Vacuum Cleaner: To clean up dust and debris.
- Sponge or Rags: For managing water and dust during wet drilling tile.
- Drill Guide or Jig (Optional but Recommended): For precise hole placement and to prevent the bit from slipping, especially on smooth surfaces.
Preparing for Tile Drilling
Proper preparation is key to drilling without cracking tile. Rushing this stage can lead to mistakes and damaged materials.
Selecting the Hole Location
- Check for obstructions: Before drilling, ensure there are no pipes, wires, or studs behind the tile. Use a stud finder that can detect live wires and pipes.
- Marking the spot: Clearly mark the exact center of where you need to drill. A pencil or marker works well.
Stabilizing the Tile and Preventing Slippage
- Masking Tape: Apply a strip of masking tape over the marked spot. This helps prevent the drill bit from “walking” or slipping as you start. You can draw your center mark directly on the tape.
- Center Punch: For harder tiles, a sharp center punch can create a small indentation for the drill bit to seat into, providing a starting point and preventing slippage. Tap it gently with a hammer.
- Drill Guide/Jig: If you have one, set up your drill guide to ensure the drill bit stays perfectly perpendicular to the tile surface.
Setting Up Your Drill
- Variable Speed: Set your drill to a low to medium speed. High speeds generate excessive heat, which can damage the tile and the drill bit.
- No Hammer Function: Ensure the hammer drill function is off. This is crucial to avoid shattering the tile.
The Step-by-Step Process for Drilling Tile
Now that you have your tools and preparations in place, let’s delve into the actual tile drilling process.
Step 1: Starting the Hole
- Positioning: Place the tip of your chosen drill bit precisely on the marked spot.
- Gentle Start: Begin drilling at a very low speed. Apply only light, steady pressure. The goal is to create a shallow groove or indentation, not to power through immediately.
- Using the Tape/Punch: If you used masking tape, the bit should start to bite into it. If you used a center punch, the bit should sit in the indentation.
Step 2: Cooling the Bit and Tile (Wet Drilling)
Wet drilling tile is essential for extending the life of your drill bit and preventing the tile from overheating and cracking.
- Water Application: As you begin to drill, start applying water to the drill site.
- Spray Bottle: Continuously spray water onto the area around the drill bit.
- Water Dam: For a more controlled approach, you can create a small dam around the hole using plumber’s putty or a ring of caulk. Fill this ring with water.
- Sponge/Rags: Keep a damp sponge or rag handy to wipe away dust and debris, reapplying water as needed.
- Purpose of Water: The water lubricates the drill bit, carries away heat, and flushes out the fine tile dust, which can be abrasive and clog the bit. This cooling action is vital for drilling without cracking tile.
Step 3: Drilling Through the Tile
- Steady Pressure: Once you have a small starting groove and are applying water, gradually increase the drill speed slightly, but remain on a low to medium setting. Apply steady, consistent pressure. Let the drill bit do the work; forcing it will increase the risk of cracking.
- Periodically Lift: Every 20-30 seconds, pull the drill bit slightly out of the hole while it’s still spinning. This helps to clear out dust and debris, allowing fresh water to cool the bit more effectively.
- Listen and Feel: Pay attention to the sound and feel of the drill. If it starts to strain or overheat, slow down, apply more water, and ease off the pressure.
- Approaching the Back: As you feel the drill bit nearing the back of the tile, reduce the pressure significantly. You want to avoid a sudden breakthrough, which can cause chipping or blowout on the backside.
Step 4: Finishing the Hole
- Final Pass: Once you’ve broken through the tile, continue drilling for a moment with very light pressure to clean up the edges of the hole.
- Clean Up: Turn off the drill and carefully remove it from the hole. Clean the area with water and a sponge to remove any remaining dust and debris.
- Inspect: Check the hole for any chips or cracks. If there are minor imperfections, you can often smooth them with a bit of fine-grit sandpaper or a specialized tile edge smoothing tool.
Specific Considerations for Different Tile Types
While the general process is similar, drilling ceramic tile and drilling porcelain tile have nuances.
Drilling Ceramic Tile
Ceramic tile is generally softer than porcelain, making it easier to drill.
- Bit Choice: Carbide-tipped bits can be effective for glazed ceramic, but diamond bits will always provide a cleaner cut and longer life.
- Speed and Pressure: You can often use slightly higher speeds than with porcelain, but still keep it moderate. Be mindful of the glaze; excessive heat can damage it.
- Risk: The main risk with ceramic is chipping the glaze or cracking the tile due to uneven pressure or overheating.
Drilling Porcelain Tile
Porcelain is much denser and harder than ceramic, requiring more care and the right tools.
- Bit Choice: Diamond drill bits for tile are almost essential for drilling porcelain tile. Carbide bits will wear out very quickly and struggle to penetrate.
- Speed and Pressure: Use the lowest possible speed settings and apply very gentle, consistent pressure. Patience is key.
- Cooling: Wet drilling tile is absolutely critical for porcelain. The heat generated is significant, and without adequate cooling, the bit will dull rapidly, and the tile will likely crack.
- Risk: Cracking the tile is the primary concern. The density of porcelain makes it brittle under stress.
Troubleshooting Common Issues
Even with the best preparations, problems can arise. Here’s how to address them.
Bit Wandering on Start
- Solution: Ensure you’ve used masking tape or a center punch to create a starting point. If using tape, apply more layers or a stronger tape.
Tile Cracking or Chipping
- Causes: Too much pressure, high speed, no cooling, or the hammer function being engaged.
- Solution: Stop immediately. If it’s a minor chip, it might be acceptable. For a crack, you may need to replace the tile. In the future, use less pressure, lower speeds, and more water.
Drill Bit Overheating
- Cause: Insufficient cooling or drilling at too high a speed for too long.
- Solution: Stop drilling. Let the bit and tile cool down. Apply more water. If the bit seems significantly dulled, it might be time for a new one.
Excessive Dust
- Cause: Not enough water, or the water is not reaching the cutting surface effectively.
- Solution: Re-evaluate your water application method. Create a better dam, spray more frequently, or try lifting the bit more often to clear dust. Consider using a shop vacuum with a brush attachment to help capture dust as you drill.
Advanced Techniques for Precision
For critical placements or very large holes, advanced tile drilling techniques can be employed.
Using a Drill Press
A drill press offers superior stability and control compared to a hand drill. It ensures the drill bit remains perfectly perpendicular to the tile.
- Setup: Secure the tile to the drill press table using clamps. Ensure your water delivery system is in place.
- Benefits: Dramatically reduces the risk of the bit wandering and ensures a straight hole.
Creating a Water Reservoir
For larger projects or when drilling without cracking tile is paramount, a more substantial water reservoir can be created.
- Plumber’s Putty Dam: A continuous ring of plumber’s putty around the drill site can hold a significant amount of water, providing consistent cooling.
- Specialized Fixtures: Some professional tile drilling kits include water reservoirs that attach directly to the drill or the drill bit assembly.
Making Larger Holes
For holes larger than what standard spear-point or core bits offer, you might need to:
- Multiple Holes: Drill several smaller holes in a circular pattern and then use a grout saw or a small file to connect them and smooth the edges.
- Hole Saw Attachments: Specialized hole saws with diamond edges are available for very large diameter holes. These often require a water feed system.
Safety First
Prioritize safety in every step of the tile drilling process.
- Eye Protection: Always wear safety glasses.
- Dust Protection: Use a dust mask to avoid inhaling fine particles.
- Electrical Safety: Keep electrical tools and water separate. Ensure your hands and the drill are dry before starting. Be aware of any electrical wiring behind the tile.
- Tool Handling: Use a firm grip and be aware of the drill’s torque.
Frequently Asked Questions About Tile Drilling
Here are some common questions people have when making holes in tile:
Can I drill through tile with a regular drill bit?
No, it’s highly recommended to use specialized tile drill bits, such as diamond-tipped bits, for drilling through ceramic or porcelain tile. Regular drill bits will likely break, dull quickly, and will not provide a clean hole.
How deep do I need to drill into the tile?
You only need to drill through the thickness of the tile itself. Once the drill bit has passed completely through the tile, you can stop.
What if I don’t have a drill? Can I drill a hole in tile without one?
While extremely difficult and not recommended for accuracy or safety, very small holes in softer ceramic tiles might be achieved with extreme effort using a very hard nail or pointed object and a hammer. However, this will likely result in a rough hole and a high risk of cracking. For any practical hole, a drill is necessary.
How do I avoid drilling through the membrane behind the tile?
As you approach the end of drilling through the tile, significantly reduce the pressure. This will allow you to feel when you’ve broken through the tile and stop before you gouge the substrate or membrane underneath.
How do I clean up the tile dust?
Use a vacuum cleaner with a brush attachment and a damp sponge or cloth to clean up the dust and water mixture. Always wear a dust mask during cleanup.
By following these detailed steps and safety precautions, you can confidently drill holes in your tiles, whether it’s drilling ceramic tile for a simple hook or drilling porcelain tile for a more complex installation. Remember, patience, the right tools, and a bit of water go a long way in achieving a professional and safe result.