
Can you use a hole saw to make a clean cut? Yes, absolutely! With the right technique and tools, a hole saw can produce incredibly neat and precise circular openings in various materials.
This guide will walk you through everything you need to know about using a hole saw, from selecting the right one to making those perfect cuts. Whether you’re a DIY enthusiast or a seasoned professional, mastering the use of a hole saw will elevate your projects.
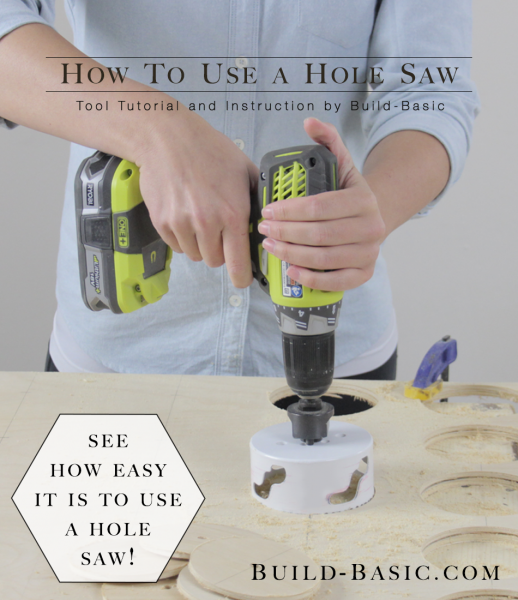
Image Source: build-basic.com
What is a Hole Saw?
A hole saw is a cutting tool that attaches to a drill. It’s shaped like a cylinder with saw teeth around the open end. When attached to a drill and spun, the teeth cut a circle into the material. They are ideal for creating holes larger than what standard drill bits can achieve.
Deciphering Hole Saw Types
There isn’t just one type of hole saw; different materials and applications call for specific designs. Knowing the hole saw types available is the first step to choosing the right one for your job.
Bi-Metal Hole Saws
These are the most common and versatile. They feature a high-speed steel (HSS) cutting edge welded to a tougher, more flexible alloy steel body. They are excellent for cutting through a wide range of materials.
- Materials: Wood, plastic, metal (including mild steel, aluminum, copper, brass), drywall, and even some thinner stainless steel.
- Advantages: Durable, good heat resistance, relatively affordable.
- Disadvantages: Can be less effective on very hard metals or thick materials compared to specialized saws.
Carbide-Tipped Hole Saws
These hole saws have carbide teeth brazed onto the cutting edge. Carbide is significantly harder than steel.
- Materials: Excellent for abrasive materials like brick, tile, concrete blocks, fiberglass, and some tougher metals that bi-metal saws struggle with.
- Advantages: Extreme hardness, long lifespan when used on appropriate materials, cut through harder substances.
- Disadvantages: Can be more brittle, so care must be taken not to overheat or apply excessive force. Not ideal for softer woods or metals where bi-metal saws are more efficient.
Diamond-Grit Hole Saws
These hole saws have a rim coated with diamond particles.
- Materials: Specifically designed for very hard, brittle materials like ceramic tile, porcelain, glass, marble, and stone.
- Advantages: Cuts through extremely hard surfaces cleanly without chipping.
- Disadvantages: Slow cutting speed, requires water for lubrication and cooling to prevent damage to the saw and the material. Not suitable for wood or metal.
Specialty Hole Saws
There are also hole saws designed for very specific tasks, such as:
- Plasterboard/Drywall Hole Saws: Often have a pointed pilot bit for easy starting and a wide flange to prevent over-penetration.
- Powder-Actuated Tool Hole Saws: Used with specialized fastening tools for concrete and steel.
Exploring Hole Saw Sizes
Hole saws come in a vast array of hole saw sizes, measured by their diameter. This allows you to create openings from as small as 1/2 inch to several inches in diameter.
- Common Woodworking Sizes: 1″, 1-1/4″, 1-1/2″, 2″, 2-1/2″, 3″.
- Plumbing/Electrical Sizes: Often range from 1/2″ to 4″ to accommodate pipes, conduit, and electrical boxes.
- Specialty Sizes: Larger sizes are available for cutting through joists or larger ductwork.
When choosing a size, always consider the exact diameter of the hole you need to create. It’s better to have a slightly larger hole saw and be able to shim if needed than to have one that’s too small.
Essential Hole Saw Attachments and Accessories
To effectively use a hole saw, you’ll need a few key accessories. The most important is the hole saw adapter, also known as a arbour or mandrel.
Hole Saw Arbors (Mandrels)
The arbour is the shank that fits into your drill chuck and holds the hole saw. It typically features a threaded end to screw the hole saw onto and a pilot bit that guides the cut.
- Shank Types:
- Round Shank: Common for smaller hole saws.
- Hex Shank: Provides better grip in the drill chuck, reducing slippage, especially for larger hole saws and tougher materials.
- Pilot Bit: A drill bit in the center that starts the cut and keeps the hole saw aligned. Most pilot bits are designed for wood. For metal, you might need a more robust pilot bit or to pre-drill a starter hole.
- Quick-Change Arbors: These allow for fast and easy swapping of different sized hole saws without tools, making them very convenient for projects requiring multiple hole sizes.
Extension Arbors
For deeper cuts or when using larger hole saws that might interfere with the drill body, an extension arbor can be invaluable. It effectively extends the reach of the arbour.
Mandrel Types
Different brands and types of hole saws may come with specific arbours or mandrels. Ensure you have a compatible arbour for your chosen hole saw. Some kits include multiple arbours for different hole saw sizes.
Getting Started: Preparing for the Cut
Before you even think about spinning the drill, proper preparation is key.
Choosing the Right Hole Saw and Arbour
- Material: Select the appropriate hole saw for wood, hole saw for metal, or other material. Bi-metal is a great all-rounder for wood and most metals. Carbide-tipped for masonry. Diamond-grit for tile and glass.
- Size: Ensure the hole saw size matches your project needs.
- Arbour: Use a secure hole saw adapter with a pilot bit. For larger holes or harder materials, a hex shank arbour is recommended. Ensure the hole saw is screwed on tightly to the arbour.
Selecting Your Drill
- Power: A powerful drill is essential, especially for larger hole saws or denser materials. Corded drills generally offer more consistent power than cordless ones.
- Speed: Hole saws work best at lower speeds. High speeds generate excessive heat, which can dull the teeth and even damage the material. Look for drills with variable speed settings.
- Chuck: Ensure your drill chuck can securely grip the arbour shank (round or hex).
Marking Your Cut Line
- Accuracy: Use a pencil, chalk line, or marker to precisely mark the center point and the circumference of the hole you want to cut. For critical projects, using a template or a hole saw jig can ensure perfect placement.
Securing Your Material
- Safety First: Always clamp your workpiece securely to a workbench or sawhorses. Never attempt to cut freehand or with the material unsupported. This prevents the material from shifting during the cut, which can cause the hole saw to bind or kick back.
Safety Gear
- Essential: Always wear safety glasses or a face shield to protect your eyes from flying debris. Gloves can protect your hands. Hearing protection is also recommended, especially when drilling into harder materials.
The Technique: Making the Perfect Cut
Now that you’re prepared, let’s get to the cutting.
Attaching the Hole Saw to the Drill
- Loosen Chuck: Open your drill chuck to accommodate the shank of the arbour.
- Insert Arbour: Insert the arbour into the chuck, ensuring it’s seated properly.
- Tighten Chuck: Tighten the chuck firmly around the arbour shank. Ensure there’s no wobble.
- Attach Hole Saw: Screw the hole saw onto the threaded end of the arbour. Tighten it securely by hand. Some arbours have a set screw to further secure the hole saw.
Starting the Cut
- Pilot Bit: Position the pilot bit exactly at the center mark you made on your material.
- Low Speed, High Torque: Set your drill to its lowest speed setting. This provides more control and reduces heat buildup.
- Start Slowly: Begin drilling slowly and steadily. Let the pilot bit establish a good starting point.
- Maintain Perpendicularity: Keep the drill perfectly perpendicular to the surface. Tilting the drill can cause the hole saw to bind, break teeth, or create an out-of-round hole.
Executing the Cut
- Apply Steady Pressure: Once the pilot bit has penetrated the material, gradually increase pressure. Don’t force it. Let the teeth do the work.
- Intermittent Drilling: For thicker materials, especially wood and metal, it’s beneficial to periodically pull the hole saw partially out of the cut. This clears sawdust or metal chips, preventing them from binding the saw and allowing for better cooling.
- Coolant (for Metal): When drilling metal, especially steel, use a cutting fluid or coolant. Apply it to the cutting edge and the pilot bit. This significantly reduces heat, extends the life of the hole saw, and results in a cleaner cut.
- Hole Saw Cutting Depth: Be mindful of the hole saw cutting depth. Most hole saws have a specific cutting depth, usually indicated on the packaging. For very thick materials, you might need to cut from both sides or use an extension arbor.
Exiting the Cut
- Reduce Pressure: As you approach the end of the cut, reduce the pressure on the drill. This prevents the material from breaking off jaggedly or the drill from kicking back violently as the plug is released.
- Support the Plug: Be prepared to support the cut-out plug as it’s about to be released, especially in wood, to prevent it from tearing the surrounding material.
Specific Applications
Let’s look at how to use a hole saw for common materials.
Hole Saw for Wood
- Technique: Use steady pressure. Pull the saw out periodically to clear sawdust. Start at low speed, then you can slightly increase it once the cut is established, but avoid excessive speed.
- Pilot Bit: Ensure the pilot bit is sharp and centered.
- Material Thickness: For very thick wood, you might need to finish the cut from the opposite side to prevent tear-out.
Hole Saw for Metal
- Technique: This is where low speed, steady pressure, and coolant are crucial. Use a hex shank arbour for better grip.
- Pilot Bit: Consider a sharper pilot bit or pre-drilling a small pilot hole for harder metals.
- Coolant: Absolutely essential for steel and other harder metals to prevent overheating and dulling. Apply frequently.
- Chip Removal: Pulling the saw out to clear metal chips is even more important here.
Hole Saw for Drywall
- Technique: Drywall is soft, so it’s a simpler process. Ensure the pilot bit is centered accurately.
- Speed: You can use a slightly higher speed than for metal, but control is still important to prevent wobbling.
- Depth: Many drywall hole saws have a depth stop or a wide flange on the arbour to prevent the saw from going too deep and damaging wiring or plumbing behind the wall.
Troubleshooting Common Issues
Even with the best intentions, you might encounter problems.
- Wobbling/Binding:
- Cause: Drill not held perpendicular, pilot bit dull, material not secured, wrong drill speed.
- Solution: Ensure drill is straight, sharpen or replace pilot bit, clamp material firmly, use lower speed, ensure hole saw is securely attached to the arbour.
- Overheating:
- Cause: Drilling too fast, not using coolant on metal, excessive pressure.
- Solution: Reduce drill speed, use coolant, ease up on pressure, clear debris more frequently.
- Jagged Edge:
- Cause: Drilling too fast, dull teeth, material tearing out on exit.
- Solution: Slow down, use a sharp hole saw, support material on exit, or finish cut from the opposite side.
- Pilot Bit Breaks:
- Cause: Excessive side pressure, drilling into a knot or hard spot in wood, drilling too fast in metal.
- Solution: Ensure drill is straight, use slow speeds, apply steady forward pressure.
How to Clean Hole Saw
Proper cleaning and maintenance will extend the life of your hole saws and ensure they perform optimally.
- Remove Saw: Carefully unscrew the hole saw from the arbour once it has cooled down.
- Clear Debris: Use a stiff brush (wire brush for metal, general-purpose brush for wood) to remove any sawdust, metal shavings, or material residue from the teeth and the body of the hole saw.
- Lubricate (Optional for Metal): For metal hole saws, a light coat of oil can help prevent rust.
- Inspect Teeth: Check the teeth for any damage or excessive wear. Sharpen or replace if necessary.
- Store Properly: Store hole saws in a dry place, ideally in their original packaging or a dedicated tool case, to protect the teeth from damage.
Frequently Asked Questions (FAQ)
Q1: Can I use a hole saw on a regular drill?
A: Yes, provided your drill has sufficient power and a chuck that can securely hold the hole saw arbour. For larger hole saws or harder materials, a more powerful drill (corded or a high-torque cordless drill) is recommended.
Q2: What speed should I use for a hole saw?
A: Always use the lowest speed setting on your drill. This provides better control, reduces heat buildup, and prolongs the life of the hole saw.
Q3: How do I prevent the hole saw from grabbing and kicking back?
A: Ensure the material is securely clamped, start drilling slowly, keep the drill perpendicular to the surface, and reduce pressure as you exit the material. Using a hex shank arbour can also improve grip.
Q4: What is the pilot bit for?
A: The pilot bit is the drill bit in the center of the hole saw. It starts the cut accurately at your marked spot and guides the hole saw, preventing it from wandering.
Q5: Do I need a special drill for hole saws?
A: Not necessarily. A standard drill with a good chuck and adequate power is sufficient for most applications. However, for heavy-duty tasks, a hammer drill (used without the hammer function for metal/wood) or a drill press can offer more stability and power.
Q6: How do I deal with tear-out when drilling wood?
A: To minimize tear-out, drill most of the way through the wood and then finish the cut from the opposite side. You can also place a scrap piece of wood underneath your workpiece to act as a backing, which helps support the exit point.
Q7: When should I use a hole saw extension?
A: You’ll need a hole saw extension if you’re using a very large diameter hole saw that might hit the drill body, or if you need to cut through material thicker than the standard cutting depth of the hole saw.
By following this comprehensive guide, you’ll be well-equipped to use a hole saw for clean, accurate cuts every time. Happy drilling!