
What is a sawhorse? A sawhorse is a sturdy frame, typically A-shaped or X-shaped, designed to support workpieces like lumber, boards, or sheets of material at a convenient height for cutting, assembling, or finishing. Can I use a sawhorse for anything? You can use sawhorses for a wide variety of tasks in woodworking, DIY projects, home improvement, and even for temporary event setups.
Sawhorses are essential tools for anyone who works with wood or needs a stable platform for various tasks. They provide a raised, steady surface to hold your materials, allowing you to cut, sand, paint, or assemble with greater ease and accuracy. Proper usage of sawhorses goes beyond just placing a board on top; it involves understanding their capabilities, employing safe practices, and leveraging their versatility for different projects.
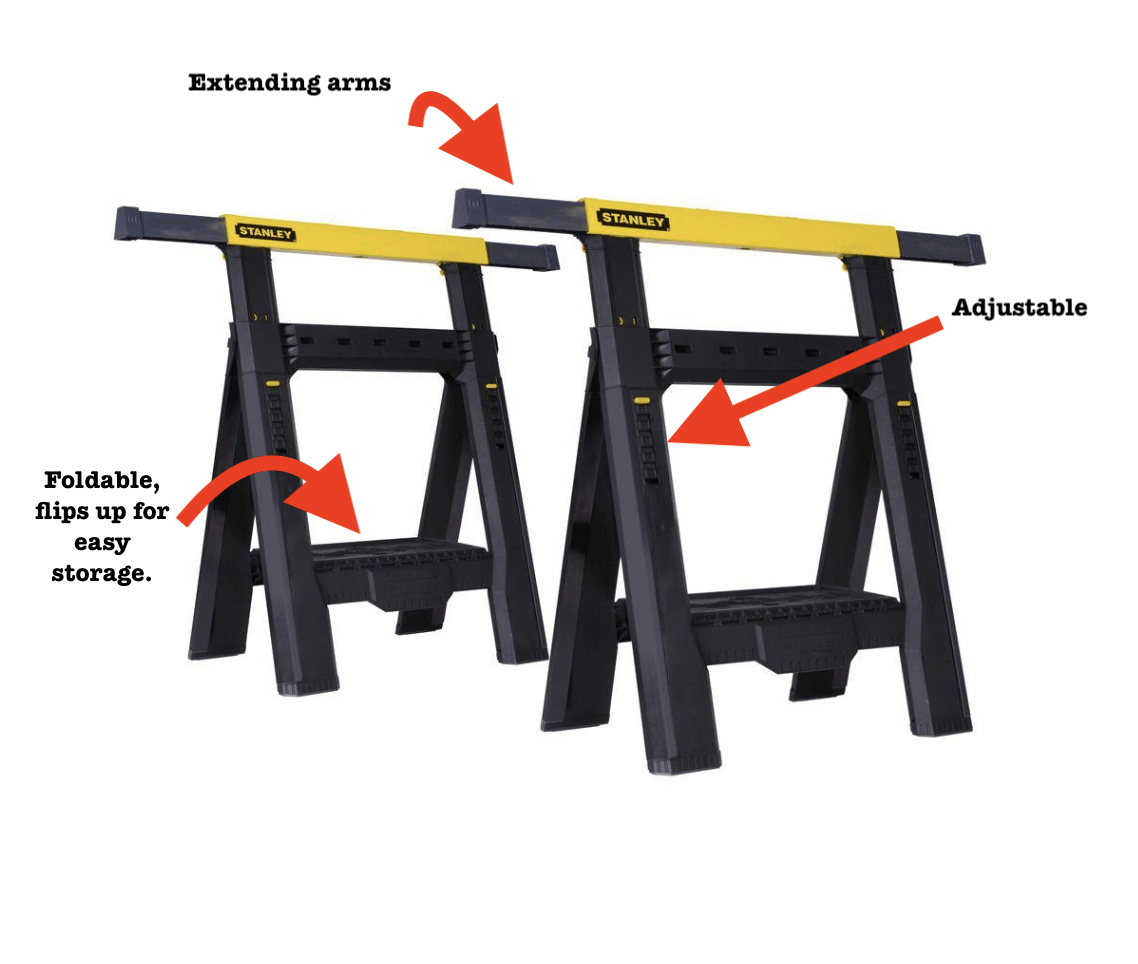
Image Source: thriftdiving.com
The Core Functions of a Sawhorse
At their heart, sawhorses are about providing support and stability. Their fundamental purpose is to elevate your work off the ground, keeping it stable while you perform operations on it. This elevation offers several key benefits:
- Ergonomics: Working at waist height reduces strain on your back and knees, making tasks more comfortable and less physically demanding.
- Precision: A stable surface minimizes unwanted movement of your workpiece, allowing for more accurate cuts, measurements, and assembly.
- Efficiency: By keeping your materials elevated and accessible, sawhorses streamline your workflow, saving you time and effort.
- Versatility: While primarily known for supporting lumber, sawhorses can be adapted for many other uses, acting as temporary tables, workbenches, or even bases for more elaborate structures.
Types of Sawhorses: Choosing the Right Support
The world of sawhorses offers a range of options to suit different needs and budgets. From basic, no-frills models to feature-rich, portable units, understanding the types available will help you select the best fit for your workshop or job site.
Traditional Wooden Sawhorses
These are the classic workhorses, often found in workshops and construction sites. They are typically robust and can be built by hand, making them a great option for DIY enthusiasts.
- Pros: Strong, durable, can be customized, often inexpensive to build yourself.
- Cons: Can be heavy and bulky, not easily portable unless designed for it.
Metal Sawhorses
Made from steel or aluminum, metal sawhorses are known for their strength and durability. They can often support significant weight and are resistant to the elements.
- Pros: Very strong, long-lasting, often weather-resistant.
- Cons: Can be more expensive, may be heavier than some plastic or wood options.
Foldable Sawhorses
For those with limited space or who need to transport their sawhorses frequently, foldable sawhorses are an excellent choice. They collapse down for easy storage and transport.
- Pros: Space-saving, portable, convenient for on-the-go projects.
- Cons: May be less robust than rigid designs, folding mechanisms can wear over time.
Plastic Sawhorses
Lightweight and often very affordable, plastic sawhorses are a good option for lighter-duty tasks or for hobbyists. Many feature integrated tool trays or notches.
- Pros: Lightweight, affordable, often have convenient features.
- Cons: Less durable than wood or metal, may not support very heavy loads.
Adjustable Height Sawhorses
Some sawhorses offer adjustable legs, allowing you to fine-tune the working height for different tasks or to compensate for uneven ground.
- Pros: Adaptable to various tasks and terrains.
- Cons: Can add complexity and cost.
Sawhorse Workbench Configurations
Many sawhorses are designed to be used in pairs, with a piece of plywood or other material laid across them to create a temporary sawhorse workbench. This significantly expands their utility.
- Pros: Creates a larger, more stable work surface, ideal for assembly or larger projects.
- Cons: Requires additional material for the workbench top.
Mastering Sawhorse Stability: The Foundation of Safe Work
Sawhorse stability is paramount. A wobbly sawhorse is not only frustrating but can be dangerous. Several factors contribute to good stability, and ensuring these are in place before you begin any work is crucial.
Proper Placement
- Level Ground: Always set up your sawhorses on a flat, level surface. Uneven ground will cause them to rock, compromising their stability.
- Even Spacing: When using two sawhorses to support a long board, ensure they are spaced appropriately. Too close and the board might sag; too far apart and it might not be adequately supported. A general rule of thumb is to place them roughly one-third of the way in from each end of the workpiece.
Weight Distribution
- Center Loading: Place your workpiece directly over the legs of the sawhorse, not hanging off the edge. This ensures the weight is distributed evenly.
- Avoid Overloading: Respect the weight capacity of your sawhorses. If you’re working with heavy materials, ensure your sawhorses are rated for the load.
Checking for Wobble
- Pre-Work Inspection: Before placing any material on them, give each sawhorse a gentle push and pull. If it wobbles, adjust its position or check its construction for loose joints.
Sawhorse Safety: Your Top Priority
Sawhorse safety is not an optional extra; it’s a fundamental requirement for any woodworking or DIY activity. Ignoring safety can lead to accidents, injuries, and damaged materials.
Personal Protective Equipment (PPE)
- Eye Protection: Always wear safety glasses or goggles to protect your eyes from sawdust, wood chips, or flying debris.
- Hearing Protection: If using power tools like circular saws or miter saws, wear earplugs or earmuffs to prevent hearing damage.
- Gloves: While not always necessary for handling lumber, gloves can protect your hands from splinters and abrasions, especially when handling rough lumber.
- Dust Mask/Respirator: Sawdust can be harmful if inhaled. Wear a dust mask or respirator, especially when sawing or sanding.
Tool Safety
- Secure Tools: Ensure your cutting tools are securely held and positioned before making a cut.
- Blade Awareness: Keep your fingers and hands well away from saw blades.
- Cord Management: If using corded power tools, manage the cords to prevent tripping hazards or entanglement.
Workpiece Security
- Clamping: For tasks requiring extra stability, or when using sawhorse clamps, secure your workpiece to the sawhorse. This prevents it from shifting during cutting or assembly.
- Avoid Overhang: Don’t let too much of your workpiece overhang the sawhorses, as this can create leverage and cause instability.
Environment Safety
- Clear Workspace: Keep the area around your sawhorses clear of obstructions, tools, and debris to prevent trips and falls.
- Good Lighting: Ensure your workspace is well-lit to improve visibility and reduce the risk of errors.
Essential Sawhorse Uses: Beyond Simple Support
The sawhorse uses extend far beyond just holding a piece of lumber. Their versatile nature makes them indispensable for a wide range of projects.
For Cutting Lumber
This is perhaps the most common and primary use of sawhorses for cutting. They provide the perfect elevated platform for using circular saws, hand saws, or even jigsaw to cut wood to size.
- Circular Saw Cuts: Position the sawhorse so the cut line is accessible and well-supported on both sides of the intended cut. Ensure the offcut piece is also stable.
- Hand Saw Cuts: The height of sawhorses makes them ideal for comfortable hand sawing.
- Miter Saw Support: While miter saws often have their own stands, sawhorses can be used to support long pieces of material extending from the miter saw, acting as outfeed supports.
Creating a Temporary Workbench
As mentioned, using two sawhorses with a piece of plywood or a solid board creates an instant sawhorse workbench. This is incredibly useful for:
- Assembly Projects: Building furniture, cabinets, or other items where you need a stable surface to join pieces.
- Sanding and Finishing: Provides a raised platform to work on, making it easier to reach all surfaces and keep the workpiece clean.
- Painting and Staining: Protects your floor and provides an easy way to access all sides of your project.
Supporting Materials for Assembly
When assembling larger items, sawhorses can act as temporary supports to hold pieces in place while you join them. This is especially helpful when working alone.
As Stands for Other Tools
- Table Saw Outfeed: For very long boards, sawhorses can provide outfeed support for a table saw, preventing the material from tipping as it exits the blade.
- Drill Press Table Extension: Similarly, they can extend the working surface for a drill press.
DIY Sawhorse Projects
For those who enjoy building, creating your own diy sawhorses can be a rewarding project. This allows for customization in size, strength, and features.
Building Simple DIY Sawhorses
A basic DIY sawhorse can be constructed with readily available lumber (like 2x4s or 2x6s) and screws or nails. The design typically involves two A-frames connected by a horizontal brace.
Materials Needed (for one basic sawhorse):
- Two 8-foot 2x4s for the legs (cut into four equal lengths)
- One 8-foot 2×4 for the top brace and diagonal support (cut into appropriate lengths)
- Wood screws or nails
Basic Construction Steps:
- Cut Legs: Cut two of the 2x4s in half to create four leg pieces.
- Form A-Frames: Take two leg pieces and join them at the top with a screw at an angle to form an ‘A’. Repeat for the other two legs.
- Add Top Brace: Cut a piece of 2×4 to the desired width of your sawhorse top. Attach this horizontally to the apex of each A-frame.
- Add Diagonal Support: Cut a piece of 2×4 to fit diagonally between the two leg pieces of each A-frame for added strength.
- Assemble: Connect the two A-frames using the top braces and diagonal supports. Ensure all joints are secure.
Considerations for DIY Sawhorses
- Strength: Use good quality lumber and robust fasteners. Consider using larger dimension lumber for heavier-duty sawhorses.
- Height: Measure your typical work height needs to determine the ideal height for your DIY sawhorses.
- Portability: If you need portable sawhorses, design them with folding legs or a lighter construction.
Tips for Maximizing Your Sawhorse Usage
To get the most out of your sawhorses, consider these practical tips.
Use Sawhorse Clamps for Enhanced Security
Sawhorse clamps, such as C-clamps or specialized sawhorses with integrated clamping mechanisms, are invaluable for securing your workpiece. This prevents accidental movement and allows for more precise cutting or assembly.
Invest in Quality, Especially for Heavy Use
If you plan on using sawhorses frequently or for heavy-duty projects, investing in a good quality pair, whether metal or robust wood, will pay off in durability and safety.
Pair Sawhorses for a Stable Workbench
Don’t underestimate the power of a simple sawhorse workbench. By laying a sturdy piece of plywood across two sawhorses, you can create a robust and versatile work surface that’s perfect for a multitude of tasks.
Consider Portability for Versatility
If you work in different locations or have limited storage space, portable sawhorses are a game-changer. Look for models that are lightweight and fold down compactly.
Integrate with Other Tools
Think about how your sawhorses can complement your other tools. Using them as outfeed supports for table saws or miter saws dramatically increases your cutting capacity.
Keep Them Clean and Maintained
Regularly inspect your sawhorses for damage, loose fasteners, or wear and tear. Keep them clean of sawdust and debris to ensure their longevity and stability.
Frequently Asked Questions (FAQ)
Q1: How much weight can a sawhorse hold?
A1: The weight capacity of sawhorses varies greatly depending on their material, construction, and design. Simple wooden sawhorses might support a few hundred pounds, while heavy-duty steel sawhorses can often hold 1,000 pounds or more. Always check the manufacturer’s specifications for the weight limit.
Q2: Can I stand on a sawhorse?
A2: It is generally not recommended to stand on a sawhorse unless it is specifically designed and rated as a step stool or platform. Most sawhorses are designed to support materials, not people, and standing on them can compromise sawhorse stability and lead to accidents.
Q3: How far apart should sawhorses be for cutting?
A3: For cutting, the ideal spacing depends on the length and thickness of the material being cut. A good rule of thumb is to place them about one-third of the way in from each end of the workpiece. For longer pieces, you might need additional support in the middle. Ensure the area you intend to cut is well-supported and doesn’t sag.
Q4: What is the best material for sawhorses?
A4: The “best” material depends on your needs. Metal sawhorses are very strong and durable, ideal for heavy-duty work. Wooden sawhorses offer a good balance of strength and can be customized or built yourself. Plastic sawhorses are lightweight and affordable, suitable for lighter tasks.
Q5: How do I prevent my workpiece from sliding off sawhorses?
A5: You can use sawhorse clamps (like C-clamps) to secure your workpiece to the sawhorse. Alternatively, some sawhorses have built-in notches or sawhorse workbench tops made from materials with better grip. Ensuring the sawhorses are on a level surface and the workpiece is centered also helps.
Q6: Are foldable sawhorses as sturdy as rigid ones?
A6: Generally, rigid sawhorses tend to be sturdier than their foldable sawhorses counterparts due to the absence of moving parts and potential flex points. However, high-quality foldable sawhorses can be surprisingly robust and perfectly adequate for many tasks. It’s important to check reviews and specifications for specific models.
Q7: What are some common DIY sawhorse projects?
A7: Besides building basic sawhorses, people create custom-sized diy sawhorses for specific needs, build heavy-duty sawhorses from larger lumber, or design sawhorses with integrated features like tool trays or vices. Many also build elaborate sawhorse workbench systems for dedicated workspaces.
By prioritizing sawhorse safety, choosing the right type for your needs, and employing smart usage techniques, you can transform these simple frames into indispensable tools for countless projects. Whether you’re building furniture, renovating your home, or simply cutting lumber for a DIY project, mastering the proper use of sawhorses will elevate your work and your results.