
Can you get perfectly straight cuts with a miter saw? Yes, you absolutely can, but only if your miter saw is properly squared. Squaring a miter saw is the process of ensuring the blade is at a perfect 90-degree angle to the fence and at a 0-degree angle to the miter scale. This critical miter saw setup is the foundation for achieving the precise miter cuts that woodworking projects demand.
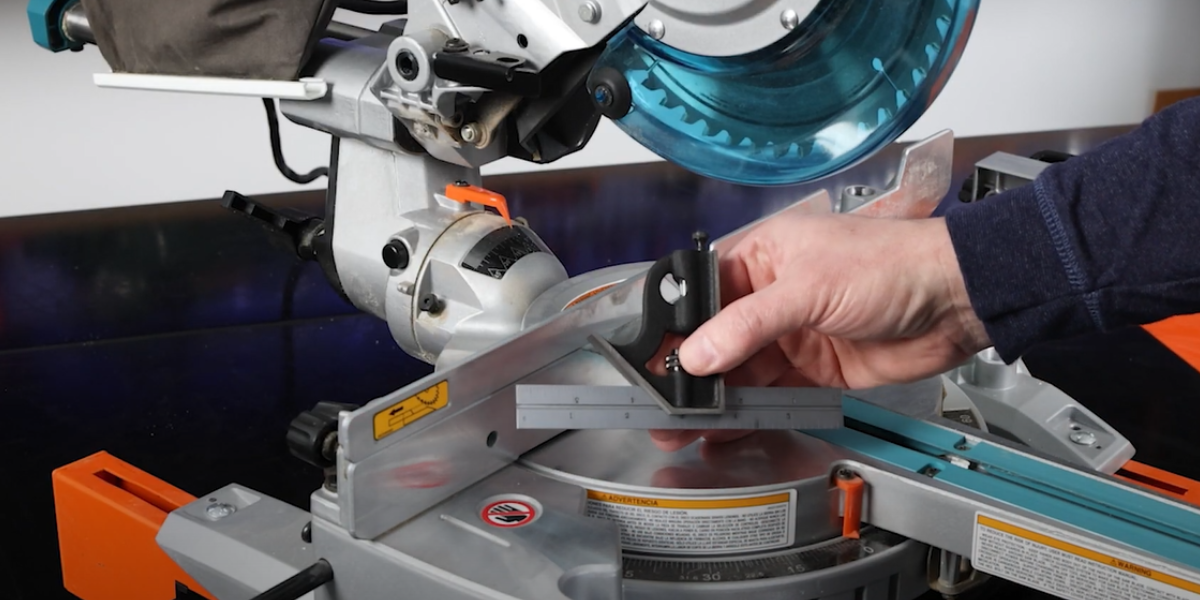
Image Source: fixcom-g4bhetdmcgd9b7er.z01.azurefd.net
Why Squaring Your Miter Saw Matters
When your miter saw isn’t squared, your cuts won’t be accurate. This means:
- Mismatched joints: Your pieces won’t fit together snugly. This is especially problematic for framing, trim work, and any project requiring tight angles.
- Wasted material: Every inaccurate cut means you might need to start over with a new piece of wood.
- Frustration: Nothing is more disheartening than spending time on a project only to find your cuts are off.
This guide will walk you through the essential steps for miter saw alignment, covering how to square a chop saw to ensure your woodworking is as precise as possible.
Essential Tools for Miter Saw Alignment
Before you start, gather these tools:
- Combination Square or Try Square: This is your primary tool for checking 90-degree angles. A good quality metal square is best.
- Protractor or Digital Angle Gauge: Useful for verifying the miter angle (0 degrees) and other common angles.
- Marking Pencil: To mark cut lines and potentially reference points.
- Safety Glasses: Always wear safety glasses when operating any power tool.
- Dust Mask: Miter saws produce a lot of sawdust.
- Clean Workspace: A clear area around your saw is crucial for safety and accuracy.
Step-by-Step Guide to Squaring Your Miter Saw
Getting your miter saw setup right involves checking and adjusting a few key components. We’ll focus on squaring the blade to the fence and ensuring the miter angle is set correctly.
1. Squaring the Blade to the Fence (90-Degree Cut)
This is the most crucial step for making square cuts. You want the blade to be perfectly perpendicular to the fence when the saw is in its “0” or “90-degree” position.
Checking the Blade’s Squareness
- Position the Saw: Ensure your miter saw is on a stable surface. Plug it in but do not turn it on yet.
- Lower the Blade: Bring the saw blade down to its lowest cutting position.
- Place the Square: Slide your combination square against the saw blade and the fence.
- Inspect the Fit:
- If the square’s edge touches both the blade and the fence perfectly: Your saw is likely already squared for this plane.
- If there’s a gap between the square and the blade or fence: Your saw needs adjustment. You should see a gap on either the top or bottom of the blade relative to the fence.
This initial check tells you if you need to proceed with miter saw calibration for the 90-degree setting.
Adjusting the Blade for Squareness
Most miter saws have adjustment screws or bolts to fine-tune the blade’s perpendicularity to the fence. These are often located near the pivot point of the saw arm or on the base of the saw. Refer to your miter saw’s manual for the exact location of these adjustment points.
- Locate Adjustment Screws: Typically, there are two screws that control the tilt of the saw head. One might limit the swing to the left, and the other to the right. You’ll be adjusting these to get the blade perfectly vertical.
- Make Small Adjustments:
- If the blade leans away from the fence at the top: You might need to tighten a screw on one side or loosen one on the other. Again, consult your manual.
- If the blade leans towards the fence at the top: The opposite adjustment is needed.
- Test After Each Adjustment:
- After making a small turn on an adjustment screw, lower the blade and re-check with your square.
- Make only small adjustments at a time. Over-adjusting can lead to overshooting the perfect 90-degree angle.
- Repeat and Refine: Continue making small adjustments and testing until the combination square sits flush against both the blade and the fence, with no visible gaps. This is key for precise miter cuts.
Miter Saw Fence Adjustment Considerations
While you’re focused on squaring the blade, remember the fence plays a vital role. Ensure your fence is:
- Straight and true: A warped or damaged fence will affect cut accuracy.
- Securely mounted: The fence should not wobble.
- Properly aligned with the blade’s path: When the blade is in the 90-degree position, it should cut cleanly against the face of the fence.
Some saws allow for slight fence adjustments independent of the blade angle. If your blade is perfectly square to the saw’s internal mechanism, but the cut edge isn’t perfectly flush with the fence face, you might need to address fence alignment separately. However, for most home users, ensuring the blade is square to the existing fence is the primary goal.
2. Squaring the Miter Angle (0-Degree Setting)
This step ensures that when your miter scale reads “0,” the blade is actually making a 90-degree cut relative to the workpiece and the fence.
Checking the Miter Angle
- Set the Miter to 0: Rotate the saw’s miter lock to the 0-degree position. Ensure it’s firmly locked.
- Lower the Blade: Bring the blade down into the cutting position.
- Use Your Square:
- Method A (Against the Fence): Place your combination square against the saw blade and the fence. If the blade is perfectly at 0 degrees (meaning a 90-degree cut to the fence), the square will sit flush.
- Method B (On the Saw Base/Table): Some people prefer to check the angle directly on the saw’s table or base. Lay your square flat on the table, with one edge along the fence. Then, bring the blade down to touch the square’s edge. If they align perfectly, the 0-degree setting is accurate.
- Use a Protractor/Angle Gauge: For extra certainty, place a digital angle gauge or a precise protractor on the saw’s table, against the fence. Bring the blade down. The angle shown should be 90 degrees relative to the fence.
This miter saw testing is crucial for setting 90 degrees accurately.
Adjusting the Miter Angle
Similar to the blade tilt, miter saws have adjustment screws for the miter detents (the points where the saw locks into specific angles, especially 0 and 45 degrees). These are typically located on the underside of the rotating table or near the miter lock mechanism.
- Locate Miter Adjustment Screws: Your saw manual will pinpoint these. They often control the travel stops for the miter.
- Make Small Adjustments:
- If the 0-degree setting cuts slightly off from 90 degrees, you’ll need to adjust these screws.
- If the cut is slightly past 90 degrees (blade leans away from the fence): You might need to adjust a screw to stop the rotation sooner.
- If the cut is slightly before 90 degrees (blade leans towards the fence): You might need to adjust a screw to allow more rotation.
- Test and Refine: Loosen the miter lock slightly, make a tiny adjustment to the relevant screw, then re-lock and re-test with your square or angle gauge.
- Repeat: Continue this process of small adjustments and testing until the blade is perfectly perpendicular to the fence when the miter is set to 0.
3. Checking and Adjusting the Bevel Angle (90-Degree Tilt)
While the primary focus is often on the miter (side-to-side) and the blade’s squareness to the fence, the bevel (up-and-down tilt) is also important, especially for compound cuts. For standard square cuts, you want the blade to be perpendicular to the table when the bevel is set to 0.
Checking the Bevel Angle
- Set Bevel to 0: Ensure the bevel lock is at its 0-degree setting.
- Lower the Blade: Bring the blade down.
- Place Square on Table: Lay your combination square flat on the saw’s table.
- Align Blade to Square: Bring the saw blade down to touch the edge of the square that is along the fence.
- Inspect: The blade should be perfectly parallel to the fence (forming a 90-degree angle with the table). If it’s not, you’ll see a gap.
Adjusting the Bevel Angle
Most miter saws have adjustment screws for the bevel stop. These are often found on the pivot assembly.
- Locate Bevel Adjustment Screws: Consult your saw’s manual.
- Make Small Adjustments: Adjust the screws to bring the blade into perfect alignment with the square on the table.
- Test and Repeat: As with the miter, make small adjustments and re-test until the bevel is precisely 0.
4. Testing Your Miter Saw Setup for Precision Miter Cuts
Once you’ve made adjustments, it’s time for miter saw testing to confirm your efforts.
Test Cut Method 1: The Square-to-Square Test
This is a classic method for checking the 90-degree miter setting.
- Cut a Test Piece: Take a piece of scrap wood, preferably something with a straight edge. Make a square cut on one end.
- Rotate and Cut Again: Flip the wood over so the cut edge is against the fence. Rotate the saw to the 0-degree miter position (or whatever position you just adjusted) and make another cut.
- Inspect the Cut: If your saw is perfectly squared, the two cut surfaces should meet at a perfect 180-degree angle (forming a straight line) when you place them together. If there’s a slight angle or a gap, your 0-degree setting is still off.
Test Cut Method 2: The 45-Degree Angle Test
This test is excellent for checking your miter detents and ensuring your compound cuts will be accurate.
- Cut Two Identical Pieces: Take two pieces of scrap wood of the same length.
- Cut 45 Degrees: Set your miter saw to 45 degrees. Make a cut on one end of each piece. Ensure you are cutting the same angle on both (e.g., both are left 45-degree cuts).
- Join the Pieces: Place the two cut ends together. They should form a perfect 90-degree angle. You can check this with your combination square.
- Repeat for the Other Side: Do the same with another two pieces, setting the saw to 45 degrees in the opposite direction. When joined, they should also form a 90-degree angle.
If the angles aren’t perfect, you’ll need to revisit the miter adjustment screws.
Test Cut Method 3: The Repeatability Test
This tests how well the saw returns to the same angle.
- Cut a Piece: Make a square cut on a piece of wood.
- Cut at an Angle: Set your miter to a specific angle (e.g., 22.5 degrees) and make a cut.
- Return to 0 and Cut Again: Return the miter to 0 degrees and make another cut on the same piece of wood.
- Inspect: The cut at 0 degrees should be perfectly square to the previous edge. If the saw doesn’t return precisely to its set detents, there might be an issue with the locking mechanism or the detent adjustment.
Maintaining Miter Saw Alignment
Miter saw alignment isn’t a one-time fix. Regular checks are essential for consistent accuracy.
- After Transport: If you move your miter saw, always re-check its alignment.
- Regular Checks: Make it a habit to perform a quick square check before starting important projects, especially if you haven’t used the saw in a while.
- Inspect for Damage: Check the blade, fence, and base for any damage or debris that could affect accuracy.
- Blade Condition: A dull or damaged blade can lead to inaccurate cuts and safety hazards. Ensure your blade is sharp and the correct type for the material you’re cutting.
Troubleshooting Common Miter Saw Alignment Issues
| Issue | Possible Cause | Solution |
|---|---|---|
| Blade not 90 degrees to the fence | Adjustment screws out of alignment | Locate and adjust the blade tilt adjustment screws. |
| 0-degree miter cut is not 90 degrees | Miter detent adjustment screws out of alignment | Locate and adjust the miter detent screws. |
| Wood binds or burns on one side of cut | Blade not square to the fence or miter not set to 0 correctly | Re-square the blade to the fence and check the miter detent settings. Also, ensure the blade is not warped or damaged. |
| Cuts are consistently slightly off | Minor calibration issue | Perform a thorough miter saw calibration process, focusing on the adjustment screws. |
| Fence appears to be the issue | Fence is warped, loose, or not parallel to the blade | Check if the fence is securely fastened. If warped, it may need replacement. Some saws allow fence alignment; consult your manual. |
| Blade wobbles | Loose blade arbor nut, damaged blade, or arbor bearing issue | Ensure the blade arbor nut is tight. Inspect the blade for damage. If the arbor bearing is suspected, professional service may be needed. |
| Miter lock doesn’t hold firmly | Worn locking mechanism or debris | Clean the locking mechanism. If worn, it might require replacement parts or professional servicing. |
| Bevel angle is inaccurate | Bevel adjustment screws out of alignment | Locate and adjust the bevel angle adjustment screws. |
Frequently Asked Questions (FAQ)
Q: How often should I square my miter saw?
A: It’s a good practice to check your miter saw alignment before starting any critical project, especially if it hasn’t been used recently or if it has been moved. For frequent users, a quick check weekly or bi-weekly can prevent errors.
Q: My miter saw has a digital display. Does this mean it’s always accurate?
A: A digital display helps you set angles accurately, but it doesn’t guarantee the blade itself is perfectly aligned. You still need to perform the physical checks with a square to ensure the saw’s internal mechanisms are correctly calibrated.
Q: Can I use a piece of paper to check for squareness?
A: While a very thin piece of paper might reveal gross inaccuracies, it’s not precise enough for woodworking. A good quality metal combination square or digital angle gauge is essential for proper miter saw calibration.
Q: What if my miter saw doesn’t have adjustment screws for the angle stops?
A: Some less expensive models may have limited adjustment capabilities. In such cases, you might need to rely on shims placed strategically under the saw’s base or fence to achieve a better alignment. However, for the most precise miter cuts, a saw with accessible adjustment screws is preferable.
Q: My saw cuts perfectly square, but the fence isn’t perfectly parallel to the blade when the blade is at 0. What should I do?
A: This usually indicates a problem with the fence alignment itself, not the blade’s perpendicularity. Check if your saw has adjustable fence stops or mounting bolts that allow you to reposition the fence. If not, you might need to consider shimming the fence.
Q: I just replaced my miter saw blade. Do I need to square it?
A: Yes, absolutely. Every time you change a blade, it’s imperative to perform a miter saw setup to ensure the new blade is correctly aligned with the saw’s fence and angle indicators. A new blade might not sit perfectly perpendicular to the arbor on its own.
By dedicating time to proper miter saw setup and regular miter saw calibration, you ensure that every cut is as precise as your tools and skills allow, leading to better-looking, better-fitting projects.