
Yes, you can sharpen a drill bit with an angle grinder. While it might seem like an advanced technique, with careful practice and the right approach, you can effectively re-sharpen your dull drill bits, saving you money and keeping your tools in top working order. This DIY guide will walk you through the process of drill bit sharpening angle grinder methods.
Dull drill bits can make your projects take twice as long and can even be dangerous. They put extra strain on your drill and can cause bits to break. Fortunately, DIY drill bit sharpening is a skill many DIYers can master. Using an angle grinder might seem intimidating, but it’s a powerful tool for grinding drill bits angle grinder style when done correctly. This angle grinder sharpening guide will help you tackle sharpening dull drill bits for various applications, focusing on metal drill bit sharpening.
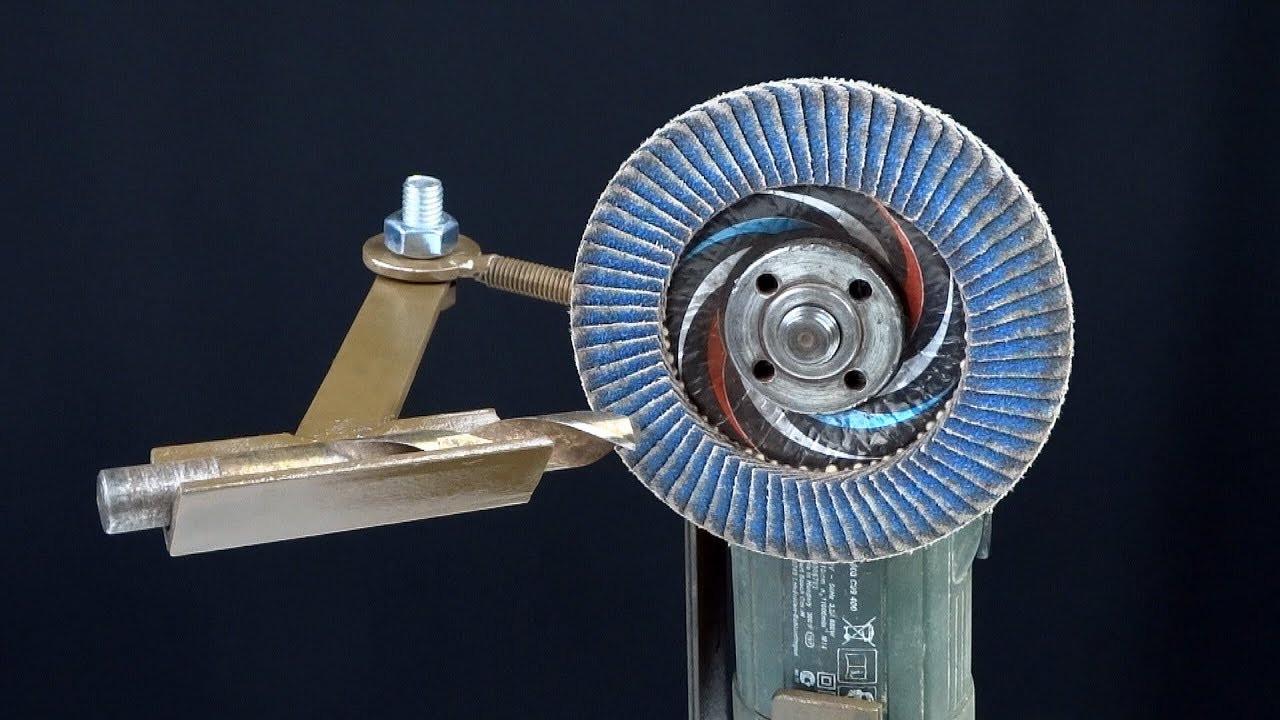
Image Source: binictools.com
Why Sharpen Your Drill Bits?
Drill bits, especially those used for metal, tend to wear down with use. The cutting edges become rounded, reducing their ability to bite into material. This leads to:
- Slower drilling: You’ll find yourself pushing harder.
- Overheating: Both the drill bit and the material can get too hot.
- Increased strain on your drill: The motor works harder, shortening its lifespan.
- Rougher holes: The finish quality suffers.
- Bit breakage: A dull bit is more likely to snap under pressure.
Regularly re-sharpening drill bits is a cost-effective way to maintain your toolkit and ensure efficient work. This process is a fundamental part of DIY tool sharpening.
Tools and Materials You’ll Need
Before you start sharpening bits angle grinder applications, gather these essential items:
- Angle Grinder: A common tool in any DIY workshop.
- Grinding Wheel/Disc: A fine-grit grinding wheel specifically designed for metal is best. Avoid coarse wheels as they remove too much material too quickly.
- Safety Glasses: Absolutely essential for protecting your eyes from flying debris.
- Gloves: To protect your hands from heat and sharp edges.
- Hearing Protection: Angle grinders can be loud.
- Dust Mask: Grinding metal creates fine dust.
- Bench Vise: To securely hold the drill bit during grinding.
- Pliers or Locking Pliers (Vise Grips): To hold the drill bit in the vise.
- Coolant (Optional but Recommended): Water or a cutting fluid to prevent overheating.
- Drill Bit: The dull bit you want to sharpen.
- Permanent Marker: For marking the cutting edges.
- A Flat Surface: For testing the sharpness later.
Safety First: Essential Precautions
Using an angle grinder requires respect for its power. Always prioritize safety:
- Wear Safety Gear: This cannot be stressed enough. Safety glasses, gloves, hearing protection, and a dust mask are non-negotiable.
- Secure Your Workpiece: The drill bit must be held firmly in a vise. Never try to grind a bit held only by hand.
- Inspect Your Grinding Disc: Ensure the disc is free of cracks or damage. Mount it correctly according to the grinder’s instructions.
- Clear Your Workspace: Remove any flammable materials from the area.
- Maintain a Stable Stance: Stand with your feet shoulder-width apart for balance.
- Keep a Firm Grip: Hold the angle grinder with both hands.
- Be Aware of Sparks: Direct sparks away from yourself and others.
- Allow for Cooling: Metal gets hot when ground. Allow the bit to cool down.
The Drill Bit Anatomy: What Are We Sharpening?
To sharpen a drill bit effectively, you need to know its parts. We’re primarily concerned with the cutting edges, which are the angled surfaces at the tip of the bit.
- Shank: The part that goes into the drill chuck.
- Body: The main shaft of the bit.
- Flute: The spiral groove that carries away chips.
- Web: The central rib separating the flutes.
- Chisel Edge: The blunt edge at the very tip, formed by the intersection of the two clearance angles. This is what we are trying to restore to a sharp point.
- Cutting Lips (or Cutting Edges): The primary angled surfaces that do the cutting. These are what we will be grinding.
- Heel: The trailing edge of the cutting lip.
- Clearance Angle: The angle behind the cutting lip. This prevents the heel from rubbing against the hole wall. We need to maintain or slightly increase this angle.
When sharpening, our goal is to restore the original primary and secondary clearance angles, ensuring the two cutting lips are of equal length and angle.
Step-by-Step Guide: Sharpening a Metal Drill Bit with an Angle Grinder
This section details the process for metal drill bit sharpening using an angle grinder. It’s a delicate operation requiring patience and precision.
Step 1: Secure the Drill Bit
- Mount the Vise: If your vise isn’t already mounted, secure it firmly to your workbench.
- Position the Bit: Place the drill bit in the vise so that the tip you want to sharpen extends out enough to access with the angle grinder. The bit should be held horizontally or at a slight angle, with the flutes facing upwards.
- Grip Firmly: Use locking pliers to hold the drill bit securely in the vise. Ensure the pliers grip the shank, not the flutes. The goal is to prevent the bit from moving or spinning during grinding.
Step 2: Prepare the Angle Grinder
- Attach the Grinding Disc: Ensure the angle grinder is unplugged. Attach a fine-grit grinding disc securely. Double-check that it’s the correct type for metal.
- Plug In and Test: Plug in the grinder and briefly turn it on to ensure it runs smoothly and the disc is stable.
Step 3: The Grinding Process – Establishing the Clearance Angle
This is the most crucial part of angle grinder techniques for this task. We are primarily focused on grinding the clearance angle behind the cutting lip.
- Angle of Approach: Hold the angle grinder at a shallow angle to the drill bit’s cutting lip. The angle of the grinder should correspond to the desired clearance angle of the drill bit (typically around 5-15 degrees for most metal bits).
- Grind the Heel: Gently touch the grinding wheel to the heel (the trailing edge) of the cutting lip. The contact should be light.
- Controlled Movement: Move the angle grinder in a sweeping motion along the cutting lip, maintaining the shallow angle. Avoid digging the wheel into the bit. The goal is to lightly grind away material behind the cutting edge to create or restore the clearance.
- Grind Both Sides: Grind the clearance angle on one side of the cutting lip. Then, carefully reposition the grinder to grind the clearance angle on the other side of the same cutting lip. This is a common point of confusion. You’re working on one lip at a time.
- Repeat for the Other Lip: Once you’ve established clearance on one lip, you need to do the same for the other lip. This requires you to rotate the drill bit in the vise slightly. The angle at which you grind the second lip must be identical to the first.
- Cool Down: After a few seconds of grinding on each lip, remove the angle grinder and allow the drill bit to cool down. Dipping it in water can speed this up. Overheating will ruin the temper of the steel.
Important Note on Angle: Achieving the correct angle is vital. It’s often helpful to practice on a scrap piece of metal first to get a feel for the angle. You are grinding the facet that runs behind the cutting edge.
Step 4: Restoring the Cutting Edge (The Primary Grind)
Once you have established clearance on both sides of both lips, you need to grind the actual cutting edge.
- Position for Primary Grind: Now, you need to adjust the angle of the grinder. The angle of approach for the primary grind is steeper than for the clearance grind. You’re aiming to create the sharp cutting edge.
- Grind the Cutting Face: Hold the grinder at a steeper angle (relative to the drill bit’s axis) and touch the grinding wheel to the cutting lip’s edge. Move the grinder along the length of the lip.
- Even Grinding: Grind both sides of the cutting lip evenly. The key is to remove just enough material to create a sharp point. You’re essentially reshaping the cone that forms the tip of the drill bit.
- Symmetry is Key: The goal is to make both cutting lips identical in length and angle. If one lip is longer or at a different angle, the drill bit will not cut cleanly and will wobble.
- Check and Adjust: Periodically remove the bit from the vise and inspect it. You can use a permanent marker to color the cutting edge; the marker will be ground off the areas you are actively sharpening. This helps you see where you are removing material and ensure even grinding.
- Cool Down Frequently: Remember to cool the bit down often.
Step 5: Creating the Chisel Edge
The chisel edge is the very tip of the drill bit. It’s formed by the meeting of the two clearance angles.
- Final Touch: With the primary cutting edges formed, you might need to touch up the very tip to ensure the chisel edge is sharp and centered.
- Small Grinding Motion: Use a very light, brief grinding motion at the center of the bit’s tip, ensuring you are grinding both sides equally to form a sharp, pointed tip.
Step 6: Testing the Sharpness
- Visual Inspection: Look at the cutting lips. They should be smooth and tapered to a sharp point. There should be no visible rounding or dullness.
- Feel (Carefully): You can carefully run your fingernail across the cutting edge. It should feel sharp, not smooth or rounded.
- Test Drill: The best test is to try drilling into a piece of scrap metal. A sharp bit will bite easily and remove material without excessive force or heat.
Sharpening Different Types of Drill Bits
While this guide focuses on metal drill bits, the principles of drill bit sharpening angle grinder use can be adapted. However, be extra cautious with bits designed for specific materials like wood or masonry.
- Standard Twist Drill Bits (Metal): Covered extensively above. The key is maintaining the clearance and primary cutting angles.
- Wood Bits: These often have spurs on the outside that need to remain intact. Grinding these with an angle grinder is generally not recommended unless you have extreme precision. A file or specialized sharpener is better.
- Masonry Bits: These have carbide tips with a different geometry. Angle grinders are generally not suitable for sharpening these effectively; specialized diamond grinding wheels or dedicated sharpeners are required.
Troubleshooting Common Issues
- Uneven Lips: If the lips are uneven, you’ve likely ground one side more than the other. You’ll need to carefully grind the longer lip down to match the shorter one.
- Overheating: If the bit turns blue or purple, it has been overheated, and the temper is lost. The bit will be much softer and won’t hold an edge. Prevent this by grinding in short bursts and cooling frequently.
- Excessive Material Removal: Using a coarse grit disc or applying too much pressure will remove too much metal, shortening the life of your drill bit.
- Loss of Original Angle: It’s very easy to change the original angles. Practice is key to developing the feel for the correct angles.
Alternatives to Angle Grinder Sharpening
While using an angle grinder for DIY drill bit sharpening is a viable option, it’s not the only one, and sometimes not the best.
- Manual Drill Bit Sharpeners: These are hand-held devices designed specifically for sharpening drill bits. They are generally easier to use and provide more consistent results for beginners. They often have built-in guides to ensure the correct angles.
- Grinding Jigs/Fixtures: These specialized tools attach to your bench grinder or drill press and hold the drill bit at the precise angle needed for sharpening.
- Files: For smaller bits or minor touch-ups, a small triangular file can be used, but it requires significant skill and patience to achieve good results.
When to Retire a Drill Bit
Even with careful sharpening, drill bits have a finite lifespan. You should consider replacing a drill bit when:
- The web has become too thick due to repeated grinding. A thick web makes drilling harder and generates more heat.
- The bit has been ground down to a very short length.
- The tip has chipped or broken in a way that cannot be reasonably repaired by sharpening.
- The material of the bit is exceptionally hard and your sharpening method is struggling to make any impact.
Conclusion: Mastering the Art of Re-Sharpening
Sharpening bits angle grinder techniques can be a rewarding part of DIY tool sharpening. It allows you to extend the life of your valuable drill bits and maintain efficient performance in your projects. Remember that practice makes perfect. Start with less critical bits to hone your skills. With patience, the right safety precautions, and a steady hand, you can master this technique and keep your tools cutting sharp. This method is particularly useful for metal drill bit sharpening where durability and precision are key.
Frequently Asked Questions (FAQ)
Q1: Can I really sharpen any drill bit with an angle grinder?
A1: You can sharpen most standard metal twist drill bits. However, specialized bits like masonry bits (with carbide tips) or wood bits with spurs are generally not well-suited for angle grinder sharpening. It’s best to use tools specifically designed for those types of bits.
Q2: What is the best angle to hold the angle grinder when sharpening a drill bit?
A2: For establishing the clearance angle, you’ll typically use a shallow angle, around 5-15 degrees relative to the side of the drill bit. For creating the primary cutting edge, the angle is steeper, typically around 59 degrees for a standard 118-degree point angle. These are general guidelines, and slight adjustments might be needed.
Q3: My drill bit turned blue after grinding. What happened?
A3: If your drill bit turned blue or purple, you overheated it. This process, called tempering, changes the metal’s properties and significantly reduces its hardness and ability to hold an edge. To prevent this, grind in very short bursts and cool the bit frequently in water.
Q4: How do I ensure both cutting edges are the same length and angle?
A4: This is crucial for a drill bit to cut properly. After grinding one edge, make a mental note or mark the bit. Rotate the bit in the vise to the corresponding position for the other cutting edge. Aim to replicate the exact angle and amount of grinding you did on the first side. Using a permanent marker to color the cutting edge before grinding can help you see where you’ve removed metal and ensure uniformity.
Q5: Is it better to use a grinding disc or a flap disc for sharpening?
A5: For sharpening, a grinding disc, specifically a fine-grit one designed for metal, is generally preferred. Flap discs are better for smoothing and finishing metal surfaces, not for precise reshaping of a cutting edge.
Q6: How often should I sharpen my drill bits?
A6: The frequency depends on how much you use them and the material you’re drilling. When you notice increased effort needed to drill, the bit is wandering, or the hole quality is poor, it’s time for sharpening. Regularly checking and sharpening is part of good tool maintenance.
Q7: What grit should the grinding wheel be for drill bit sharpening angle grinder applications?
A7: A fine grit is best, typically around 60-80 grit. Coarser grits remove too much material too quickly, making it hard to control the sharpening process and increasing the risk of overheating.
Q8: Can I sharpen a drill bit with a bench grinder?
A8: Yes, a bench grinder can be used, but it’s often more challenging to maintain the correct angles compared to using a dedicated drill bit sharpener or a jig. If using a bench grinder, a grinding jig or fixture is highly recommended for accurate results.
Q9: What’s the difference between clearance angle and cutting angle?
A9: The clearance angle is the relief angle ground behind the cutting lip, which prevents the heel from rubbing against the hole wall. The cutting angle (or point angle) is the angle formed by the two cutting lips at the very tip of the bit, which determines how the bit penetrates the material. You’re primarily grinding the clearance angle to allow the cutting edge to engage effectively.