
Yes, you can drill your own well, but it’s a significant undertaking requiring research, planning, physical labor, and adherence to regulations. This guide will walk you through the process of DIY well drilling, from initial assessment to enjoying your own water source.
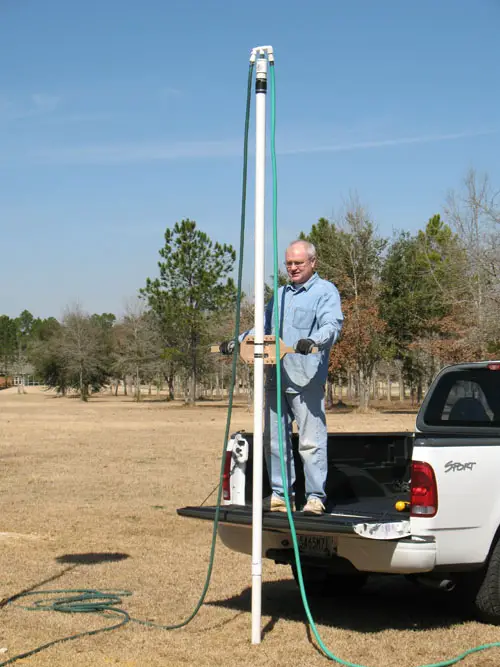
Image Source: drillyourownwell.com
Is Drilling Your Own Well Right for You?
Deciding whether to drill your own well is a big choice. It can save you money compared to hiring professionals, but it also demands a lot of your time and effort. You’ll need to be prepared for physical work and the possibility of unexpected challenges.
Factors to Consider Before You Start
- Budget: While DIY can be cheaper, factor in the cost of equipment rental or purchase, materials, permits, and potential professional consultation.
- Time Commitment: Drilling a well is not a weekend project. It can take days or even weeks, depending on the depth and difficulty.
- Physical Fitness: This is a labor-intensive process. You’ll be lifting, digging, and operating machinery.
- Technical Skills: Basic mechanical aptitude and the ability to follow instructions are essential.
- Local Regulations: This is crucial. Most areas have strict well permit requirements and rules about well construction to protect groundwater.
Benefits of DIY Well Drilling
- Cost Savings: This is often the primary motivator.
- Self-Sufficiency: Having your own reliable water source is empowering.
- Learning Experience: It’s a chance to gain valuable skills.
Drawbacks of DIY Well Drilling
- Physical Strain: It’s hard work, and injuries are a risk.
- Time Investment: It takes a considerable amount of time.
- Potential for Errors: Mistakes can be costly and may require professional intervention.
- Unpredictable Water Quality/Quantity: You might not find water where you expect, or the water quality might be poor.
- Equipment Costs/Rental: Accessing the right tools can be expensive.
Planning Your Well Project
Before you even think about touching a shovel or a drill, thorough planning is paramount. This stage sets the foundation for a successful well.
Determining Your Water Needs
How much water do you need? This depends on your household size, irrigation plans, and any potential future needs. A typical household uses 50-100 gallons per person per day.
Locating a Suitable Water Source
- Aquifer Depth Estimation: This is a critical step. You need to know how deep you’ll likely need to drill to reach a reliable aquifer. Local geological surveys, agricultural extension offices, or experienced well drillers in your area can provide information on typical aquifer depth estimation. Neighboring wells can also offer clues.
- Proximity to Existing Structures: Regulations often dictate setback distances from septic systems, property lines, and buildings to prevent contamination.
- Accessibility for Drilling Equipment: Ensure a drilling rig for wells can access your chosen spot.
Understanding Well Permit Requirements
This is non-negotiable. Contact your local health department, environmental agency, or water authority. They will explain the well permit requirements, application process, fees, and any specific construction standards you must follow. Failure to obtain permits can result in fines or the need to re-drill your well.
Choosing Your Well Type
For DIYers, the most common options are:
- Shallow Wells: These tap into the first water-bearing layer. They are generally easier and cheaper to drill but are more susceptible to contamination and drought. You might consider shallow well digging if local conditions are favorable and regulations permit.
- Deep Wells (Boreholes): These penetrate multiple layers to reach a deeper, more reliable aquifer. They require more advanced drilling techniques and equipment.
Essential Equipment and Materials
Having the right tools makes all the difference. For DIY well drilling, you’ll need a combination of specialized and general equipment.
Drilling Equipment
- Drilling Rig: This is the most significant piece of equipment. You can rent or, if you plan on multiple projects, purchase a rig. Options range from portable, manual rigs to truck-mounted or PTO-driven units.
- Drill Bits: Different bits are designed for various soil and rock types (e.g., auger bits for soft soil, rock bits for harder formations).
- Drill Pipe: This connects the drill bit to the rig and is added as you drill deeper.
- Water Swivel and Pump: To circulate water down the drill pipe, which cools the bit and flushes cuttings to the surface.
- Mud Pump (Optional but Recommended): For circulating drilling fluid (mud), which stabilizes the borehole walls and carries cuttings.
- Casing: This is the pipe that lines the borehole to prevent collapse and keep out surface contaminants. Common materials are PVC or steel. You’ll need the correct diameter and length.
- Screen: A section of perforated casing placed at the aquifer level to allow water to enter the well while keeping out sand and gravel.
- Gravel Pack (if needed): Coarse gravel placed around the screen to filter water.
- Surface Seal/Grout: Cement or bentonite clay mixture used to seal the annular space between the casing and the borehole above the aquifer to prevent surface contamination.
- Well Cap: A secure, vented cap to protect the wellhead.
Ancillary Tools
- Wrenches and Pipe Wrenches: For assembling and disassembling drill pipe.
- Shovels and Picks: For initial site preparation and handling cuttings.
- Buckets and Bailing Equipment: For removing water and debris from the well.
- Safety Gear: Hard hat, safety glasses, steel-toed boots, gloves, hearing protection.
- Measuring Tape: For monitoring depth.
- Generators (if power is needed): For pumps and lights.
- Hose and Water Source: For drilling fluid.
The Drilling Process: Step-by-Step
Drilling techniques for wells vary, but the general principles involve advancing the borehole, removing cuttings, and stabilizing the hole.
Site Preparation
- Clear the Area: Remove any vegetation, rocks, or debris from the drilling site.
- Mark the Well Location: Confirm your chosen spot adheres to all setback regulations.
- Set Up the Rig: Position the drilling rig on a stable, level surface.
Drilling the Borehole
- Start Drilling: Begin by drilling the initial section of the borehole.
- Add Drill Pipe: As you go deeper, add sections of drill pipe. Ensure connections are secure to prevent leaks.
- Circulate Water/Mud: Use your pump to circulate water or drilling fluid down the drill pipe. This lubricates the bit, cools it, and carries the excavated material (cuttings) back up to the surface through the annular space between the drill pipe and the borehole wall.
- Monitor Progress: Keep track of the depth and observe the type of cuttings coming up, which can indicate the geological formations you’re passing through.
- Dealing with Obstacles: Encountering hard rock, boulders, or unstable formations can be challenging. You may need to change drill bits or adjust your drilling fluid.
- Reaching the Aquifer: Continue drilling until you reach a stable water-bearing layer. You’ll typically notice a change in cuttings and an increase in water flow. You may need to drill several feet into the aquifer to ensure a good supply.
Well Casing Installation
Once you’ve reached the desired depth, the well casing installation is the next critical step.
- Lower the Casing: Carefully lower the casing pipe into the borehole. This prevents the sides of the hole from caving in.
- Install the Screen: At the aquifer level, attach the well screen to the bottom of the casing.
- Grouting/Sealing: This is vital for preventing surface water contamination. A grout (cement or bentonite slurry) is pumped into the annular space between the casing and the borehole, typically from the bottom up to the surface or a predetermined depth. This creates a watertight seal. Follow specific local regulations for grouting procedures.
Developing the Well
Well development is the process of cleaning out the borehole and screen to improve water flow and remove drilling fluids and fine particles.
- Surging and Pumping: This involves alternately pumping water out and allowing it back in, or using a surge block, to create pressure fluctuations that help draw water through the screen and flush out fine sediment.
- Pumping Until Clear: Continue pumping water until it runs clear, indicating that the well is sufficiently developed.
Installing the Wellhead and Pump
- Set the Well Cap: Securely install a vented well cap to the top of the casing.
- Install the Pump: Depending on your water needs and well depth, you’ll install a submersible pump or a hand pump well system. This requires careful selection and installation to ensure efficient water delivery.
Hand Pump Well Installation
For simpler, off-grid setups, a hand pump well is a viable option. This usually involves a simpler casing and a manual pump mechanism.
- Choosing a Hand Pump: Select a pump designed for your well’s depth and diameter. Different types exist, from pitcher pumps to piston pumps.
- Installation: This typically involves attaching the pump rod and cylinder to the casing and installing the handle mechanism above ground. Ensure a watertight seal at the wellhead.
Post-Drilling: Water Testing and Maintenance
Well Water Testing
Crucially, after drilling and development, you must test your water.
- Coliform Bacteria: Test for the presence of E. coli and total coliforms, which indicate potential fecal contamination.
- Nitrates: High nitrate levels can be dangerous, especially for infants.
- Minerals and Other Contaminants: Test for dissolved solids, heavy metals (like lead or arsenic), and any other contaminants of concern in your area. Your local health department can advise on accredited labs.
Well Maintenance
Regular maintenance ensures the longevity and safety of your well.
- Inspect the Wellhead: Check for any damage or signs of contamination around the cap and casing.
- Monitor Water Quality: Periodically re-test your water, especially if you notice any changes in taste, odor, or appearance.
- Pump Maintenance: Follow the manufacturer’s recommendations for your specific pump.
Alternatives and Professional Help
If the prospect of DIY well drilling seems too daunting, or if you encounter significant geological challenges, consider these options:
Hiring a Professional Well Driller
- Expertise: They have the experience, knowledge, and specialized equipment to handle complex drilling situations.
- Efficiency: They can often complete the job faster and more reliably.
- Compliance: They are knowledgeable about well permit requirements and construction standards.
Other Water Source Excavation Methods
- Shallow Well Digging (Manual): For very shallow water tables, manual shallow well digging using a well-digging auger or a shovel might be an option. This is labor-intensive and typically only suitable for obtaining water for non-potable uses or in areas with very shallow, clean groundwater.
- Water Source Excavation (Hand Dug Wells): Historically, wells were dug by hand. This involves excavating a larger diameter pit to the water table. These are prone to contamination and collapse and are rarely used for potable water today due to modern regulations and practices.
Frequently Asked Questions (FAQ)
Q1: How deep do I need to drill to find water?
A1: This varies greatly depending on your location. Aquifer depth estimation is key. You’ll need to research local groundwater maps, consult with neighbors, or contact local water authorities or experienced drillers who can provide estimates for your specific area.
Q2: Can I use a homemade drilling rig for wells?
A2: While technically possible, using a homemade drilling rig for wells is highly discouraged due to safety risks, potential for damage to the borehole, and the likelihood of not meeting well permit requirements. Renting or purchasing a commercially designed rig is strongly recommended.
Q3: What if I can’t find water where I expected?
A3: This is a common challenge in DIY well drilling. It might mean the aquifer depth estimation was incorrect for that spot, or the formation is less permeable. You may need to relocate the drilling site slightly and try again, or consult with a professional driller.
Q4: How long does it take to drill a well?
A4: The time it takes can range from a few days to several weeks. Factors include the depth of the well, the hardness of the rock or soil, the type of drilling techniques for wells used, and the efficiency of your equipment and crew (even if it’s just you).
Q5: What is the difference between a well screen and gravel pack?
A5: A well screen is a perforated pipe that allows water into the well while keeping out larger sediment. A gravel pack is a layer of coarse gravel placed around the screen to provide an additional layer of filtration, especially in wells with fine sand.
Q6: Do I need to purify well water?
A6: Yes, all well water should be tested regularly and may require purification depending on the results. Common purification methods include chlorination, UV treatment, or filtration systems to remove bacteria, minerals, or other contaminants.
Q7: What are the legal requirements for drilling my own well?
A7: You absolutely must research and comply with all local well permit requirements. These typically involve submitting an application, paying fees, adhering to setback distances, and meeting specific construction standards to ensure water quality and prevent contamination. Contact your local health or environmental department for details.
Q8: Can I dig a shallow well by hand?
A8: For very shallow groundwater sources, shallow well digging by hand is possible. However, these wells are more susceptible to contamination and drought. Regulations may also restrict hand-dug wells, especially for potable water. It’s essential to check local rules and consider the long-term reliability and safety.
Q9: What is the most critical step in drilling a well?
A9: While many steps are crucial, well casing installation and proper sealing (grouting) are often considered the most critical for long-term water quality and well integrity. This prevents surface contaminants from entering the groundwater.
Q10: What kind of pump is best for a DIY well?
A10: For a DIY project, a hand pump well is a simpler option. If you need more volume or pressure, a submersible pump is common, but its installation is more complex. The choice depends on your water needs, well depth, and budget.
Disclaimer: This guide provides general information. Always consult with local authorities and consider seeking professional advice before undertaking any well drilling project. Safety should be your top priority.