
Can you sharpen drill bits at home? Yes, you absolutely can sharpen drill bits at home. With the right tools and a bit of practice, you can bring dull drill bits back to life, saving you money and ensuring cleaner, more efficient drilling. This guide will walk you through the process of sharpening drill bits at home with expert DIY tips.
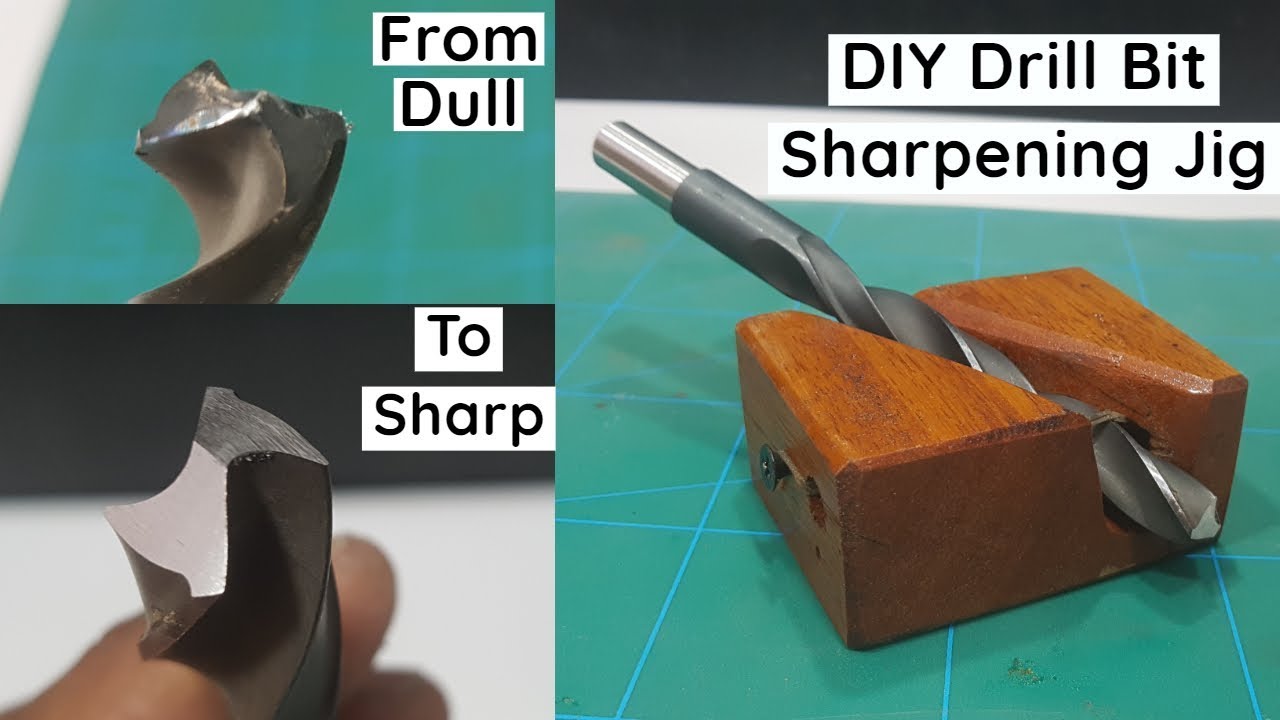
Image Source: i.ytimg.com
Why Sharpen Your Drill Bits?
Over time, drill bits become dull from use. This dullness isn’t just an inconvenience; it can lead to several problems. Dull bits require more force to penetrate material, increasing the risk of damaging your workpiece, overheating your drill motor, and even causing the bit to break. They also produce rougher holes and can slip, leading to inaccurate drilling. Regular maintenance and sharpening are crucial for maintaining drill bits and prolonging their lifespan.
The Essential Tools for DIY Drill Bit Sharpening
Before you begin DIY drill bit sharpening, you’ll need a few key tools. The right equipment makes the process much easier and more effective.
Manual Sharpening Tools
- Sharpening Stone for Drill Bits: A good quality sharpening stone, often a diamond or carbide sharpening stone, is essential for hand sharpening. Look for stones with different grit levels to start with coarser grits for reshaping and finer grits for honing.
- Small Metal File: A fine-toothed metal file can be useful for minor touch-ups and initial shaping.
Powered Sharpening Tools
- Drill Bit Grinder: This is a specialized tool designed specifically for sharpening drill bits. They offer greater precision and speed compared to manual methods.
- Grinding Wheel for Drill Bits: If you have a bench grinder, you can use a grinding wheel specifically designed for sharpening tools. You’ll need to be extra careful with angle and pressure.
- Rotary Tool with Grinding Attachment: For smaller bits or precise touch-ups, a rotary tool like a Dremel with a small grinding stone attachment can be effective.
Supporting Tools and Accessories
- Sharpening Jig: A sharpening jig is highly recommended, especially for beginners. It helps you maintain the correct angles while sharpening, ensuring a consistent and effective edge.
- Safety Glasses: Always wear safety glasses to protect your eyes from metal filings and debris.
- Gloves: Wearing gloves can provide a better grip and protect your hands.
- Magnifying Glass (Optional): For very small bits or detailed work, a magnifying glass can help you inspect the cutting edges.
- Marker: A permanent marker can be used to mark the cutting lip for reference during sharpening.
Comprehending Drill Bit Anatomy for Sharpening
To effectively sharpen a drill bit, it’s important to know its key parts:
- Point (Apex): The very tip of the drill bit.
- Cutting Lips (Cutting Edges): These are the beveled edges at the tip of the bit that do the cutting. They are angled to shear material.
- Heel: The lower trailing edge of the cutting lip.
- Chisel Edge (Web Thinning): The thin edge running up the center of the bit. It’s not a cutting edge but helps guide the bit.
- Flutes: The spiral grooves that clear chips away from the hole.
When sharpening, your primary focus is on restoring the sharp cutting lips.
The Best Way to Sharpen Drill Bits: Step-by-Step Guides
The best way to sharpen drill bits depends on the tools you have available and the type of bit. We’ll cover both manual and powered methods.
Method 1: Hand Sharpening Drill Bits with a Sharpening Stone
This method is accessible and requires minimal specialized equipment. It’s ideal for smaller bits or for those who prefer a more hands-on approach.
What you’ll need:
- Sharpening stone (diamond or carbide, with at least a medium grit)
- Sharpening jig (highly recommended)
- Safety glasses
- A marker (optional)
Steps:
- Inspect the Bit: Examine the drill bit. Identify which cutting lip needs sharpening. You can use a marker to lightly color the existing bevel on the cutting lip; this will help you see where you’re grinding.
- Set Up the Sharpening Jig: If you’re using a jig, follow its instructions to secure the drill bit. The jig typically allows you to set the correct clearance angle (the angle behind the cutting edge) and the point angle (the angle at the very tip of the bit). For most standard twist drill bits, the point angle is 118 degrees.
- Position the Bit on the Stone: Place the cutting lip you’re sharpening against the sharpening stone. The jig will guide you, ensuring the correct angle. You want to hold the bit at an angle that matches the original bevel of the cutting lip.
- Sharpen with a Drawing Motion: Move the drill bit across the stone in a drawing motion, away from the cutting edge. The goal is to grind away material from the bevel until it’s sharp. The jig will hold the bit at the correct angle.
- Maintain Consistent Angle and Pressure: Apply light, consistent pressure. Avoid excessive force, which can overheat and damage the bit. Keep the angle of the bit against the stone constant throughout the stroke.
- Rotate and Sharpen the Other Lip: Once you’ve worked on one lip, rotate the drill bit in the jig to sharpen the other cutting lip. Repeat the drawing motion until both lips are equally sharp.
- Check for Sharpness: Carefully feel the cutting edge with your fingertip (be cautious, it will be sharp!). A sharp edge will feel keen and will easily shave a thin sliver of your fingernail. You can also check by seeing if it catches on the stone.
- Hone the Edge (Optional): For a finer, more polished edge, switch to a finer grit of your sharpening stone or a honing compound. Use the same motion to hone both cutting lips.
- Web Thinning (Advanced): For heavily worn bits or to improve performance, you might need to thin the web at the center of the bit. This is an advanced technique best done with a jig or careful filing. The goal is to reduce the resistance of the chisel edge.
- Clean the Bit: Thoroughly clean the drill bit to remove any metal filings or sharpening residue.
Method 2: Using a Drill Bit Grinder
A drill bit grinder is designed for this purpose and offers more consistent results, especially for frequent sharpening.
What you’ll need:
- Drill bit grinder
- Safety glasses
- Gloves
Steps:
- Read the Grinder’s Manual: Each grinder is slightly different, so familiarize yourself with its specific settings and operation.
- Select the Correct Angle Setting: Most grinders have adjustable angle settings for common drill bit point angles (e.g., 118°, 135°). Choose the appropriate setting for your bit.
- Insert the Drill Bit: Place the drill bit into the grinder’s chuck or holder according to the manufacturer’s instructions. Ensure it’s securely held.
- Position for Grinding: Align the cutting lip with the grinding wheel. The grinder is designed to automatically maintain the correct angles as you rotate the bit.
- Grind with Steady Pressure: Turn on the grinder. Move the drill bit against the grinding wheel with steady, light pressure. The grinder will guide the motion.
- Rotate and Sharpen the Second Lip: Once the first lip is sharpened, rotate the bit to grind the second lip. The grinder will ensure symmetry.
- Check for Sharpness: Remove the bit and check the sharpness.
- Honing (If Available): Some grinders have a separate honing stage or attachment.
- Clean the Bit: Clean the bit thoroughly.
Method 3: Using a Grinding Wheel for Drill Bits (Bench Grinder)
This method requires a steady hand and good control. Using a grinding wheel for drill bits on a bench grinder can be effective, but it’s easy to overheat or grind at the wrong angle if you’re not careful.
What you’ll need:
- Bench grinder with a fine grit grinding wheel
- Drill bit sharpening jig (highly recommended for consistency)
- Safety glasses
- Gloves
- A container of water for cooling
Steps:
- Secure the Grinding Wheel: Ensure the grinding wheel is properly mounted and in good condition.
- Set Up the Jig: Attach your drill bit sharpening jig to the bench grinder’s tool rest. This is crucial for maintaining the correct angles.
- Position the Bit: Place the drill bit in the jig and align the first cutting lip with the grinding wheel.
- Grind with a Drawing Motion: Turn on the grinder. Move the drill bit against the wheel in a drawing motion. Maintain the angle set by the jig.
- Cool the Bit Regularly: Metal can heat up quickly on a grinding wheel. Dip the drill bit in water frequently to prevent overheating, which can ruin the temper of the steel.
- Rotate and Sharpen: Once the first lip is sharp, rotate the bit in the jig to sharpen the second cutting lip.
- Check and Refine: Check the sharpness. You might need to make a few light passes on each side to achieve a symmetrical and sharp edge.
- Clean the Bit: Clean off any metal dust and residue.
Method 4: Hand Sharpening Drill Bits Without a Jig (Advanced)
While not recommended for beginners, it is possible to sharpen drill bits by hand without a jig, though achieving perfect symmetry is challenging.
What you’ll need:
- Sharpening stone (medium grit)
- Safety glasses
- Gloves
- Marker (optional)
Steps:
- Mark the Cutting Lip: Lightly mark the bevel of one cutting lip with a marker.
- Hold the Bit: Grip the drill bit firmly with one hand, holding it at approximately a 59-degree angle to the stone (this is half of the 118-degree point angle).
- Position for Grinding: Place the cutting lip onto the sharpening stone. The bevel of the cutting lip should rest flat against the stone.
- Grind with a Rocking Motion: With your other hand, push the bit into the stone and move it with a slight rocking motion, as if you’re trying to slice a thin piece off the stone. The motion should be away from the cutting edge.
- Maintain Angle and Pressure: This is the trickiest part. You need to maintain a consistent angle and apply even pressure.
- Sharpen the Second Lip: Once the first lip appears sharp, rotate the bit and repeat the process for the second cutting lip, ensuring it matches the first.
- Check and Hone: Check for sharpness and hone if necessary.
Tips for Successful Drill Bit Sharpening
- Start with Medium Grit: Begin with a medium grit stone or wheel to reshape the cutting edges. You can follow up with a finer grit for honing.
- Cool the Bit: Avoid overheating the drill bit, as this can soften the steel and make it lose its hardness. Dip the bit in water periodically, especially when using powered tools.
- Maintain Symmetry: The key to a good cutting edge is symmetry. Both cutting lips should be identical in angle and length.
- Don’t Over-Sharpen: Remove only enough material to restore the sharpness. Over-sharpening can reduce the lifespan of the bit.
- Practice on Old Bits: Before working on your best drill bits, practice on some old or worn-out ones to get a feel for the process.
- Identify Bit Material: Different materials require different sharpening approaches. High-speed steel (HSS) bits are common and can be sharpened on most stones. Carbide bits are much harder and require diamond sharpening tools.
- Web Thinning: For better drilling performance, especially in hard materials, consider web thinning. This reduces the thrust required to drill. It’s an advanced step usually done after the primary sharpening.
Common Problems and How to Fix Them
| Problem | Cause | Solution |
|---|---|---|
| Uneven Cutting Lips | Inconsistent angle or pressure during sharpening. | Use a sharpening jig. Practice consistent hand motions. Check symmetry frequently. |
| Overheated Bit | Too much pressure, insufficient cooling. | Use lighter pressure. Dip the bit in water frequently. |
| Dull Bit After Sharpening | Insufficient material removed, wrong angle, or poor sharpening technique. | Spend more time on the sharpening stone/wheel. Ensure correct angles are used. Re-sharpen with a coarser grit if needed. |
| Bit Wandering | The point is not centered or the cutting lips are uneven. | Re-sharpen to ensure symmetrical cutting edges and a well-formed point. |
| Rough Holes | Dull bit or improper sharpening angle. | Sharpen the bit properly. Ensure the point angle is correct for the material being drilled. |
Maintaining Your Sharpened Drill Bits
Once you’ve sharpened your drill bits, proper care will keep them in good condition.
- Clean After Use: Always clean drill bits after use to remove debris, especially if you’ve been drilling through sticky materials.
- Store Properly: Store drill bits in a case or organizer to prevent them from bumping into each other and getting damaged.
- Lubricate (Optional): For certain materials, a cutting fluid or lubricant can reduce friction and heat, extending the life of your bit.
Frequently Asked Questions (FAQ)
Q1: How often should I sharpen my drill bits?
A1: The frequency depends on how much you use them and what materials you drill. If you notice drilling becoming slower, requiring more force, or producing rough holes, it’s time to sharpen.
Q2: What is the best angle to sharpen a drill bit?
A2: The most common point angle for standard twist drill bits is 118 degrees. For drilling softer materials like aluminum or plastics, a steeper angle (around 90-118 degrees) might be better. For harder materials like stainless steel, a shallower angle (around 135 degrees) can be more effective. Always aim to match the original angle if possible.
Q3: Can I use a regular grinding wheel to sharpen drill bits?
A3: While you can, it’s not ideal. Regular grinding wheels are aggressive and can easily overheat the bit. A fine-grit grinding wheel specifically designed for tools, or better yet, a drill bit grinder or jig, is recommended.
Q4: What’s the difference between sharpening and honing a drill bit?
A4: Sharpening involves removing material to create a new cutting edge. Honing refines an existing edge to make it sharper and smoother, typically done with a finer grit stone or a stropping compound.
Q5: My drill bits are made of carbide. Can I sharpen them with regular stones?
A5: No. Carbide is much harder than high-speed steel. You will need diamond sharpening stones or diamond-coated grinding wheels to sharpen carbide drill bits effectively.
By following these expert DIY tips, you can master the art of sharpening drill bits at home, ensuring your tools are always ready for the job. This skill will save you money, improve your drilling accuracy, and extend the life of your valuable drill bits.