
What is the Drill Doctor 750x? The Drill Doctor 750x is a portable, electric drill bit sharpener designed to restore the cutting edges of dulled drill bits, saving you money and improving your drilling performance. Can I sharpen all types of drill bits with it? The 750x is primarily designed for sharpening standard twist drills and can also sharpen split-point bits and masonry bits (with the correct diamond abrasive). Who is it for? It’s ideal for homeowners, DIY enthusiasts, and small workshops that frequently use drill bits and want a reliable way to keep them in top condition.
Getting a sharp drill bit can make a world of difference in your projects. A dull bit struggles to cut, wanders off course, and can even overheat, leading to premature wear on both the bit and your drill. Investing in a tool like the Drill Doctor 750x is a smart move for anyone who values efficiency and precision in their work. This guide will walk you through everything you need to know to become a pro at using the Drill Doctor 750x, from basic setup to advanced techniques.
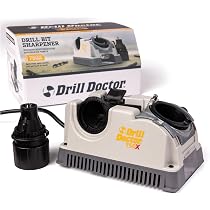
Image Source: images-na.ssl-images-amazon.com
Getting Started with Your Drill Doctor 750x
Before you dive into sharpening, it’s crucial to familiarize yourself with your new tool. Proper setup ensures safety and optimal performance.
What’s in the Box?
When you unbox your Drill Doctor 750x, you’ll typically find:
- The Drill Doctor 750x sharpening unit.
- A diamond abrasive wheel for general-purpose sharpening (usually 180-grit).
- A diamond abrasive wheel for split-point bits (often 120-grit).
- An alignment guide.
- An instruction manual.
It’s important to check that all these components are present.
Setting Up for Sharpening
- Placement: Find a stable, flat surface to place your Drill Doctor 750x. Ensure there’s adequate lighting so you can clearly see the drill bit and the sharpening ports.
- Power: Plug the Drill Doctor into a standard electrical outlet.
- Abrasive Wheel Check: Make sure the correct diamond abrasive wheel is installed. The 180-grit wheel is for most standard drill bits, while the 120-grit wheel is specifically for split-point bits. The wheels are typically easy to swap out. Consult your manual for the exact procedure.
Safety First!
- Eye Protection: Always wear safety glasses or goggles when operating the Drill Doctor. Small metal particles can be ejected during the sharpening process.
- No Loose Clothing or Jewelry: Tie back long hair and avoid wearing loose clothing or jewelry that could get caught in the rotating parts.
- Read the Manual: Thoroughly read the manufacturer’s instructions before operating the machine.
How to Sharpen Twist Drills: The Core Functionality
The primary job of the Drill Doctor 750x is to bring back the sharp edges on standard twist drills. This process involves creating the correct cutting angle and relief angle.
Understanding the Angles
- Cutting Edge: This is the sharpened tip of the drill bit that actually cuts the material.
- Clearance Angle (Relief Angle): This is the slight angle behind the cutting edge. It prevents the heel of the bit from rubbing against the hole wall, which would cause friction and inefficient cutting. The 750x is designed to create the optimal 118-degree point angle for most general-purpose bits.
The Sharpening Process for Twist Drills
Here’s a step-by-step guide on sharpening a standard twist drill bit:
- Select the Bit: Choose a drill bit that needs sharpening. Look for signs of dullness, such as the bit struggling to bite into material, producing shavings that are more like dust than curls, or generating excessive heat.
- Insert the Bit:
- Locate the primary sharpening port. This is usually the larger, angled port on the front of the machine.
- Insert the drill bit shank into the port until it stops.
- Rotate the drill bit counter-clockwise while pushing it firmly into the port. You should feel it seat against the internal guides.
- Sharpening Stroke:
- With the bit firmly seated, press the trigger or the button to start the motor.
- Hold the drill bit in place and rotate it counter-clockwise for about 5-10 seconds. You should hear the abrasive wheel grinding the metal.
- Release the trigger to stop the motor.
- Advance and Repeat:
- Pull the drill bit out slightly, then push it in again, rotating it counter-clockwise to a new position. This ensures you’re grinding a fresh section of the abrasive wheel and bit.
- Repeat the sharpening stroke (step 3).
- Continue this process of inserting, sharpening, and advancing for about 3-5 cycles on each side of the bit.
- Checking the Edge:
- Remove the drill bit and examine the tip. You should see a new, sharp cutting edge forming.
- The Drill Doctor 750x has a built-in split-point cam that automatically creates the split point, reducing the need for center punching and preventing bit wander. You’ll notice the bit tip now has a small split in the center.
- Rotate the bit and check both cutting edges to ensure they are even and sharp.
- Refining (Optional): If the edges aren’t perfectly sharp or even, you can do a few more short sharpening strokes, paying attention to any dull spots.
Important Tip: Don’t over-sharpen. The goal is to restore the edge, not to remove excessive material. Over-sharpening can shorten the life of your drill bit.
Sharpening Drill Bits: A Table of Common Mistakes and Solutions
| Mistake | Cause | Solution |
|---|---|---|
| Dull Cutting Edges | Insufficient sharpening time/strokes | Increase the number of sharpening cycles on each side. Ensure firm pressure and consistent rotation. |
| Uneven Cutting Edges | Inconsistent pressure or rotation | Focus on smooth, consistent pressure and rotation. Ensure the bit is fully seated in the guide. |
| Bit Wandering | Improperly formed split point | Ensure the correct abrasive wheel is used and the bit is rotated correctly during sharpening. |
| Overheating the Bit | Excessive grinding time, too much pressure | Reduce grinding time per stroke. Let the bit cool between cycles if necessary. Use lighter pressure. |
| Deformed or Broken Tip | Dropped bit, excessive force during sharpening | Handle drill bits carefully. Avoid forcing the bit into the sharpening port. |
Sharpening Split-Point Drills
Split-point drill bits are designed to prevent the bit from “walking” or wandering when you start a hole. The Drill Doctor 750x is equipped to handle these, often with a dedicated port or by using the primary port with specific techniques.
How to Sharpen Metal Drill Bits with Split Points
- Install the Split-Point Wheel: For optimal results, many users recommend installing the dedicated split-point abrasive wheel (often 120-grit). This wheel has a slightly different profile designed to create the split point accurately.
- Locate the Correct Port: Use the primary sharpening port.
- Insert and Rotate: Insert the split-point drill bit into the port. The internal cam system within the 750x is designed to automatically create the split point as you rotate the bit during sharpening.
- Sharpening Cycle: Follow the same sharpening and advancing process as for standard twist drills (insert, sharpen, advance, repeat). You’ll be working to resharpen the main cutting edges while the cam system forms the split.
- Check for Evenness: After several cycles, remove the bit and visually inspect the tip. The split point should be centered, and both cutting edges should appear sharp and symmetrical. If the split point isn’t pronounced enough, give it a few more short cycles.
Sharpening Wood Drill Bits
While the Drill Doctor 750x is primarily designed for metal drill bits, it can also sharpen certain types of wood drill bits, particularly those with a standard twist flute design.
Considerations for Wood Bits
- Bit Type: The 750x works best on wood bits that resemble metal twist drills. Bits with specialized spurs (like Forstner bits or brad-point bits with large pilot points) are generally not suitable for sharpening with the 750x.
- Abrasive Grit: The standard 180-grit wheel is usually sufficient for wood bits. If the wood bit is significantly dull or has minor damage, you might try the 120-grit wheel for a more aggressive cut, but be cautious not to remove too much material.
The Process for Wood Bits
- Select the Bit: Choose a wood bit that has dulled from use.
- Use the Primary Port: Insert the wood bit into the primary sharpening port.
- Sharpening: Proceed with the same sharpening technique as for metal twist drills: insert, rotate counter-clockwise, hold for a few seconds, release, advance to a new position, and repeat.
- Check for Sharpness: Examine the cutting edges. They should be clean and sharp enough to bite into wood easily.
- Avoid Over-Grinding: Wood bits can be softer than metal bits, so be mindful of over-grinding. A few sharpening cycles on each side should be enough.
Advanced Techniques and Tips for the Drill Doctor 750x
Becoming proficient with the Drill Doctor 750x involves not just following the basic steps, but also employing a few tricks and understanding its nuances.
Drill Doctor 750X Tips for Better Results
- Listen to the Sound: The sound of the grinding wheel can tell you a lot. A consistent, smooth grinding sound usually means you’re sharpening correctly. A high-pitched squeal might indicate too much pressure or the bit is not seated properly.
- Cooling: For very dull bits or when sharpening many bits in succession, allow the bit to cool down between cycles. This prevents heat buildup that can temper (soften) the drill bit’s cutting edge.
- Bit Alignment: The Drill Doctor’s internal guides are designed for precision, but ensure you are inserting the bit straight and applying consistent pressure.
- Practice Makes Perfect: Like any tool, mastering the Drill Doctor 750x takes practice. Start with inexpensive bits that you don’t rely on heavily to get a feel for the process.
- Lubrication (for Sharpening): While not typically required for the Drill Doctor itself, some users find a small amount of water or cutting fluid applied to the drill bit tip during sharpening can help cool it and produce a finer edge. However, this can make the machine messier and potentially damage it if not cleaned up properly. Stick to dry sharpening unless the manual specifically allows for wet sharpening.
Sharpening Large Diameter Bits
The 750x can handle a range of drill bit sizes (check your manual for the exact range, usually from 3/32” to 1/2”). For larger bits within its capacity, ensure they are fully seated in the sharpening port and that you’re applying even pressure.
Sharpening Small Diameter Bits
Small bits can be trickier. Ensure you’re not forcing them into the port, as this can damage the bit or the internal guides. The cam system will still engage to create the split point.
Drill Doctor 750X Maintenance
Proper maintenance ensures your Drill Doctor 750x operates reliably for years to come.
Regular Cleaning
- After Each Use: Brush away any metal dust or debris from the sharpening ports and the exterior of the unit. A small brush or compressed air can be useful.
- Abrasive Wheel: Periodically inspect the diamond abrasive wheels. If they become loaded with metal dust, gently brush them clean. The diamond grit is very hard, so it’s the metal that gets removed, not the diamond.
Replacing Abrasive Wheels
Diamond abrasive wheels do wear down over time, though they last a very long time. You’ll notice a decrease in sharpening speed or effectiveness when the wheel is worn.
- How to Replace: The Drill Doctor 750X instructions will detail how to swap out the abrasive wheels. This typically involves unscrewing a retaining nut or collar. Ensure the machine is unplugged before attempting to change the wheels.
- When to Replace: Replace the wheel when you can no longer achieve sharp edges after a reasonable number of sharpening cycles, or when the wheel surface appears visibly worn or damaged.
Storage
Store your Drill Doctor 750x in a dry place, away from moisture and dust. Keeping it in its original box or a protective case can help.
Drill Bit Sharpening: Frequently Asked Questions
Q1: How often should I sharpen my drill bits?
A1: This depends on how often you use them and the materials you drill. Sharpen bits when you notice them struggling to cut, producing dust instead of shavings, or creating excessive heat. It’s better to sharpen a bit too soon than too late.
Q2: Can I sharpen cobalt or titanium drill bits with the 750x?
A2: Yes, the 750x can sharpen cobalt and titanium drill bits. The diamond abrasive wheels are hard enough to grind these tougher alloys. You might need slightly longer sharpening times for these materials.
Q3: What is the best way to sharpen drill bits?
A3: For standard twist drills, using a dedicated drill bit sharpener like the Drill Doctor 750x is widely considered the best and most consistent way for DIY users to achieve sharp, correctly angled cutting edges. While grinding by hand with a bench grinder is possible, it requires significant skill to achieve proper angles.
Q4: My drill bit is really dull, almost rounded. Can the 750x fix it?
A4: Yes, the 750x can restore even very dull bits. You might need to perform more sharpening cycles than you would for a slightly dulled bit. Focus on achieving a sharp cutting edge on both sides.
Q5: How do I know when a drill bit is sharpened correctly?
A5: A properly sharpened drill bit will have a clean, sharp cutting edge that appears symmetrical on both sides. When you try to drill into a piece of wood or metal (with appropriate safety measures), the bit should bite easily and start cutting immediately without excessive pressure.
Q6: Can I sharpen carbide drill bits?
A6: The standard Drill Doctor 750x comes with diamond wheels suitable for most metal and wood bits. For carbide bits, which are extremely hard, you would typically need a specific diamond abrasive wheel designed for carbide or a specialized carbide grinder. Check your Drill Doctor manual or contact the manufacturer to see if an optional carbide wheel is available for your model.
Q7: What does the split point do?
A7: The split point is a small indentation created in the center of the drill bit’s tip. It serves to center the bit immediately upon contact with the material, preventing the bit from “walking” or drifting off your intended starting point. This is especially useful for precise drilling on smooth surfaces like metal or when starting holes without a center punch.
Conclusion
The Drill Doctor 750x is an invaluable tool for anyone who wants to maintain a sharp set of drill bits. By following these detailed instructions and tips, you can significantly improve your drilling accuracy, efficiency, and the lifespan of your drill bits. Regular use and proper maintenance will ensure your Drill Doctor 750x remains a reliable workhorse in your toolkit, making every drilling task easier and more effective. Happy drilling!