
Can you cut tile with a wet saw? Yes, absolutely! A wet saw is a powerful tool designed specifically for cutting tile, making it the ideal choice for both DIYers and professionals tackling tiling projects.
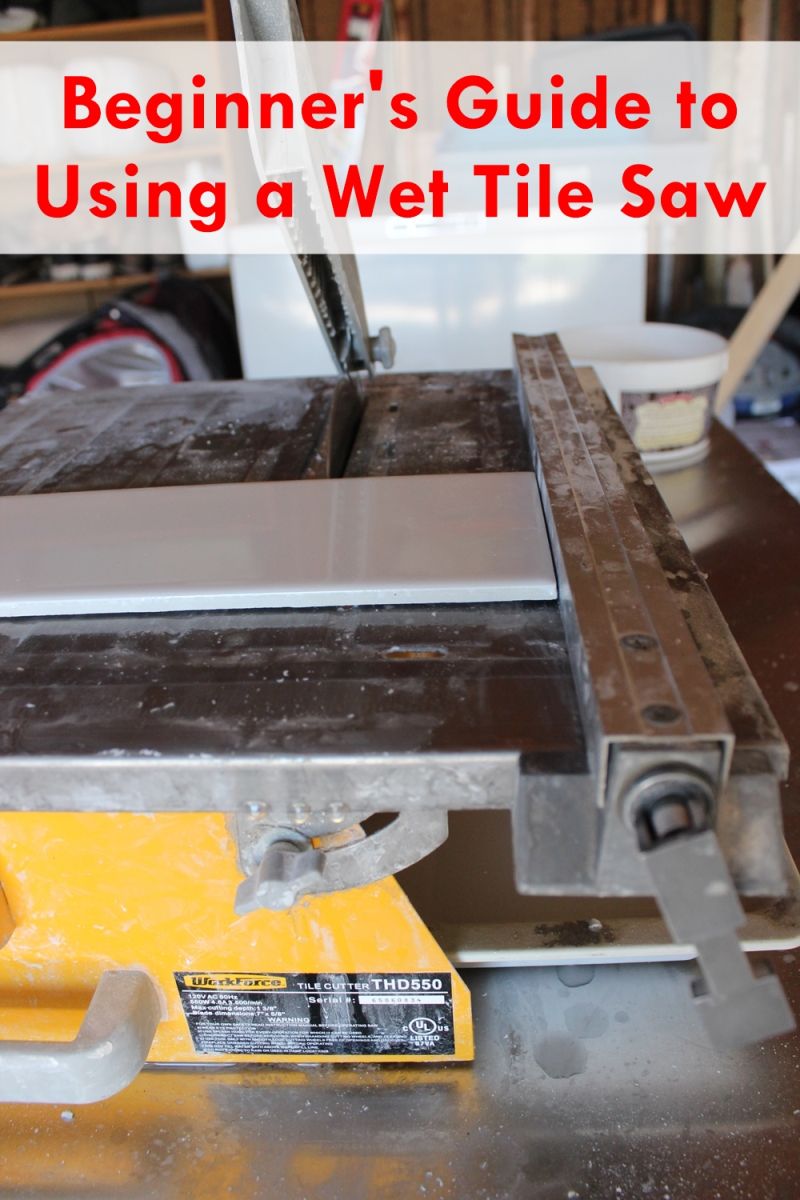
Image Source: cdn.homedit.com
Getting Started with Your Wet Tile Saw
Using a wet saw might seem daunting at first, but with a little guidance, you’ll be cutting like a pro. The key to success lies in preparation and following safety procedures. This guide will walk you through everything you need to know to use your wet tile saw safely and effectively.
What is a Wet Saw?
A wet saw is an electric saw that uses a diamond blade to cut through hard materials like tile, stone, and glass. The “wet” aspect comes from its integrated coolant system, which involves a water reservoir. Water is pumped from the reservoir to the blade, cooling it down and lubricating the cutting surface. This prevents the blade from overheating and cracking, reduces dust, and creates a smoother cut. Essentially, it’s a specialized tile cutter that offers precision and power.
Why Use a Wet Saw for Tile?
When you need to know how to cut tile, a wet saw is often the best answer. While other tile cutters exist, a wet saw excels in several areas:
- Precision: It allows for intricate cuts, including curves and angles, that are difficult or impossible with other methods.
- Cleanliness: The water system significantly reduces airborne dust, making it a healthier and cleaner option, especially for indoor work.
- Material Versatility: It can handle a wide range of tile materials, from basic ceramic to tougher porcelain tile and natural stone.
- Speed and Efficiency: It cuts through tile much faster than manual methods.
Essential Safety Precautions for Wet Saw Operation
Wet saw safety is paramount. This tool is powerful, and using it improperly can lead to serious injury. Always prioritize safety.
Personal Protective Equipment (PPE)
- Safety Glasses or Goggles: Essential to protect your eyes from flying debris and water spray.
- Hearing Protection: Wet saws can be noisy. Earplugs or earmuffs are recommended.
- Gloves: Waterproof, non-slip gloves will protect your hands and improve grip.
- Waterproof Apron or Old Clothing: You will get wet, so wear something that can handle moisture.
- Closed-Toe Shoes: Protect your feet from dropped materials or tools.
Electrical Safety
- GFCI Outlet: Always plug your wet saw into a Ground Fault Circuit Interrupter (GFCI) outlet. This is a critical safety feature that can prevent electrical shock.
- Inspect the Power Cord: Before use, check the power cord for any damage. Do not use the saw if the cord is frayed or damaged.
- Keep Water Away from Electrical Components: Ensure the motor housing and plug remain dry.
Operational Safety
- Read the Manual: Always read and follow the manufacturer’s instructions for your specific tile saw.
- Stable Work Surface: Place the wet saw on a sturdy, level surface to prevent tipping.
- Secure Tile: Ensure the tile is stable and properly positioned on the saw’s support table before cutting.
- Keep Hands Clear: Never place your hands directly in the path of the diamond blade. Use push sticks or the saw’s guides.
- Don’t Force the Cut: Let the saw do the work. Forcing the tile can cause it to chip, break, or damage the blade.
- Supervise Children and Pets: Keep them away from the work area at all times.
Assembling and Preparing Your Wet Saw
Before you can start cutting, your wet saw needs to be set up correctly.
Unpacking and Initial Setup
- Unpack Carefully: Remove all components from the packaging.
- Check for Damage: Inspect the saw and all accessories for any signs of damage that may have occurred during shipping.
- Read the Manual: Familiarize yourself with the parts and their functions as described in your saw’s manual.
Assembling the Saw
Most wet saws come partially assembled. You’ll typically need to:
- Attach the Stand or Legs: If your saw has a stand, assemble and attach it according to the instructions.
- Install the Water Pump: Ensure the water pump is correctly positioned in the water reservoir.
- Place the Blade: This is a crucial step.
- Blade Orientation: Most diamond blades have a specific direction of rotation. Check for an arrow on the blade or the arbor. The arrow should point in the direction the blade spins.
- Securing the Blade: Loosen the blade flange nuts, place the blade on the arbor, and then re-secure the flange nuts. Tighten them firmly but do not overtighten, as this can damage the blade or arbor. Refer to your manual for specific instructions.
- Fill the Water Reservoir: Fill the water reservoir with clean water. Some users add a few drops of dish soap to help lubricate and keep the blade clean, but check your saw’s manual to see if this is recommended.
Testing the Coolant System
- Turn on the Pump: With the saw unplugged, turn on the water pump to ensure water is flowing correctly to the blade.
- Plug In and Test: Once you’re satisfied the pump is working, plug in the saw and briefly run the blade to confirm water is lubricating it properly.
How to Cut Tile with a Wet Saw: Step-by-Step
Now you’re ready to cut! Here’s a detailed guide on how to cut tile using your wet saw.
Step 1: Mark Your Cut Line
- Accuracy is Key: Measure your tile and mark the exact cut line using a pencil or a marker. For straight cuts, a ruler or straight edge can help. For angled cuts (like miters), use a protractor or angle finder.
- Consider the Blade Kerf: Remember that the diamond blade has a certain thickness (kerf). Account for this when marking your line to ensure the final piece is the exact size you need. It’s often best to mark the line where you want the edge of the cut to be.
Step 2: Position the Tile
- Align the Mark: Place the tile on the saw’s support table, aligning your marked cut line with the diamond blade.
- Use the Guides: Most wet saws have rip guides or fences that help you make straight cuts. Position the tile against the guide for accuracy.
- Start the Cut: Ensure the blade is spinning at full speed before you begin pushing the tile through.
Step 3: Make the Cut
- Smooth and Steady: Gently and smoothly push the tile through the blade. Don’t force it. Let the saw and blade do the work.
- Maintain Contact: Keep the tile in contact with the blade and the guide throughout the cut.
- Complete the Cut: Continue pushing the tile until it has completely passed through the blade.
- Blade Rotation: Always feed the tile against the direction of blade rotation (usually feeding from back to front). This helps prevent the tile from being pulled into the blade unevenly.
Step 4: Finishing the Cut and Cleanup
- Remove Tile: Once the cut is complete, carefully remove the cut tile from the saw.
- Turn Off the Saw: Turn off the saw and unplug it immediately after you are finished cutting.
- Let the Blade Stop: Allow the diamond blade to come to a complete stop before removing any remaining tile or making adjustments.
- Water Management: If you are finished, drain the water reservoir and clean the saw. If you plan to continue cutting, ensure the water level remains adequate.
Different Types of Cuts and Techniques
A wet saw isn’t just for straight lines. You can achieve a variety of cuts with practice.
Straight Cuts
This is the most common type of cut. Use the saw’s rip fence or a straight edge guide for precise, straight lines.
Miters and Angles
- Adjustable Table: Many wet tile saw models have tilting tables that allow you to set the angle of the cut.
- Marking Angles: Carefully mark your desired angle on the tile.
- Setting the Angle: Adjust the saw’s table or miter guide to the correct angle.
- Cutting: Proceed with the cut as you would a straight cut, ensuring the tile is held firmly against the guide.
Bevel Cuts
Bevel cuts create an angled edge on the tile, often used for finishing edges or creating decorative effects.
- Blade Tilt: Some wet saws allow you to tilt the blade itself, enabling bevel cuts.
- Angle Setting: Set the blade to the desired bevel angle.
- Cutting: Feed the tile through the blade, ensuring the angled edge is against the cutting surface. This requires a steady hand and often a specialized jig or guide.
Curve Cuts and Plunge Cuts
- Freehand Cutting: For curved cuts, you’ll need to carefully guide the tile freehand around the diamond blade. This is more challenging and requires significant practice.
- Plunge Cuts: To make a cut starting from the middle of the tile (a plunge cut), you’ll need to carefully lower the spinning blade into the tile. This should only be attempted with a saw designed for it and with extreme caution. Always start the plunge cut with the blade slightly elevated and then lower it gradually.
Maintaining Your Wet Saw for Optimal Performance
Proper maintenance ensures your wet saw operates efficiently and safely for years to come.
Blade Care
- Keep it Clean: Rinse the diamond blade after each use to remove grout and debris.
- Check for Wear: Inspect the blade regularly for wear. If the diamonds appear worn down or the blade is significantly pitted, it’s time for a replacement.
- Blade Wobble: If the blade wobbles, it might be loose or damaged. Re-tighten it or replace it.
Water System Maintenance
- Clean the Reservoir: Regularly empty and clean the water reservoir. This prevents sediment buildup that can clog the pump and lines. Use a brush to scrub away any grime.
- Check the Pump: Ensure the water pump is working effectively and that the intake is clear of debris.
- Replace Water: Change the water frequently, especially during long cutting sessions, to maintain its cooling and lubricating properties.
Saw Body and Components
- Wipe Down: Wipe down the saw after each use, especially the cutting tray and support surfaces, to prevent corrosion and mineral buildup.
- Lubrication: Some moving parts may require occasional lubrication. Refer to your manual for specific recommendations.
- Storage: Store the saw in a clean, dry place when not in use.
Troubleshooting Common Wet Saw Issues
Even with careful use, you might encounter a few problems.
Issue: Saw Not Cutting Effectively or Chiseling Tile
- Possible Causes:
- Dull Blade: The diamond blade may be worn out.
- Blade Wobble: The blade might not be tightened properly or could be damaged.
- Not Enough Water: The coolant system may not be providing sufficient lubrication.
- Forcing the Tile: You might be pushing too hard.
- Solutions:
- Replace the diamond blade.
- Check blade tightness and condition.
- Ensure the water reservoir is full and the pump is working.
- Use a steadier, lighter pressure.
Issue: Excessive Water Spray
- Possible Causes:
- Blade Speed: Blade might be spinning too fast for the material.
- Blade Angle: Blade might be slightly off-kilter (if adjustable).
- Water Pump Volume: The pump might be pushing too much water.
- Solutions:
- Ensure you are using the correct blade for the material.
- Check blade mounting and alignment.
- Some saws have adjustable water flow; reduce it slightly if possible.
- Wear adequate protective gear and ensure good ventilation.
Issue: Saw Motor Overheating or Shutting Off
- Possible Causes:
- Overuse: The saw may be running for too long without breaks.
- Blocked Air Vents: Dust and debris could be blocking the motor’s ventilation.
- Low Voltage: The power source might be insufficient.
- Solutions:
- Allow the saw to cool down periodically.
- Clean the saw’s air vents.
- Ensure you are using a GFCI outlet with a properly rated extension cord, if needed.
Advanced Cutting Techniques and Tips
Once you’ve mastered the basics of how to cut tile, you can explore more advanced techniques.
Cutting Porcelain Tile
Cutting porcelain tile can be more challenging than cutting ceramic tile due to its density and hardness.
- Blade Choice: Always use a high-quality diamond blade specifically designed for porcelain or a universal blade that can handle it. A continuous rim blade often provides a cleaner edge for porcelain.
- Slow and Steady: Take your time and use a steady, consistent feed rate.
- Adequate Cooling: Ensure the coolant system is working optimally. Overheating can easily crack dense porcelain.
Cutting Natural Stone
Natural stone tiles like granite, marble, and slate can be cut with a wet saw.
- Specific Blades: Some natural stones may benefit from specialized diamond blades. Consult your tile supplier or saw manufacturer for recommendations.
- Dust Control: Stone can produce fine dust. The wet saw is excellent for managing this.
- Edge Finishing: Be prepared for potential chipping on the edges of natural stone. A diamond hand pad or grinder can be used for touch-ups.
Using a Miter Saw Attachment (if applicable)
Some larger tile saw models come with or can accept miter saw attachments. These are very useful for consistent angled cuts on multiple tiles.
Precision Cuts for Grouting Lines
When laying tile, the width of your grout line is important. Practice making cuts that account for this, ensuring your tiles will fit perfectly with the desired grout spacing.
Frequently Asked Questions About Wet Saws
Q: What is the best type of blade for a wet saw?
A: The best blade depends on the material you are cutting. For general tile cutting, a diamond blade with a continuous rim or segmented edge is versatile. For cutting porcelain tile, a blade specifically designed for porcelain or a high-quality universal tile blade is recommended. For natural stone, specialized blades might offer better results. Always ensure the blade is suitable for wet use.
Q: Can I use my wet saw indoors?
A: Yes, a wet saw is designed for indoor use due to its water-based cooling system, which significantly reduces airborne dust compared to dry cutting methods. However, ensure you have good ventilation and protect surrounding areas from water spray.
Q: How much water should be in the reservoir?
A: The water reservoir should contain enough water to fully submerge the pump intake and provide ample lubrication to the diamond blade during operation. Check your saw’s manual for the recommended water level. Ensure the pump is always covered by water to prevent it from burning out.
Q: How often should I change the water?
A: It’s best to change the water whenever it becomes visibly dirty or cloudy, or at least every few hours of continuous use. Clean water ensures optimal cooling and lubrication.
Q: My tile is chipping when I cut it. What am I doing wrong?
A: Chipping can be caused by several factors:
* Dull Blade: The diamond blade might be worn out.
* Too Much Pressure: You might be forcing the tile through the blade.
* Blade Wobble: The blade may not be securely mounted.
* Incorrect Blade: The blade might not be suitable for the tile type.
* Tile Quality: Some tiles are more prone to chipping than others.
Try using a new, appropriate blade, applying steady, light pressure, and ensuring the blade is properly mounted.
Q: Can I cut glass with a wet saw?
A: Yes, specialized diamond blades are available for cutting glass. Ensure you use the correct blade and a steady hand, as glass can be brittle.
Q: How do I clean my wet saw after use?
A: After unplugging the saw and allowing the blade to stop, drain the water reservoir. Remove the cutting tray and any accessible parts. Rinse the blade and pump with clean water. Wipe down the saw’s surfaces to remove water and debris. Periodically, deep clean the reservoir and pump to prevent buildup.
By following these guidelines, you can confidently and safely use your wet saw to achieve professional-looking results on your tiling projects. Happy cutting!