
Can you cut porcelain tile with a wet saw? Yes, you absolutely can cut porcelain tile with a wet saw, and it’s often the best method for achieving clean, precise cuts. So, how do you use a tile wet saw safely? This guide will walk you through everything a beginner needs to know, from setup to the best practices for a successful and safe tiling project.
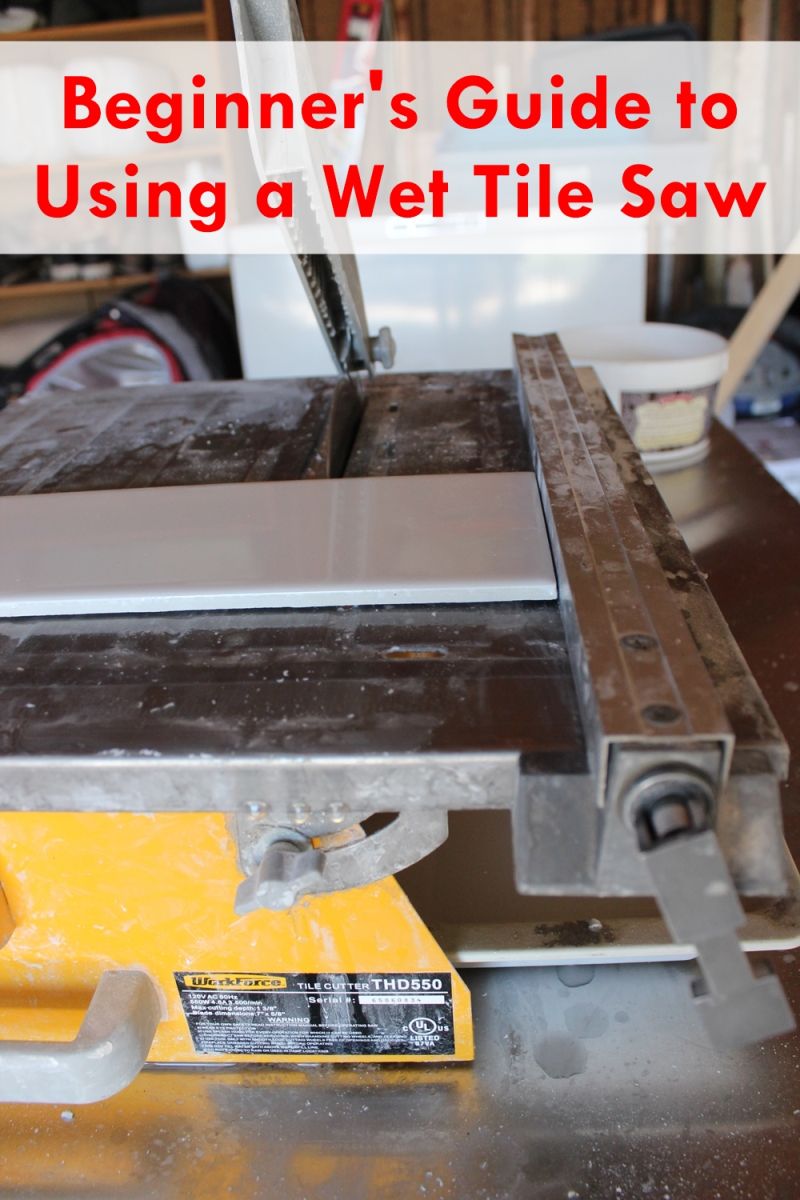
Image Source: cdn.homedit.com
Getting Started with Your Tile Wet Saw
Using a tile wet saw might seem intimidating at first, but with the right knowledge and precautions, it’s a straightforward process. These powerful tools are designed to make cutting various types of tiles much easier and more accurate than traditional methods. Whether you’re cutting ceramic, porcelain, or even stone, a wet saw is a game-changer.
What is a Tile Wet Saw?
A tile wet saw is a specialized power tool used for cutting tiles. It uses a diamond-tipped blade that rotates at high speed. Water is continuously supplied to the blade and the cutting area, which serves multiple crucial purposes: it cools the blade, lubricates the cut, and most importantly, suppresses the dust generated during the cutting process. This dust can be harmful if inhaled.
Choosing the Best Wet Saw for Tile
When selecting a wet saw, consider the type and volume of tile work you anticipate doing.
- For occasional DIY projects: A smaller, portable wet saw is usually sufficient. These are lightweight and easy to store.
- For larger or more frequent projects: A larger, more powerful saw with a bigger blade and a more robust motor will be a better investment.
Key features to look for include:
- Motor Power: Higher wattage means it can handle tougher materials like porcelain.
- Blade Size: Common sizes are 7, 10, and 12 inches. Larger blades can cut thicker tiles.
- Rip Capacity: This is the maximum length of tile you can cut.
- Depth of Cut: Important for thicker tiles.
- Water Reservoir: A good-sized reservoir means less frequent refilling.
- Portability: If you need to move the saw around your worksite.
Essential Tile Saw Safety Gear
Tile saw safety is paramount. Never compromise on protective gear. Always wear:
- Safety Glasses or Goggles: Essential to protect your eyes from water spray, tile fragments, and debris.
- Hearing Protection: Wet saws can be loud, especially when cutting denser materials. Earplugs or earmuffs are highly recommended.
- Waterproof Gloves: Protect your hands from water and provide a better grip.
- Closed-Toe Shoes: Protect your feet from falling tiles or tools.
- Dust Mask (Optional but Recommended): While the water suppresses dust, some fine particles can still become airborne. A mask adds an extra layer of protection.
Setting Up Your Wet Saw for Operation
Proper setup ensures both safety and the best cutting results.
Assembling the Wet Saw
Most wet saws come partially assembled. Follow the manufacturer’s instructions carefully for complete assembly. This typically involves attaching the stand, water pump, and blade guard.
Filling the Wet Saw Water Reservoir
The wet saw water reservoir needs to be filled with clean water.
- Locate the reservoir: This is usually a tray at the base of the saw.
- Add water: Fill it to the recommended level indicated by the manufacturer. Some saws have a minimum and maximum fill line.
- Additives (Optional): Some professionals add a wetting agent or a few drops of dish soap to the water. This helps reduce surface tension and improve lubrication. However, for most DIYers, plain water is perfectly adequate.
Important: Do not overfill the reservoir, as this can cause water to spill onto the motor and electrical components, creating a safety hazard.
Installing the Correct Wet Saw Blade
The type of tile you’re cutting dictates the wet saw blade types you should use. Diamond blades are the standard.
- Continuous Rim Blades: These have a smooth edge and are ideal for cutting delicate materials like glass or very smooth ceramic tiles. They produce cleaner cuts with less chipping.
- Segmented Blades: These have a notched or “segmented” edge. The gaps help clear debris more effectively and are better suited for cutting harder, denser materials like porcelain, stone, and quarry tiles. They cut faster but might produce a slightly rougher edge.
- Turbo Rim Blades: These are a hybrid, offering a balance between continuous and segmented blades. They have small notches along the edge, providing good cooling and faster cutting than continuous rims without the excessive chipping sometimes associated with segmented blades.
Choosing the Right Blade:
- Cutting ceramic tile: A continuous rim or a turbo rim blade is usually best for clean cuts.
- Cutting porcelain tile: A segmented or turbo rim blade is recommended due to its hardness and density.
Blade Installation:
- Turn off and unplug the saw: Ensure the power is completely disconnected.
- Remove the blade guard: This allows access to the blade arbor.
- Loosen the arbor nut: Use the wrench that came with your saw.
- Remove the old blade (if applicable):
- Place the new blade on the arbor: Ensure the blade is oriented correctly, with the directional arrow on the blade pointing in the direction of blade rotation (usually indicated on the saw’s housing or the blade itself).
- Install the washer and arbor nut: Hand-tighten first, then use the wrench to secure it. Do not overtighten, as this can damage the blade or arbor.
- Reinstall the blade guard:
Mastering Tile Cutting Techniques
Once your wet saw is set up, you can start cutting. Precision and patience are key.
Basic Straight Cuts
This is the most common type of cut.
- Mark your tile: Use a pencil or wax marker to draw a clear line on the tile where you want to cut. For precise cuts, you might need to account for the blade’s kerf (the width of the cut).
- Position the tile: Place the tile flat on the saw’s cutting table, ensuring the cutting line aligns with the blade.
- Feed the tile smoothly: Gently and steadily push the tile into the spinning blade. Do not force it. Let the blade do the work.
- Support the offcut: If you’re cutting off a small piece, ensure the remaining larger portion is supported on the table as you complete the cut. This prevents the piece from falling and potentially damaging the blade or yourself.
- Turn off the saw and unplug it: After you’re finished cutting for the session.
Making Miter Cuts with a Wet Saw
A miter cut with a wet saw is an angled cut, typically used for corner edges or decorative finishes.
- Adjust the table angle: Most wet saws have a tilting table or an adjustable miter guide. Set the table to the desired angle (e.g., 45 degrees).
- Align the cut line: Position the tile so your marked cut line is aligned with the blade at the set angle.
- Feed the tile: Feed the tile smoothly into the blade, maintaining consistent pressure.
- Support the tile: As with straight cuts, ensure proper support for the tile, especially when cutting at an angle.
Performing Bevel Cuts with a Wet Saw
A bevel cut with a wet saw creates an angled edge on the tile itself, often used for bullnose effects or to create a sloped transition.
- Adjust the blade angle: Some wet saws allow you to tilt the blade assembly itself for bevel cuts. Consult your saw’s manual for this specific function.
- Set the angle: Adjust the blade to your desired bevel angle.
- Position the tile: Place the tile on the cutting table and align the cut line with the tilted blade.
- Cut carefully: Feed the tile into the blade, applying gentle, steady pressure. Be extra mindful of maintaining control, as the geometry of the cut is more complex.
Cutting Curves and Shapes
While most wet saws are designed for straight and angled cuts, some techniques can achieve more intricate shapes.
- Plunge Cuts: For making internal cuts (like for a pipe), you can carefully lower the blade into the tile after it’s started. Mark your shape clearly. Start the cut at the edge of the tile and plunge the blade in. You may need to make multiple passes.
- Small Tile Sections: For very small or intricate shapes, you might need to make a series of straight cuts to remove material, effectively creating your desired shape.
Important Considerations for Tile Cutting Techniques:
- Tile Direction: Always feed the tile into the blade with a steady, consistent motion. Avoid jerky movements.
- Support: Never let the tile hang off the edge of the saw’s table without proper support.
- Water Flow: Ensure the water pump is running and water is adequately cooling and lubricating the blade throughout the cut. If the water level drops too low, pause the cut, unplug the saw, and refill the reservoir.
- Blade Wear: As you cut, the diamond blade will wear down. If you notice the cutting speed slowing or increased chipping, it might be time to replace the blade.
Wet Saw Maintenance for Longevity and Safety
Proper wet saw maintenance is crucial for both the performance of the saw and your safety.
Cleaning the Wet Saw
Regular cleaning prevents buildup and ensures smooth operation.
- Turn off and unplug the saw: Always disconnect power before cleaning.
- Drain the water reservoir: Most saws have a drain plug. Carefully remove it and let the dirty water drain away from any electrical components.
- Remove excess sludge: Use a brush or shop vacuum to remove any mud or debris from the reservoir and the saw’s internal components.
- Wipe down the surfaces: Use a damp cloth to clean the cutting table, blade guard, and exterior of the saw.
- Clean the pump intake: Periodically check and clean the water pump’s intake filter to ensure efficient water flow.
Blade Care
Your diamond blade is the heart of the operation.
- Keep it clean: Rinse the blade after each use to remove tile residue.
- Sharpening: Diamond blades don’t “sharpen” in the traditional sense, but they can get clogged. You can “rejuvenate” a dull blade by cutting through a sharpening stone (specifically designed for diamond blades) or even a concrete paver. Follow the blade manufacturer’s recommendations.
- Storage: Store blades in a dry place to prevent rust on the metal core.
General Maintenance Checks
- Water Pump: Ensure it’s running efficiently and not making unusual noises.
- Motor: Listen for any strange sounds during operation.
- Blade Guard: Make sure it’s securely in place and functioning correctly.
- Power Cord and Plug: Inspect for any damage.
Frequently Asked Questions (FAQ)
Can I cut glass tiles with a wet saw?
Yes, you can cut glass tiles with a wet saw, but it’s crucial to use a continuous rim blade specifically designed for glass. The smooth edge of this blade type will prevent chipping and cracking of the delicate glass.
How often should I change the water in the wet saw reservoir?
It’s best to change the water frequently, especially when cutting a lot of tile or hard materials like porcelain. Aim to change it every few hours of use or whenever the water becomes excessively cloudy or dirty. Clean water ensures better lubrication and cooling.
My wet saw is making a loud noise. What could be wrong?
A loud noise can indicate several issues:
* A dull or damaged blade.
* The blade is not installed correctly.
* The water pump is clogged or failing.
* There’s debris interfering with the motor or blade.
Always unplug the saw before inspecting for the cause.
What is the difference between cutting ceramic tile and cutting porcelain tile?
Ceramic tile is generally softer and less dense than porcelain tile. This means ceramic tiles are easier to cut and less prone to chipping. Porcelain tiles are much harder and denser, requiring a more robust blade (like a segmented or turbo rim) and a more powerful saw motor to cut cleanly.
How do I ensure the most accurate cuts?
- Use a sharp, appropriate blade for your tile type.
- Ensure the saw is stable and the cutting table is clean and level.
- Mark your cut lines precisely.
- Feed the tile smoothly and steadily, without forcing it.
- Support the tile properly, especially the offcut.
- If your saw has rip fences or guides, use them for consistent parallel cuts.
Is it safe to use a wet saw indoors?
While wet saws are designed to contain water and dust, it’s still advisable to use them in a well-ventilated area, even indoors. Minor water spray can occur, and if you’re working in a confined space, ventilation is always a good idea. Consider laying down plastic sheeting to protect floors and surrounding areas from any water splashes.
Conclusion
Using a tile wet saw safely and effectively opens up a world of possibilities for your tiling projects. By prioritizing tile saw safety, choosing the right wet saw blade types, understanding tile cutting techniques, and performing regular wet saw maintenance, you can achieve professional-looking results with confidence. Remember to always consult your saw’s manual for specific operating instructions and safety guidelines. With practice and attention to detail, you’ll be expertly cutting ceramic and porcelain tile in no time.