
Can I use a hole saw with any drill? While you can technically use a hole saw with most drills, it’s crucial to match the hole saw’s size and material requirements with your drill’s power and chuck capacity for safe and effective hole saw drilling.
Using a hole saw is a straightforward process that allows you to cut clean, perfectly round holes in various materials like wood, metal, and plastic. Whether you’re a DIY enthusiast or a seasoned professional, knowing how to use a hole saw safely and effectively is an essential skill. This comprehensive guide will walk you through every step, from choosing the right tool to making those precise cuts.
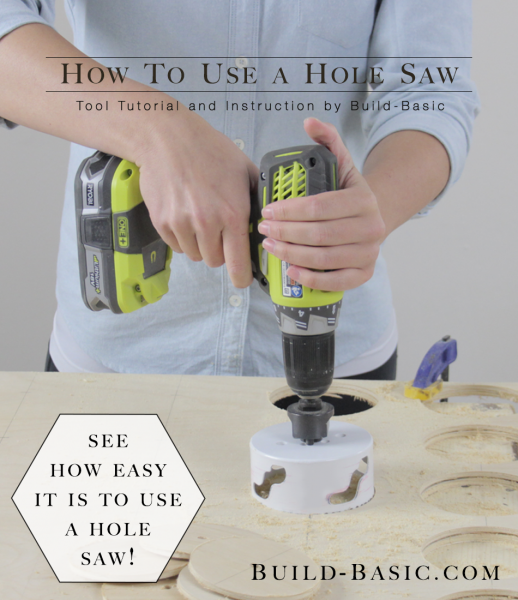
Image Source: build-basic.com
Choosing the Right Hole Saw
Selecting the correct hole saw is the first and most critical step. Different hole saws are designed for different tasks and materials.
Types of Hole Saws
- Bi-Metal Hole Saws: These are the most common type. They have hardened teeth made of high-speed steel (HSS) brazed onto a flexible spring steel body. They are excellent for cutting wood, plastics, non-ferrous metals (like aluminum and brass), and some mild steels.
- Carbide-Tipped Hole Saws: These have cutting edges made of carbide, a very hard material. They are ideal for cutting tougher materials like tile, brick, ceramic, fiberglass, and some harder metals where bi-metal saws might struggle or dull quickly.
- Diamond Grit Hole Saws: These have a coating of diamond grit along the edge. They are specifically designed for cutting very hard and brittle materials like glass, porcelain, tile, and stone. They require water for lubrication.
- Plumbers’ Hole Saws: These are typically larger diameter bi-metal saws designed for cutting through studs for plumbing pipes.
Matching Hole Saw to Material
| Material | Recommended Hole Saw Type | Notes |
|---|---|---|
| Wood | Bi-metal | Various tooth counts available; coarser teeth for faster cutting. |
| Plastic | Bi-metal | Use a slower speed to prevent melting. |
| Drywall | Bi-metal | Very easy to cut; use a lighter drill if possible. |
| Non-ferrous Metals (Aluminum, Brass) | Bi-metal | Use cutting fluid or lubricant. |
| Mild Steel | Bi-metal | Use cutting fluid and slower speeds. |
| Stainless Steel | Bi-metal (high tooth count) or Carbide-Tipped | Requires lubrication and slower speeds; can generate significant heat. |
| Cast Iron | Carbide-Tipped | Use cutting fluid and slow speeds. |
| Tile (Ceramic, Porcelain) | Diamond Grit or Carbide-Tipped | Requires water for cooling and dust suppression. |
| Glass | Diamond Grit | Requires water for cooling and dust suppression; use very light pressure. |
| Brick, Concrete | Carbide-Tipped | May require a hammer drill for tougher materials. |
Hole Saw Size
Hole saws come in a wide range of diameters. Always choose a size that is appropriate for the opening you need. Consider the minimum and maximum sizes your drill can handle.
Essential Hole Saw Accessories
To ensure effective and safe hole saw drilling, certain accessories are highly recommended.
Mandrels and Pilot Bits
Most hole saws require a mandrel to connect to the drill. The mandrel typically has a shank that fits into your drill chuck and a threaded end to which the hole saw body screws.
- Pilot Bit: Almost all mandrels have a pilot bit, a drill bit located in the center. Its primary function is to keep the hole saw centered on the material as you begin cutting, preventing the saw from wandering. This is crucial for accurate starting a hole with a hole saw.
- Pilot Bit Use: Ensure the pilot bit is sharp and properly centered. If the pilot bit breaks, you will have trouble keeping the hole saw stable.
Hole Saw Adapters
For larger hole saws or when using a drill with a specific chuck size, you might need a hole saw adapter. These adaptors can change the drive mechanism or allow you to use a larger hole saw with a smaller drill.
Extension Bars
If you need to cut holes deeper than the standard depth of a hole saw and mandrel combination, extension bars can be used. These screw onto the mandrel, extending the reach.
Arbor Systems
Some manufacturers offer arbor systems that allow for quick and easy swapping of different size hole saws without needing to screw and unscrew them each time. This is a great convenience when you need to make multiple holes of different sizes.
Preparing for Hole Saw Drilling
Proper preparation is key to a safe and efficient drilling experience.
Safety First: Hole Saw Safety Gear
Before you even pick up your drill, prioritize safety. Always wear:
- Safety Glasses or Goggles: Essential to protect your eyes from flying debris.
- Gloves: Work gloves can improve grip and protect your hands from sharp edges and heat.
- Hearing Protection: Hole saws can be noisy, especially in denser materials.
- Dust Mask or Respirator: Crucial when cutting materials that produce fine dust, like drywall, wood, or certain plastics, to prevent inhalation.
Securing Your Workpiece
Loose workpieces are a major safety hazard. Always secure the material you are cutting.
- Clamps: Use C-clamps, bar clamps, or F-clamps to firmly hold the material to a workbench or stable surface. Ensure the clamps are positioned so they don’t interfere with the drilling path.
- Vise: For smaller pieces, a vise can provide a secure grip.
Selecting the Right Drill
The drill you use needs to be powerful enough for the job.
- Corded vs. Cordless: Corded drills generally offer more consistent power for tougher jobs. Cordless drills are convenient but ensure the battery is fully charged and the drill has sufficient torque.
- Drill Speed: Hole saws perform best at slower to medium speeds. High speeds can cause the saw to overheat, dull the teeth, and lead to a rougher cut or material damage. Look for drills with variable speed settings.
- Chuck Size: Ensure your drill’s chuck can securely grip the mandrel shank. Most common hole saws use 3/8″ or 1/2″ shanks.
Preparing the Material
- Marking the Center: Clearly mark the center point where you want the hole. A pencil or marker works well for wood and plastics. For metals, a center punch can prevent the pilot bit from skittering.
- Lubrication: For metal cutting, apply a cutting fluid or lubricant to the cutting area and the pilot bit. This reduces friction, cools the saw, and helps clear chips, extending the life of your hole saw.
- Drilling Pilot Holes (Optional but Recommended): For very large hole saws or very hard materials, drilling a small pilot hole with a standard drill bit can help guide the pilot bit of the hole saw, ensuring a more accurate start.
How to Use a Hole Saw: Step-by-Step Guide
Now that you’re prepared, let’s get to the actual cutting holes with a hole saw.
Step 1: Mounting a Hole Saw
- Select the Correct Hole Saw: Choose the hole saw diameter and type suitable for your material and desired hole size.
- Attach the Hole Saw to the Mandrel: Most hole saws have a threaded opening. Screw the hole saw body onto the threaded end of the mandrel. Ensure it’s screwed on tightly.
- Install the Pilot Bit: If the pilot bit isn’t already in place, insert it into the center of the mandrel. It usually has a spring-loaded mechanism or is secured with a set screw.
- Insert the Mandrel into the Drill: Open the drill’s chuck and insert the mandrel shank. Tighten the chuck securely around the shank, ensuring it’s centered and firm.
Step 2: Starting the Hole
- Position the Hole Saw: Place the pilot bit directly on your marked center point.
- Engage the Drill: Start the drill at a low speed. Allow the pilot bit to create a small indentation.
- Apply Steady Pressure: Once the pilot bit is seated, gradually increase the drill speed to a medium setting. Apply steady, consistent pressure to the drill. Don’t force it; let the teeth do the work.
- Maintain Perpendicularity: Keep the drill as perpendicular to the material as possible. Tilting the drill can cause the hole saw to bind, break teeth, or result in an oval hole.
Step 3: Cutting Through the Material
- Listen to the Drill: Pay attention to the sound of the drill. If it starts to strain or bog down, reduce pressure slightly or lower the speed.
- Clear Debris: Periodically withdraw the hole saw from the cut while it’s still spinning slowly to clear accumulated chips and debris. This prevents the saw from overheating and binding. For metals, this also helps distribute lubricant.
- Prevent Jamming: As you approach the end of the cut, the material plug can sometimes jam in the hole saw. Reduce pressure significantly in the last few millimeters of the cut to prevent this. If it does jam, back the drill out slowly.
Step 4: Finishing the Cut
- Ease Pressure: As the pilot bit begins to poke through the backside of the material, reduce the drill pressure considerably.
- Complete the Cut: Continue with very light pressure until the hole saw cuts completely through. This prevents the hole saw from catching on the backside and tearing the material or pulling the drill suddenly.
- Withdraw the Hole Saw: Once the cut is complete, keep the drill running at a slow speed and carefully withdraw the hole saw from the hole.
Step 5: Cleaning Up
- Remove the Plug: The cut-out plug of material should be in the hole saw. Carefully remove it. If it’s stuck, a screwdriver or pliers might be needed.
- Inspect the Hole: Check the edges of the hole for any burrs or rough spots. These can often be smoothed with sandpaper or a deburring tool.
- Clean the Hole Saw: Remove any debris from the hole saw teeth and mandrel. This prolongs the life of the tool.
Tips for Effective Hole Saw Use
Here are some additional tips to enhance your experience cutting holes with a hole saw.
- Variable Speed is Key: Always use a drill with variable speed control. Start slow, increase to medium speed, and back off as you finish.
- Don’t Overheat: Overheating is the enemy of hole saws. Use lubrication for metals and take breaks if the saw feels too hot.
- Steady Pressure: Consistent, moderate pressure is more effective than brute force.
- Drill Stability: Maintain a stable stance and keep the drill perpendicular to the work surface.
- Clean Saw Teeth: Keep the teeth of the hole saw clean. Pitch and debris can build up and reduce cutting efficiency.
- Pilot Bit Sharpness: A dull or damaged pilot bit will make accurate starting difficult and increase the risk of the saw wandering.
- Material Thickness: Be aware of the cutting depth of your hole saw. If the material is thicker than the hole saw’s depth, you’ll need to make the cut from both sides or use an extension.
- Starting on Different Materials:
- Wood: For splinter-free cuts, especially on veneered plywood or laminate, drill halfway through from one side, then finish from the other.
- Metal: Use plenty of cutting fluid. Start slow and increase speed gradually.
- Tile/Glass: Use very light pressure. Water cooling is essential. You might need a variable speed drill that can go very slow.
Troubleshooting Common Hole Saw Issues
Even with preparation, you might encounter issues. Here’s how to address them.
Hole Saw Wandering
- Cause: Pilot bit not centered, material too hard, drill not stable, insufficient initial pressure.
- Solution: Ensure the pilot bit is sharp and centered. Use a center punch on metal. Secure your workpiece firmly. Start with very light pressure to seat the pilot bit before applying more.
Hole Saw Binding or Stalling
- Cause: Forcing the drill, dull teeth, lack of lubrication, material plug jamming.
- Solution: Reduce pressure, use a slower speed, clear debris more often, use lubrication for metals. If the plug jams, try backing out the drill slowly.
Rough Cut Edges
- Cause: Dull teeth, wrong speed, forcing the cut, material type.
- Solution: Use a sharp hole saw. Use appropriate speed and pressure. For wood, try drilling halfway and finishing from the other side. Sand or deburr the edges after cutting.
Overheating
- Cause: Too high a speed, insufficient lubrication, dull teeth, prolonged continuous cutting.
- Solution: Reduce speed. Use cutting fluid or water. Take breaks to let the saw cool. Ensure teeth are sharp and clean.
Hole Saw Attachments and Advanced Techniques
Beyond the basic setup, there are hole saw attachments and techniques that can expand your capabilities.
Hole Saw Kits
Many manufacturers offer hole saw kits that include a variety of popular sizes along with mandrels and a carrying case. These are excellent value for money if you anticipate needing different sizes.
Expanding Hole Saws
These are adjustable hole saws that can cut a range of hole sizes within a certain diameter range. They are convenient for projects where precise sizing isn’t critical, or for when you only need a few sizes. However, they can be more prone to vibration and might not offer the cleanest cut compared to fixed-size saws.
Using Hole Saws with Drill Presses
For maximum accuracy and stability, especially for larger hole saws or harder materials, a drill press is ideal.
- Mount the Mandrel: Secure the mandrel in the drill press chuck.
- Secure Workpiece: Use the drill press vise or clamps to firmly hold the material.
- Set Speed: Adjust the drill press speed to the appropriate setting for the hole saw size and material.
- Lower Slowly: Lower the drill press head slowly with consistent pressure. The weight of the drill press head provides excellent control.
Frequently Asked Questions (FAQ)
Q1: Can I use a hole saw on my hammer drill?
A1: Yes, you can, but usually only in the standard drilling mode, not the hammer mode. Hammer action can damage the hole saw teeth or the mandrel. Some specialized hole saws are designed for masonry, and they would be used with a hammer drill in hammer mode.
Q2: How do I prevent the pilot bit from breaking?
A2: Ensure the pilot bit is sharp and that you’re not applying excessive side pressure. Keep the hole saw drilling straight. If drilling a very thick material, consider drilling partway and then finishing from the other side to reduce stress on the pilot bit.
Q3: What is the best way to remove a stuck plug from a hole saw?
A3: Many hole saws have slots or cut-outs on the side. You can often use a flathead screwdriver or a pry bar to gently work the plug loose and remove it. For stubborn plugs, running water over the saw can sometimes help expand the metal slightly or lubricate it for removal.
Q4: How deep can a hole saw cut?
A4: The cutting depth is determined by the height of the hole saw cup itself. Standard hole saws typically cut to a depth of about 1 to 1.5 inches. For deeper cuts, you can use hole saw extension bars or make the cut from both sides of the material.
Q5: Is it safe to cut plywood with a hole saw?
A5: Yes, it is safe and common to cut plywood with a hole saw. For a cleaner cut and to prevent tear-out on the exit side, drill halfway through the plywood, then flip it over and finish the cut from the other side.
Q6: What is a hole saw adapter for?
A6: A hole saw adapter is used to connect different sizes of hole saws or different types of mandrels to a drill. It can also be used to adapt a larger hole saw to a drill with a smaller chuck size or to a drill press.
Q7: When should I use a pilot bit use with a hole saw?
A7: You should always use the pilot bit that comes with your hole saw and mandrel. Its purpose is to guide the hole saw and keep it centered on your mark as you begin drilling, ensuring accuracy and preventing the saw from wandering.
By following these guidelines, you can confidently and safely use a hole saw to create precise, clean holes in a variety of materials. Remember to always prioritize safety, choose the right tool for the job, and practice good technique. Happy drilling!