
Can you sharpen drill bits with a grinder? Yes, you absolutely can sharpen drill bits with a grinder, and it’s a skill that can save you money and keep your tools performing optimally. This guide will walk you through the process, from choosing the right equipment to executing the perfect sharpening technique. Whether you’re dealing with dulled twist drill bits or need to revive a set of worn-out bits, we’ll cover how to grind drill bits effectively.
Sharpening drill bits might seem daunting, but with the right approach and a bit of practice, anyone can master it. A sharp drill bit cuts cleaner, faster, and with less effort, reducing strain on both your drill and yourself. This comprehensive guide will equip you with the knowledge to tackle this task with confidence.
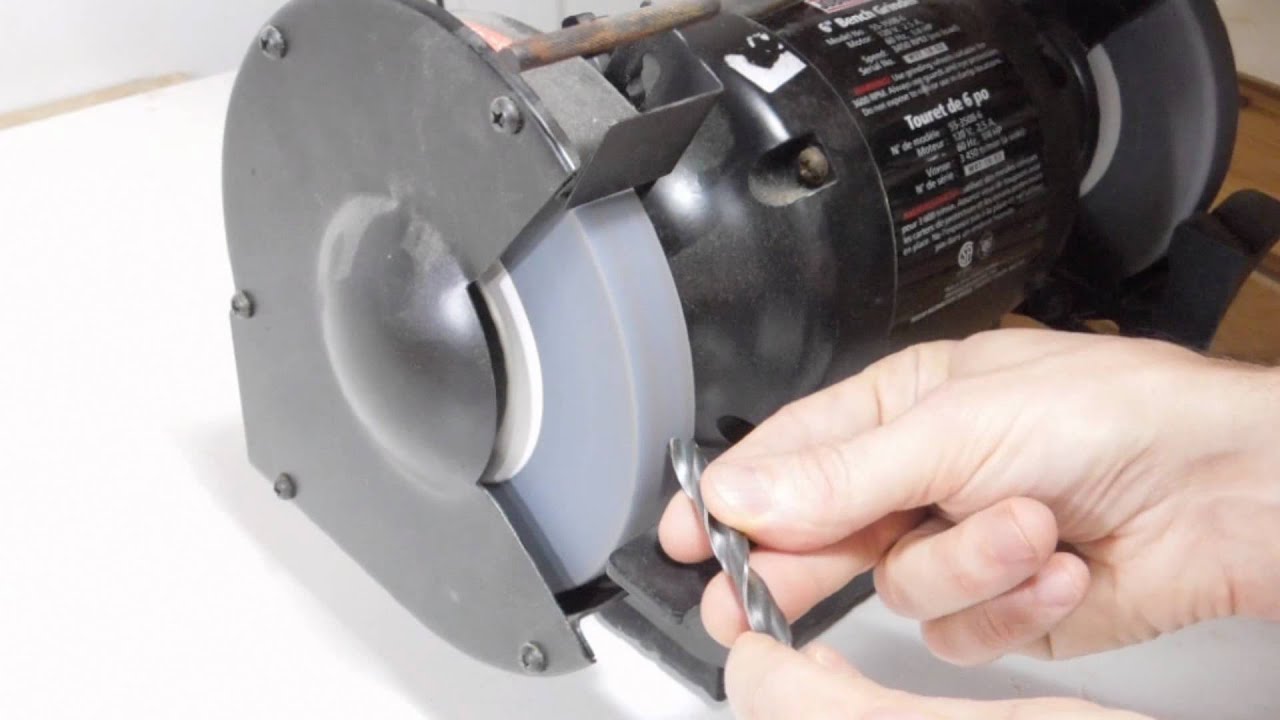
Image Source: i.ytimg.com
Why Sharpen Your Drill Bits?
Drill bits don’t last forever, but they can certainly last longer with proper maintenance. Sharpening your drill bits offers several key advantages:
- Improved Cutting Performance: Sharp bits slice through materials cleanly, reducing the chance of burning, wandering, or producing rough holes.
- Increased Efficiency: Sharp bits require less pressure, meaning your drill works less, lasts longer, and you can get the job done faster.
- Cost Savings: Replacing dull drill bits regularly can be expensive. Sharpening extends their lifespan, saving you money in the long run.
- Reduced Material Waste: Clean cuts from sharp bits minimize material damage and rework.
- Enhanced Safety: A bit that binds or wanders due to dullness can be dangerous, potentially causing injury or damage. Sharp bits offer more control.
Essential Tools for Drill Bit Sharpening
To successfully sharpen your drill bits with a grinder, you’ll need a few key pieces of equipment. Selecting the right tools is crucial for achieving good results.
The Grinder Itself: Choosing the Best Grinder for Drill Bits
When it comes to sharpening drill bits with a grinder, not all grinders are created equal. Here are the most common types and what to consider:
- Bench Grinder: This is the most popular choice for drill bit sharpening. Bench grinders offer a stable platform and a variety of wheels. The key is to use the right type of grinder wheel.
- Grinding Wheel for Drill Bits: Look for a white aluminum oxide wheel. These are harder and cooler cutting than standard gray silicon carbide wheels, which can overheat and damage the temper of your drill bit. A fine-grit wheel (around 60-80 grit) is usually best for sharpening.
- Angle Grinder: While versatile, angle grinders are generally not ideal for precision drill bit sharpening. The handheld nature makes it difficult to maintain a consistent angle.
- Die Grinder with Grinding Stone: A die grinder with a small grinding stone can be used for very small drill bits or for touch-ups, but it lacks the stability of a bench grinder.
- Portable Drill Bit Grinder: These are specialized tools designed specifically for sharpening drill bits. They often come with guides to help maintain the correct angle, making them user-friendly for beginners. Many are powered by your existing drill.
For most home and workshop use, a bench grinder is the best grinder for drill bits.
Other Necessary Equipment:
- Safety Glasses or Face Shield: Absolutely essential to protect your eyes from flying metal sparks and debris.
- Gloves: Protect your hands from heat and sharp edges.
- Marker Pen: To mark the cutting edge.
- Vise (Optional but Recommended): A small vise can help hold the drill bit steady.
- Drill Bit Sharpener Jig (Optional but Highly Recommended): While you can learn to sharpen freehand, a jig for sharpening drill bits grinder attachment can dramatically improve accuracy and consistency, especially for beginners. These jigs hold the drill bit at the correct angle and guide it against the grinding wheel.
- Water Quench Bucket: A container of water to cool the drill bit between passes. Overheating a drill bit can ruin its hardness.
Preparing to Sharpen Your Drill Bits
Before you fire up the grinder, a little preparation goes a long way.
Inspecting the Drill Bit
First, examine the drill bit. Look for:
- Damage: Is the tip chipped or severely damaged? In some cases, the damage might be too extensive to repair by sharpening alone.
- Wear: How dull is it? The more dull, the more material you’ll need to remove.
- Material: Is it high-speed steel (HSS), cobalt, or carbide? Different materials might require slightly different approaches or grinding wheels. HSS and cobalt are common and well-suited for bench grinder sharpening. Carbide is much harder and can chip easily, often requiring specialized sharpening methods or diamond wheels.
Setting Up Your Grinder
- Secure Placement: Ensure your bench grinder is firmly secured to your workbench.
- Wheel Selection: Mount a clean, white aluminum oxide grinding wheel. Make sure it’s the correct size for your grinder.
- Wheel Dressing (If Necessary): If your grinding wheel is glazed or loaded with metal, you’ll need to dress it with a wheel dresser to expose fresh abrasive.
- Angle Setting (If Using a Jig): If you’re using a drill bit sharpening jig, set it up according to the manufacturer’s instructions. These often have pre-set angles for common drill bit types.
Understanding the Drill Bit Anatomy
To sharpen effectively, you need to know the parts of a drill bit:
- Point: The very tip of the drill bit that does the cutting.
- Cutting Edges (Lips): The two sharpened edges at the point.
- Heel: The lower surface of the cutting edge.
- Clearance Angle: The angle behind the cutting edge that prevents the heel from rubbing against the material. This is crucial for proper cutting.
- Web: The central thickness of the drill bit.
- Flutes: The spiral grooves that carry chips away from the cutting area.
The primary goal of sharpening is to restore the cutting edges and maintain the correct clearance angles.
The Sharpening Process: How to Grind Drill Bits Effectively
Sharpening drill bits with a grinder involves carefully grinding away material to re-establish the cutting edges. The key is to maintain the correct drill bit grinder angle and to avoid overheating the bit.
Sharpening Twist Drill Bits Grinder Technique (Freehand)
For those without a jig, sharpening twist drill bits grinder freehand requires practice.
- Mark the Cutting Edge: Use a marker to color the cutting edge of the drill bit. This helps you see how much material you’re removing and where.
- Grip the Bit: Hold the drill bit firmly in your dominant hand, with your other hand supporting it. Aim to hold it as close to the point as possible.
- Approach the Wheel: Bring the drill bit to the grinding wheel at the correct angle. The goal is to grind the heel of the cutting edge.
- The Correct Angle: For most standard drill bits, the point angle is 118 degrees, and the clearance angle (the angle of the heel) should be around 12-15 degrees. You’ll be grinding the side of the heel at this clearance angle.
- Grinding Motion:
- Touch the heel of the drill bit to the grinding wheel.
- Rotate the drill bit slightly to grind a small portion of the heel.
- Move the drill bit from heel to point.
- Lift the bit and rotate it slightly to the other side to work on the second cutting edge.
- Maintain the same angle.
- Crucially, keep the drill bit moving to prevent overheating and to ensure even grinding.
- Cooling: Dip the drill bit in the quench bucket frequently, especially after a few passes. Do not quench a red-hot bit; let it cool slightly first.
- Checking Progress: Periodically check the sharpness. You should see a fresh, shiny cutting edge emerge. The marker line should be mostly gone from the heel. Aim to remove material evenly from both cutting edges.
- Restoring the Point: As you grind the heels, the point will naturally reform. Ensure both cutting edges are the same length and angle. The web of the drill bit will get thinner as you grind.
Using a Drill Bit Sharpener Jig
A jig for sharpening drill bits grinder attachment simplifies the process significantly. These jigs typically have a channel or clamp to hold the drill bit and a guide that sets the correct angle against the grinding wheel.
- Mount the Jig: Attach the jig to your bench grinder.
- Insert the Drill Bit: Place the drill bit into the jig’s designated holder. Many jigs have adjustable stops to set the depth of the bit, which helps in aligning the cutting edges.
- Set the Angle: The jig is usually pre-set or adjustable to the correct clearance and point angles.
- Grind: Bring the jig (with the drill bit) to the grinding wheel. Follow the jig’s instructions for rotating the bit to sharpen each cutting edge. The jig ensures consistent contact and angle.
- Cool and Repeat: As with freehand sharpening, cool the bit in water regularly. Rotate the bit to sharpen the opposite cutting edge, ensuring both are sharpened equally.
Special Considerations for Different Drill Bit Types
- Cobalt Drill Bits: Cobalt bits are harder than HSS and can be more brittle. Use a lighter touch and cool them more frequently.
- Carbide Drill Bits: These are very hard and brittle. Grinding them with standard aluminum oxide wheels can be ineffective and may chip the carbide. Diamond grinding wheels are often recommended for carbide bits. Be extremely careful not to overheat them, as they can lose their hardness quickly.
The Correct Drill Bit Grinder Angle and Angles Explained
Achieving the correct angles is paramount for proper drill bit function.
Point Angle
- What it is: The angle formed by the two cutting edges at the very tip of the drill bit.
- Common Angles:
- 118 degrees: General purpose for soft metals, wood, and plastics.
- 135 degrees: For harder metals like stainless steel and brass, offering a more aggressive cut.
- How to achieve: When sharpening, you are essentially re-forming this angle by grinding the faces of the cutting edges.
Clearance Angle (Lip Relief)
- What it is: The angle at the back of the cutting edge (the heel). This angle prevents the heel from rubbing against the material being drilled.
- Common Angles: 12-15 degrees.
- How to achieve: This is the primary angle you are grinding when sharpening. You are grinding the side of the cutting lip so that the very back edge (the heel) is slightly lifted off the material.
Table: Common Drill Bit Angles
| Drill Bit Type/Material | Point Angle | Clearance Angle |
|---|---|---|
| General Purpose (Wood, Soft Metal) | 118 degrees | 12-15 degrees |
| Harder Metals (Steel, Stainless) | 135 degrees | 12-15 degrees |
Fathoming the Grind: When you bring the drill bit to the wheel, you are touching the side of the cutting lip at the clearance angle. As you rotate the bit and grind, you are essentially shaping the face of the cutting lip to meet at the point angle.
Maintaining Your Sharpened Drill Bits
Once sharpened, proper care ensures they stay sharp longer.
- Cleanliness: Brush off any metal shavings or debris after sharpening.
- Storage: Store your sharpened bits in a clean, dry place, ideally in a drill bit organizer to prevent them from bumping against each other and dulling.
Troubleshooting Common Sharpening Issues
- Uneven Cutting Edges: This is the most common problem. It means you haven’t removed the same amount of material from both sides. Go back and carefully grind the shorter side to match the longer one. A jig helps prevent this.
- Overheating: If the bit turns blue or purple, it’s overheated and its temper is ruined. It will be brittle and won’t cut well. Let it cool completely and try again with a lighter touch and more frequent quenching.
- Chipped Edges: This can happen if you apply too much pressure or grind too aggressively. Use a finer grit wheel or a lighter touch.
- Bit Wanders: This usually indicates an improperly formed point or uneven cutting edges.
Alternatives to Grinder Sharpening
While bench grinder drill bit sharpening is effective, other options exist:
- Manual Drill Bit Sharpeners: These are small, handheld devices that guide the drill bit against an abrasive insert. They are often less precise but can be useful for quick touch-ups.
- Electric Drill Bit Sharpeners: These are dedicated electric tools that sharpen drill bits automatically, often with built-in angle guides. They can be an investment but offer ease of use and accuracy.
Frequently Asked Questions (FAQ)
Q1: How often should I sharpen my drill bits?
A: You should sharpen your drill bits whenever they start to feel dull, cut slowly, or require excessive pressure. This can depend on the material you’re drilling and the quality of the bit.
Q2: Can I use any grinder wheel to sharpen drill bits?
A: It’s best to use a white aluminum oxide grinding wheel. Standard gray silicon carbide wheels can generate more heat and damage the drill bit’s temper, making it brittle.
Q3: What is the correct drill bit grinder angle?
A: For most standard drill bits, you’re aiming for a point angle of 118 degrees and a clearance angle of 12-15 degrees behind the cutting edge.
Q4: How do I prevent overheating my drill bits while sharpening?
A: Dip the drill bit in water frequently to cool it down. Avoid prolonged contact with the grinding wheel and use a light touch.
Q5: My drill bits are turning blue after sharpening. What did I do wrong?
A: The drill bit has overheated. This ruins its hardness and temper. Let the bit cool down completely and try again with a lighter touch and more frequent cooling.
Q6: What is the best grinder for drill bits?
A: A bench grinder with a white aluminum oxide wheel is generally considered the best grinder for drill bits due to its stability and the availability of appropriate wheels. Specialized drill bit sharpeners are also excellent options.
Q7: Do I need a jig for sharpening drill bits with a grinder?
A: While not strictly necessary, a jig for sharpening drill bits with a grinder is highly recommended, especially for beginners. It helps maintain consistent angles, leading to better results and reducing the chance of damaging the bit.
By following this comprehensive guide, you can confidently sharpen your drill bits using a grinder, keeping your tools in top condition and ensuring efficient, clean drilling for all your projects. Remember to always prioritize safety and practice makes perfect!