
Yes, you can sharpen drill bits with a grinder! Grinding drill bits is a fantastic way to bring dulled bits back to life, saving you money and ensuring your DIY projects go smoothly. This guide will walk you through proper drill bit sharpening using a grinder, making DIY drill bit sharpening accessible for everyone. We’ll cover everything from choosing the right grinder to the step-by-step process of re-sharpening twist bits.
Having sharp drill bits is crucial for efficient and clean drilling. Dull bits require more force, can burn through your material, and often lead to crooked holes. Investing a little time in sharpening dulled drill bits can significantly improve your drilling experience and the quality of your work. This guide focuses on using common grinding tools, like bench grinders and angle grinders, to achieve sharp cutting edges on your drill bits.
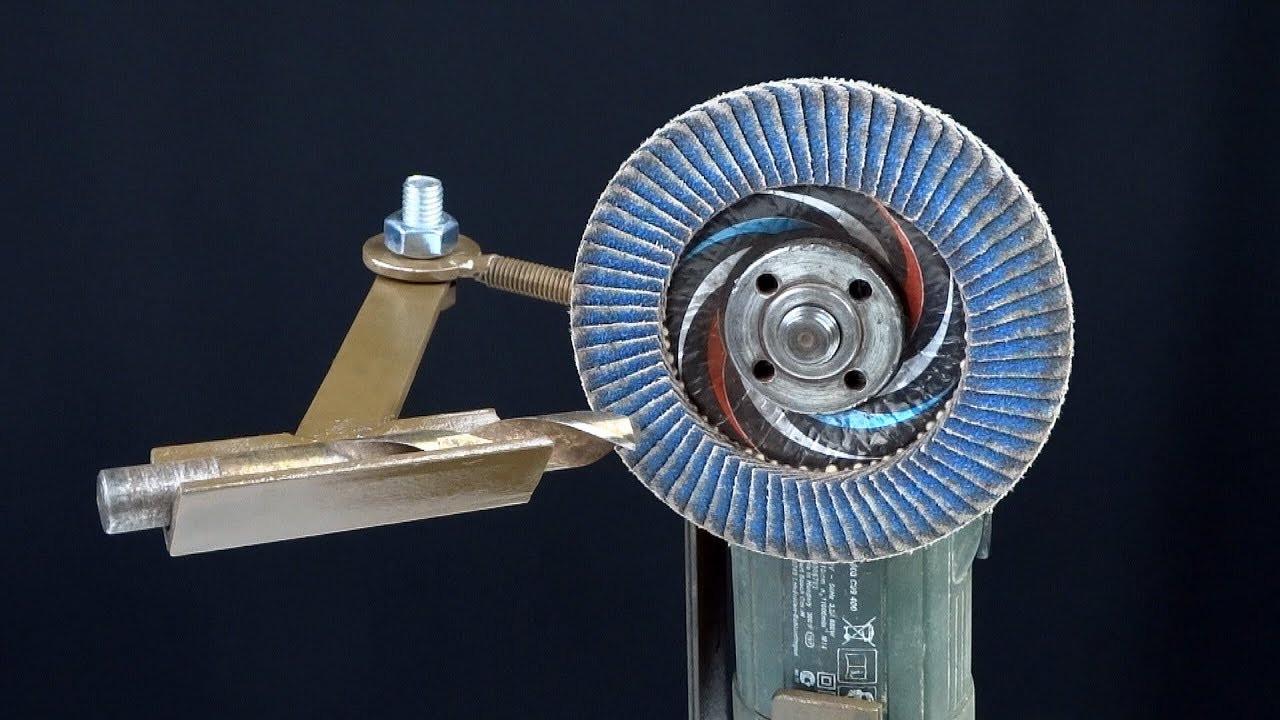
Image Source: binictools.com
Why Sharpen Your Drill Bits?
Drill bits, especially those used for metal, wear down over time. The cutting edges become rounded, losing their ability to bite into material effectively. This leads to several problems:
- Increased Effort: You’ll need to push harder, which can lead to fatigue and less control.
- Poor Hole Quality: Holes may be oversized, rough, or not perfectly round.
- Overheating: Both the drill bit and the material can get too hot, potentially damaging both.
- Increased Tool Wear: Your drill motor works harder, shortening its lifespan.
- Cost Savings: Sharpening is much cheaper than buying new bits.
Tools You’ll Need for Grinding Drill Bits
Before you start grinding drill bits, gather these essential tools:
- Grinding Tool: This could be a bench grinder or an angle grinder.
- Grinding Wheel: Ensure it’s suitable for metal. A medium grit (e.g., 60-80 grit) is generally good for sharpening.
- Drill Bit Gauge or Holder (Optional but Recommended): Helps maintain the correct sharpening angle.
- Safety Glasses: Absolutely essential to protect your eyes from flying sparks and metal shards.
- Work Gloves: To protect your hands.
- Vise or Clamps: To secure the drill bit or grinder if needed, ensuring stability.
- Coolant (Optional): Water or a cutting fluid can help prevent the bit from overheating, though for small sharpening jobs, this might be less critical.
- Marker Pen: To mark the cutting edges.
- Wire Brush: For cleaning the drill bit before sharpening.
Preparing Your Grinder and Workspace
Safety first! Always ensure your grinder wheel drill sharpening area is well-lit and free from flammable materials.
- Secure the Grinder: If using a bench grinder, make sure it’s firmly mounted to a workbench. If using an angle grinder, you might want to use a stand or a vise to hold it steady, or be very comfortable using it freehand.
- Inspect the Grinding Wheel: Check for any cracks or damage. A damaged wheel can break apart during use. Ensure the wheel is clean and free of debris.
- Wear Safety Gear: Put on your safety glasses and gloves. A face shield over your glasses offers extra protection.
- Clear the Area: Remove any clutter around your workspace.
Step-by-Step Guide to Sharpening Drill Bits with a Grinder
This process focuses on re-sharpening twist bits, the most common type of drill bit.
Step 1: Clean the Drill Bit
Use a wire brush to remove any dirt, grease, or metal shavings from the drill bit. A clean bit allows for a more accurate sharpening process.
Step 2: Identify the Cutting Edge and Clearance Angle
A standard twist drill bit has two cutting edges at the tip. The goal is to restore the original cutting angle and the clearance angle.
- Cutting Edge: This is the sharp edge that does the actual cutting.
- Clearance Angle: This is the small facet behind the cutting edge. It’s crucial because it prevents the body of the drill bit from rubbing against the hole wall as it drills. If this angle is too small, the bit will bind. If it’s too large, the cutting edge will be weak.
Step 3: Setting the Correct Angle
The most common angle for the primary cutting edge of a drill bit for general-purpose drilling is 118 degrees. For harder materials like steel, 135 degrees is often preferred. For softer materials like wood or plastic, 90-118 degrees works well.
- Using a Drill Bit Gauge: These tools have slots or markings to help you achieve the correct angle.
- Freehand Method: Practice is key here. You’ll be aiming to replicate the existing angle on the bit.
Step 4: Grinding the Cutting Edge
This is where you’ll be using the grinder for drill bits.
- Grasp the Drill Bit: Hold the drill bit firmly between your thumb and forefinger, with your index finger on the shank for control.
- Position the Bit: Bring the cutting edge of the drill bit to the grinder wheel drill sharpening surface. The angle you hold the bit at should match the desired cutting angle (e.g., 118 degrees).
- Grind with a Sweeping Motion: Apply light pressure and move the drill bit in a slight sweeping or rocking motion across the grinding wheel. This helps create a new, sharp cutting edge and avoids overheating or creating a flat spot.
- Grind One Side: Focus on grinding one cutting edge first. You want to remove just enough metal to create a sharp point.
- Rotate and Repeat: Rotate the drill bit to the other side and repeat the process, aiming to match the angle and the amount of metal ground off the first side. The goal is for both cutting edges to be identical.
- Check Progress: Periodically dip the drill bit in water to cool it and inspect the cutting edges. You should see a new, sharp edge forming. Avoid grinding too much material at once.
Step 5: Grinding the Clearance Angle
This is a critical part of proper drill bit sharpening that is often overlooked.
- Adjust the Angle: Slightly adjust the angle of the drill bit relative to the grinding wheel. You want to grind on the land of the drill bit, which is the raised cylindrical surface just behind the cutting edge.
- Grind the Clearance: With light pressure, rock the drill bit slightly back and forth. This creates a secondary bevel, the clearance angle. Again, move the bit in a slight sweeping motion to maintain an even grind.
- Match Both Sides: Grind the clearance angle on both sides of the drill bit, ensuring they are symmetrical. You should be able to see a small gap between the heel of the cutting edge and the surface it will rest on when drilling.
Step 6: Inspect and Refine
- Visual Check: Look at the tip of the drill bit. Both cutting edges should be sharp and meet at a point. The clearance angles should be present on both sides.
- Feel the Sharpness: Carefully feel the cutting edge (be cautious!). It should feel sharp to the touch.
- Make Adjustments: If one side is sharper or the angles don’t match, go back to the grinder for a few more light passes, focusing on the areas that need refinement.
- Deburr: Use a fine sharpening stone or a piece of fine-grit sandpaper to gently deburr any rough edges left by the grinder.
Sharpening Different Types of Drill Bits
While this guide primarily focuses on twist bits, the principles can be adapted.
Sharpening Metal Drill Bits
Sharpening metal drill bits requires precision. Always ensure the bit is cool. Overheating can soften the metal and ruin the temper of the bit. Use lighter pressure and more frequent cooling.
Sharpening Wood Drill Bits
Wood drill bits, especially spade bits or brad-point bits, have different geometries.
- Spade Bits: These have a central point and two spurs. You’ll need to sharpen the spurs to a sharp point and the cutting edges. This is often best done with a bench grinder or a file.
- Brad-Point Bits: The central point needs to be sharp. The spurs also need a keen edge. A small grinding wheel on a Dremel tool or a small file can be effective here.
Sharpening Masonry Drill Bits
Masonry bits have a carbide tip. Grinding these requires a diamond grinding wheel, as regular abrasive wheels will quickly wear down. The sharpening process is different, focusing on maintaining the shape of the carbide tip.
Using Specific Grinding Tools
Bench Grinder Drill Bit Sharpening
A bench grinder offers more stability.
- Using a Grinding Rest: Most bench grinders have adjustable rests. Position this rest to support the drill bit at the desired angle.
- Controlled Movement: Hold the bit against the rest and use a controlled rocking motion.
- Two Wheels: If your bench grinder has two wheels of different grits, use the coarser grit for initial shaping and the finer grit for refinement.
Angle Grinder Drill Sharpening
Angle grinder drill sharpening can be more challenging due to the tool’s power and tendency to vibrate.
- Use a Smaller Grinding Disc: A smaller disc offers more control.
- Secure the Grinder: If possible, mount the angle grinder in a vise or use a grinder stand.
- Steady Hand: Maintain a very steady hand and light pressure. The speed of an angle grinder means you can remove metal very quickly, so be extra cautious.
- Safety: This method produces more sparks and noise. Ensure maximum safety precautions are taken.
Angle of Attack: Finding the Sweet Spot
The angle grinder drill sharpening angle is critical. A common mistake is holding the bit too flat against the wheel, which grinds away too much material and creates a weak edge.
- Aim for a Shallow Angle: Think of the angle you’d use to shave a thin sliver off a piece of wood.
- Practice Makes Perfect: Try this on a cheap, old drill bit first to get a feel for the process.
Table: Drill Bit Sharpening Angles
| Material | Primary Cutting Angle | Clearance Angle (Approximate) |
|---|---|---|
| General Purpose | 118 degrees | 12-15 degrees |
| Hardened Steel | 135 degrees | 10-13 degrees |
| Soft Metals (Al) | 90-118 degrees | 15-20 degrees |
| Wood | 90-118 degrees | 15-20 degrees |
| Masonry (Carbide) | Varies (depends on tip geometry) | N/A (sharpen tip only) |
Note: These are general guidelines. Specific applications may require slightly different angles.
Common Mistakes to Avoid in DIY Drill Bit Sharpening
- Overheating: This is the biggest enemy of a sharp drill bit. Grind in short bursts and let the bit cool.
- Uneven Grinding: Not matching the angles on both sides results in a bit that wobbles and drills poorly.
- Too Much Pressure: This can damage the grinding wheel and remove too much metal from the drill bit.
- Ignoring the Clearance Angle: A bit without proper clearance will bind and cut inefficiently.
- Not Wearing Safety Gear: Sparks and metal fragments can cause serious injury.
Maintaining Your Sharp Drill Bits
After sharpening, it’s good practice to keep your bits organized and clean. Store them in a way that protects the sharpened edges from damage.
Frequently Asked Questions (FAQ)
Q1: Can I really sharpen a drill bit with an angle grinder?
Yes, you can sharpen a drill bit with an angle grinder. However, it requires a steady hand, light pressure, and careful attention to maintaining the correct angles. It’s often easier and safer to use a bench grinder, but an angle grinder is a viable option if that’s what you have.
Q2: What grit should the grinding wheel be for sharpening drill bits?
A medium grit, such as 60 to 80 grit, is generally recommended for sharpening drill bits. This grit size removes metal efficiently without being so coarse that it creates a rough edge. For a final touch-up, a finer grit can be used.
Q3: How do I know if I’m using the correct angle when grinding?
The standard angle for most general-purpose drill bits is 118 degrees. For harder metals, 135 degrees is better. Practice is key. You can use a drill bit gauge or a protractor to help you find and maintain the correct angle. The key is to ensure both cutting edges are ground to the same angle.
Q4: My sharpened drill bit still doesn’t cut well. What could be wrong?
Several things could be the issue:
* Incorrect Angle: The primary cutting edge or the clearance angle might be wrong.
* Uneven Sharpening: The two cutting edges might not be identical.
* Overheated Bit: The heat from grinding could have softened the metal, making it dull.
* Worn Out Bit: In some cases, a drill bit is simply too worn down to be effectively resharpened.
Q5: Is it better to use a bench grinder or an angle grinder for sharpening?
A bench grinder is generally preferred for sharpening dulled drill bits due to its stability. It allows for more controlled grinding and makes it easier to maintain consistent angles. An angle grinder is more portable but requires more skill and a very steady hand to achieve good results.
Q6: What is the most important part of sharpening a drill bit?
Maintaining the correct primary cutting angle and the clearance angle on both sides is the most crucial aspect. The clearance angle prevents the body of the bit from rubbing against the hole wall. Without it, the bit will overheat and bind.
Q7: How often should I sharpen my drill bits?
You should sharpen your drill bits when you notice they are becoming dull, requiring more force to drill, or producing rough holes. Regularly inspecting your bits and sharpening them as needed will prolong their life and improve your drilling efficiency.
By following these steps, you can effectively restore sharpness to your drill bits and tackle your projects with confidence. Happy drilling!