
Sure, here is a blog post on DIY water well drilling.
Can you drill your own water well? Yes, you can drill your own water well, but it’s a significant undertaking that requires careful planning, the right tools, and a good grasp of the process. Who is this guide for? This guide is for motivated individuals with a knack for DIY projects, a willingness to invest time and effort, and a desire for self-sufficiency.
Access to clean, reliable water is a fundamental need for any home, and for many, drilling a private well is the most practical solution. While professional well drilling services are readily available, the allure of DIY water well drilling can be strong for those seeking cost savings and a sense of accomplishment. This comprehensive guide will walk you through the essential steps of home water well installation and private well construction, from initial planning to securing your water supply.
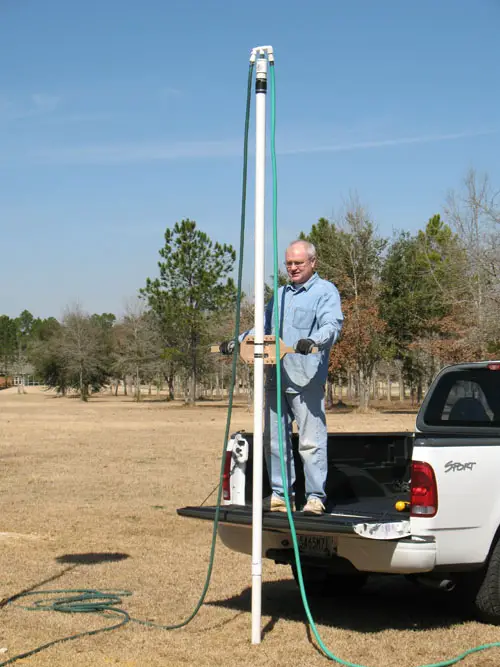
Image Source: drillyourownwell.com
Deciphering Well Drilling Basics
Before you even think about picking up a drill, you need to get a firm grip on well drilling basics. This isn’t just about digging a hole; it’s about accessing a vital resource safely and effectively.
Site Selection: Finding Your Water Source
The most crucial first step is selecting the right spot. You’re looking for an area with a high probability of hitting a productive aquifer.
- Geological Surveys and Maps: Consult local geological surveys and well logs. These resources often pinpoint areas with known water-bearing rock formations (aquifers). Your local government or a well drilling supply company might have these available.
- Topography: Avoid drilling in low-lying areas that might flood. Higher ground is generally preferable.
- Setback Requirements: Local regulations dictate how far a well must be from septic systems, property lines, and potential contamination sources like landfills or chemical storage. Always check these rules first!
- Accessibility: Can you get the necessary well drilling equipment to the site? Large drilling rigs require space and stable ground.
Legalities and Permits: Navigating the Red Tape
This is non-negotiable. Before you do anything else, research and obtain all necessary permits.
- Local Regulations: Every county and state has specific rules regarding well drilling. This includes depth requirements, casing specifications, water usage rights, and testing procedures.
- Permit Applications: You’ll likely need to submit a detailed plan of your proposed well, including its location, depth, and construction methods.
- Inspections: Be prepared for inspections at various stages of the drilling process.
Fathoming the Aquifer: Locating Your Water Source
The goal of drilling is to reach an aquifer, a natural underground layer of water-bearing rock or gravel. Aquifer access is what makes your well functional.
Types of Aquifers
- Unconfined Aquifers: These are the most common. The upper surface of the saturated zone is the water table. They are recharged directly by rainfall and surface water.
- Confined Aquifers: These are sandwiched between layers of impermeable rock or clay. The water is under pressure, which can lead to artesian wells.
Signs of Potential Water
While scientific data is key, some natural indicators can hint at underground water:
- Vegetation: Lush green vegetation in drier areas can suggest shallow groundwater.
- Animal Behavior: Animals often congregate near water sources.
- Low-Lying Areas: While you want to avoid flood zones, sometimes water table levels are closer to the surface in valleys.
Gathering Your Well Drilling Equipment
This is where the DIY aspect really comes into play. You’ll need to acquire or rent specialized well drilling equipment. The type of equipment depends heavily on the drilling method you choose.
Common Well Drilling Methods
There are several ways to drill a well, each with its pros and cons:
1. Cable Tool Drilling
- Process: This is a traditional method. A heavy bit is repeatedly dropped onto the ground to break up the rock. The pulverized material is then removed with a bailer.
- Pros: Relatively simple equipment, can be effective in harder rock.
- Cons: Slow, labor-intensive, can be challenging to control depth precisely.
2. Rotary Drilling
- Process: A rotating drill bit grinds the rock. Water or drilling fluid is pumped down the drill string and back up the hole, carrying cuttings with it.
- Pros: Faster than cable tool, more precise depth control.
- Cons: Requires more complex equipment (drill rig, pump), drilling fluids must be managed.
3. Jetting or Percussion Drilling (for shallow wells)
- Process: High-pressure water is used to dislodge soil and gravel. This is often used for shallow well digging.
- Pros: Relatively simple and less expensive for shallow wells.
- Cons: Only effective in unconsolidated materials (sand, gravel), not suitable for rock.
Essential Equipment Checklist
Regardless of the method, you’ll likely need some or all of the following:
- Drill Rig: The core piece of equipment. Can be rented or purchased.
- Drill Bits: Specific to the type of rock or soil you’ll encounter.
- Drill Pipe/Rods: To extend the reach of the drill bit.
- Water Pump: To circulate drilling fluid (for rotary drilling) or to bail out cuttings.
- Hose and Fittings: For fluid circulation.
- Generator/Power Source: To run the equipment.
- Safety Gear: Hard hats, safety glasses, gloves, steel-toed boots, hearing protection.
- Measuring Tools: Tape measures, depth indicators.
- Bailer or Pump: To remove cuttings.
- Well Casing: The pipe that lines the well to prevent collapse and contamination.
- Grouting Materials: Cement or bentonite to seal the annulus (space between the casing and the borehole wall).
The Drilling Process: Step-by-Step Construction
Once you have your permits, chosen your site, and gathered your equipment, the actual drilling can begin.
Stage 1: Breaking Ground
This is the initial phase of creating the borehole.
Creating the Pilot Hole
- Start drilling using a smaller diameter bit to establish a clean entry point.
- Maintain consistent pressure and rotation.
- Regularly remove cuttings to assess progress and geological layers.
Advancing the Borehole
- As you deepen the hole, you’ll switch to larger bits as needed.
- For rotary drilling, ensure the drilling fluid is circulating properly. Monitor fluid levels and pressure.
- For cable tool drilling, bail out the cuttings regularly.
Managing Drilling Fluids and Cuttings
- Drilling fluids (often a mix of water and bentonite clay) serve to cool the bit, lubricate the drill string, stabilize the borehole walls, and carry cuttings to the surface.
- Ensure you have a system for collecting and disposing of cuttings and drilling fluids responsibly, adhering to environmental regulations.
Stage 2: Installing the Well Casing
Once you reach your target depth, installing the well casing is critical for the integrity and longevity of your well.
What is Well Casing?
Well casing is a strong, watertight pipe that is inserted into the drilled borehole. It prevents the borehole walls from collapsing, seals off shallow, potentially contaminated water sources, and provides a conduit for drawing water. Common materials include steel, PVC, or fiberglass.
Casing Installation Steps
- Lowering the Casing: Carefully lower the casing pipe into the drilled borehole. Ensure it is plumb (vertical).
- Sealing the Annulus: The space between the borehole wall and the casing is called the annulus. This gap must be sealed to prevent surface water and shallow groundwater from contaminating the deeper aquifer. This is typically done by:
- Grouting: Pumping a cement-based grout or bentonite slurry down the inside of the casing and allowing it to flow up the annulus. This creates a watertight barrier.
- Underreaming and Gravel Packing: In some cases, particularly in unconsolidated aquifers, the borehole may be enlarged at the bottom (underreamed) and a screen installed. Gravel is then packed into the annulus around the screen to filter water.
Stage 3: Developing the Well
This stage is crucial for removing drilling fluids, fine sediment, and debris from the aquifer zone around the well screen, thereby improving water flow and quality.
- Surging: This involves rapidly forcing water into and out of the well. This can be done with a surge block or by pumping. The goal is to create pulses of pressure that dislodge sediment.
- Pumping: Once the well is surged, it is pumped at a high rate until the discharged water is clear and free of sediment.
Stage 4: Installing the Water Well Pump
With the well drilled, cased, and developed, it’s time for the water well pump installation. This is often the most complex part of the system.
- Pump Type: The most common type for private wells is a submersible pump, which is placed directly in the well. Jet pumps are used for shallower wells and are located above ground.
- Pump Selection: Choose a pump that is appropriately sized for your well’s depth, yield, and your household’s water demands.
- Installation:
- Attach a drop pipe to the pump.
- Connect the electrical power cable to the pump.
- Carefully lower the pump assembly into the well using a safety rope or cable.
- Secure the casing head at the surface.
- Connect the discharge pipe to the pressure tank and home’s plumbing system.
- Wire the pump according to manufacturer instructions and local electrical codes.
Testing Your Water: Ensuring Purity
After installation, water quality testing is a critical final step to ensure your water is safe to drink.
What to Test For
- Coliform Bacteria: Indicates potential contamination from human or animal waste.
- Nitrates: High levels can be harmful, especially to infants.
- Total Dissolved Solids (TDS): Affects taste and can indicate dissolved minerals or contaminants.
- Minerals: Iron, manganese, calcium, magnesium can affect taste, color, and cause scaling.
- pH Levels: Affects corrosivity.
- Heavy Metals: Lead, arsenic, etc., if there’s a suspicion of contamination.
How to Test
- Certified Laboratory: The most accurate method is to collect samples according to the lab’s instructions and submit them to a certified water testing laboratory.
- Home Test Kits: These can provide a preliminary indication for some parameters but are less precise than lab tests.
Maintaining Your Well: Ensuring Long-Term Performance
A well-maintained well will provide clean water for decades.
Regular Inspections
- Visual Check: Periodically inspect the wellhead for damage or signs of contamination.
- Pump Performance: Listen for unusual noises from the pump.
- Water Quality: Consider periodic re-testing, especially if you notice any changes in taste, odor, or appearance.
Preventative Measures
- Protect the Wellhead: Ensure the cap is secure and the area around the wellhead is kept clean and free of debris.
- Avoid Contamination: Be mindful of activities near the well that could introduce contaminants, such as pesticide use or improper waste disposal.
Cost Considerations for DIY Water Well Drilling
While the allure of cost savings is a major driver for DIY drilling, it’s important to be realistic.
Potential Cost Savings
- Labor: The biggest saving is in not paying for professional drilling labor, which can be a significant portion of the total cost.
- Equipment Rental/Purchase: While you’ll have costs here, if you can rent or find used equipment, it can reduce upfront investment.
Hidden and Additional Costs
- Equipment Rental/Purchase: This can be substantial. A professional drill rig rental alone can cost hundreds or thousands of dollars per day.
- Permits and Fees: These vary by location but are mandatory.
- Materials: Casing, grout, screen, fittings, and the pump system itself are significant expenses.
- Testing: Water quality testing costs money.
- Mistakes: If you make errors, you might have to pay professionals to fix them, negating your savings.
- Time: Your time is valuable. DIY drilling is extremely time-consuming.
- Unexpected Challenges: Hitting hard rock, encountering unstable soil, or drilling too deep and not finding water can lead to significant unforeseen costs.
Comparing DIY vs. Professional Costs
A rough estimate: A professional well installation can cost anywhere from $5,000 to $15,000 or more, depending on depth, geology, and location. A DIY approach might save 30-60% of this, but only if everything goes smoothly. If you encounter major problems, the cost could easily exceed professional rates.
Safety First: Prioritizing Your Well-being
Drilling a well is inherently dangerous. Safety cannot be stressed enough.
Personal Safety
- Personal Protective Equipment (PPE): Always wear appropriate safety gear.
- Machinery Operation: If you are not experienced with heavy machinery, consider getting training or professional help for operating the drill rig.
- Electrical Hazards: Be aware of buried power lines and electrical connections for the pump.
- Working at Heights: If you need to work on the wellhead or pump, ensure you have secure footing.
Environmental Safety
- Contamination Prevention: Take extreme care to prevent drilling fluids and cuttings from contaminating local water sources.
- Waste Disposal: Dispose of all drilling waste and materials according to local environmental regulations.
Frequently Asked Questions (FAQ)
Q1: How deep does a well need to be?
A1: The required depth varies greatly depending on your location and the depth of the aquifer. Local geological surveys and existing well logs are the best resources to estimate the typical depth needed in your area.
Q2: How long does it take to drill a well?
A2: This can range from a few days to several weeks, depending on the drilling method, soil/rock conditions, depth, and whether you are working alone or with a crew. Professional drilling is typically much faster.
Q3: Can I use a hand auger or shallow well digging method for my primary water source?
A3: Hand augers and shallow digging methods are generally only suitable for very shallow wells, often used for irrigation or temporary sources. They are usually not deep enough to reliably access a potable groundwater supply protected from surface contamination.
Q4: What if I can’t find water?
A4: This is a risk with any well drilling project. If you don’t find a sufficient water supply, you may need to try a different location on your property or drill deeper. This can significantly increase costs.
Q5: Do I need to hire a licensed well driller even if I do most of the work myself?
A5: In many areas, permits require that a licensed professional oversees or performs certain critical aspects of the drilling and installation, even if you are doing the physical labor. Always check your local regulations.
Q6: What is the difference between a well casing and a well screen?
A6: The well casing is the main pipe that lines the entire borehole to prevent collapse and seal off contaminants. The well screen is a perforated section of pipe, usually at the bottom of the well, that allows water to enter the well while keeping sand and gravel out.
Q7: How do I know which type of water well pump to install?
A7: The choice of pump depends on the depth of your well, the water level within the well (static water level and drawdown), and your water usage needs. Submersible pumps are typically used for deeper wells, while jet pumps are for shallower ones. Consulting with a pump supplier is highly recommended.
Q8: Is DIY well drilling worth the effort and risk?
A8: For some, the satisfaction and potential cost savings are worth it. However, the significant risks to safety, the complex nature of the work, and the potential for costly mistakes mean that for many homeowners, hiring a licensed professional is the more practical and safer choice.
Embarking on a DIY water well drilling project is a monumental task that demands respect for the process, a commitment to safety, and a thorough understanding of the underlying principles. While the rewards of self-sufficiency and potential cost savings are appealing, the complexities and inherent risks cannot be underestimated. By carefully following these guidelines, conducting thorough research, and always prioritizing safety, you can determine if this ambitious project is the right path for you.