
Image Source: theme-assets.ecommercedns.uk
How To Drill Stone Safely & Effectively
Can you drill stone? Yes, you can drill stone, but it requires the right tools, techniques, and a focus on safety. Drilling through various types of stone, from soft sandstone to hard granite, presents unique challenges. This guide will walk you through the essential aspects of stone drilling, ensuring you can tackle your projects with confidence. We’ll cover everything from choosing the right stone drilling equipment to mastering stone drilling techniques for different materials like drilling through granite and drilling through slate.
Essential Stone Drilling Equipment
Before you start drilling, gather the necessary tools. Having the right equipment makes a huge difference in achieving clean holes and preventing damage to your stone or your drill.
Power Tools for Stone Drilling
- Drills: For most stone drilling, a powerful corded or cordless hammer drill is recommended. A hammer drill has a hammering action that helps break up the stone as the bit rotates, which is crucial for harder materials. For very hard stones or larger holes, a dedicated SDS drill or rotary hammer might be necessary.
- Angle Grinder: An angle grinder with a diamond cutting disc can be useful for making pilot holes or for shaping edges before drilling, especially on thicker or harder materials.
Stone Drilling Bits: The Key to Success
The type of drill bit you use is paramount. Using the wrong bit will result in frustration, damaged bits, and poor results.
- Masonry Drill Bits: These are a good starting point for softer stones like brick or some types of limestone. They typically have a carbide tip. They are not ideal for harder stones.
- Carbide-Tipped Bits: Similar to masonry bits, but often designed for tougher jobs. They can handle some natural stone but will wear down quickly on very hard materials.
- Diamond Core Bits for Stone: These are the gold standard for drilling natural stone, especially tough materials like drilling through granite, porcelain, or engineered stone. They have a hollow center and are coated or embedded with industrial diamonds. They create clean, precise holes by grinding away the material.
- Diamond Hole Saws: Similar to core bits but often come in larger diameters and are used for creating larger openings.
Safety Gear: Non-Negotiable
Safety should always be your top priority when drilling stone. Stone dust can be harmful if inhaled, and flying debris is a risk.
- Safety Glasses or Goggles: Protect your eyes from dust and flying chips.
- Dust Mask or Respirator: Essential for preventing inhalation of silica dust, which is present in many types of stone and can cause serious long-term health issues. A P2 or P3 rated mask is recommended.
- Gloves: Protect your hands from sharp edges and vibration.
- Hearing Protection: Drills, especially hammer drills, can be loud.
- Sturdy Footwear: Protect your feet from dropped tools or materials.
Other Useful Accessories
- Water Source/Coolant: Water is crucial for cooling the drill bit and dust suppression, especially when drilling harder stones. A spray bottle, a slow-release water bottle attachment, or a helper to pour water can be used.
- Chalk or Marker: To mark your drilling spot accurately.
- Drill Press (Optional but Recommended): For precision drilling, especially for consistent depth or straight holes, a drill press is invaluable.
- Vacuum Cleaner: To clean up dust and debris.
- Center Punch: To create a small indentation to prevent the drill bit from wandering.
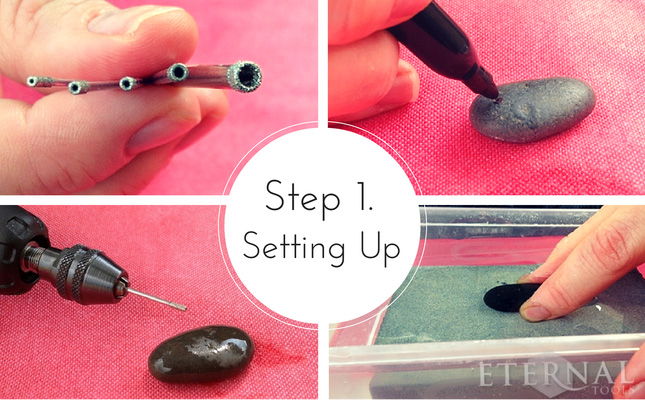
Preparing for Stone Drilling
Proper preparation is key to a successful and safe drilling operation. This involves marking your target, securing the material, and setting up your drill.
Marking the Drilling Spot
Accuracy is important. Use chalk or a marker to indicate exactly where you need to drill. For precise holes, especially on decorative pieces, a center punch can be used to create a small dimple. This dimple will guide the tip of the drill bit and stop it from skittering across the surface.
Securing the Stone
This is absolutely critical for safety. Loose stone can move unexpectedly, causing the drill bit to bind, break, or worse, cause injury.
- For smaller pieces: Clamp them securely to a workbench.
- For larger or fixed installations: Ensure the stone is stable. If you are drilling into a countertop or a wall, ensure there are no hidden pipes or wires behind your drilling location. Use a stud finder or pipe detector if necessary.
Setting Up Your Drill
- Speed Settings: For most stone drilling techniques, you’ll want to use a slow to medium speed. High speeds can cause excessive heat buildup, damaging the drill bit and the stone.
- Hammer Function: For drilling hard stone like granite or quartz, engage the hammer function on your drill. For softer stones or when using diamond core bits, you may want to disengage the hammer function to avoid chipping.
Stone Drilling Techniques: Step-by-Step
The method for drilling stone varies depending on the type of stone and the drill bit you are using.
Drilling Soft Stone
Drilling soft stone like sandstone, limestone, or certain types of concrete block is generally easier.
- Mark your spot: Use chalk or a marker.
- Secure the stone: Clamp it down if possible.
- Choose your bit: A carbide-tipped masonry drill bit is usually sufficient.
- Start slow: Begin drilling at a low speed.
- Engage hammer action (optional): If your drill has a hammer function, you can use it, but at a lower setting.
- Apply steady pressure: Don’t force the drill; let the bit do the work.
- Withdraw and clear debris: Periodically pull the drill bit out of the hole to clear dust and allow the bit to cool.
- Use water sparingly: A light mist can help with dust control.
Drilling Natural Stone (General)
When drilling natural stone like marble, slate, or some types of granite, you’ll need to be more careful.
- Mark and secure: As with soft stone, mark your spot and secure the material firmly.
- Select the right bit: For marble and slate, a good quality carbide-tipped bit or a diamond-tipped bit is recommended. For harder natural stones, a diamond core bit is essential.
- Start with a pilot hole: If drilling a large hole or a deep hole, start with a smaller diameter bit to create a pilot hole. This helps guide the larger bit.
- Use a steady, consistent speed: Avoid sudden changes in speed or pressure.
- Cool the bit and stone: Water is your best friend here. Continuously apply water to the drilling area to prevent overheating. A slow drip or a steady spray is effective.
- Engage hammer action cautiously: For harder stones, the hammer function can help, but be mindful of the risk of chipping delicate or layered stones like slate.
- Withdraw frequently: Pull the bit out every 30-60 seconds to clear dust and cool the bit and the stone.
- Clean the hole: Use compressed air or a vacuum to remove debris from the hole as you go.
Drilling Through Granite
Drilling through granite is one of the more challenging tasks due to its density and hardness. This is where diamond core bits for stone truly shine.
-
Essential Equipment:
- A powerful hammer drill or a rotary hammer.
- High-quality diamond core bits specifically designed for granite.
- A constant supply of water for cooling.
- Full safety gear, including a respirator.
-
Marking and Securing: Precisely mark your spot and ensure the granite slab is absolutely stable. Use clamps and possibly even wedges if necessary.
-
Applying Water: This cannot be stressed enough. Water is vital for preventing the diamond bit from overheating and losing its effectiveness. It also suppresses the dangerous silica dust. You can use a water bottle with a controlled nozzle, a drip system, or have a helper pour water. Aim to keep the drilling area wet at all times.
-
Starting the Hole:
- Place the diamond core bit at your marked spot.
- Begin drilling at a very slow speed without the hammer function engaged.
- Once a slight indentation is made, you can gently engage the hammer function if your drill has one, but keep the speed low to medium.
- The goal is to let the diamond abrasives grind away the granite.
-
Drilling Process:
- Maintain steady, moderate pressure. Do not force the drill.
- Periodically (every 30-60 seconds), lift the bit slightly out of the hole while it’s still spinning to allow water to flush out debris and cool the bit.
- Continue this process, ensuring the area remains wet.
-
Finishing the Hole: As you get close to breaking through, ease up on the pressure to prevent chipping on the exit side.
Drilling Through Slate
Drilling through slate requires a delicate touch due to its layered nature. Slate can be prone to chipping and delamination.
-
Choose Your Bit Wisely: For drilling through slate, a good quality carbide-tipped bit or a specialized diamond-tipped bit is usually best. Avoid using the hammer function of your drill, as it can easily cause the slate to split.
-
Mark and Secure: Mark your drilling location precisely. Secure the slate firmly, but avoid over-tightening clamps that could cause it to crack.
-
Start Slow and Steady: Begin drilling at a slow speed. Apply light, consistent pressure.
-
Water is Key: Keep the drilling area wet to control dust and cool the bit.
-
Withdraw Frequently: Pull the bit out of the hole regularly to clear away dust and debris. This also helps prevent the bit from binding in the layers.
-
Watch for Delamination: Pay attention to the edges of the hole. If you see signs of the slate layers starting to separate, reduce pressure and speed.
Drilling Hard Stone (General)
When referring to drilling hard stone, this can encompass materials like engineered quartz, dense granite, or very hard natural stones.
-
Diamond Core Bits are Essential: For these materials, standard masonry drill bits will be ineffective and will likely break. Diamond core bits for stone are the only effective solution.
-
Cooling is Critical: The friction generated when drilling hard stone is immense. Constant and ample water cooling is non-negotiable. Without it, the diamond bits will wear out rapidly, and the stone can crack from thermal stress.
-
Use a Drill Press if Possible: For the most consistent and controlled results when drilling hard stone, a drill press is highly recommended. It ensures the bit remains perpendicular to the surface and allows for steady, controlled feed rates.
-
Start with a Pilot Hole: For larger diameter holes, creating a smaller pilot hole first with a smaller diamond core bit will significantly improve accuracy and ease the process.
-
Steady Pressure, No Forcing: Apply firm, consistent pressure, but never force the drill. Let the diamond particles do the grinding. Forcing the bit will only generate more heat and can damage the bit or the stone.
-
Withdraw for Cooling and Cleaning: Regularly pull the bit partially out of the hole while it’s still spinning. This allows water to flush out the slurry (the mixture of stone dust and water) and lets the bit cool down.
-
Be Patient: Drilling hard stone takes time. Rushing the process is a recipe for failure and potential injury.
Maintenance and Troubleshooting
Even with the best preparation, issues can arise. Knowing how to maintain your equipment and solve common problems will save you time and frustration.
Bit Maintenance
- Cleaning: After each use, rinse your diamond bits thoroughly with water to remove any residual slurry.
- Cooling: If bits appear to be overheating during use (indicated by steam or discoloration), you are not using enough water or are drilling too fast.
- Sharpening: Diamond bits don’t truly “sharpen” in the traditional sense. Their abrasive action comes from the exposed diamond particles. If a bit seems to be losing its cutting ability, it might be clogged with slurry or the diamonds are worn down. Sometimes, drilling into a softer material like a piece of concrete or a brick can help expose fresh diamond particles.
Common Problems and Solutions
| Problem | Cause | Solution |
|---|---|---|
| Bit is not cutting | Dull bit, insufficient speed, wrong bit type, not enough water, too much pressure. | Ensure you are using the correct bit type for the stone. Increase water flow. If using a diamond bit, try drilling into a concrete block briefly to expose new diamond edges. Gradually increase drill speed if appropriate for the bit and stone. Reduce excessive downward pressure. |
| Stone is chipping or cracking | Hammer function engaged on delicate stone, too much pressure, bit binding, stone not secured. | Disengage hammer function. Reduce drilling pressure. Ensure the stone is firmly secured. Drill at a slower, steady speed. For materials like slate, drill slowly and withdraw the bit frequently. Make sure you are not hitting rebar or other hard inclusions. |
| Excessive heat | Insufficient water, drilling too fast, prolonged continuous drilling. | Increase water supply. Slow down the drilling speed. Withdraw the bit periodically to allow cooling and flushing of debris. Ensure the drill itself is not overheating; take breaks if necessary. |
| Dust clouds | Insufficient water, not using a dust shroud, poor ventilation. | Increase water flow at the drilling point. Use a dust shroud attached to your drill and connect it to a HEPA-filtered vacuum cleaner. Work in a well-ventilated area or wear a high-quality respirator. |
| Bit wandering on start | No pilot hole or indentation, surface is uneven. | Use a center punch to create a small indentation before drilling. Start drilling at a very slow speed to create an initial groove. Consider using a drill guide or template for precise starting points. |
| Bit getting stuck | Slurry buildup, excessive heat causing expansion, uneven drilling pressure. | Withdraw the bit while it is still spinning to clear slurry. Ensure adequate water flow. If the bit is completely stuck, try a slight rocking motion or applying a small amount of penetrating oil (ensure it’s compatible with your stone if appearance is critical). Sometimes, a sharp tap on the drill chuck can help dislodge it. Exercise extreme caution if the bit is truly jammed. |
Specific Considerations for Different Stone Types
While the general principles apply, some stones require special attention.
Drilling Through Porcelain
Porcelain is incredibly dense and hard, often harder than granite.
- Use Diamond Core Bits Exclusively: No other type of bit will be effective.
- Water Cooling is Paramount: Porcelain generates extreme heat. Keep the area constantly wet.
- Slow and Steady: Drill at a slow to medium speed.
- Avoid Hammer Function: The hammer action will almost certainly chip or shatter porcelain.
- Patience: Porcelain takes time to drill through.
Drilling Through Marble
Marble is a beautiful but relatively soft and porous stone compared to granite.
- Carbide-Tipped Bits: Good quality carbide-tipped masonry bits can work for smaller holes.
- Diamond Bits for Precision: For cleaner holes or if drilling through veining, diamond bits are superior.
- No Hammer Function: Absolutely no hammer action, as it will cause significant chipping.
- Watch for Overheating: Even though it’s softer, marble can still overheat and crack. Use water.
Drilling Through Concrete
Concrete is a composite material.
- Hammer Drill and Masonry Bits: For general concrete drilling, a hammer drill with a carbide-tipped masonry bit is the standard.
- Diamond Core Bits for Larger Holes: For larger diameter holes or coring, diamond core bits are used, often with a water supply.
- Reinforcement: Be aware of rebar within the concrete. Hitting rebar will require a more robust bit, often a diamond bit, and can be challenging.
Safety First, Always
Recap of critical safety points:
- Wear Your PPE: Safety glasses, dust mask/respirator, gloves, and hearing protection are essential.
- Secure Your Workpiece: Never drill into unsecured stone.
- Manage Dust: Stone dust, especially from silica-containing stones, is a serious health hazard. Always use water and/or dust extraction.
- Electrical Safety: Keep water away from the drill’s motor and electrical connections. Use GFCI outlets if drilling near water.
- Know Your Limits: If a job feels too dangerous or beyond your capabilities, hire a professional.
By following these guidelines and using the appropriate stone drilling equipment, you can safely and effectively drill through a wide variety of stone materials. Remember that patience and a methodical approach are key to achieving the best results.