
Can you drill your own shallow well? Yes, with the right knowledge, tools, and effort, you can certainly drill your own shallow well. This guide will walk you through the process, covering everything from initial planning to the final installation of a shallow water well pump.
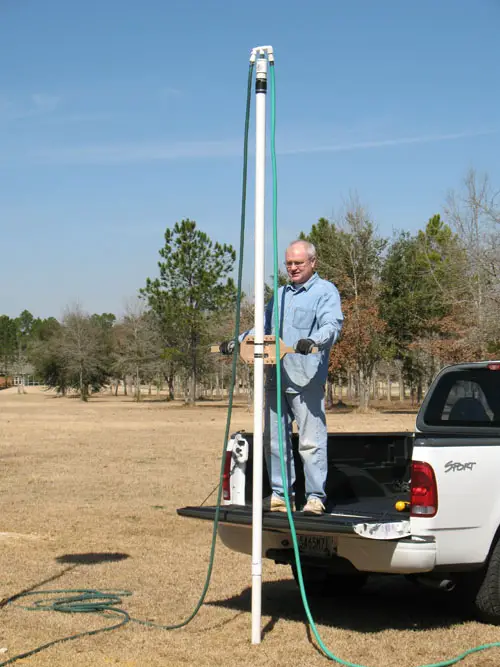
Image Source: drillyourownwell.com
Getting Started: Planning Your Shallow Well Project
Before you even think about putting a shovel in the ground or turning a drill, careful planning is essential. This ensures your project is safe, legal, and ultimately successful in accessing shallow aquifer access.
Legal and Permitting Considerations
- Check Local Regulations: Water rights and well drilling are often heavily regulated. Contact your local health department, environmental agency, or building department. They will tell you about permits required, setback distances from property lines and septic systems, and any restrictions on well depth or construction. Failing to get the proper permits can lead to fines or the need to dismantle your well.
- Property Lines and Easements: Be aware of where your property lines are. You don’t want to accidentally drill on a neighbor’s land or within required setback zones. Check for any utility easements that might affect your drilling location.
- Underground Utilities: Call 811 (or your local equivalent) before you dig. This free service will mark underground utility lines like gas, electric, and water. Hitting one of these can be dangerous and costly.
Site Selection for Your Shallow Well
Choosing the right location is crucial for a clean and reliable water source.
- Proximity to Water Source: While you’re drilling to reach water, the closer your well is to a reliable shallow aquifer, the better. Look for areas where water is generally known to be accessible at shallower depths.
- Elevation and Drainage: Your wellhead should be on higher ground than potential sources of contamination. Avoid low-lying areas that might flood or collect runoff. Good drainage around the well prevents surface water from seeping into it.
- Distance from Contamination Sources: This is paramount for water safety. Adhere strictly to local regulations regarding setbacks from:
- Septic tanks and drain fields
- Animal pens or manure piles
- Fuel storage tanks
- Landfills or dumpsites
- Rivers, lakes, or streams (depending on local rules)
- Accessibility: You’ll need to bring equipment to the site and have room to work. Consider how you will get materials to the location and if there’s enough space for drilling and any subsequent construction.
Understanding Your Water Needs
- Water Usage: How much water do you need daily? This influences the type of pump you’ll install and the capacity of your well. A simple garden irrigation system will need less water than a whole house.
- Water Quality: While shallow wells can provide good water, they can also be more susceptible to surface contamination. Consider water testing after the well is drilled to ensure it’s safe for your intended use.
Essential Tools and Materials for Shallow Well Drilling
Gathering the right equipment before you start is key to a smooth DIY shallow well project.
Drilling Equipment
- Hand Auger: For very shallow wells or initial exploratory digging, a hand auger is a fundamental tool for manual well drilling. It’s effective for breaking up soil and bringing it to the surface.
- Well Drilling Rig: For deeper shallow wells, you’ll likely need a more robust drilling rig. These can be rented or purchased. For DIY shallow well drilling, consider smaller, portable rigs or even a robust manual well drilling setup.
- Drill Bits/Augers: Various types of bits are used depending on the soil conditions:
- Auger Bits: Spiral-shaped, excellent for cohesive soils.
- Bucket Augers: Open-ended cylinders, good for soft to medium soils.
- Welders’ Bucket Augers: Similar to bucket augers but with blades, better for tougher soils.
- Rock Augers/Drills: For breaking through rock layers.
- Drill Rods/Sections: These connect to the drill bit and extend as you go deeper. Ensure they are strong enough for the depth and soil conditions.
- Water Swivel: If using a mud rotary drilling method, this allows water to be pumped down the drill string.
- Mud Pump: To circulate drilling fluid (mud) during rotary drilling.
- Derrick or Hoist: For lifting heavy drill rods and casing.
Casing and Well Screen
- Well Casing: This is the pipe that lines the borehole to prevent collapse and keep contaminants out. Common materials are PVC or steel. The diameter will depend on your pump size and local regulations.
- Well Screen: This section of casing has slots or perforations that allow water to enter the well while keeping sediment out. It’s placed opposite the water-bearing layer (aquifer).
- Gravel Pack (Optional but Recommended): Pea gravel can be placed around the well screen to further filter water and prevent fine sediment from clogging it.
- Bentonite Seals: Bentonite clay, when hydrated, forms a watertight seal to protect the upper part of the well from surface contamination.
Other Essential Supplies
- Shovels and Picks: For initial surface digging and site preparation.
- Buckets: For removing excavated material and carrying water.
- Pry Bars and Wrenches: For assembling and disassembling drill rods.
- Measuring Tape: To track depth and casing installation.
- Level: To ensure the casing is plumb.
- Water Source: For drilling fluid or flushing the well.
- Safety Gear: Gloves, safety glasses, steel-toed boots, hard hat.
Step-by-Step: Digging a Shallow Well
This section details the process of digging a shallow well using common DIY methods.
Step 1: Preparing the Site
- Clear the Area: Remove any vegetation, rocks, or debris from your chosen drilling spot. You’ll need at least a 10-foot diameter clear space.
- Mark the Well Location: Clearly mark the exact center where you will begin drilling.
- Excavate Surface Material: For very shallow wells, you might start by digging a shallow pit with a shovel and pick. This helps remove the topsoil and any immediate obstructions.
Step 2: Starting the Borehole
- Using a Hand Auger:
- Place the tip of the hand auger at the marked center.
- Push down and twist the auger clockwise.
- As you twist, the soil will fill the auger flights.
- Periodically lift the auger out of the hole, empty the soil, and repeat.
- Continue until you encounter resistance indicating a harder layer or reach your target depth.
- Using a Drilling Rig (Manual or Powered):
- Attach the first section of drill rod to your chosen bit (auger, etc.).
- Position the bit directly over the marked center.
- Begin rotating the drill string. If using a powered rig, engage the motor. If manual, use a T-handle or crank.
- Apply downward pressure.
- As you drill deeper, add more sections of drill rod.
Step 3: Drilling Through Different Soil Layers
- Soil Types: You’ll encounter various soil types: topsoil, clay, sand, gravel, and possibly rock.
- Clay: Generally easy to drill. Use an auger bit.
- Sand and Gravel: Can be unstable. Consider using casing as you drill to prevent collapse. You might need a bucket auger or a drill bit designed for looser materials. Drilling fluid (mud) can help stabilize sandy formations in rotary drilling.
- Rock: Requires specialized rock bits and potentially a more powerful drill. This is where manual well drilling can become very difficult.
Step 4: Reaching the Water Table
- Signs of Water: You’ll notice the soil becoming consistently damp, then saturated. The auger might become harder to turn as it fills with wet material. In some cases, you might see water begin to rise in the borehole.
- Identifying the Aquifer: Your goal is to reach a layer that can reliably supply water. This is the shallow aquifer access point. Continue drilling a few feet into this layer to ensure good contact.
Step 5: Installing Well Casing and Screen
This is a critical step for water well construction and protecting your water source.
- Lowering the Casing: Once you’ve reached the desired depth, begin installing the well casing.
- Carefully lower the first section of casing into the borehole.
- If using PVC, you might screw sections together. For steel, welding or threaded couplings are common.
- Ensure the casing is centered in the borehole.
- As you lower the casing, you may need to dislodge it if it gets stuck by gently tapping it.
- Positioning the Well Screen: The well screen is installed opposite the main water-bearing layer.
- The bottom of the casing is usually fitted with a cap, and the well screen is attached above this.
- Lower the casing with the screen attached until the screen is positioned in the water-bearing zone.
- Gravel Packing (Optional but Recommended):
- Once the screen is in place, if the space between the screen and the borehole wall is too large, you can fill this gap with clean, washed pea gravel.
- This is often done by pouring the gravel down the borehole around the screen. The gravel acts as a filter.
Step 6: Developing the Well
Well development is crucial to remove drilling mud, fine sediment, and to encourage water flow into the screen.
- Bailing or Pumping:
- Use a bailer (a long, cylindrical tool with a one-way valve) to repeatedly lift water and sediment out of the well.
- Alternatively, use a temporary submersible pump to pump water out.
- As you bail or pump, the water should gradually become clearer. This process can take hours or even days.
- Surging: You can also “surge” the well by rapidly moving a plunger up and down inside the casing opposite the screen. This creates pressure changes that help draw water and fine particles into the screen.
Step 7: Sealing the Annulus (Bentonite Seal)
The space between the borehole and the casing above the water-bearing zone needs to be sealed to prevent surface contaminants from entering the well.
- Bentonite Slurry: Mix bentonite clay with water to form a thick slurry.
- Pouring the Seal: Carefully pour the bentonite slurry down the borehole annulus (the space between the casing and the borehole wall). The bentonite will hydrate and expand, creating an impermeable seal.
- Allowing to Set: Let the bentonite seal set for at least 24-48 hours.
Step 8: Installing the Well Cap
- Secure the Cap: A sanitary well cap is installed at the top of the casing. This cap should be watertight and allow for ventilation. It prevents insects, animals, and debris from entering the well.
Step 9: Water Testing
- Sample Collection: Once the well is developed and sealed, collect a water sample.
- Laboratory Analysis: Send the sample to a certified laboratory for testing. This will identify any contaminants like bacteria, nitrates, or heavy metals. If the water quality is poor, you may need additional treatment or re-drilling.
DIY Shallow Well Pump Installation
Once your shallow well is drilled and ready, you’ll need a pump to bring water to your home or application.
Types of Shallow Well Pumps
For shallow wells (typically less than 25 feet deep), you generally have two main options:
- Jet Pumps: These are surface-mounted pumps that use a venturi system to create suction. They are placed above ground, usually near your water source or building. They are ideal for wells where the water level is within their suction lift capabilities.
- Submersible Pumps: While more commonly associated with deeper wells, some smaller submersible pumps are designed for shallower applications. These are placed directly in the water.
Installing a Shallow Well Jet Pump
- Position the Pump: Place the jet pump on a stable, level surface near the wellhead.
- Connect the Suction Line:
- A foot valve (a check valve with a strainer) is attached to the bottom of the suction pipe. This keeps water in the pipe and prevents it from draining back into the well.
- Lower the suction pipe with the foot valve into the well, ensuring the foot valve is submerged but not resting on the bottom of the well.
- Connect the top of the suction pipe to the pump’s suction port. Use appropriate fittings and sealant to ensure an airtight connection.
- Connect the Discharge Line: Connect a pipe from the pump’s discharge port to your water system.
- Prime the Pump: Jet pumps need to be primed, meaning the pump and suction line must be filled with water before starting. Open the priming port on the pump, fill it with water, close the port, and turn on the pump.
- Electrical Connections: Connect the pump to a power source according to the manufacturer’s instructions and local electrical codes. It’s highly recommended to have a qualified electrician do this.
Installing a Shallow Well Submersible Pump
- Attach Drop Pipe and Power Cable: Connect the drop pipe (the pipe that carries water up) to the pump. Securely attach the submersible pump’s power cable along the drop pipe using cable ties.
- Lower the Pump: Carefully lower the pump into the well using the drop pipe. Ensure the pump is suspended at the correct depth, away from the bottom sediment.
- Connect to Water System: Once the pump is at the desired depth, connect the top of the drop pipe to your water system.
- Electrical Connections: Connect the pump’s power cable to your electrical system, often through a control box. Again, this is best done by a qualified electrician.
Maintaining Your Shallow Well
Proper maintenance ensures the longevity and safety of your water source.
- Regular Water Testing: Test your well water at least annually, or more often if you suspect contamination.
- Inspect the Wellhead: Periodically check the well cap and casing for any damage or signs of tampering. Ensure the area around the wellhead is clear and drains well.
- Pump Maintenance: Follow the manufacturer’s recommendations for pump maintenance. This might include checking pressure tanks, seals, and electrical connections.
- Flush the Well: Periodically, you might need to flush the well to remove any accumulated sediment. This can be done by pumping water at a high rate for a short period.
- Protect from Freezing: In colder climates, ensure the wellhead and any exposed piping are properly insulated or protected from freezing.
Considerations for Different Drilling Methods
While this guide focuses on general steps, different shallow water well drilling methods exist.
Hand Auger Well
This is the most basic form of manual well drilling.
- Pros: Simple, low cost, minimal equipment, good for very shallow wells or exploratory holes.
- Cons: Limited depth (typically under 20-30 feet), labor-intensive, difficult in rocky or hard soil, slow.
Drive Point Well (Well Point Installation)
This method involves driving a screened well point into the ground with a drive rod.
- Pros: Relatively simple, can be done with a heavy hammer or driving maul, good for accessing shallow water where the water table is very close to the surface.
- Cons: Limited to sandy or gravelly soils, shallow depths (usually less than 20 feet), can be difficult to drive through dense layers, potential for damage to the screen during driving.
Cable Tool Drilling
This method uses a heavy bit that is repeatedly lifted and dropped to chip away at the rock and soil.
- Pros: Can handle a variety of soil and rock conditions, can be done manually or with powered rigs.
- Cons: Slower than rotary drilling, requires more specialized equipment and expertise.
Rotary Drilling
This method uses a rotating drill bit, often with drilling fluid to flush out cuttings and stabilize the borehole.
- Pros: Faster than cable tool drilling, can handle a wider range of formations.
- Cons: Requires more complex equipment and expertise, higher cost.
Frequently Asked Questions About Shallow Wells
Q1: How deep is a “shallow” well?
A1: A shallow well typically refers to a well that taps into the first significant water-bearing layer (aquifer) found below the surface, generally not exceeding 50 feet in depth. However, local definitions can vary.
Q2: Can I really drill a well myself?
A2: Yes, you can drill a shallow well yourself, especially if the water table is close to the surface and the soil is not overly challenging. However, it requires careful planning, the right tools, adherence to safety practices, and compliance with local regulations.
Q3: What is the easiest way to drill a shallow well?
A3: For very shallow depths and soft soil, a hand auger is the simplest and most accessible method for manual well drilling. For slightly deeper or more challenging conditions, a drive point system (well point installation) can also be effective.
Q4: What kind of pump do I need for a shallow well?
A4: For shallow wells where the water level is less than 25 feet from the pump, a shallow well jet pump is a common and effective choice. In some cases, smaller submersible pumps can also be used.
Q5: How do I know where to drill for water?
A5: Look for signs of existing water, such as damp ground, lush vegetation in dry periods, or proximity to surface water bodies. Consulting local geological surveys or experienced well drillers can also provide valuable information about shallow aquifer access in your area.
Q6: What are the risks of drilling a shallow well?
A6: Risks include hitting utility lines, encountering difficult soil or rock conditions, contaminating the water source if not properly sealed, and legal penalties for not obtaining permits. Safety precautions are essential throughout the process.
Q7: How much does it cost to drill a shallow well?
A7: The cost can vary significantly based on your location, the depth of the well, soil conditions, equipment rental or purchase costs, and whether you hire professionals for parts of the job. A DIY shallow well is generally less expensive than hiring a professional driller, but it requires a significant investment of time and effort.
Q8: What is a well point installation?
A8: Well point installation involves driving a pre-fabricated, screened well point into the ground to access shallow groundwater. It’s a method for digging a shallow well where suitable soil conditions exist.
Q9: Is manual well drilling effective?
A9: Manual well drilling, particularly with a hand auger, is effective for very shallow wells or as an initial step to assess soil conditions. For greater depths or harder materials, powered drilling methods become more practical, but manual techniques are fundamental to understanding well drilling basics.
This comprehensive guide aims to provide a solid foundation for your DIY shallow well project. Remember to prioritize safety, legality, and water quality throughout the entire process of water well construction.