
Can you drill your own water well? Yes, in many areas, it is possible for a determined individual to drill their own water well, but it requires careful planning, the right tools, and a solid understanding of the process. This comprehensive guide will walk you through the essential steps of well drilling for your own water source.
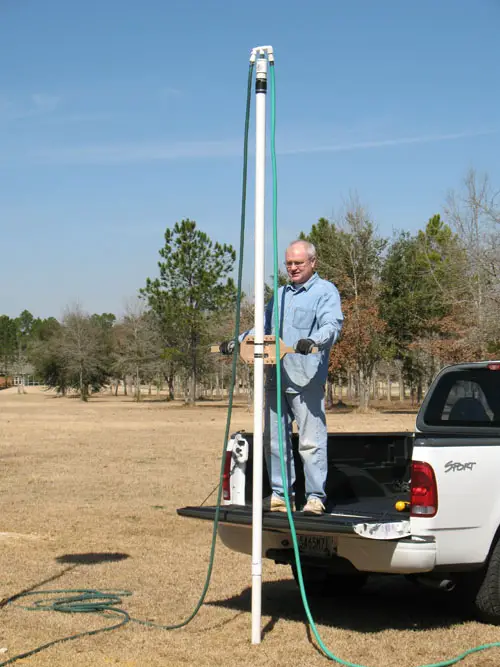
Image Source: drillyourownwell.com
Introduction: Your Path to an Independent Water Supply
Having your own water well means independence from municipal water systems. You control the quality and quantity of your water. This guide is for the do-it-yourselfer who wants to undertake the challenging yet rewarding task of DIY water well construction. We’ll cover everything from initial assessments to well pump installation and final testing.
Initial Assessment: Is a DIY Well Right for You?
Before you grab a shovel or rent equipment, you need to assess if a DIY well is feasible and wise for your situation.
Feasibility Checks
- Local Regulations and Permits: This is the most crucial first step. Contact your local health department or environmental agency. They will have specific rules about home water well installation, including setback requirements from property lines, septic systems, and other potential contamination sources. You will likely need a permit to drill. Ignoring these can lead to fines or an order to abandon your well.
- Water Availability: Not every location has accessible groundwater. Research the water table in your area. Geologic surveys and local well drillers can provide this information. You need to know if there’s enough water to justify the effort and expense.
- Soil and Geology: The type of soil and rock you’ll encounter significantly impacts the drilling method and equipment needed. Hard rock requires different techniques than soft sediment.
- Your Skill Level and Time Commitment: Well drilling is physically demanding and time-consuming. Be realistic about your abilities and the time you can dedicate to this project.
Legal Considerations
- Permitting Process: Understand the application requirements, fees, and inspection schedules.
- Water Rights: In some regions, water rights are governed by specific laws. Ensure you have the legal right to extract groundwater from your property.
- Professional Consultation: Even for a DIY project, consulting with a licensed well driller for an initial site assessment can be invaluable. They can offer insights into local conditions and potential challenges.
Planning Your Water Well
A well-planned water well construction project is a safe and successful one.
Choosing Your Well Location
- Proximity to Water Use: Ideally, your well should be close to your home for easier connection and reduced piping costs.
- Elevation: Site your well on higher ground than potential contamination sources like septic tanks, leach fields, or animal pens.
- Accessibility: The location needs to be accessible for drilling equipment and future maintenance.
- Geological Suitability: Avoid areas prone to landslides or flooding.
Deciding on Well Depth: Shallow vs. Deep Wells
The depth of your well is determined by the local water table and water quality.
Shallow Well Drilling
- Definition: Shallow wells typically draw water from depths of less than 25 feet, often relying on a single aquifer.
- Pros: Generally less expensive to drill, less complex equipment needed.
- Cons: More susceptible to surface contamination and drought conditions. Water quality can be more variable.
- Suitability: Best suited for areas with a consistently high water table and minimal risk of surface pollution.
Deep Well Drilling
- Definition: Deep wells penetrate multiple aquifer layers, often reaching depths of 100 feet or more, to tap into more stable and often cleaner water sources.
- Pros: Typically provide a more reliable and consistent water supply, often of better quality, as it’s filtered through more geological layers. Less susceptible to surface contamination and drought.
- Cons: More expensive and requires specialized, more powerful drilling equipment. Drilling water source at greater depths takes more time and effort.
Estimating Water Needs
Consider your household’s daily water usage. This will help determine the required flow rate of your pump and the storage capacity of your system. A typical household uses 50-100 gallons per person per day.
Essential Equipment for DIY Well Drilling
The equipment you need depends heavily on the drilling method you choose and the geology of your site.
Drilling Rigs and Tools
- Manual Drilling (Augers): For very shallow wells in soft soil, hand augers might suffice. This is the most basic form of digging a well.
- Jetting/Washing Rigs: These use high-pressure water to flush sediment and cuttings from the borehole. Suitable for unconsolidated sediments.
- Percussion (Cable Tool) Rigs: These use a heavy bit that is repeatedly dropped to break up rock and soil.
- Rotary Rigs: The most common type, using a rotating drill bit. These can be further classified into:
- Auger Rigs: Use helical screw-like bits. Good for soft to medium-hard formations.
- Mud Rotary Rigs: Use a drilling fluid (mud) to lubricate the bit, cool the borehole, and bring cuttings to the surface.
- Air Rotary Rigs: Use compressed air instead of mud, often faster in hard rock but can be more expensive.
Important Note: Renting drilling equipment is often more practical than buying for a single DIY project. Ensure you receive proper training on its operation and safety features.
Ancillary Equipment
- Drill Bits: Various types are needed for different soil and rock formations (e.g., auger bits, drag bits, roller cone bits).
- Drill Pipe: Sections of pipe that connect the drill bit to the rig and transmit rotational power and downward force.
- Casing: Large diameter pipe (usually PVC or steel) installed in the borehole to prevent collapse and seal off unwanted water layers.
- Screen: A slotted or perforated section of pipe placed at the aquifer level to allow water in while keeping out sediment.
- Gravel Pack: Coarse gravel placed around the screen to filter water.
- Cement Grout: Used to seal the annular space between the casing and the borehole wall, preventing surface contamination from reaching the aquifer.
- Water Swivel: For mud or air rotary drilling, this allows water or air to be injected down the drill pipe.
- Mud Pump (if applicable): To circulate drilling fluid.
- Generator: For powering equipment.
- Safety Gear: Hard hats, safety glasses, gloves, steel-toed boots, hearing protection.
The Drilling Process: Step-by-Step
This section outlines the typical phases of well drilling.
1. Site Preparation
- Clear the chosen well site of debris, vegetation, and any obstructions.
- Ensure a level and stable surface for the drilling rig.
- Establish a safe working perimeter.
2. Drilling the Borehole
The method used will vary, but the general principle is to create a hole to the desired depth.
Rotary Drilling (Most Common for DIYers with Rented Equipment)
- Setting Up: Position the drilling rig over the chosen spot.
- Initial Spudding: Begin drilling with a large-diameter bit to establish the borehole.
- Adding Drill Pipe: As the borehole deepens, sections of drill pipe are added.
- Circulating Drilling Fluid (Mud or Air): This lubricates the bit, cools it, and carries rock cuttings to the surface. The consistency and type of drilling fluid are crucial.
- Monitoring Progress: Watch the cuttings brought to the surface to identify different soil and rock layers. This helps determine when you’ve reached a productive aquifer.
- Reaching Target Depth: Continue drilling until you reach the desired depth or encounter a reliable water-bearing zone.
Percussion Drilling (Cable Tool)
- Operation: A heavy chisel-like bit is repeatedly lifted and dropped, breaking up the rock.
- Bailing: Periodically, the cuttings are removed from the borehole using a bailer.
- Water Inflow: Water naturally enters the hole as it’s drilled.
- Slower Process: Generally slower than rotary drilling, especially in harder rock.
3. Casing Installation
Once the desired depth is reached, the borehole must be stabilized.
- Lowering the Casing: Large-diameter pipe (steel or PVC) is carefully lowered into the borehole. This casing prevents the hole from collapsing.
- Grounting (Cementing): A mixture of cement and water is pumped down the inside of the casing, then up the annular space between the casing and the borehole wall. This creates a watertight seal, preventing surface water and shallower, potentially contaminated groundwater from entering the well. The grout needs time to cure.
4. Installing the Well Screen and Gravel Pack
This step is vital for ensuring clean water inflow.
- Screen Placement: A section of pipe with slots or perforations, called the screen, is placed at the aquifer level. This allows water to enter the well but keeps out sand and gravel.
- Gravel Packing: Coarse, washed gravel is introduced into the annular space between the screen and the borehole wall. This acts as a primary filter.
5. Well Development
After casing and screen installation, the well needs to be “developed” to maximize water flow and remove drilling fines.
- Surging: This involves alternately forcing water into and pulling it out of the screen area to dislodge fine particles and improve water flow.
- Pumping: Pumping the well for an extended period can also help clean out the screen and gravel pack.
Well Pump Installation
A well is useless without a pump to bring the water to the surface. This is a critical step in well pump installation.
Types of Well Pumps
- Submersible Pumps: These are the most common type for domestic wells. They are placed directly inside the well casing, below the water level. They push water up.
- Pros: Efficient, quiet, less prone to priming issues.
- Cons: Can be difficult to access for repairs.
- Jet Pumps: These are located above ground, either in the well house or basement. They use suction and a venturi mechanism in the well to lift water.
- Pros: Easier to access for maintenance.
- Cons: Limited to shallower depths (typically under 25 feet), less efficient than submersible pumps.
Pump Selection Considerations
- Depth to Water: The distance from the ground surface to the water level in the well.
- Total Dynamic Head (TDH): The total resistance the pump must overcome. This includes the vertical lift, friction losses in the pipes, and the pressure required at the point of use.
- Flow Rate (GPM): Gallons per minute needed to meet your household demand.
- Well Yield: The rate at which the well can safely produce water. The pump’s flow rate should not exceed the well’s yield.
Installing the Pump
- Attaching Drop Pipe and Power Cable: The pump is connected to the drop pipe (which carries the water) and the submersible power cable.
- Lowering the Pump: The pump is carefully lowered into the well.
- Connecting to Pressure Tank and Distribution System: The drop pipe is connected to the household plumbing, usually via a pressure tank and pressure switch. The pressure tank stores water and maintains system pressure.
Water Testing and Treatment
Once your well is operational, testing the water quality is paramount.
Well Water Testing
- Why Test? Your water can contain naturally occurring minerals, bacteria, or contaminants from surface runoff. Testing is essential to ensure it’s safe for drinking.
- What to Test For:
- Bacteria: Total coliform and E. coli are critical indicators of contamination.
- Minerals: Iron, manganese, calcium, magnesium (hardness), and sulfur can affect taste, odor, and plumbing.
- Chemicals: Nitrates, pesticides, volatile organic compounds (VOCs), lead, and arsenic should be tested, especially if there’s a known risk in your area.
- How to Test:
- DIY Test Kits: Available for basic parameters like hardness, iron, and pH.
- Lab Testing: For comprehensive analysis, collect samples following specific instructions from a certified laboratory. They will provide detailed results and recommended treatment options.
Water Treatment Systems
Based on your test results, you may need treatment systems.
- Sediment Filter: Removes sand and silt.
- Iron Filter: Oxidizes and removes iron.
- Water Softener: Removes calcium and magnesium to combat hardness.
- UV Sterilizer: Kills bacteria and viruses.
- Activated Carbon Filter: Removes chlorine, VOCs, and improves taste/odor.
- Reverse Osmosis (RO): For removing a wide range of contaminants, including dissolved solids and heavy metals.
Maintenance and Ongoing Care
A properly maintained well system ensures longevity and consistent water quality.
Regular Inspections
- Wellhead: Ensure the cap is secure and the area around the wellhead is clean and free of debris.
- Pump and Pressure Tank: Listen for unusual noises. Check pressure gauge readings.
- Water Quality: Consider periodic re-testing, especially if you notice changes in taste, odor, or appearance.
Preventative Measures
- Protect the Wellhead: Ensure it’s properly sealed and protected from surface runoff.
- Seasonal Checks: In freezing climates, ensure exposed pipes and equipment are properly insulated or drained.
- Professional Servicing: Have your pump system inspected by a professional every few years.
Frequently Asked Questions (FAQ)
Q1: How much does it cost to drill a well myself?
The cost varies significantly based on depth, local geology, equipment rental fees, and materials (casing, pump, etc.). A rough estimate for a DIY well could range from $3,000 to $10,000 or more. Professional drilling typically costs $50-$100+ per foot, plus materials and labor.
Q2: What is the average depth of a home water well?
The average depth can range from 50 to 200 feet, but this is highly dependent on local groundwater levels. Some wells might be shallower, while others, especially for deep aquifer access, can be hundreds of feet deep.
Q3: Do I need a permit to drill a water well?
Yes, in almost all jurisdictions, you are required to obtain a permit from your local health or environmental department before drilling a water well.
Q4: Can I use a regular well pump for any depth?
No. The type of pump depends on the well’s depth and the required water flow. Submersible pumps are used for deep wells, while jet pumps are typically for shallower wells.
Q5: How long does it take to drill a well?
Drilling a well can take anywhere from a few days to a couple of weeks, depending on the depth, the drilling method, the geology, and the efficiency of your operation.
Q6: What is a well yield test?
A well yield test measures how much water your well can consistently produce over a set period without the water level dropping too low. This is crucial for properly sizing your well pump.
Conclusion: Your Rewarding DIY Journey
Embarking on a DIY water well project is a significant undertaking. It demands careful research, meticulous planning, and a willingness to learn and adapt. By following the steps outlined in this guide, from initial assessments and planning through drilling, well pump installation, and final testing, you can achieve the goal of establishing your own independent and reliable water source. Remember to prioritize safety, adhere to all local regulations, and don’t hesitate to seek expert advice when needed. The reward of fresh, clean water from your own well is well worth the effort.