
Can you drill into metal studs? Yes, you absolutely can drill into metal studs safely and effectively for your DIY projects. It’s a common task when hanging shelves, mounting TVs, or installing other fixtures. This guide will walk you through the entire process, ensuring you get the job done right and without any safety mishaps.
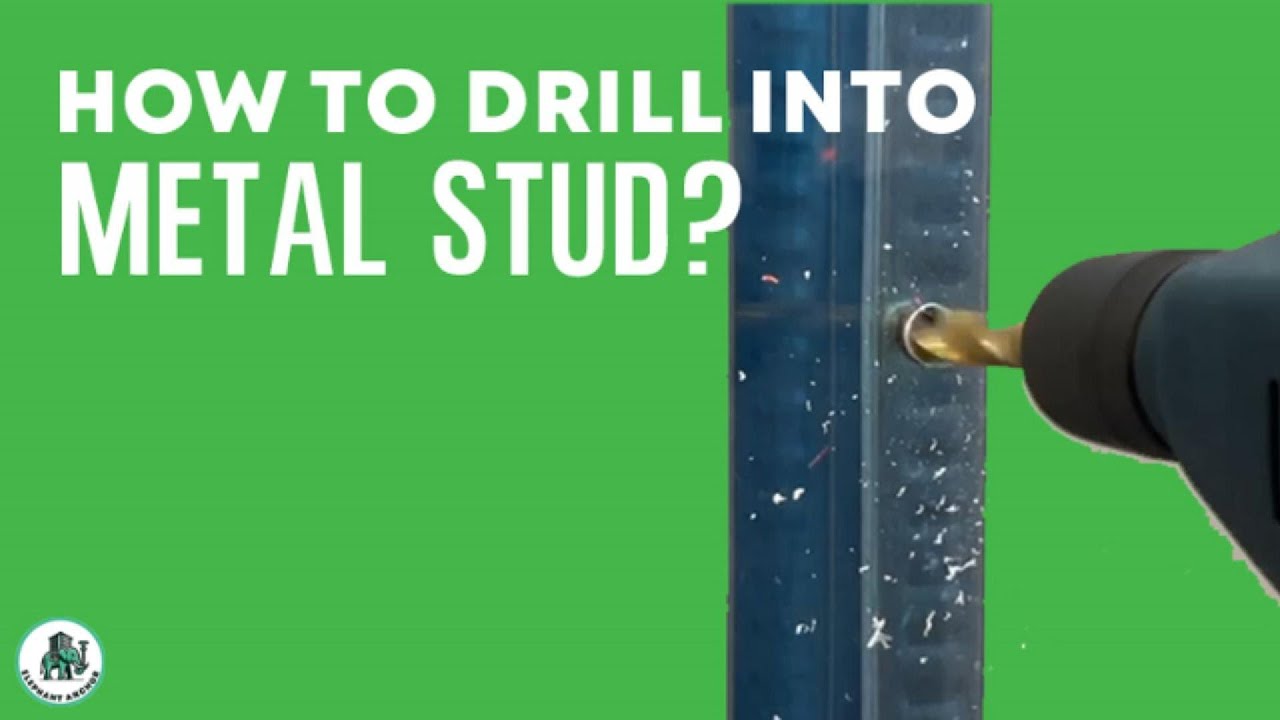
Image Source: i.ytimg.com
Getting Ready to Drill Metal Studs
Before you even pick up a drill, proper preparation is key to successful metal stud drilling. This involves gathering the right tools and understanding the materials you’ll be working with.
Essential Tools for Metal Stud Drilling
Having the correct tools makes drilling metal framing much easier and safer. Here’s what you’ll need:
- Drill: A corded or cordless drill with variable speed and a clutch is ideal. A hammer drill is usually not necessary for standard metal studs, but a powerful impact driver can be useful for driving screws.
- Best Drill Bit for Metal Studs: This is crucial. You need high-speed steel (HSS) drill bits specifically designed for metal. Cobalt bits offer even greater durability and heat resistance, making them excellent for drilling metal framing. Start with smaller bits and work your way up if needed.
- Center Punch: To create a small indentation for the drill bit to start, preventing it from wandering.
- Measuring Tape: For accurate placement of your holes.
- Pencil or Marker: To mark your drilling locations.
- Safety Glasses: Absolutely essential to protect your eyes from metal shavings.
- Work Gloves: To protect your hands from sharp edges and heat.
- Screws: Choose screws appropriate for the weight you’re attaching to metal studs. Wood screws can work, but self-tapping metal screws (sheet metal screws) are often a better choice as they create their own threads.
- Drywall Anchors (if applicable): If you’re not drilling directly into the metal stud itself but into the drywall and need extra support for lighter items, you’ll need appropriate drywall anchors. We’ll cover how to use these later.
- Stud Finder: While not always perfect for metal, a good quality stud finder can help you locate the studs behind drywall. Look for ones that can detect metal.
- Vacuum Cleaner or Shop Vac: To clean up metal shavings.
Locating Metal Studs
Finding the exact location of the metal stud is your first step.
Using a Stud Finder
- Calibration: Follow your stud finder’s instructions for calibration on a blank wall space.
- Scanning: Slowly slide the stud finder horizontally across the wall at the desired height.
- Marking Edges: When the stud finder indicates a stud, mark both the left and right edges. The center of the stud is usually between these marks. Repeat this process to confirm the stud’s location.
- Vertical Check: Move the stud finder vertically to ensure you’ve found the full width of the stud.
Alternative Location Methods
If a stud finder isn’t giving you clear results or you don’t have one:
- Tapping: Lightly tap the wall with your knuckle. The sound will often change from a hollow thud (drywall) to a more solid sound when you hit a stud.
- Outlet/Switch Plates: Electrical boxes are typically attached to the side of a stud. You can often find the stud by carefully removing a faceplate and looking for the metal it’s attached to. Be sure to turn off the power at the breaker first!
- Visual Cues: In some cases, you might see nail or screw lines in the drywall that indicate the location of studs.
Understanding Metal Stud Types
Metal studs used in residential construction are typically light-gauge steel, often referred to as “C-channel” studs. They have a U-shape with flanges. The thickness can vary, but for most DIY tasks, you’ll be dealing with standard wall framing thickness. Knowing this helps in selecting the right drill bit and screws.
Step-by-Step Guide to Drilling Metal Studs
Once you have your tools and know where the stud is, it’s time to start drilling.
Step 1: Mark Your Drilling Point
- Measure Twice, Drill Once: Use your measuring tape and pencil to mark the exact spot where you need to drill. Consider the size of the object you’re mounting on metal studs and where the fasteners need to go.
- Consider Pilot Holes: If you plan to screw into metal studs, marking for a pilot hole is essential. The pilot hole should be slightly smaller than the diameter of the screw you intend to use.
Step 2: Use the Center Punch
- Create an Indentation: Place the tip of the center punch on your marked spot. Give it a sharp tap with a hammer. This creates a small dimple in the metal. This dimple will guide the drill bit and prevent it from sliding or “walking” across the metal surface. This is a critical step for precise metal stud drilling.
Step 3: Select the Right Drill Bit
- For Pilot Holes: If you are drilling a pilot hole to screw into metal studs, choose a drill bit that is about half the diameter of the screw shank (the solid part of the screw, not including the threads).
- For Anchors or Larger Fasteners: If you are drilling a hole to accommodate a drywall anchor or a bolt, select a drill bit that matches the diameter specified for the anchor or fastener. Always check the packaging for the recommended drill bit size.
- Best Drill Bit for Metal Studs: As mentioned, HSS or cobalt bits are your best bet.
Step 4: Set Your Drill Settings
- Variable Speed: Set your drill to a low to medium speed. Drilling too fast generates excess heat, which can dull your drill bit and make the metal harder to penetrate.
- Clutch Setting: If your drill has a clutch, set it to a lower setting. This is more important when driving screws to avoid overtightening. For drilling, you’ll want the drill to have enough power to cut through the metal.
Step 5: Drill the Hole
- Steady Pressure: Place the tip of the drill bit in the dimple created by the center punch.
- Start Slowly: Begin drilling at a slow speed, applying steady, firm pressure.
- Keep it Straight: Try to keep the drill as perpendicular (straight up and down) to the metal surface as possible. This ensures a clean hole and helps the screw or anchor sit properly.
- Withdraw and Clear: Periodically pull the drill bit out of the hole while it’s still spinning slowly. This clears out metal shavings and helps cool the bit.
- Cooling: If the bit feels very hot, stop drilling and let it cool down. You can also use a small amount of cutting fluid or oil, especially if drilling through thicker metal.
Step 6: Clean Up
- Remove Shavings: Use a brush or vacuum to clean up any metal shavings from the drilling area. Metal shavings can be sharp and are a safety hazard.
- Dust Removal: Clean up any drywall dust as well.
Step 7: Insert Fasteners or Anchors
- For Screws: If you drilled a pilot hole, you can now screw into metal studs using your chosen screws. If using self-tapping screws, they will create their own threads as you drive them in.
- For Drywall Anchors: If you are drilling for drywall anchors that don’t go directly into the stud (e.g., you missed the stud or are using anchors for lighter loads), insert the anchor according to its instructions. Then, you can attach your item using a screw through the anchor.
Securing Items to Metal Studs: Different Methods
There are several ways to secure to metal studs, depending on what you’re hanging and how much weight it will support.
Screwing Directly into Metal Studs
This is the most common and strongest method for attaching to metal studs.
- Pilot Holes: Always drill a pilot hole first. For sheet metal screws, a pilot hole that’s about 60-70% of the screw’s minor diameter (the diameter at the root of the threads) is usually sufficient.
- Self-Tapping Screws: These are designed to cut their own threads into metal. They are excellent for screwing into metal studs. Drive them slowly at first to ensure they catch the metal properly.
- Lag Bolts/Machine Screws: For heavier loads, you might need to drill a larger hole and use a lag bolt or a machine screw with a nut and washer. This is more involved and might require access to both sides of the stud or using toggle bolts.
Using Drywall Anchors (When Not Hitting the Stud)
Sometimes, you might miss the stud or need to hang something in a location where a stud isn’t perfectly positioned for your needs. In these cases, drywall anchors are your solution.
- Hollow Wall Anchors: These are designed to expand behind the drywall to provide a strong grip.
- Drilling for Drywall Anchors: You’ll need to drill a hole in the drywall of the size specified by the anchor manufacturer.
- Insertion: Push the anchor into the hole. Some may require a slight tap with a hammer.
- Fastening: Drive a screw into the anchor. The anchor will expand or collapse to grip the back of the drywall.
- Toggle Bolts: These are excellent for heavier items and work by a spring-loaded toggle that drops open behind the wall.
- Drilling: Requires a larger hole than most expansion anchors.
- Insertion: You thread the bolt through the item, then through the hole, and the toggle opens behind the wall.
- Stud Mounting Plate: For very heavy items like large TVs, specialized mounting plates designed for mounting on metal studs might be available. These plates often have multiple pre-drilled holes designed to align with the spacing of metal studs, allowing you to anchor into two studs for maximum support.
Mounting Heavy Items
When mounting on metal studs, especially heavy items, it’s crucial to distribute the weight and ensure you’re using the strongest possible fastening method.
- Locate the Center: Try to position your item so that the mounting points align with the center of the metal studs.
- Multiple Fasteners: Use multiple screws or fasteners per mounting point if possible.
- Bridging/Blocking: For extremely heavy loads or when mounting items like handrails, you might need to add metal blocking or bridging between studs to create a more robust support structure. This often involves cutting pieces of metal stud and screwing them into place between the vertical studs. This is a more advanced technique.
- Consult the Item’s Manufacturer: Always check the manufacturer’s recommendations for attaching to metal studs. They may specify certain types of fasteners or provide brackets designed for metal framing.
Troubleshooting Common Issues
Even with careful preparation, you might encounter a few snags.
Drill Bit Gets Hot Quickly
- Solution: Slow down your drilling speed. Let the drill bit cool down between holes. Use cutting fluid or oil. Ensure you are using the correct type of drill bit for metal.
Drill Bit Wanders on the Surface
- Solution: This is why the center punch is essential. If it’s still happening, try a smaller pilot hole first. Ensure you are applying firm, steady pressure.
Difficulty Driving Screws into Metal Studs
- Solution: Ensure your pilot hole is the correct size. If using self-tapping screws, make sure you are using them correctly and have enough torque. For harder metal, you might need a more powerful drill or impact driver.
Stripped Screw Heads or Holes
- Solution: If the screw head is stripped, you might need a screw extractor. If the hole is stripped (meaning the screw can’t bite anymore), you’ll need to drill a slightly larger hole and use a larger screw or a different anchoring method.
Safety First!
Working with tools and metal requires constant vigilance.
Personal Protective Equipment (PPE)
- Eye Protection: Always wear safety glasses or goggles. Metal shavings can fly unexpectedly.
- Hand Protection: Wear sturdy work gloves to protect your hands from sharp edges and heat.
- Hearing Protection: While not as loud as some power tools, continuous drilling can be noisy. Consider earplugs if drilling for extended periods.
Electrical Safety
- Avoid Live Wires: Be extremely cautious when drilling near electrical outlets, light switches, or any visible wiring. If in doubt, turn off the power to that area at the breaker box before drilling.
Sharp Edges
- Metal is Sharp: The edges of cut metal studs or drilled holes can be very sharp. Handle with care.
Frequently Asked Questions (FAQ)
Q: What is the best drill bit for metal studs?
A: The best drill bits for metal studs are high-speed steel (HSS) bits. Cobalt bits are even better for durability and heat resistance when drilling metal framing.
Q: Can I use a regular drill bit for metal studs?
A: While you can sometimes get away with it for very light-duty tasks with standard wood bits, it’s strongly discouraged. Regular drill bits (like those for wood) will dull very quickly and can be damaged by the harder metal, making them ineffective and potentially dangerous. Always use bits designed for metal.
Q: What size pilot hole should I drill for screws into metal studs?
A: For most wood screws going into light-gauge steel studs, a pilot hole that is about 60-70% of the screw’s shank diameter is appropriate. For self-tapping metal screws, follow the manufacturer’s recommendations, but a similar pilot hole size is often suitable.
Q: How do I know if I hit a metal stud?
A: You’ll likely hear a more solid “thunk” sound when tapping or drilling compared to the hollow sound of drywall. A stud finder is the most reliable way to locate them before drilling.
Q: Can I hang a heavy TV on a metal stud?
A: Yes, but you must do it correctly. Locate the studs accurately, use appropriate heavy-duty screws designed for metal, and ensure you are driving them securely into the center of the stud. For very heavy TVs, consider mounting brackets designed specifically for metal studs or those that span multiple studs. Always check the weight capacity of your chosen hardware.
Q: What if I need to drill through the metal stud flange (the edge)?
A: Drilling through the flange is generally okay. However, the metal is thinner there, so use a smaller drill bit and be careful not to apply excessive force, which could bend or damage the stud.
By following these steps and safety precautions, you can confidently drill into metal studs for any of your DIY projects, ensuring your fixtures are securely mounted and your workspace remains safe. Happy building!