
Can you drill holes in tiles? Yes, you absolutely can drill holes in tiles, but it requires the right tools and techniques to avoid cracking or breaking them. This comprehensive tile drilling guide will walk you through everything you need to know for successful tile hole drilling, whether you’re working with ceramic, porcelain, or natural stone.
Drilling into tile can seem daunting, but with the correct approach, it’s a manageable DIY task. Whether you’re hanging a shelf on your bathroom backsplash, installing a towel rack, or routing pipes through a tiled wall, knowing how to properly drill a hole is essential. This guide will equip you with the knowledge and confidence to tackle any tiling project.
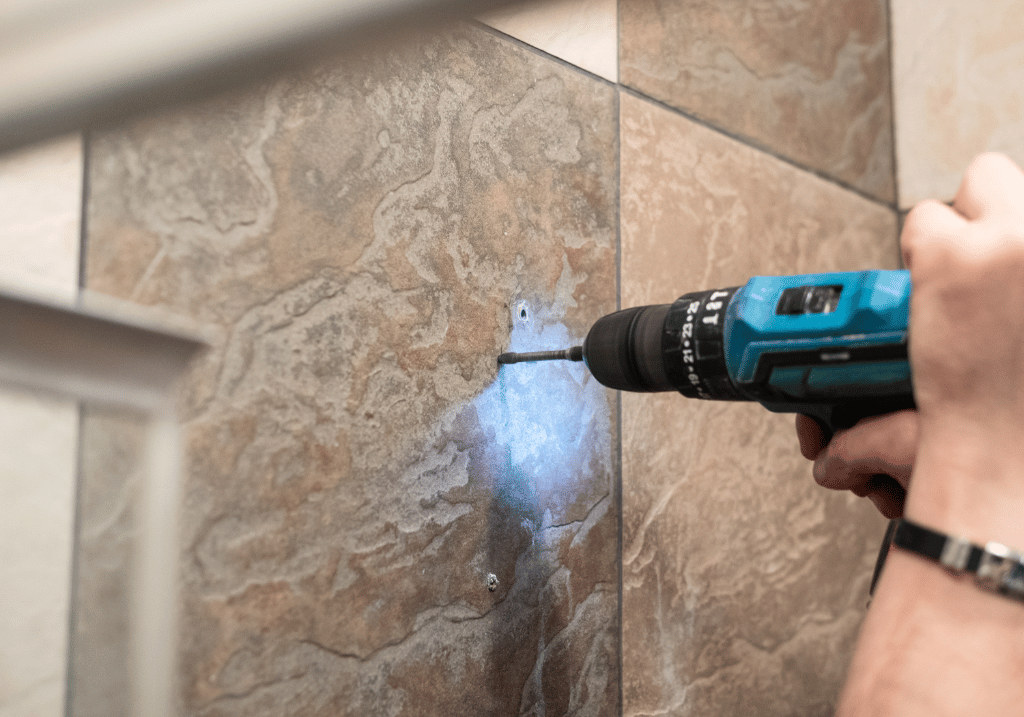
Image Source: ceramiccity.ie
Essential Tools and Materials for Tile Drilling
Before you start, gathering the right supplies is key. Using the wrong tools can lead to frustration and damaged tiles.
Drill Bits for Tile: The Critical Component
The type of drill bits for tile you use is paramount. Standard wood or metal drill bits will simply skate across the surface, shatter, or overheat.
- Carbide-Tipped Masonry Bits: These are a good starting point for softer tiles like ceramic. They have a pointed carbide tip that scores the tile surface. However, they are less effective on harder materials like porcelain.
- Specialized Tile Bits: These are designed specifically for tile. They often have a spear-shaped or bullet-shaped tip made of tungsten carbide. They are more robust than basic masonry bits.
- Diamond Drill Bits for Tile: For the hardest materials like porcelain, granite, and other natural stones, diamond drill bits for tile are the undisputed champions. These bits have a diamond-impregnated tip that grinds through the tile rather than cutting it. They are essential for drilling porcelain tiles and natural stone.
Your Drill: Power and Control
- Cordless Drill/Driver: A good quality cordless drill is ideal for most tile drilling tasks. Look for one with variable speed settings and a clutch to prevent over-torquing.
- Hammer Drill Setting (Use with Caution): While some drills have a hammer setting, it’s generally not recommended for drilling tile unless you are using specific masonry bits and drilling into the grout or wall behind the tile. For drilling through the tile itself, the percussion can shatter the tile. Stick to the regular drilling setting.
Other Necessary Supplies
- Safety Glasses: Non-negotiable! Tile dust can be harmful, and shards can fly.
- Gloves: Protect your hands.
- Dust Mask: Especially important when drilling into harder materials that create finer dust.
- Water (for cooling): A spray bottle filled with water is crucial for keeping the drill bit and tile cool. This prevents overheating, which can dull the bit and crack the tile.
- Painter’s Tape or Masking Tape: Helps prevent the drill bit from skating on the surface and can also reduce chipping.
- Marker or Pencil: For marking the drill spot.
- Level: To ensure your hole is straight if necessary.
- Vacuum Cleaner: To clean up dust and debris.
- Putty or Clay (optional): To create a small dam around the hole to hold water for cooling.
Preparing to Drill: Setting Yourself Up for Success
Proper preparation is half the battle when it comes to drilling ceramic tiles and other types.
1. Mark Your Spot
- Precision is Key: Decide exactly where you need the hole.
- Use Tape: Apply a piece of painter’s tape or masking tape over the drilling area. This gives the drill bit something to grip, preventing it from wandering, and helps minimize chipping on the surface.
- Mark the Center: Use a marker or pencil to mark the exact center of your hole directly on the tape.
2. Set Up Your Workspace
- Clear the Area: Remove any items that might get in the way or be damaged by dust.
- Ventilation: Ensure the area is well-ventilated, especially if you’re not using water.
3. Set Your Drill Settings
- Variable Speed: Set your drill to a low to medium speed. High speeds generate more heat and increase the risk of cracking the tile.
- Clutch: Engage the clutch on your drill to a low setting. This prevents you from applying too much torque once the bit starts to penetrate.
- No Hammer Setting: As mentioned, avoid the hammer drill function.
Mastering Tile Drilling Techniques
Now, let’s get to the actual drilling. The technique will vary slightly depending on the type of tile and bit.
For Ceramic and Softer Tiles (Using Carbide-Tipped or Specialized Tile Bits)
- Start Slow: Begin drilling at a very low speed. Apply gentle, steady pressure.
- Score the Surface: Let the bit bite into the tile and create a small indentation. This is where the tape helps significantly.
- Cooling is Crucial: Periodically pull the drill bit out of the hole to clear dust and allow the bit to cool. You can also spray a little water into the hole at this stage. If you’re drilling a larger hole or a series of holes, consider using a putty or clay dam to create a small pool of water around the drilling site. This continuous cooling is vital for drilling ceramic tiles without overheating.
- Maintain Steady Pressure: Continue drilling with consistent, light pressure. Avoid forcing the drill. Let the bit do the work.
- Ease Through: As you approach the other side of the tile, reduce the pressure even further. This is when chipping is most likely to occur.
- Clear Debris: Once the hole is complete, withdraw the drill bit and use a vacuum to clean up any dust or small fragments.
For Porcelain and Natural Stone Tiles (Using Diamond Drill Bits for Tile)
Drilling porcelain tiles and natural stone requires a bit more patience and a specific approach due to their hardness. Diamond drill bits for tile are essential here.
- Lubrication is Non-Negotiable: Water is absolutely critical for cooling when using diamond bits. Without it, the diamond coating will overheat and be destroyed very quickly, rendering the bit useless.
- Create a Water Reservoir (Recommended):
- Use plumber’s putty or modeling clay to create a small, watertight ring around the marked drilling spot on the tape.
- Fill this ring with water. This provides continuous lubrication and cooling.
- Start with an Angle (Optional but helpful): You can start drilling with the diamond bit held at a slight angle (around 45 degrees) to the tile surface. This helps the bit “catch” and start a groove without slipping.
- Apply Light, Consistent Pressure: Once the bit has started a groove, gradually bring the drill perpendicular to the tile. Apply light, steady pressure. Let the diamond particles grind away at the tile.
- Keep it Cool: Ensure the water reservoir remains filled. If you’re not using a reservoir, frequently spray water into the hole and pull the bit out to clear debris and cool the bit. You should see a slurry of water and tile dust being produced.
- Slow and Steady Wins: Do not rush the process. Drilling natural stone tiles can take time. High speeds and excessive force are your enemies.
- Patience at Breakthrough: As you feel the bit is about to break through the other side, ease up on the pressure significantly. This prevents chipping and blow-out on the exit side.
- Clean Up: Once the hole is complete, remove the water reservoir, clean the area thoroughly with a vacuum.
Drilling Backsplash Tiles: Specific Considerations
Drilling backsplash tiles is a common DIY task, often involving the delicate area behind sinks or stoves.
- Material Matters: Backsplashes can be ceramic, porcelain, glass, or even natural stone. Identify your tile material to choose the correct drill bits.
- Avoid Damage: The backsplash is often a focal point, so careful drilling is paramount to avoid unsightly chips or cracks. Always use tape and cool the bit.
- Behind the Tile: Be mindful of what’s behind the tile. You might be drilling into drywall, plaster, or studs. Knowing this can help you choose the right anchors if needed after drilling the tile.
- Grout Lines: If possible, try to drill into the tile itself rather than directly into the grout line, as grout can crumble. However, sometimes drilling through grout is unavoidable or even preferred for certain mounting hardware.
Advanced Techniques and Tips
Here are some extra tips to elevate your tile drilling techniques:
Using a Guide or Template
- For precise alignment, especially when drilling multiple holes, consider using a template or a drilling guide. These can help ensure your holes are perfectly spaced and perpendicular.
Water Swivel or Water Feed Systems
- For professionals or those doing extensive tile drilling, specialized water swivels or water feed systems can be attached to the drill to provide a constant, controlled flow of water directly to the drilling site. This is the most effective way to manage heat and dust.
Managing Heat
- Heat is the primary enemy of tile. If your bit feels hot to the touch, or if you see steam, stop drilling immediately. Let the bit and tile cool down completely.
- Test Drilling: If you’re nervous, practice on a spare tile first.
Preventing Chipping
- Sharp Bits: Ensure your drill bits for tile are sharp and in good condition. Dull bits require more force, leading to chipping.
- Slow Speed: Lower speeds help control the drilling process and reduce the chance of chipping.
- Tape: The painter’s tape trick is your best friend for preventing surface chipping.
- Backing Material (for thin tiles): For very thin or brittle tiles, you might consider placing a piece of scrap wood on the back of the tile and drilling through both simultaneously. This can help support the tile as the bit exits.
Troubleshooting Common Tile Drilling Problems
Even with the best preparation, issues can arise.
The Drill Bit is Skating
- Problem: The drill bit is not biting into the tile and is just spinning on the surface.
- Solution:
- Ensure you have applied painter’s tape.
- Try starting at a very slight angle to create an initial groove.
- Make sure you’re using the correct type of drill bit for your tile material.
- Increase pressure slightly once a small indentation is made.
The Tile is Cracking
- Problem: The tile is showing signs of cracking around the drilling area.
- Solution:
- Stop immediately.
- Ensure you are using slow speeds and gentle pressure.
- Check your cooling system – is the bit and tile getting too hot?
- If using a diamond bit, ensure you are using sufficient water.
- Consider using a template or guide for straighter drilling.
The Bit is Overheating
- Problem: The drill bit or the tile is getting excessively hot.
- Solution:
- Slow down your drilling speed.
- Use more water for cooling.
- Take more frequent breaks to let the bit cool.
- Ensure you’re using the correct lubricant (water is standard for most tile drilling).
Tile Drilling Safety: Your Health and Well-being
Tile drilling safety is crucial to prevent injuries and damage.
- Eye Protection: Always wear safety glasses. Tile shards and dust are sharp and can cause serious eye damage.
- Respiratory Protection: When drilling, especially harder materials, fine dust particles are created. Wear a dust mask or respirator to avoid inhaling this dust, which can be harmful to your lungs.
- Gloves: Protect your hands from sharp edges and potential abrasions.
- Secure the Tile (if possible): If you are drilling a tile that is not yet installed, secure it firmly to prevent it from moving erratically during the drilling process. Clamps can be useful here.
- Awareness of Surroundings: Be aware of electrical wires or plumbing that might be behind the wall you are drilling into.
Summary Table: Drill Bits and Tile Types
| Tile Type | Recommended Drill Bit | Key Considerations |
|---|---|---|
| Ceramic | Carbide-Tipped Masonry Bit or Specialized Tile Bit | Start slow, use tape, cool with water, gentle pressure. |
| Porcelain | Diamond Drill Bit for Tile | Water lubrication is essential, slow speed, steady pressure, create water reservoir. |
| Natural Stone | Diamond Drill Bit for Tile | Similar to porcelain – ample water, slow speed, patience. |
| Glass | Glass and Tile Drill Bit (specialized, often spear-tipped) | Start at an angle, use water, slow speed, very light pressure. |
Frequently Asked Questions (FAQ)
Q1: Can I use a regular drill bit to drill holes in tiles?
A1: No, you should not use regular wood or metal drill bits. They are not designed for the hardness of tile and will likely break, damage the tile, or simply fail to make a hole. Always use specialized drill bits for tile, such as carbide-tipped or diamond-tipped bits.
Q2: What is the best drill bit for drilling porcelain tiles?
A2: The best drill bit for drilling porcelain tiles is a diamond drill bit for tile. Porcelain is extremely hard, and only the grinding action of a diamond bit can effectively and safely cut through it.
Q3: Do I need to use water when drilling tiles?
A3: Yes, it is highly recommended, especially when drilling porcelain, natural stone, or using diamond drill bits. Water acts as a coolant, preventing the drill bit and the tile from overheating. Overheating can damage the drill bit’s cutting surface and cause the tile to crack.
Q4: How can I prevent tiles from chipping when drilling?
A4: To prevent chipping, always apply painter’s tape over the drilling area, start at a slow speed, use light and steady pressure, and ease up significantly as you reach the other side of the tile. Using the correct drill bit for the tile material is also crucial.
Q5: My drill bit is skating on the tile. What should I do?
A5: If your drill bit is skating, first ensure you have applied painter’s tape over the spot. If the tape is on, try starting the drill at a very slight angle to create a small groove, then gradually bring the drill to a perpendicular position. Make sure you’re not using too high a speed.
Q6: How deep should I drill into the tile?
A6: You only need to drill through the thickness of the tile itself. Once the drill bit has passed completely through the tile, stop drilling. Further drilling into the wall material behind the tile should be done with the appropriate bit for that material, or with the tile removed if necessary.
Q7: Can I drill holes in already installed tiles?
A7: Yes, you can drill holes in installed tiles. The techniques described in this tile drilling guide apply to both uninstalled and installed tiles. Just be extra cautious of what is behind the tile (electrical wires, plumbing) when drilling into a wall.
This comprehensive approach ensures you can confidently tackle drilling holes in various tile types, leading to a professional and safe finish for your projects.