
Can you drill holes in really tight spaces? Yes, you absolutely can drill holes in tight spaces with the right tools, techniques, and a bit of planning. It’s a common challenge faced by DIYers and professionals alike.
Drilling in confined areas, whether it’s within cabinets, behind plumbing, under sinks, or in the cramped engine bay of a vehicle, presents a unique set of difficulties. The primary hurdle is access. You need to be able to position the drill correctly, maintain stability, and execute the drilling action effectively without bumping into surrounding objects or injuring yourself. This often means accessing awkward spots drilling requires more than just a standard drill. It demands a strategic approach, specialized equipment, and careful execution.
This comprehensive guide will equip you with the knowledge and skills needed to tackle drilling in even the most restrictive environments. We’ll delve into the tools, techniques, and safety considerations that will make drilling in tight quarters a manageable task.
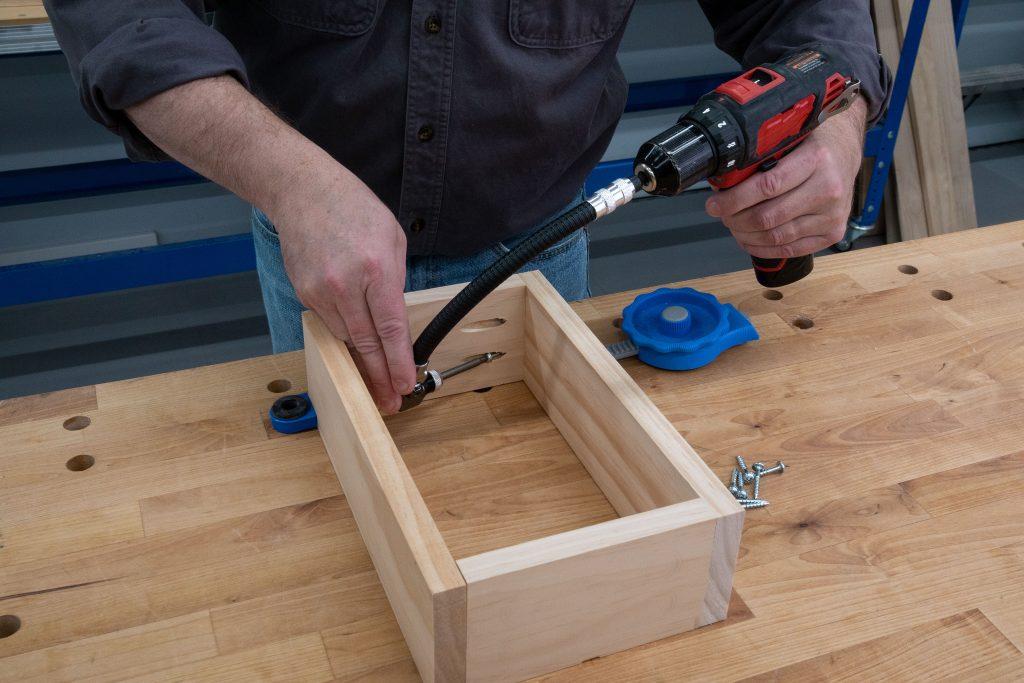
Image Source: learn.kregtool.com
The Right Tools for the Job: Essential Gear for Tight Spaces
When you’re drilling in confined areas, your standard corded drill might be too bulky. The key is to select tools designed for maneuverability and precision.
Compact Drills and Drivers
For many tight-space drilling tasks, the size of your drill is paramount.
- Cordless Drills/Drivers: These are often the go-to choice due to their portability and lack of a power cord, which can easily snag. Look for models that are lightweight and have a compact head profile. Many manufacturers offer “sub-compact” or “compact” lines specifically designed for better handling in tight spots. These often have shorter chucks and a more streamlined body.
- Impact Drivers: While primarily for driving screws, impact drivers can also be used for drilling with the correct bit. Their compact size and powerful rotational force can be advantageous. However, they lack the clutch settings of a drill, so care must be taken to avoid stripping holes or damaging materials.
Specialized Drills for Awkward Spots
When even compact drills struggle, specialized tools become invaluable.
Right-Angle Drills for Tight Spaces
A right-angle drill for tight spaces is a game-changer. These drills have the motor positioned perpendicular to the chuck, allowing you to drill in extremely confined areas where a straight drill would never fit. They are perfect for drilling behind obstacles or into the side of studs where access is limited.
- Key Features: Look for adjustable heads or heads that can be positioned at various angles. Some have very low profiles, making them ideal for reaching into corners.
- Applications: Ideal for cabinet installation, framing, and working around pipes or wiring.
Gimbal Drills
These are even more specialized, often featuring a drill head that can pivot and lock at virtually any angle, offering maximum flexibility for drilling in confined areas. They are less common but extremely useful for highly complex situations.
The Importance of the Right Drill Bit
The drill bit itself plays a crucial role in successful tight-space drilling.
Compact Drill Bit Usage
Using the right bit isn’t just about length, but also about the overall profile.
- Short or Stubby Drill Bits: These are essential for drilling in confined areas where overhead clearance or space in front of the drill is minimal. They reduce the overall length of your drilling assembly.
- Hex Shank Bits: Bits with hex shanks can often be inserted directly into the chuck of an impact driver or a drill with a hex chuck, offering a more secure fit and faster bit changes.
- Specialized Drill Bits:
- Brad-Point Bits: For wood, these have a sharp point that prevents the bit from wandering when starting a hole, ensuring accuracy even when you can’t get a firm grip.
- Spade Bits (and Paddle Bits): While generally bulkier, some very short spade bits can be useful for larger diameter holes in wood. Be mindful of their width.
- Step Bits: Useful for drilling holes of various sizes with a single bit and for deburring. Their conical shape can be advantageous in some tight spots.
- Hole Saws: For larger holes, consider compact hole saw kits. Ensure you have enough clearance for the saw’s body.
Miniature Drill Bit Applications
For very small, precise holes, miniature drill bit applications are key. These are often used for delicate tasks, electronics repair, or when working with small fasteners.
- Pin Vise Drills: These are hand-held tools that use a small chuck to hold tiny drill bits. They offer incredible control but are best suited for very soft materials or pilot holes.
- Micro Drill Bits: Available in sets for use with rotary tools or small drill presses.
Mastering the Techniques: How to Drill Effectively in Restrictive Environments
Having the right tools is only half the battle. Your technique is crucial for successful tight quarters drilling techniques.
Preparing Your Workspace
Before you even pick up a drill, preparation is key.
Clearing Obstructions
- Assess the Area: Identify any wires, pipes, or other components that could be damaged by the drill bit or the drill itself.
- Temporary Removal: If possible, carefully remove or temporarily move any nearby obstacles. This might involve loosening a pipe clamp or unsecuring a wire bundle.
- Protection: If obstacles cannot be moved, protect them with tape, cloth, or plastic sheeting.
Marking Your Drilling Point
Precision is vital when space is limited.
- Center Punch: For metal or hard surfaces, use a center punch to create a small indentation. This will guide the drill bit and prevent it from skating across the surface.
- Masking Tape: Applying a strip of masking tape over the drilling point and marking it can help prevent the drill bit from wandering on smooth or painted surfaces.
- Templates: For repetitive holes or precise positioning, create a simple template from cardboard or thin plastic.
Maneuvering the Drill in Restricted Areas
This is where the art of maneuvering drill in restricted areas comes into play.
Achieving a Stable Grip
- Two-Handed Control: Whenever possible, use both hands to control the drill. One hand grips the main body, and the other stabilizes the barrel or a secondary handle if available.
- Bracing: Bracing yourself against a solid surface can provide much-needed stability. Lean into the drill with your body weight, not just your arms.
- Auxiliary Handles: If your drill has an auxiliary handle, use it. It significantly improves control, especially when drilling at an angle or with larger bits.
Positioning for Access
- Angle of Approach: Sometimes, you can’t get the drill perfectly perpendicular to the surface. Learn to drill at a slight angle if necessary, especially when using a right-angle drill.
- Chuck Clearance: Be acutely aware of how much space your drill chuck has. Ensure it won’t hit anything as it rotates.
- Body Position: You might need to contort your body into awkward positions. Prioritize your own safety and comfort to maintain control. Consider kneeling, lying down, or even working overhead.
Drilling Strategy for Tight Spots
The actual drilling process requires careful thought.
Starting the Hole
- Low Speed: Begin drilling at a very low speed. This allows you to guide the bit precisely and prevent it from jumping.
- Pilot Holes: For larger holes, always start with a smaller pilot hole. This makes it easier to guide the larger bit and reduces the torque required.
- Pressure Control: Apply steady, consistent pressure. Don’t force the drill. Let the bit do the work. Excessive pressure can cause the bit to bind or break.
Managing Swarf and Heat
When drilling behind obstacles or in confined spaces, dealing with debris and heat is crucial.
- Retracting and Clearing: Periodically retract the drill bit partially or completely from the hole to clear out wood shavings, metal filings, or plastic debris. This prevents the bit from getting clogged and overheating.
- Coolant/Lubricant: For drilling metal, a cutting fluid or lubricant is essential to reduce friction, cool the bit, and extend its life. For wood, water can sometimes be used sparingly for cooling, but be cautious of water damage.
- Air Blower: A small burst of compressed air can help clear debris from the hole and the bit.
Overhead Drilling in Confined Spaces
Overhead drilling in confined spaces adds another layer of difficulty, primarily related to gravity and debris falling into your eyes or on you.
- Safety Goggles are Non-Negotiable: Always wear safety goggles.
- Secure the Drill: Ensure you have a firm grip and that the drill is well-balanced.
- Retract Often: Pull the bit out frequently to clear chips.
- Catch the Debris: If possible, position a dustpan or a piece of cardboard below the drilling area to catch falling debris.
- Impact Driver Caution: Be extra cautious with impact drivers overhead. The hammering action can be harder to control.
Advanced Tips and Specialized Drill Accessories for Tight Areas
Beyond the basics, several advanced techniques and accessories can make your life easier.
Utilizing Specialized Drill Accessories for Tight Areas
These accessories are designed to extend the reach and capability of your drill.
- Flexible Shaft Extensions: These attach to your drill chuck and allow the drill bit to bend and reach into very tight corners or around obstructions. They offer great control for delicate work but can reduce power transfer slightly.
- Offset Screwdriver/Drill Attachments: These attach to your drill and offset the chuck by a few inches, allowing you to drill or drive screws parallel to the drill’s body, perfect for reaching into narrow gaps.
- Magnetic Bit Holders: Essential for miniature drill bit applications and for holding bits securely when working at odd angles or overhead.
Techniques for Specific Materials
The material you are drilling into dictates some of your approach.
Drilling Wood in Tight Spaces
- Sharp Bits: Ensure your wood bits are sharp for clean entry and less resistance.
- Brad-point Bits: As mentioned, these are excellent for precise starts.
- Depth Stop: Use a depth stop on your drill to prevent drilling too deep, especially when working near the back of a material.
Drilling Metal in Tight Spaces
- Pilot Holes are Essential: Always start with a pilot hole, especially for harder metals.
- Lubrication: Use cutting oil or WD-40.
- Slower Speed: Drill at a slower speed to prevent overheating and bit wear.
- Clearing Chips: Retract the bit frequently to clear metal chips.
Drilling Drywall and Plaster
- Light Pressure: These materials are soft, so use light pressure.
- Dust Control: Use a dust shroud attachment if available, or a damp cloth positioned around the drill bit to catch dust.
- Vacuum Attachment: Some drills or vacuums have attachments that can help collect dust as you drill.
Working with Difficult Angles and Curves
Sometimes the surface isn’t flat, or you need to drill at an extreme angle.
- Template Guide Bushings: These small sleeves can be placed around a drill bit to guide it at a consistent angle, particularly useful when drilling into angled surfaces or creating precise patterns.
- Marking the Angle: Use an angle finder or protractor to mark the precise angle on your material before drilling.
Safety First: Essential Precautions for Tight Space Drilling
Working in confined spaces inherently carries more risk. Prioritizing safety is paramount.
Personal Protective Equipment (PPE)
- Eye Protection: Always wear safety glasses or goggles. Debris can fly unpredictably.
- Gloves: Work gloves can protect your hands from splinters, sharp edges, and provide a better grip.
- Hearing Protection: While often overlooked in short drilling tasks, if you’re drilling many holes or using a noisy tool, consider earplugs or earmuffs.
- Dust Mask/Respirator: If drilling materials that produce fine dust (like drywall, MDF, or certain metals), wear a dust mask or respirator.
Tool Safety
- Battery Management: For cordless drills, ensure batteries are fully charged. Consider having spares ready.
- Cord Management: If using a corded drill, ensure the cord is routed safely away from your work area and any moving parts.
- Secure the Workpiece: If possible, clamp the material you are drilling. This prevents it from moving unexpectedly.
- Check for Obstructions: Double-check for hidden wires or pipes before drilling. A stud finder with electrical detection can be helpful.
- Avoid Overheating: Give your drill and bits breaks to cool down, especially in tight spaces where airflow is limited.
Body Safety
- Maintain Balance: Ensure you have a stable stance. Avoid overreaching.
- Ergonomics: Try to position yourself so you are not straining your back or wrists.
- Awareness: Always be aware of your surroundings and the location of your hands, feet, and the drill bit.
Troubleshooting Common Issues
Even with preparation, you might encounter problems.
Drill Bit Stuck
- Don’t Force It: If the bit gets stuck, don’t try to yank the drill.
- Reverse: Gently try to back the drill out in reverse.
- Wiggle: Try to wiggle the drill slightly while applying gentle reverse pressure.
- Lubrication: If it’s metal, try applying more lubricant.
- Cutting Fluid: Sometimes a bit of cutting fluid can help free a stuck bit.
Drill Bit Wandering on Start
- Center Punch: Use a center punch for a better starting point.
- Masking Tape: Apply masking tape over the spot.
- Start Slow: Begin at a very low RPM.
- Pilot Hole: Drill a small pilot hole first.
Overheating Drill or Bit
- Retract More Often: Clear debris and allow for airflow.
- Lower Speed: Reduce your drilling speed.
- Lubrication: Use appropriate lubricant for the material.
- Breaks: Give the tool a rest.
- Correct Bit: Ensure you are using the right type and size of bit for the job.
Frequently Asked Questions (FAQ)
Here are some common questions about drilling in tight spaces:
Q1: What’s the best type of drill for very narrow spaces?
A: A right-angle drill is typically the best tool for accessing awkward spots drilling when space is severely limited. Compact cordless drills are also very useful.
Q2: Can I use a standard drill bit in a right-angle drill?
A: Yes, most standard drill bits with a round or hex shank can be used in a right-angle drill, provided the chuck is compatible.
Q3: How do I keep the drill bit from slipping when starting a hole in a smooth surface?
A: Using a center punch on metal or applying masking tape to smooth surfaces and marking the spot can prevent the bit from slipping. Starting at a very low speed also helps.
Q4: What if I can’t get a good grip on the drill in a tight space?
A: Bracing yourself against a solid surface and using both hands on the drill, or employing an auxiliary handle if available, can improve your grip and control.
Q5: Is it safe to drill overhead in a confined area?
A: It can be, but it requires extra caution. Always wear eye protection, ensure a secure grip, and retract the bit frequently to manage falling debris.
Q6: What are specialized drill accessories for tight areas?
A: These include flexible shaft extensions, offset drill attachments, and magnetic bit holders that help extend reach and improve access.
Q7: How do I prevent the drill bit from overheating in confined spaces?
A: Regularly retracting the bit to clear debris, using a slower drilling speed, and applying appropriate lubricants are key to preventing overheating.
By combining the right tools with careful planning and execution, drilling in confined areas becomes a much more manageable and successful task. Remember, patience and safety are your most important allies.