
Can you drill holes for cabinet handles yourself? Yes, absolutely! With the right tools and a bit of careful preparation, drilling holes for cabinet handles is a straightforward DIY project that can dramatically update the look of your kitchen or bathroom. This guide will walk you through everything you need to know to achieve professional-looking results, ensuring your cabinet hardware installation is a success.
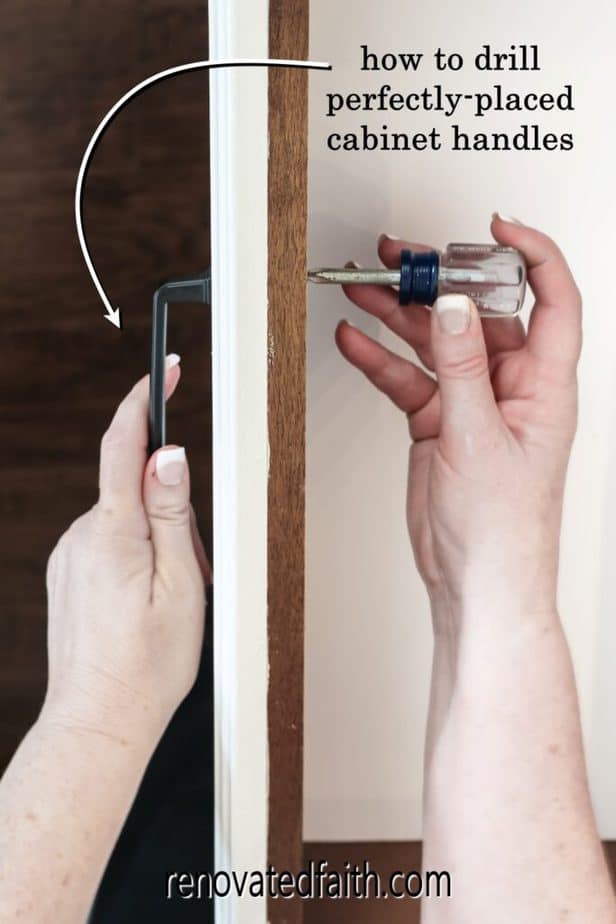
Image Source: renovatedfaith.com
Preparing for Precision: Gathering Your Tools and Materials
Before you even think about picking up a drill, proper preparation is key. This ensures your cabinet hardware installation is smooth and your new handles are perfectly aligned.
Essential Tools for Drilling Cabinet Doors
- Drill: A cordless drill is ideal for its portability and power. Ensure it has a variable speed setting.
- Drill Bits: You’ll need drill bits specifically designed for wood. The size of your drill bit should match the screw size for your cabinet handles. It’s often best to have a few sizes on hand, including one slightly larger than the screw for a snug fit and one the exact size of the screw thread.
- Tape Measure: For accurate measuring for cabinet hardware.
- Pencil: To mark your drilling points.
- Level: To ensure handles are straight, especially on upper cabinets.
- Painter’s Tape or Masking Tape: To create a clean surface for marking and prevent splintering.
- Cabinet Hardware Template or Jig: This is a game-changer for consistent placement. We’ll discuss these in detail later.
- Screwdriver (or Drill Bit Attachment): To drive the screws for your handles.
- Safety Glasses: Always protect your eyes when drilling.
- Work Surface: A stable surface like a workbench or sawhorse to work on.
- Clamps (Optional but Recommended): To secure the cabinet door or drawer front while drilling.
Choosing Your Cabinet Hardware
The type of cabinet handles or pulls you choose will influence the drilling process.
- Single-Hole Knobs: These are the simplest to install, requiring only one hole.
- Handles/Pulls with Two Holes: These require two precisely spaced holes for a secure and aesthetically pleasing look. The distance between these holes is called the “center-to-center” measurement. Always check this measurement on your hardware before marking.
Mastering the Mark: Accurate Measuring and Placement
Precision is paramount when drilling cabinet doors. Even a slight miscalculation can lead to crooked handles or holes that are too far apart or too close together.
Finding the Perfect Spot: Drawer Handle Placement
For drawers, the placement often depends on personal preference and the drawer’s design.
- Center Placement: Many people prefer to center the handle horizontally and vertically on the drawer front.
- Horizontal Centering: Measure the width of the drawer front and divide by two. Mark this center point.
- Vertical Centering: Measure the height of the drawer front and divide by two. Mark this center point. The intersection of these marks is your center.
- Placement from the Edge: Some prefer to position the handle a specific distance from the top or side edge. Measure your desired distance from the top and the center of the drawer front.
Aligning Handles on Cabinet Doors
Upper and lower cabinet doors require careful alignment.
- Vertical Alignment: Measure the height of the cabinet door. A common practice is to place the handle about one-third of the way down from the top edge of the door, or at a consistent height across all cabinets. Use your tape measure and pencil to mark this point.
- Horizontal Alignment: For doors with a single handle, center it horizontally as you would a drawer. For doors with two handles (less common on standard cabinets), ensure consistent spacing and alignment.
- Using a Level: Once you have your initial marks, use a level to draw a faint pencil line to confirm your placement is perfectly horizontal or vertical before drilling.
The Importance of the Center-to-Center Measurement
For handles requiring two holes, the center-to-center measurement is critical. This is the distance between the two screw holes on the handle itself. Measure this accurately with your tape measure. This measurement dictates the spacing of your drilled holes.
The Secret Weapon: Leveraging a Jig for Cabinet Handles
A jig for cabinet handles, also known as a hardware template or cabinet door drilling guide, is an invaluable tool for ensuring perfect alignment and consistent spacing, especially when installing hardware on multiple cabinets or drawers.
What is a Jig for Cabinet Handles?
A jig is a guide or template that helps you drill holes accurately. They are typically made of plastic or metal and have pre-drilled holes or adjustable guides that correspond to common hardware center-to-center measurements.
Types of Jigs and Templates:
- Adjustable Jigs: These are the most versatile. They feature rulers and sliding stops that can be adjusted to fit any center-to-center measurement and any desired placement on your cabinet doors or drawers.
- Fixed Jigs: These are pre-set for specific center-to-center measurements (e.g., 3 inches, 96mm). They are simpler to use if you know your hardware’s measurements in advance.
- Printable Templates: You can find downloadable templates online that you can print on cardstock and cut out. While less durable than manufactured jigs, they can be a good option for a one-off project.
How to Use a Hardware Template:
- Set the Jig: If using an adjustable jig, set the stops to your desired center-to-center measurement and the desired distance from the edge of the cabinet.
- Position the Jig: Place the jig on your cabinet door or drawer front, aligning it with your previously marked center point or desired edge placement. Ensure it’s level.
- Mark the Holes: The jig will have holes that you can use to mark your drilling points directly onto the cabinet with a pencil.
- Drill: Place your drill bit through the marked holes on the jig (or the jig itself if it has built-in drill guides) and drill your pilot holes.
Using a jig eliminates guesswork and ensures that every handle is installed at the exact same height and spacing.
Drilling with Confidence: The Step-by-Step Process
Now that you’re prepared and have your marks or jig ready, it’s time to drill.
Step 1: Secure the Cabinet Door or Drawer Front
- If the door or drawer front is still attached to the cabinet, it’s often easier to remove it for drilling.
- Place the door or drawer front on a flat, stable surface.
- Use clamps to secure it in place, ensuring the clamps don’t obstruct your drilling area.
Step 2: Mark Your Drilling Points
- Using a Jig: Place your jig on the cabinet surface and mark the drill points as described above.
- Without a Jig:
- Mark your center point for the handle.
- Measure the center-to-center distance for your hardware.
- Using your tape measure and pencil, mark the exact locations for the two holes, ensuring they are perfectly aligned and spaced according to the center-to-center measurement. Use your level to double-check.
- Apply painter’s tape over your marked spots. This helps prevent splintering. Re-mark your drill points on top of the tape for maximum accuracy.
Step 3: Select the Correct Drill Bit
- Choose a drill bit for wood that is the same diameter as the screws that come with your cabinet hardware. If the screws are a bit loose in the holes, the handle might wobble.
- It’s often recommended to use a drill bit that is the same size as the screw’s shank (the solid part of the screw, not the threads).
- Pilot Holes for Screws: Drilling pilot holes for screws is crucial. These are small guide holes that make it easier to drive the screw and prevent the wood from splitting, especially in hardwood or near the edges of the cabinet door.
Step 4: Drill the Pilot Holes
- Set your drill to a low speed setting.
- Hold the drill perpendicular (straight up and down) to the cabinet surface.
- Gently press the drill bit into your marked spot.
- Drill only as deep as the length of your screw. You can mark your drill bit with a piece of tape to indicate the correct depth.
- Drill straight through the cabinet door or drawer front.
- If you are not using a jig, drill the first hole, then carefully reposition the jig or your tape measure to drill the second hole, ensuring perfect alignment.
Table: Drill Bit Size Guide (General)
| Screw Diameter (Approx.) | Recommended Drill Bit Size (for Pilot Hole) |
|---|---|
| #6 Screw | 3/32 inch (2.4 mm) |
| #8 Screw | 7/64 inch (2.8 mm) |
| #10 Screw | 9/64 inch (3.6 mm) |
Note: Always test on a scrap piece of wood first to confirm the correct drill bit size for your specific screws and cabinet material.
Step 5: Install the Cabinet Hardware
- Remove the painter’s tape.
- Insert the screws from the backside of the cabinet door or drawer front.
- Align the cabinet handle or knob with the screws.
- Gently tighten the screws by hand or with a screwdriver. Avoid over-tightening, which can strip the screw hole or damage the cabinet.
- If the screws are a little short, you may need to drill a slightly larger hole or use the recommended drill bit for the screw’s shank size.
- If the screws are too long and protrude from the other side, you may need shorter screws or a slightly larger drill bit for the pilot hole.
Step 6: Test and Adjust
- Once the hardware is installed, open and close the cabinet door or drawer to ensure it operates smoothly and the handle is secure.
- If any handles feel loose, tighten the screws slightly.
Troubleshooting Common Issues
Even with careful planning, occasional problems can arise.
Hole is Too Big
- Cause: Used a drill bit that was too large for the screw.
- Solution:
- Use a slightly larger screw if possible.
- Fill the hole with wood filler or a wooden dowel and glue. Once dry, re-drill a pilot hole in the correct location.
- Use a “screw anchor” designed for wood.
Hole is Too Small or Screw Won’t Go In
- Cause: Used a drill bit that was too small.
- Solution:
- Carefully try to widen the hole with the same drill bit or a slightly larger one.
- If the screw is already started, try to back it out and use a slightly larger drill bit for the pilot hole.
Handles Are Not Aligned
- Cause: Inaccurate measuring or no jig used.
- Solution: This is the most challenging issue.
- If the holes are slightly off, you might be able to adjust the handle’s position if it has a bit of play.
- For significant misalignment, you’ll likely need to fill the existing holes (as described above) and re-drill them in the correct position. This is where a jig becomes indispensable for future projects.
Tips for Success in Installing Cabinet Pulls
Achieving a professional finish for your cabinet hardware installation involves more than just drilling.
Prioritize Test Drills
Always test your drill bit and screw combination on a scrap piece of wood that matches your cabinet material. This helps you confirm the right drill bit size and depth for your pilot holes.
Use the Correct Drill Bit for Wood
Standard twist drill bits are fine, but brad-point drill bits are excellent for wood. They have a sharp tip that bites into the wood and prevents the bit from wandering, leading to more precise holes.
Protect Your Cabinet Surface
- Painter’s Tape: As mentioned, tape over your marks to prevent splintering.
- Drilling from Both Sides (for very thin doors): If your cabinet doors are very thin, drilling all the way through from one side might cause tear-out on the other. In such cases, drill halfway from one side, then flip the door and drill from the other side, meeting the first hole. This requires precise alignment.
Consider the Door/Drawer Material
- Solid Wood: Generally forgiving, but can still split if not pre-drilled.
- MDF/Particle Board: These materials are more prone to splintering and may require a finer grit sandpaper after drilling.
- Laminate/Veneer: Be extra careful to avoid chipping the surface. Use painter’s tape and drill slowly.
Clean Up
After installation, wipe away any pencil marks and clean your cabinets.
Frequently Asked Questions About Drilling Cabinet Handles
Q1: What is the standard height for cabinet handles?
There isn’t one single “standard” height, as it often comes down to personal preference and kitchen design. However, a common practice for upper cabinets is to place the center of the handle about 2.5 to 3 inches down from the top edge of the door, or roughly one-third of the way down. For lower cabinets, the placement might be similar, or centered vertically. Consistency across all cabinets is key for a cohesive look.
Q2: Can I use a hammer and nail to start the screw hole?
No, this is generally not recommended. While it might seem like a quick way to make a mark, it can easily damage the cabinet surface, create an uneven starting point, and make it difficult to get the screw started straight. Always use a drill for creating pilot holes.
Q3: What if my cabinet hardware comes with different screws?
Always check which screws are intended for your cabinet doors and drawers. Some hardware kits include screws of different lengths. The screws should be long enough to pass through the cabinet door/drawer front and securely engage with the handle, but not so long that they protrude significantly on the visible side. If screws are too long, you might need to trim them carefully or find shorter ones.
Q4: How do I drill holes on curved cabinet doors?
Drilling holes on curved surfaces can be trickier. A jig designed for curves or a steady hand with a drill press might be necessary. For most DIYers, it’s best to stick to a standard jig and position it carefully, ensuring it sits as flush as possible on the curve. Mark your points, remove the jig, and then drill with extreme care, keeping the drill perpendicular to the surface at your marked spot.
Q5: Do I need to drill pilot holes for every cabinet hardware installation?
Yes, it’s highly recommended. Even if the cabinet material seems soft, drilling pilot holes prevents the wood from splitting, ensures the screw goes in straight, and makes the installation process much easier and cleaner.
By following these steps and utilizing the right tools, you can confidently drill holes for your cabinet handles and achieve a professional, stylish upgrade for your cabinetry.