
Can you drill glass? Yes, you absolutely can drill glass, but it requires the right tools, techniques, and a good dose of patience. Drilling glass is not like drilling wood or metal; it’s a delicate process where mistakes can lead to shattered materials. This guide will walk you through everything you need to know to successfully drill holes in glass, whether you’re a seasoned DIYer or a beginner tackling a new project.
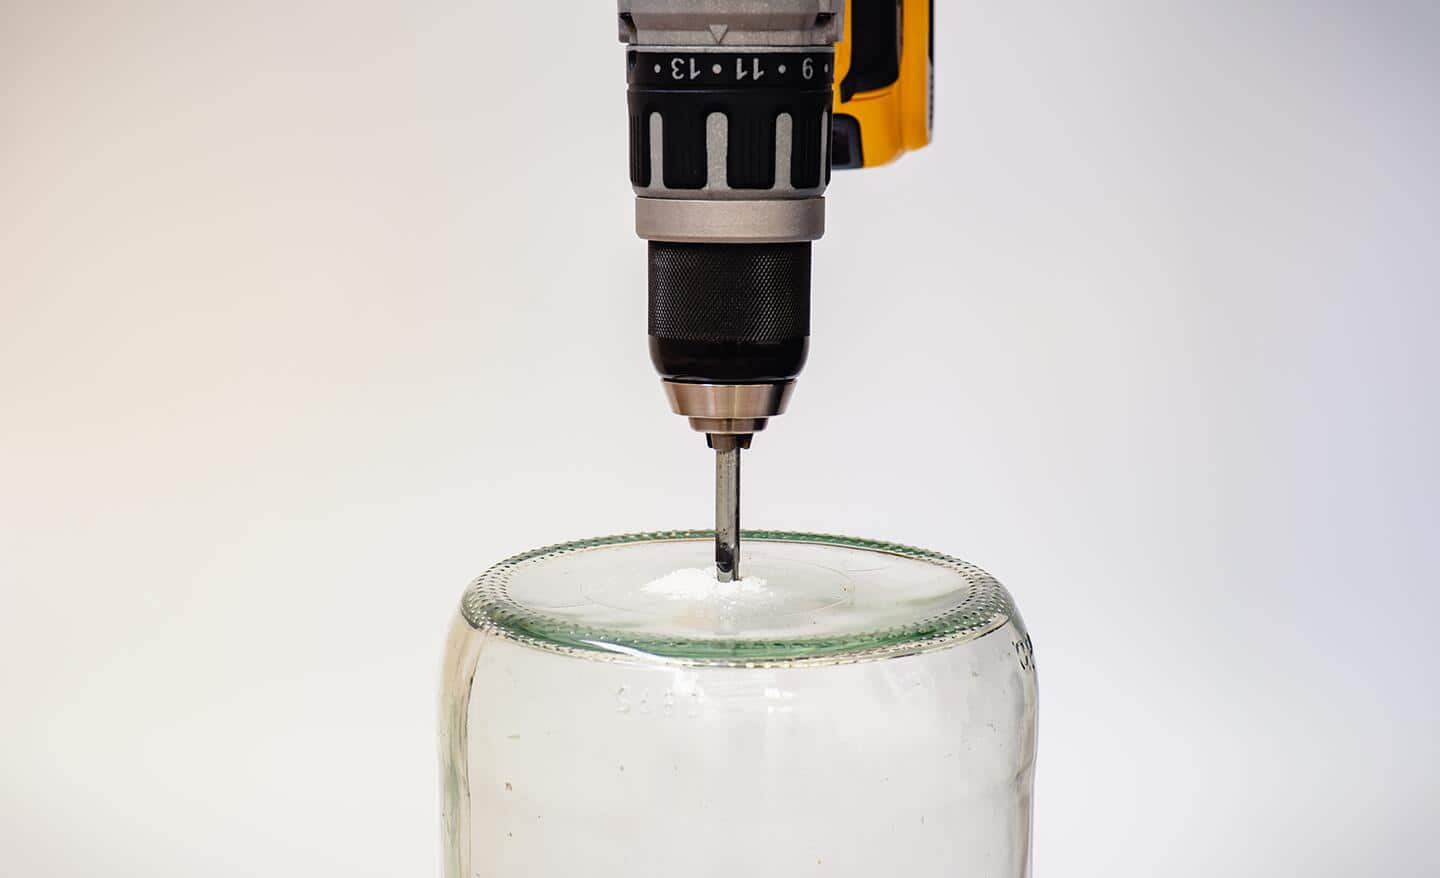
Image Source: dam.thdstatic.com
Deciphering the Art of Glass Drilling
Drilling glass is a skill that combines precision with understanding the material’s fragility. It’s about controlling the process to create a clean hole without causing stress fractures or complete breakage. This involves selecting the correct tools, managing speed and pressure, and using appropriate cooling methods.
Essential Glass Drilling Tools
Having the right equipment is the first step to success. Using the wrong tools can lead to frustration and broken glass.
The All-Important Glass Drill Bit
The type of drill bit you use is paramount. Standard metal or wood drill bits are not designed for glass and will chip or shatter it.
- Diamond-Coated Drill Bits: These are the champions of glass drilling. The diamond particles electroplated onto the bit’s tip are incredibly hard, allowing them to grind away the glass. They are ideal for most glass types and thicknesses. They come in various sizes, from tiny bits for small projects to larger ones for significant holes.
- Carbide-Tipped Drill Bits (Glass and Tile Bits): While diamond bits are superior, carbide-tipped bits are a more budget-friendly option for softer glass types or occasional use. They have a spear-shaped tip designed to cut through brittle materials. However, they wear down faster than diamond bits and require more careful handling.
Supporting Glass Drilling Tools
Beyond the drill bit itself, several other tools will make your job much easier and safer.
- Electric Drill: A variable-speed drill is highly recommended. This allows you to start at a slow speed and gradually increase it as needed. A cordless drill offers mobility, while a corded one provides consistent power.
- Drill Press: For maximum stability and control, especially for larger projects or when drilling multiple holes, a drill press is invaluable. It ensures the drill bit remains perpendicular to the glass surface.
- Lubricant/Coolant: This is absolutely critical. Glass drilling generates a lot of heat, which can cause the bit and the glass to overheat, leading to cracking.
- Water: Simple water is often sufficient for smaller jobs and thinner glass.
- Cutting Oil/Lubricating Spray: These specialized fluids provide better cooling and lubrication, especially for thicker glass or prolonged drilling.
- Template or Guide: To prevent the drill bit from wandering when you start drilling, a template or guide is essential. You can make one from plywood, plastic, or even a piece of duct tape.
- Safety Gear: This is non-negotiable.
- Safety Glasses or Goggles: Protect your eyes from glass shards.
- Gloves: Protect your hands from sharp edges.
- Dust Mask: While glass dust is minimal, it’s good practice to wear one.
- Clamps: To secure the glass to your work surface and prevent it from moving during drilling.
- Sponge or Spray Bottle: For applying coolant.
- Container: To catch the coolant and glass dust.
Mastering Glass Drilling Techniques
The “how-to” of drilling glass is where the expertise comes into play. It’s about a methodical approach that prioritizes control and cooling.
Preparing Your Workspace and Glass
Proper preparation is key to drilling glass without cracking.
- Clean the Glass: Ensure the surface where you plan to drill is clean and free of dirt, oil, or debris. This helps the drill bit grip the surface and prevents contamination.
- Mark Your Spot: Use a permanent marker or a wax pencil to precisely mark the drilling location.
- Create a Starting Point (Optional but Recommended): For very thin glass or when starting with a new bit, you can create a small indentation at your mark using a center punch. A light tap is sufficient; you don’t want to crack the glass. Alternatively, you can build a small dam around the drilling area using putty or modeling clay. This dam will hold the coolant in place.
- Secure the Glass: This is crucial. Clamp the glass firmly to a stable work surface. Place a piece of scrap wood or a thick towel underneath the glass to provide support and absorb some of the drilling pressure. Ensure the clamps are not directly over the drilling area and don’t overtighten, which could stress the glass.
The Drilling Process: Step-by-Step
Here’s a breakdown of the actual drilling process for achieving successful glass drilling.
Step 1: Setting Up for Success
- Choose the Right Bit: Select your diamond-coated or carbide-tipped drill bit according to the glass type and desired hole size.
- Set Your Drill: Ensure your drill is set to its lowest speed setting.
- Apply Coolant: Have your water or cutting fluid ready. A spray bottle or a sponge is ideal for applying it directly to the drilling area.
Step 2: The Initial Touchdown
- Position the Bit: Place the tip of the drill bit directly on your marked spot.
- Start Slowly: Begin drilling at an extremely slow speed. Let the bit make contact gently.
- Create a Pilot Indentation: Allow the bit to create a slight indentation in the glass. This helps prevent the bit from skipping.
Step 3: The Drilling Action
- Maintain Constant Coolant: Continuously apply coolant to the drilling site. If using a dam, keep it filled. If not, periodically spray or sponge water onto the bit and glass. The coolant should keep the area wet but not flooded.
- Apply Light, Steady Pressure: This is where patience is key. Avoid applying heavy pressure. Let the drill bit do the work. Imagine you are gently grinding through the glass rather than forcing your way through it.
- Occasional “Pecking” (Optional): For thicker glass or to clear debris, you can periodically lift the drill bit slightly from the hole, allowing coolant to flush out glass dust. Do this gently without removing the bit completely from the hole.
- Drill from Both Sides (for thicker glass): If you are drilling through thicker glass (say, over 1/4 inch), consider drilling halfway through from one side, then flipping the glass over and drilling from the other side to meet the first hole. This reduces the risk of chipping on the exit side. Make sure to re-align your marks carefully.
Step 4: Breaking Through
- Ease Up as You Approach the Other Side: As you feel the drill bit about to break through the other side, significantly reduce pressure. This prevents chipping and splintering on the exit.
- Let the Bit Egress Gently: Allow the bit to finish the hole with minimal pressure.
- Clean the Hole: Once the hole is complete, carefully remove the drill bit while the drill is still running at a slow speed. Flush the hole with water to remove any remaining glass dust.
Drilling Thick Glass: Special Considerations
Drilling thick glass presents a greater challenge due to increased heat and the potential for stress.
- Use Diamond Bits Exclusively: For thick glass, diamond-coated bits are almost always the best choice due to their durability and cutting efficiency.
- Ample Lubrication: Ensure you are using a generous amount of coolant. Consider using a specialized cutting oil designed for glass or stone.
- Slower Speeds and Less Pressure: Drill at the slowest possible speed and apply very light, consistent pressure.
- Drill Press is Highly Recommended: The stability of a drill press is invaluable when dealing with thicker glass.
- Pecking Technique: Employ the pecking technique more frequently to clear debris and allow the coolant to reach the cutting surface.
- Patience is Paramount: Drilling thick glass can take a significant amount of time. Do not rush the process.
Drilling Thin Glass: Delicate Handling
Thin glass is more prone to cracking from vibration and uneven pressure.
- Use a Template or Guide: A good guide is essential to prevent the bit from wandering. A simple masking tape guide can work by providing a slight grip.
- Gentle Pressure: Apply the lightest possible pressure. The weight of the drill itself might be enough.
- Start Very Slowly: Begin at an ultra-slow speed to create a stable starting point.
- Coolant is Still Important: Even thin glass generates heat. Keep the area cool with water.
- Avoid Over-Tightening Clamps: Clamps can create stress points that lead to cracks. Be gentle.
- Consider a Diamond Hole Saw: For larger holes in thin glass, a diamond hole saw can be more effective than a standard bit.
Maintaining Your Glass Drill Bits
Proper maintenance ensures your drill bits last longer and perform better.
- Cooling: Always keep diamond bits cool when in use. Heat is their enemy.
- Cleaning: After each use, rinse your drill bits thoroughly with water to remove any glass dust or residue.
- Storage: Store your bits in a dry place, preferably in their original packaging or a designated bit holder, to prevent damage.
Troubleshooting Common Glass Drilling Issues
Even with the best intentions, you might encounter problems. Here’s how to address them.
Glass Cracking During Drilling
- Cause: Too much pressure, excessive speed, inadequate cooling, starting the drill bit on a non-flat surface, or stress from clamping.
- Solution: Reduce pressure, slow down the drill, ensure constant coolant flow, and use a stable starting point and secure clamping.
Bit Not Cutting Effectively
- Cause: Dull bit (especially carbide), insufficient speed, or lack of coolant.
- Solution: Ensure you are using a diamond bit. If using carbide, try a new bit. Increase speed slightly and ensure adequate coolant is being applied.
Chipping on Entry or Exit
- Cause: Starting the drill at too high a speed, too much pressure on exit, or not using a guide.
- Solution: Start at a very slow speed. Ease pressure as you approach the exit. Use a template or guide.
Frequently Asked Questions About Drilling Glass
Here are answers to some common questions people have when they want to drill glass.
Q1: Can I use my regular drill for drilling glass?
A: Yes, you can use a standard electric drill, but it must have a variable speed setting. You’ll need to set it to its lowest speed. It’s also highly recommended to have a drill press for better control, especially for larger or more precise holes.
Q2: What is the best method for drilling glass?
A: The best method involves using a diamond-coated drill bit, a variable-speed drill (or drill press), a constant supply of coolant (water or cutting oil), and applying light, steady pressure. Proper preparation and securing the glass are also crucial.
Q3: How do I prevent glass from cracking when drilling?
A: Prevent cracking by using the correct diamond drill bit, starting at a very slow speed, applying minimal and steady pressure, ensuring constant cooling, and securing the glass properly without overtightening clamps. Drilling halfway from each side for thicker glass also helps.
Q4: What kind of drill bit do I need for glass?
A: You need a diamond-coated drill bit or a carbide-tipped glass and tile bit. Diamond bits are generally superior and recommended for most applications due to their hardness and durability.
Q5: Do I need special tools for DIY glass drilling?
A: For DIY glass drilling, the essential tools are a diamond drill bit, a variable-speed drill, a coolant source, and safety gear. Clamps and a template or guide are also highly beneficial for a smoother process.
Q6: How deep can I drill into glass?
A: The depth you can drill depends on the length of your drill bit. The main challenge is maintaining consistent cooling and pressure as you drill deeper, which can increase the risk of breakage. For very deep holes, specialized equipment might be necessary.
Q7: What if I don’t have coolant?
A: While not ideal, if you absolutely cannot access coolant, you can try using a very small amount of water applied sparingly, or even a light oil. However, this significantly increases the risk of overheating and cracking the glass. It’s strongly advised to use proper coolant.
Conclusion: Achieving Pristine Holes in Glass
Drilling glass is a rewarding skill that opens up a world of creative possibilities. By arming yourself with the right information, tools, and a patient approach, you can confidently tackle projects that involve making holes in glass. Remember, the keys to success are slow and steady progress, constant cooling, and a healthy respect for the material’s delicate nature. With practice, you’ll find yourself expertly creating clean, precise holes in glass for all your creative endeavors.