
Image Source: i.ytimg.com
How Do You Charge A Black And Decker Drill: Step-by-Step
Can you charge a Black and Decker drill battery? Yes, you can charge a Black and Decker drill battery using the appropriate Black and Decker battery charger designed for your specific drill model. This guide will walk you through the straightforward process of keeping your Black and Decker cordless drill powered up and ready for any task. Whether you’re a seasoned DIY enthusiast or just starting with home improvement projects, knowing how to properly charge your drill is essential for its longevity and your productivity. We’ll cover everything from connecting the charger to interpreting its indicator lights, ensuring you get the most out of your Black and Decker power tool charger.
Gathering Your Charging Essentials
Before you can begin to charge your Black and Decker drill battery, it’s important to ensure you have the correct equipment. Using the wrong charger can damage your battery or even pose a safety risk. Always refer to your drill’s manual for specific charging instructions and compatibility.
Key items you will need:
- Your Black and Decker Drill: The tool itself, which houses the battery.
- The Black and Decker Battery Charger: This is the specific charger that came with your drill or a compatible replacement. It’s crucial to use the charger designated for your Black and Decker drill battery.
- A Working Power Outlet: Ensure the outlet you plan to use is functioning correctly and is accessible.
Why Using the Right Charger Matters:
Black and Decker produces a range of drills, and their batteries and chargers are often model-specific. A charger designed for a Black and Decker 18V drill battery, for instance, may not be suitable for a 12V model. Mismatched chargers can lead to:
- Overcharging: This can degrade the battery’s capacity and lifespan.
- Undercharging: The battery may not reach its full potential, leading to poor performance.
- Damage to the Battery or Charger: Incorrect voltage or amperage can cause irreparable harm.
- Safety Hazards: In rare cases, using the wrong charger could lead to overheating or other dangerous situations.
Always double-check the model number on both your drill and your charger to confirm they are compatible. If you’ve misplaced your original charger, visit the Black and Decker website or a reputable hardware store to find the correct Black and Decker power tool charger for your specific drill model.
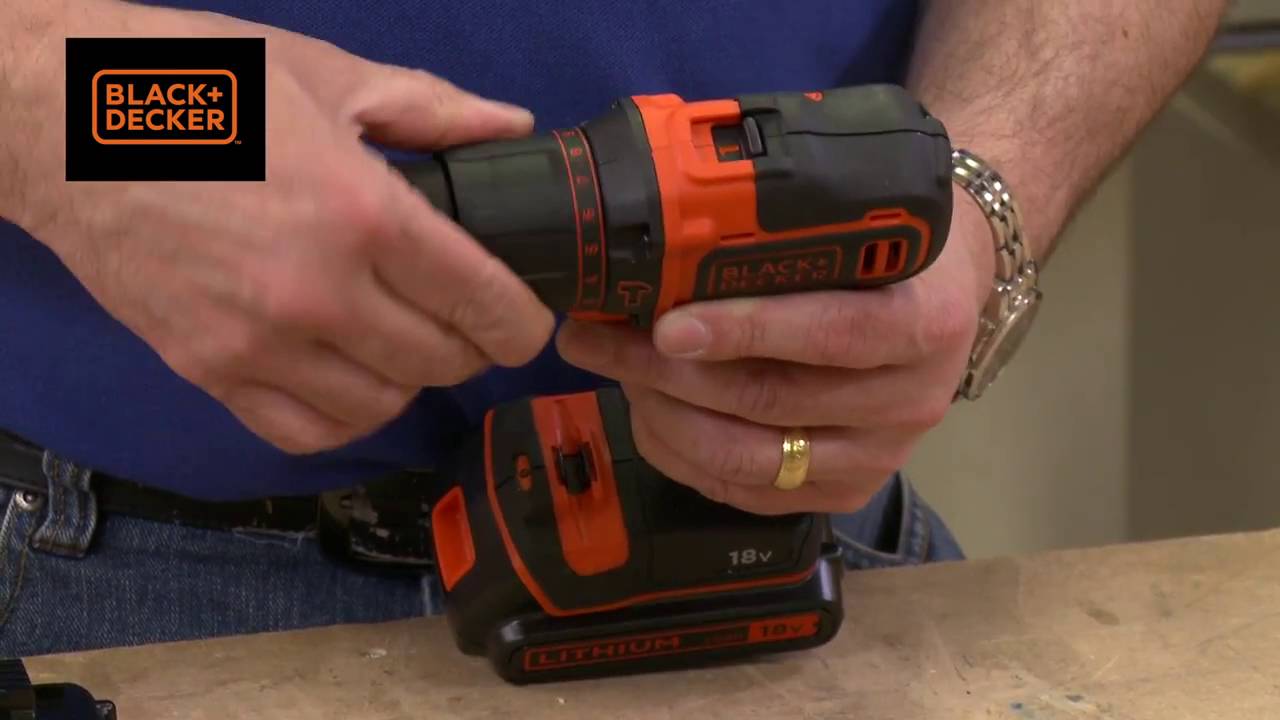
Connecting the Black and Decker Drill Battery to the Charger
The process of connecting your Black and Decker drill battery to its charger is usually very simple. Most Black and Decker cordless drill charging systems are designed for ease of use.
Step-by-step connection:
- Locate the Battery: Remove the Black and Decker drill battery from your drill. Most batteries have a release button or lever on the back or side. Press this and slide the battery out.
- Identify the Charging Port: Examine your Black and Decker battery charger. You’ll see a slot or cradle designed to accept the battery. The shape of this port will typically match the shape of the battery’s connection terminals.
- Align the Battery: Carefully align the battery with the charging port on the Black and Decker battery charger. Look for guides or notches that help ensure you insert it correctly.
- Insert the Battery: Gently but firmly slide the battery into the charging port until it clicks into place. This click indicates that the battery is securely seated and making proper contact with the charger’s terminals.
- Ensure it’s Seated: Give the battery a slight nudge to confirm it’s fully inserted and won’t easily fall out.
Important Considerations:
- Cleanliness: Before inserting the battery, check the battery terminals and the charger’s contacts for any dust or debris. You can gently wipe them with a dry, lint-free cloth if necessary. Dirty contacts can prevent proper charging.
- Orientation: Batteries are designed to be inserted in only one direction. Do not force the battery if it doesn’t seem to fit. Realign it and try again.
Understanding the Black and Decker Charger Indicator Lights
One of the most helpful features of a Black and Decker power tool charger is its indicator lights. These lights provide visual feedback on the charging status of your Black and Decker drill battery. Familiarizing yourself with these indicators will help you know when your battery is charging, fully charged, or if there might be an issue.
While specific light patterns can vary slightly between different Black and Decker models, here’s a general guide to common indicators:
- Solid Red Light: Typically indicates that the battery is currently charging.
- Flashing Red Light: Sometimes this can signal a problem, such as the battery being too hot or too cold to charge, or a faulty battery. Consult your drill’s manual for specific interpretations.
- Solid Green Light: This usually means the Black and Decker drill battery is fully charged and ready to use.
- Flashing Green Light: This can sometimes indicate that the battery is in a maintenance mode or has reached a certain level of charge, but is not yet at 100%.
- No Light: If no lights are illuminated, it could mean the charger isn’t receiving power, the battery isn’t properly seated, or there’s an issue with the charger or battery itself.
What to do if the lights are unusual:
If you see unusual flashing patterns or no lights at all, try the following:
- Reseat the Battery: Remove the battery and reinsert it, ensuring it clicks securely into place.
- Check Power Source: Make sure the charger is plugged into a working outlet. Try plugging another device into the same outlet to test it.
- Consult the Manual: Your Black and Decker drill’s user manual will have a specific section detailing the meaning of the Black and Decker charger indicator lights for your model. This is the most reliable source of information.
- Contact Support: If you suspect a faulty battery or charger, it’s best to contact Black and Decker customer support or a qualified repair service.
The Black and Decker Cordless Drill Charging Process: What to Expect
Once your Black and Decker drill battery is properly connected to the Black and Decker battery charger and the charger is powered on, the charging process begins. Here’s what you can generally expect:
Initial Charging Phase:
- The indicator light on the Black and Decker battery charger will typically turn on, signaling that the charging process has commenced. As mentioned, this is often a solid red light.
- The charger works by supplying a controlled electrical current to the battery. The internal circuitry of both the battery and the charger manages this flow to optimize charging speed and prevent damage.
During Charging:
- You may notice that the battery or the charger itself feels slightly warm to the touch. This is normal, as electrical resistance during charging generates heat. However, if either becomes excessively hot, immediately unplug the charger and allow them to cool down before attempting to charge again.
- The Black and Decker drill charging time will vary depending on the battery’s capacity (measured in Amp-hours or Ah) and its current charge level. A completely depleted battery will naturally take longer to charge than one that is only partially discharged.
Completion of Charging:
- As the Black and Decker drill battery approaches full charge, the charger’s intelligent system will gradually reduce the charging current.
- The indicator light will typically change to signal that charging is complete. This is commonly a solid green light.
- Once the indicator light shows a full charge, you can safely remove the battery from the charger. It’s generally not necessary or beneficial to leave a fully charged battery connected to the charger for extended periods, although most modern Black and Decker power tool chargers have a “trickle charge” or “maintain” mode that can keep the battery topped up without causing damage. However, for optimal battery health, it’s best practice to remove the battery once it’s fully charged.
Factors Influencing Black and Decker Drill Battery Charging Time
Several factors can affect how long it takes to charge a Black and Decker drill battery. Understanding these can help you manage your expectations and plan your work accordingly.
Key factors influencing Black and Decker drill charging time:
- Battery Capacity (Ah): This is the most significant factor. Batteries with higher Amp-hour ratings store more energy and will take longer to charge than those with lower ratings. For example, a Black and Decker 18V drill battery with a 4.0Ah capacity will take longer to charge than a 2.0Ah version of the same voltage.
- Battery’s Current Charge Level: A battery that is almost fully discharged will require more time to charge than one that has only been used lightly and still retains some charge.
- Charger’s Charging Rate: Black and Decker chargers are designed to match their battery systems. Faster chargers can significantly reduce charging time, while older or standard chargers might take longer.
- Battery Age and Condition: As batteries age and undergo many charge cycles, their ability to hold a charge can diminish. An older battery might charge faster simply because it can’t accept as much energy, or it might charge slower if its internal resistance has increased.
- Ambient Temperature: Extreme temperatures (very hot or very cold) can affect charging speed and efficiency. Most chargers have built-in safety features to slow down or stop charging if the battery temperature is outside the optimal range.
- Battery Chemistry: While most modern Black and Decker drills use Lithium-Ion (Li-ion) batteries, older models might have used Nickel-Cadmium (NiCad) or Nickel-Metal Hydride (NiMH) batteries. Li-ion batteries generally charge faster and hold their charge better than older chemistries.
General Charging Time Estimates:
It’s difficult to give exact charging times without knowing your specific battery and charger model, but here are some general estimates for common Lithium-Ion batteries:
- 1.5Ah – 2.0Ah Batteries: Typically 30-60 minutes for a full charge.
- 3.0Ah – 4.0Ah Batteries: Can range from 60-120 minutes for a full charge.
- 5.0Ah and higher Batteries: May take 90-180 minutes or more.
Always refer to your specific Black and Decker drill’s manual or the specifications listed on the battery and charger for more precise Black and Decker drill charging time information.
Maximizing Battery Life: Tips for Charging and Usage
Proper charging habits and thoughtful usage can significantly extend the lifespan of your Black and Decker drill battery, ensuring it performs reliably for years to come.
Best practices for charging:
- Avoid Overcharging (Usually Not an Issue with Modern Chargers): While modern Li-ion battery systems and their associated chargers are designed to prevent overcharging, it’s still a good habit to remove the battery once it’s fully charged. Leaving it connected for days or weeks unnecessarily isn’t ideal.
- Charge Before Storage: If you plan to store your drill for an extended period, ensure the battery has a partial charge (around 50-70%) before putting it away. Storing a completely depleted battery can lead to deep discharge, which can damage the battery.
- Use the Correct Charger: As emphasized earlier, always use the Black and Decker battery charger that came with your drill or a certified compatible replacement.
- Charge in Moderate Temperatures: Avoid charging batteries in extreme heat or cold. The ideal temperature range is typically between 50°F and 77°F (10°C and 25°C).
Best practices for usage:
- Don’t Fully Deplete Batteries: While Li-ion batteries don’t suffer from the “memory effect” like older NiCad batteries, it’s still beneficial to avoid draining them completely every time. It’s better to recharge when you notice a significant drop in power.
- Avoid Extreme Heat During Use: Prolonged use that causes the drill or battery to overheat can degrade battery performance and lifespan. If the tool feels excessively hot, let it cool down.
- Keep Batteries Clean: Ensure the battery terminals remain clean and free from debris.
- Store Batteries Properly: When storing batteries, keep them in a cool, dry place. Avoid storing them in direct sunlight or damp environments.
Troubleshooting Common Black and Decker Drill Charging Issues
Even with the best care, you might occasionally encounter problems when trying to charge your Black and Decker drill battery. Here are some common issues and how to address them.
Issue: Battery not charging, no lights on the charger.
- Possible Cause: No power to the outlet, charger not plugged in properly, battery not seated correctly.
- Solutions:
- Verify the outlet has power by plugging in another device.
- Ensure the charger is firmly plugged into the outlet and the power cord is securely connected to the charger itself.
- Remove the Black and Decker drill battery and reinsert it, making sure it clicks into place.
- Check the charger for any visible damage.
Issue: Battery seems to charge, but doesn’t last long or has reduced power.
- Possible Cause: Battery is old and has reached the end of its lifespan, the battery is damaged, or it’s not fully charging.
- Solutions:
- This is often a sign that the Black and Decker drill battery replacement is needed. Batteries have a finite number of charge cycles.
- Ensure you are using the correct Black and Decker battery charger and it’s functioning properly.
- Try charging a different, known-good battery if you have one.
- Clean the battery terminals and charger contacts.
Issue: Charger indicator lights are flashing in an unusual pattern.
- Possible Cause: Battery temperature is too high or too low, or there’s a fault with the battery or charger.
- Solutions:
- Allow the battery to cool down or warm up to room temperature before attempting to charge again.
- Remove the battery and check for any physical damage.
- Consult the Black and Decker drill manual for the specific meaning of the flashing lights.
- If the problem persists, the battery or charger may need replacement.
Issue: Charger is making strange noises or smells hot.
- Possible Cause: Internal fault within the charger.
- Solution: Immediately unplug the charger and do not use it. This could be a fire hazard. Contact Black and Decker customer support for assistance or to purchase a replacement Black and Decker power tool charger.
When to Consider Black and Decker Drill Battery Replacement:
If you’ve tried all troubleshooting steps and your battery still doesn’t hold a charge or perform as it should, it’s likely time for a Black and Decker drill battery replacement. You can usually find replacement batteries on the Black and Decker website, through authorized retailers, or on online marketplaces. Always ensure you are purchasing a genuine Black and Decker battery or a high-quality compatible replacement.
Frequently Asked Questions (FAQ)
Q1: How long does it typically take to charge a Black and Decker drill battery?
A1: The Black and Decker drill charging time varies depending on the battery’s capacity (Ah), its current charge level, and the charger’s output. For common Lithium-Ion batteries, expect anywhere from 30 minutes to a few hours for a full charge.
Q2: Can I use a charger from a different brand for my Black and Decker drill battery?
A2: It is strongly advised not to use chargers from different brands. Compatibility issues can lead to inefficient charging, damage to the battery or charger, or safety hazards. Always use the designated Black and Decker battery charger.
Q3: Is it bad to leave the Black and Decker drill battery on the charger overnight?
A3: Modern Black and Decker Lithium-Ion battery systems are designed with safeguards to prevent overcharging. However, for optimal battery health, it’s best practice to remove the battery once the charger indicates it’s fully charged. Leaving it connected for extended periods, while generally safe with modern tech, isn’t necessary.
Q4: My Black and Decker charger isn’t lighting up. What should I do?
A4: First, ensure the charger is plugged into a working power outlet. Then, check that the Black and Decker drill battery is properly seated in the charger. If neither of these resolves the issue, there might be a problem with the charger or the battery itself. Consult your manual or contact Black and Decker support.
Q5: How do I know if my Black and Decker drill battery needs to be replaced?
A5: Signs that your Black and Decker drill battery replacement is needed include the battery not holding a charge for long, the drill losing power quickly, or the battery failing to charge at all after trying different troubleshooting steps.
Q6: What are the benefits of using a Black and Decker power tool charger?
A6: Using a dedicated Black and Decker power tool charger ensures optimal charging speeds, protects the battery from damage, and extends the overall lifespan of your Black and Decker drill battery. They are engineered to work specifically with your drill’s power system.