
Yes, you can drill through ceramic tile safely and effectively, provided you use the right tools and techniques. This guide will walk you through the entire process, ensuring you achieve clean holes without damaging your tile.
Drilling into ceramic tile might seem daunting, but with the correct approach, it’s a manageable DIY task. Whether you need to hang a shelf, mount a towel rack, or install a fixture, knowing how to drill through ceramic tile safely is a valuable skill. The key lies in preparation, the right equipment, and a steady hand. Let’s dive into everything you need to know to tackle this project with confidence.
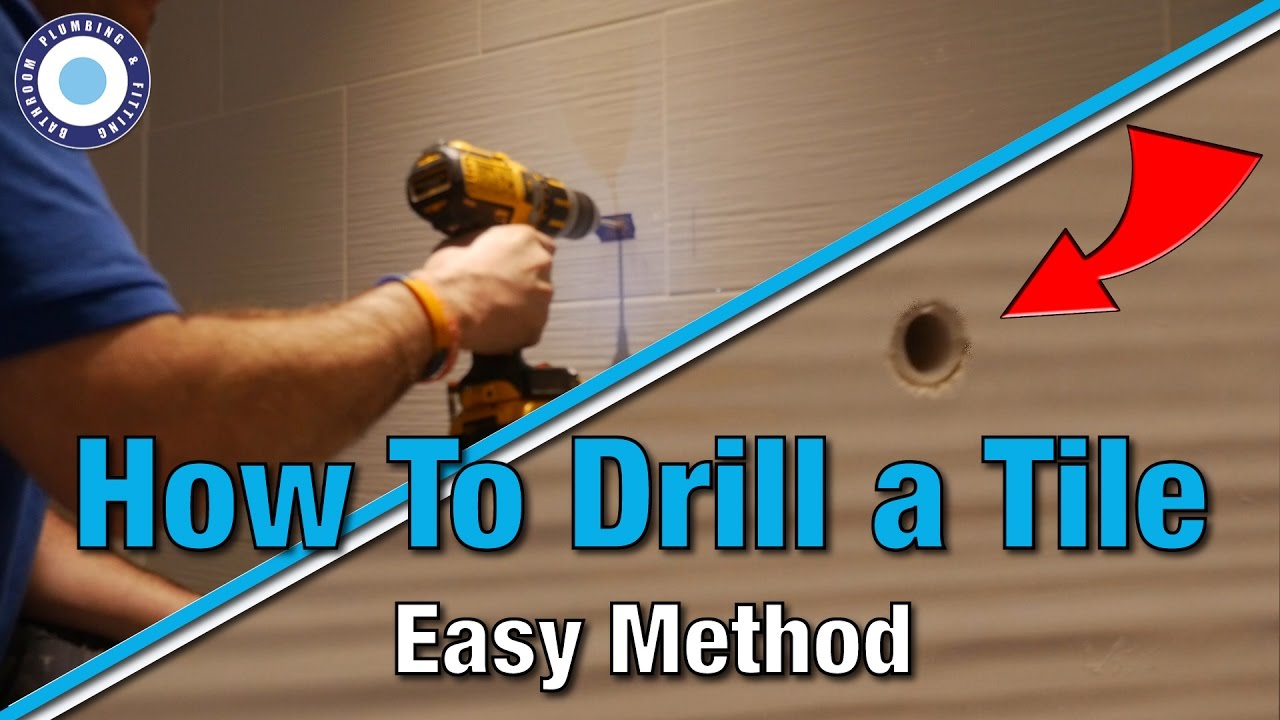
Image Source: i.ytimg.com
Gathering Your Essential Tools and Materials
Before you even think about picking up a drill, ensure you have all the necessary supplies. Having everything ready will make the process smoother and safer.
The Right Drill Bits for Ceramic Tile
The type of drill bit you use is crucial for success. Standard bits designed for wood or metal will likely shatter the tile.
-
Diamond Drill Bits: These are the champions for drilling ceramic tile. They feature a diamond-coated tip that grinds through the hard surface rather than cutting. This friction-based action is much gentler on the tile.
- When to Use: Excellent for all types of ceramic tile, porcelain, glass, and stone.
- Key Features: Often shaped like a spearhead or cone, they create a precise hole by grinding away the material.
- Maintenance: Keep them cool with water or a lubricant to prevent overheating and extend their lifespan.
-
Glass Drill Bits: Similar to diamond bits, glass drill bits also have a carbide or diamond tip. They are specifically designed for brittle materials like glass and can also be very effective on ceramic tile.
- When to Use: Good for thinner ceramic tiles or when a very precise, small hole is needed.
- Key Features: Often have a spear-like tip that requires a slow, steady drilling motion.
-
Masonry Bits: While not ideal for ceramic tile, a masonry bit can be used in a pinch, especially if it’s a higher-quality carbide-tipped one. However, expect slower progress and a higher risk of chipping.
- When to Use: Best reserved for grout or very soft ceramic tiles. Not recommended for glazed or hard porcelain.
- Key Features: Have a hardened tip designed to chip away at materials like brick and concrete.
-
Hole Saws (for larger holes): If you need to create a larger opening, like for a pipe or electrical box, a hole saw with a diamond-coated edge is the way to go.
- When to Use: For openings larger than what standard drill bits can create.
- Key Features: A circular blade with diamond grit on the cutting edge.
Your Drill
- Corded Drill: Offers consistent power, which is beneficial for drilling through tough materials.
- Cordless Drill: Provides portability. Ensure it has enough power (voltage) and is fully charged.
- SDS Drill: While powerful, an SDS drill (rotary hammer) is generally overkill for ceramic tile. If you have one, use it on a non-hammering setting, but be aware it can increase the risk of chipping if not handled carefully. For most ceramic tile drilling, a standard drill is sufficient.
Other Necessary Supplies
- Safety Glasses: Absolutely essential to protect your eyes from flying tile shards and dust.
- Gloves: Protect your hands from sharp edges and potential heat.
- Mask: A dust mask is important to avoid inhaling silica dust, which can be harmful.
- Masking Tape or Painter’s Tape: Helps prevent the drill bit from slipping on the smooth tile surface.
- Water Source: A spray bottle with water or a trickle of water is crucial for wet drilling.
- Drill Guide or Template: Helps maintain a stable drilling angle and prevent the bit from wandering.
- Measuring Tape and Pencil/Marker: For accurate placement of the hole.
- Screwdriver or Impact Driver (optional): For securing screws after drilling.
- Vacuum Cleaner: To clean up dust and debris.
- Chisel and Hammer (for pilot hole, optional): For creating a starting point if needed.
Preparing Your Workspace and Tile
Proper preparation is paramount for a successful and safe drilling experience.
Marking the Drilling Spot
Precision is key. Use your measuring tape and pencil to mark the exact center of where you want the hole.
- Tip: Draw a small “X” at the center point.
Creating a Guide with Tape
To prevent your drill bit from skittering across the smooth tile surface and to reduce chipping, apply masking tape or painter’s tape over your marked spot.
- Apply a piece of tape over the marked “X.”
- Use your pencil to re-mark the center of the “X” on top of the tape. This gives your drill bit a better grip.
Considering the Grout Line
If your hole needs to be near a grout line, be extra cautious. Drilling through grout is easier than through tile, but the transition can cause chipping.
- Option 1: Drill Through Grout: If possible, aim to start your hole in the grout line. This is generally easier and less likely to cause tile damage.
- Option 2: Drill Through Tile: If you must drill directly into the tile, proceed with extreme care, especially near the edge of a tile.
Pilot Hole Creation (Optional but Recommended)
For larger holes or very hard tiles, creating a pilot hole can be beneficial.
- Method 1 (Gentle): Use a small carbide-tipped masonry bit or even a sharp nail and gently tap it with a hammer to create a tiny indentation at your marked spot. This provides a starting point for your main drill bit.
- Method 2 (More Involved): Some professionals use a small chisel to create a shallow divot. This must be done with extreme care to avoid cracking the tile.
The Drilling Process: Step-by-Step
Now that you’re prepared, let’s get drilling. The goal is slow, steady progress and heat management.
Step 1: Secure the Drill
Place the tip of your chosen drill bit (diamond or glass bit) precisely on the marked spot.
Step 2: Start Slow and Steady
Begin drilling at a very slow speed. This is crucial to prevent the bit from jumping or overheating.
- No Hammer Setting: Ensure your drill is not on the hammer or impact setting. This is for masonry only.
Step 3: Introduce Water for Wet Drilling
Wet drilling is highly recommended for ceramic tile and essential for glass or porcelain. Water acts as a coolant, preventing the drill bit and the tile from overheating, which can lead to cracks.
- Spray Bottle Method: Periodically spray water onto the drilling area as you work.
- Trickle Method: Some people create a small dam around the hole with plumber’s putty or clay and let a slow trickle of water flow into it.
- DIY Water Reservoir: You can also use a small, empty plastic bottle with a hole in the cap, allowing water to drip slowly onto the drilling site.
Why Wet Drilling is Important:
| Benefit | Explanation |
|---|---|
| Cooling | Prevents excessive heat buildup, reducing the risk of cracking the tile. |
| Lubrication | Helps the drill bit grind more smoothly, prolonging its life. |
| Dust Control | Minimizes airborne silica dust, making the process safer and cleaner. |
| Chip Reduction | A wet environment can help to bind small chips, leading to cleaner edges. |
Step 4: Apply Gentle, Consistent Pressure
Once the hole starts to form, you can gradually increase the speed slightly, but always maintain gentle, consistent pressure. Let the drill bit do the work; don’t force it.
Step 5: Clean Out Debris Periodically
As you drill, dust and small pieces of tile will accumulate. Periodically lift the drill bit slightly to allow water and debris to escape. This also helps to prevent the bit from getting bogged down.
Step 6: Reaching the Other Side
As you get close to breaking through the other side of the tile, reduce your speed again. This is a critical moment where chipping is most likely to occur.
Step 7: Finishing the Hole
Once the drill bit has passed through, continue to run the drill slowly for a moment with water to clear out any remaining dust. Carefully remove the drill bit.
Step 8: Cleaning Up
Use a damp cloth or sponge to wipe away any remaining dust and water. Vacuum the area thoroughly.
Dealing with Different Tile Types and Situations
While the general process remains the same, some tiles require extra attention.
Porcelain Tile
Porcelain is denser and harder than standard ceramic tile.
- Use: Diamond drill bits are absolutely essential.
- Technique: Patience is key. Drill at a slower speed with ample water. A pilot hole can be very helpful.
Glazed Ceramic Tile
The glaze on ceramic tiles can be prone to chipping.
- Use: Diamond or glass drill bits.
- Technique: Start with tape and a very slow speed. Keep the drilling area wet. Avoid excessive pressure.
Textured or Uneven Tile Surfaces
If the tile has a textured surface, it can be challenging to keep the drill bit centered.
- Use: A drill guide or template is highly recommended. This will help keep the bit perpendicular to the surface.
- Technique: Apply tape as usual. You might need to build up a small mound of plumber’s putty around the bit to create a stable base if a guide isn’t feasible.
Drilling Near the Edge of a Tile
This is where most accidents happen.
- Use: Extreme caution. Diamond bits are best.
- Technique: Drill at the slowest possible speed. Consider starting the hole with a small indentation using a nail and hammer. If you are only drilling into the grout and not the tile itself, you can often use a standard masonry bit, but proceed with care.
When to Consider Professional Tile Cutting Services
While DIY is often possible, for complex projects or very expensive tiles, it might be wise to consider professional services.
- Large Holes: If you need to cut large, irregular shapes or large diameter holes (beyond what a standard hole saw can manage), a tile saw or wet saw is required. This is specialized equipment.
- Precise Cutouts: For intricate designs or openings for plumbing, a professional using appropriate tile cutting tools will yield the best results.
- High-End Materials: If you are working with extremely fragile or expensive tiles, it might be worth outsourcing the cutting or drilling to avoid costly mistakes.
Troubleshooting Common Drilling Issues
Even with the best preparation, you might encounter minor problems.
Chipping
- Cause: Too much speed, too much pressure, dull drill bit, no water, drilling too fast when breaking through.
- Solution: Slow down, reduce pressure, use plenty of water, re-evaluate your drill bit’s condition, and go slowly as you break through.
Bit Stuck
- Cause: Overheating, excessive pressure causing the bit to bind.
- Solution: Stop drilling, carefully remove the bit, cool it down, and clear any debris from the hole. Restart at a slower speed.
Slow Progress
- Cause: Insufficient pressure, wrong drill bit, dull bit, tile is extremely hard (like porcelain).
- Solution: Apply gentle, consistent pressure. Ensure you are using the correct drill bit (diamond is best). Check if your bit needs replacement. If drilling porcelain, expect it to take time.
Maintaining Your Drill Bits
Proper care extends the life of your valuable diamond and glass drill bits.
- Cooling: Always use water or a coolant.
- Storage: Store bits in a dry place, away from moisture.
- Cleaning: After use, rinse them with water to remove any debris.
Safety First: A Comprehensive Checklist
Your safety is paramount. Always adhere to these guidelines:
- [ ] Wear safety glasses at all times.
- [ ] Wear gloves to protect your hands.
- [ ] Wear a dust mask to avoid inhaling silica dust.
- [ ] Ensure your drill is unplugged or battery removed before changing bits.
- [ ] Never use the hammer setting on your drill for tile.
- [ ] Keep your workspace clear of clutter.
- [ ] Have a fire extinguisher nearby, as electrical tools can sometimes be a risk. (While unlikely for tile, it’s a good general safety practice.)
- [ ] Ensure electrical cords are not in your work area where they can be damaged.
Frequently Asked Questions (FAQ)
Can I use a regular drill bit for ceramic tile?
No, regular drill bits (like those for wood or metal) are not designed for the hardness of ceramic tile. They will likely dull instantly, overheat, and shatter the tile, potentially causing injury. You must use specialized bits like diamond or glass drill bits.
What is the best drill bit for ceramic tile?
The best drill bit for ceramic tile is a diamond drill bit. Its diamond-coated tip grinds through the tile material effectively and with less risk of chipping compared to other types.
How do I stop the drill bit from slipping on ceramic tile?
Apply masking tape or painter’s tape to the tile where you intend to drill. Mark your drilling spot on the tape. This provides traction and prevents the bit from skittering. Alternatively, you can create a small indentation with a nail and hammer or a small chisel before drilling.
Do I need to use water when drilling ceramic tile?
Yes, wet drilling (using water) is highly recommended. Water acts as a coolant, preventing the drill bit and tile from overheating, which significantly reduces the risk of cracking. It also helps to control dust and prolong the life of your drill bit.
How fast should I drill into ceramic tile?
Always start drilling at a very slow speed. You can gradually increase the speed slightly once the hole has started, but maintain steady, controlled pressure. Avoid high speeds, as they generate excessive heat and increase the risk of chipping or cracking.
What if I need to drill a large hole in ceramic tile?
For larger holes, you’ll need a hole saw designed for tile or glass. These have a circular cutting edge coated with diamond grit. For very large or irregular openings, a tile saw or wet saw is typically required, which is a specialized tool.
Can I use an SDS drill for ceramic tile?
While an SDS drill is powerful, it’s generally not necessary and can even be risky for ceramic tile. If you do use one, ensure the hammer or rotary hammer function is turned OFF. Use a standard drill with the appropriate diamond bit at a slow speed for best results.
How do I drill through a tile already installed on a wall?
The process is the same as drilling through a loose tile. Ensure you have a secure grip on your drill and maintain control. Be extra cautious of the surrounding wall material if you are drilling near edges or corners.
What is the best way to drill through porcelain tile?
Porcelain is harder and denser than standard ceramic. You absolutely must use diamond drill bits and practice wet drilling with plenty of water. Drill slowly and steadily, and consider creating a pilot hole to help guide the bit. Patience is crucial.
Can I drill through a tile without chipping it?
Yes, by using the correct diamond or glass drill bits, starting slow, applying steady pressure, using wet drilling techniques, and being extra careful as you break through the other side, you can drill through ceramic tile with minimal to no chipping.
What is the difference between ceramic tile drilling and using a masonry bit?
Ceramic tile drilling specifically refers to creating holes in ceramic tiles. For this, diamond or glass drill bits are essential because they grind through the hard, brittle material. A masonry bit is designed to chip away at softer materials like brick, concrete, or mortar. While a high-quality masonry bit might be used for the grout between tiles, it’s not suitable for the tile itself and can easily damage it.