
Imagine a wood floor that shines like a mirror, resists spills, and stands up to everyday life with ease. Sounds amazing, right? But choosing the right epoxy for your wood floors can feel like navigating a maze. You want something durable and beautiful, but the sheer number of products and confusing jargon can leave you scratching your head. What if there was a way to cut through the noise and find the perfect epoxy that makes your floors look fantastic and last for years?
This post is your roadmap to understanding epoxy for wood floors. We’ll break down what makes it a great choice, explore the common worries people have when picking one, and show you how to avoid costly mistakes. By the time you finish reading, you’ll feel confident in your ability to select an epoxy that not only protects your precious wood but also transforms your space into something truly special.
Let’s dive in and discover how the right epoxy can bring new life to your wooden floors.
Our Top 5 Epoxy For Wood Floors Recommendations at a Glance
| Image | Product | Rating | Links |
|---|---|---|---|
 |
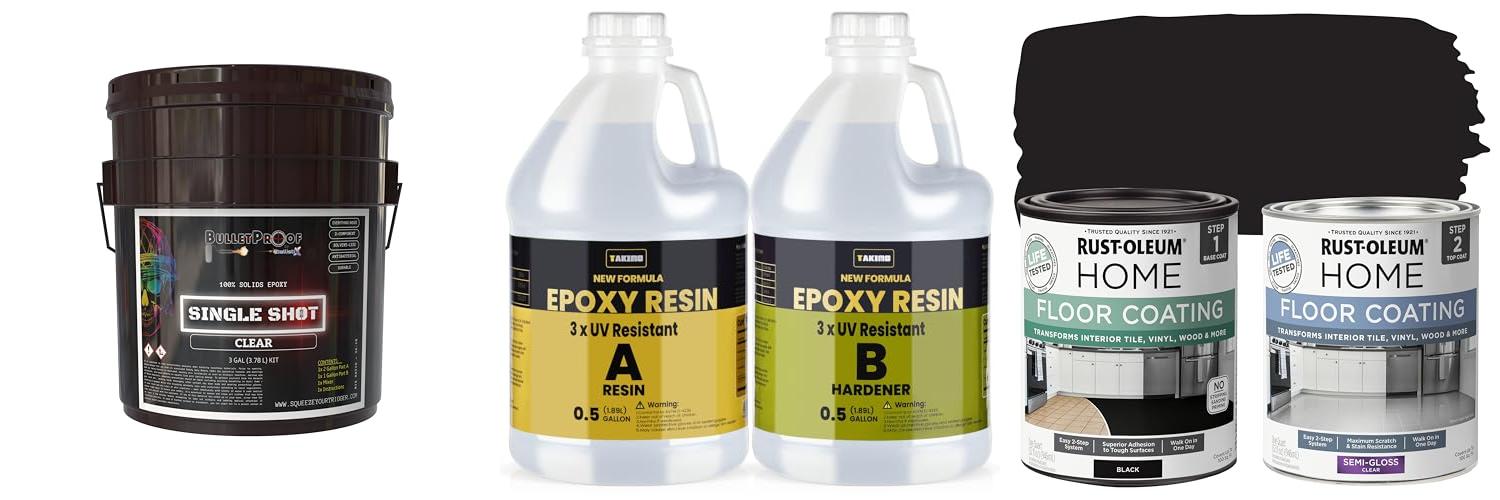
BP Resins: Single Shot | 9.1/10 | Check Price |
 |
TAKIMO 1 Gallon 3×UV Resistant Resin Kit | 9.1/10 | Check Price |
 |
Rust-Oleum 367605 Home Interior Floor Coating Kit | 8.6/10 | Check Price |
 |
Upgrade Epoxy Coloured Sand Floor Paint | 8.7/10 | Check Price |
 |
Clear Epoxy Resin Coating for Floors & Counter Tops | 8.6/10 | Check Price |
Top 5 Epoxy For Wood Floors Detailed Reviews
1. BP Resins: Single Shot
Rating: 9.4/10
The BP Resins: Single Shot |100% Solids Epoxy Resin Kit is a powerful tool for transforming and protecting your surfaces. This 3-gallon kit is designed for a clear, high-gloss finish that’s tough and looks great. It’s perfect for garages, wood projects, and even industrial floors. The kit comes with a free mixer, making application easier.
What We Like:
- This resin is 100% solids, meaning it’s very strong.
- It’s solvent-less and low VOC, making it safer to use.
- It creates a “bulletproof” coating that resists damage.
- You can use it on concrete, wood, acrylic, and more.
- It’s self-leveling, which helps create a smooth finish.
- It resists water spots and amine blushing.
- The surface is easy to clean and resists chemicals and impacts.
- Multiple layers can be applied with great adhesion.
- The 3-gallon kit covers up to 300 square feet.
What Could Be Improved:
- The coverage area depends on the surface’s porosity and how thick you apply it.
- While user-friendly, professional results might require some practice.
This epoxy resin kit offers a durable and attractive solution for many projects. It’s a solid choice for anyone needing a tough, beautiful finish.
2. TAKIMO 1 Gallon 3×UV Resistant Resin Kit
Rating: 8.7/10
Get ready to create amazing things with the TAKIMO 1 Gallon 3xUV Resistant Resin Kit. This kit is made for anyone who loves DIY projects, from making beautiful jewelry to crafting stunning river tables. It’s designed to give you a super shiny, clear finish that lasts. Plus, it’s tough enough to handle heat and scratches.
What We Like:
- It’s super easy to mix and use, even for beginners. Just mix equal parts of resin and hardener.
- It cures fast, usually within 8 to 24 hours, so you can finish your projects quickly.
- The resin is crystal clear and stays that way because it’s 3 times more UV resistant than others, meaning it won’t turn yellow.
- You get a super glossy, glass-like finish that looks professional.
- It has a special formula to prevent bubbles, making your finished pieces smooth and perfect.
- It’s safe to use because it’s non-toxic, odorless, and not flammable.
- It can handle heat up to 203℉ (95℃) and resists scratches once cured.
- It works great with silicone molds without tearing them.
- You have about 40 minutes of working time to get your design just right.
What Could Be Improved:
- For best results in cold weather, you need to warm up the resin and hardener first.
- It’s recommended to pour layers no thicker than 1/4 inch to ensure bubbles are fully eliminated.
- Always do a small test first to avoid any curing problems.
This TAKIMO resin kit is a fantastic choice for both new crafters and experienced artists. It helps you achieve professional-looking results with ease and confidence.
3. Rust-Oleum 367605 Home Interior Floor Coating Kit
Rating: 8.7/10
Ready to give your floors a fresh new look without breaking the bank or dealing with a huge mess? The Rust-Oleum 367605 Home Interior Floor Coating Kit in Semi-Gloss Black is your answer. This kit lets you update old floors easily. You don’t need to strip, sand, or prime your surfaces. Just clean them, and you’re ready to paint!
-
What We Like:
- It saves you money compared to replacing floors.
- You can apply it over many floor types like tile, wood, and vinyl.
- It’s a water-based formula, so it’s not too smelly and cleans up easily.
- You can walk on it lightly in just 24 hours.
- It covers up to 100 square feet, so one kit can do a good amount of space.
- The semi-gloss black color looks modern and stylish.
- You can even mix colors or use stencils for a custom design.
- It’s “Life Tested” for durability, meaning it’s made to last.
- The two-part system dries fast.
-
What Could Be Improved:
- While it adheres without stripping, very damaged or uneven surfaces might still need some prep work for the best results.
- The 6-hour wait time for the top coat and 24 hours for light traffic might feel long if you need to use the room quickly.
This Rust-Oleum kit offers a fantastic way to refresh your home’s look. It’s a user-friendly option for a stylish and durable floor update.
4. Upgrade Epoxy Coloured Sand Floor Paint
Rating: 9.4/10
Tired of dull, boring floors? The Louis Forest Epoxy Floor Paint promises to transform your concrete, wood, or even old tile floors into stunning works of art. This special coating uses colored sand to create a luxurious, high-gloss marble effect. It’s designed to be tough, waterproof, and even slip-resistant, making it a fantastic option for busy areas like garages, basements, or outdoor patios.
What We Like:
- It gives your floors a beautiful, high-gloss marble look that really stands out.
- The waterproof coating protects your floors from spills and moisture.
- The surface is slip-resistant, which makes it safer, especially in damp areas.
- It’s made with safe materials, so you can feel good about using it.
- This paint is super strong and lasts a long time, even with lots of foot traffic or cars.
- It works on many different surfaces like concrete, wood, and tile, both inside and outside.
What Could Be Improved:
- The 0.5kg size might be too small for very large projects, requiring multiple purchases.
- While self-leveling, achieving a perfectly smooth finish can still require some skill and preparation.
If you’re looking for an affordable way to add both beauty and protection to your floors, this epoxy paint is definitely worth considering. It offers a durable, stylish upgrade for almost any space.
5. Clear Epoxy Resin Coating for Floors & Counter Tops
Rating: 8.6/10
Transform your spaces with this incredible Clear Epoxy Resin Coating. This 3-gallon kit is a game-changer for both floors and countertops. It’s super tough, so it can handle lots of use. It also looks amazing, giving a smooth, shiny finish that brightens any room. You can use it in your home, your business, or even a factory!
What We Like:
- It’s super strong and lasts a long time.
- It resists scratches, spills, and doesn’t turn yellow.
- It spreads out smoothly and creates a thick, protective layer.
- It works great for homes, shops, and factories.
- The 3-gallon size means you have plenty to cover a good area.
What Could Be Improved:
- You need to keep it dry for two whole days after you put it on.
- It’s important to protect it from moisture, like rain or steamy bathrooms, until it’s fully set.
This epoxy resin is a fantastic way to upgrade your surfaces with a beautiful and lasting finish. Just be sure to follow the drying instructions carefully for the best results.
The Ultimate Buying Guide: Epoxy for Your Wood Floors
Are you thinking about giving your wood floors a fresh, new look? Epoxy can be a fantastic option! It’s super tough and can make your floors look amazing. This guide will help you choose the best epoxy for your wood floors.
What to Look For: Key Features of Epoxy for Wood Floors
When you’re shopping for epoxy, keep these important features in mind.
Durability and Strength
You want an epoxy that can handle a lot of foot traffic. Look for epoxies that are rated for high-traffic areas. This means they won’t scratch or chip easily. A strong epoxy protects your wood floor from wear and tear.
Finish and Appearance
Epoxy comes in many colors and finishes. You can get a clear finish to show off the natural wood grain. Or, you can choose a solid color for a bold new look. Some epoxies even have metallic flakes for a sparkly effect. Think about the style you want for your room.
Ease of Application
Some epoxy kits are designed for DIYers. They often come with everything you need and have clearer instructions. If you’re new to epoxy, an easier-to-use product will make the job go smoother.
Chemical and Stain Resistance
Wood floors can get stained by spills. Epoxy is great because it resists most common household chemicals and stains. This makes cleaning up messes much easier.
UV Resistance
Sunlight can fade and damage wood floors. Some epoxies have UV inhibitors. These help prevent the sun’s rays from causing damage. This keeps your floor looking good for longer.
Important Materials and What They Mean
Epoxy is made of two main parts: resin and hardener.
- Resin: This is the main liquid part of the epoxy. It’s what gives the coating its strength and shine.
- Hardener: This liquid is mixed with the resin. It causes a chemical reaction that makes the epoxy harden and cure into a solid layer.
The quality of these materials affects how well the epoxy performs. High-quality resins and hardeners create a more durable and long-lasting finish.
Factors That Affect Epoxy Quality
Several things can make your epoxy better or worse.
Preparation is Key
This is the most important step! Your wood floor must be perfectly clean and dry before you apply epoxy. Any dirt, grease, or old finish will prevent the epoxy from sticking properly. This will lead to peeling or bubbling later. You might need to sand the floor first.
Application Conditions
The temperature and humidity in the room matter. Most epoxies work best in moderate temperatures, usually between 60-85°F (15-30°C). High humidity can slow down the drying process. Always follow the manufacturer’s instructions for the best results.
Mixing Ratios
It’s crucial to mix the resin and hardener in the exact amounts the product tells you. If you mix them incorrectly, the epoxy might not harden properly. It could stay sticky or cure too quickly and become unusable.
User Experience and Use Cases
Many people use epoxy for wood floors in different areas of their homes.
Garages and Workshops
Garages are a popular spot for epoxy. It protects the wood from oil, tire marks, and tools. It also makes the garage floor look much cleaner and more professional.
Basements and Laundry Rooms
These areas can sometimes get damp. Epoxy provides a waterproof layer, protecting the wood from moisture. It also creates a smooth, easy-to-clean surface.
High-Traffic Entryways
Entryways see a lot of action. Epoxy can withstand the constant foot traffic and dirt tracked in from outside. It keeps your entryway looking great.
Living Areas and Kitchens
You can use epoxy in living rooms or kitchens for a modern and durable floor. Just be sure to choose an epoxy that is safe for indoor use and has good UV resistance if the area gets a lot of sunlight.
DIY vs. Professional Application
Many epoxy kits are made for homeowners to apply themselves. These are usually simpler to use. For very large areas or if you want a flawless finish, hiring a professional might be a good idea. They have the tools and experience to get the best outcome.
Frequently Asked Questions (FAQ) about Epoxy for Wood Floors
Q: Can I apply epoxy directly over my existing wood floor?
A: Usually, yes, but you must prepare the floor first. It needs to be clean, dry, and sometimes sanded smooth. Always check the epoxy product’s instructions.
Q: How long does epoxy for wood floors take to dry?
A: Drying times vary. Most epoxies are dry to walk on in 24 hours. They fully cure and reach maximum hardness in about 3-7 days.
Q: Is epoxy slippery on wood floors?
A: Some epoxies can be slippery when wet. Many kits include anti-slip additives or you can buy them separately to mix in. This makes the floor safer.
Q: How do I clean an epoxy-coated wood floor?
A: Cleaning is easy! Use a mild soap and water with a soft mop or cloth. Avoid harsh chemicals or abrasive scrubbers, as these can damage the epoxy.
Q: Will epoxy hide imperfections in my wood floor?
A: Epoxy can cover small scratches and minor imperfections. However, deep gouges or unevenness in the wood may still show through, especially with clear or light-colored epoxies.
Q: Can I change the color of my wood floor with epoxy?
A: Absolutely! Epoxy comes in a wide range of colors. You can completely transform the look of your wood floor.
Q: Is epoxy safe for pets and children?
A: Once fully cured, epoxy is generally considered safe. However, it’s important to keep pets and children away from the area while the epoxy is wet and curing, as the fumes can be strong.
Q: How long does an epoxy floor last on wood?
A: With proper preparation and care, an epoxy coating on a wood floor can last for many years, often 10-20 years or even longer.
Q: Can I use epoxy on engineered wood floors?
A: Yes, you can often use epoxy on engineered wood floors. The key is proper preparation, ensuring the surface is clean, dry, and free of any existing finishes.
Q: What if I want to remove the epoxy later?
A: Removing epoxy can be challenging. It usually involves mechanical methods like grinding or sanding. It’s a good idea to consider this before applying it.
In conclusion, every product has unique features and benefits. We hope this review helps you decide if it meets your needs. An informed choice ensures the best experience.
If you have any questions or feedback, please share them in the comments. Your input helps everyone. Thank you for reading.