
Can you use a table saw for the first time? Yes, with proper training and caution, anyone can learn how to operate a table saw safely and effectively. This guide will walk you through everything a beginner needs to know.
A table saw is a woodworking powerhouse, capable of making straight, accurate cuts in wood with ease. From ripping long boards to making precise crosscuts, this versatile tool is a staple in many workshops. However, its power also demands respect and careful handling. This guide aims to equip you with the foundational knowledge for safe and successful table saw operation.
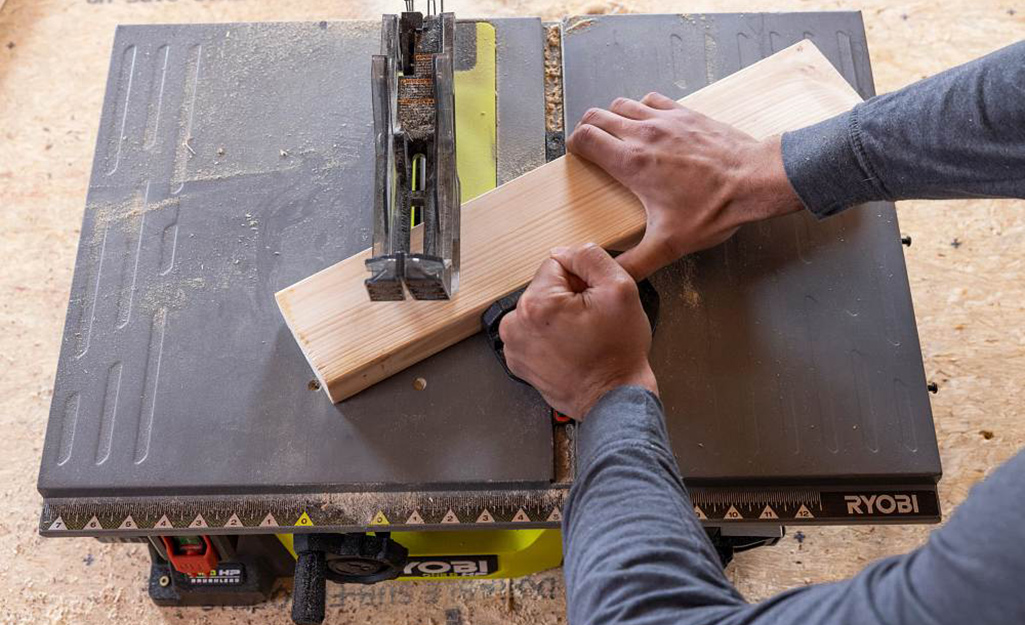
Image Source: contentgrid.homedepot-static.com
Getting Started: Table Saw Setup
Before you even think about making a cut, your table saw needs to be set up correctly. This ensures accuracy and, most importantly, safety.
H4: Placement and Stability
- Location: Place your table saw on a level, stable surface. Avoid placing it near high-traffic areas where people might bump into it or the wood you’re cutting.
- Clearance: Ensure there’s ample space around the saw for you to move freely, feed material, and manage cut-off pieces. You’ll need space behind the saw for dust collection and in front for feeding stock.
- Power: Connect the saw to a suitable power source. For larger saws, this might mean a dedicated circuit. Check your saw’s manual for power requirements.
- Stability: If your saw has wheels, ensure it’s locked in place. For stationary saws, make sure it’s securely mounted or heavy enough not to move during operation.
H4: Blade Height and Alignment
- Blade Height: The blade height is crucial for both safety and cut quality. For most cuts, the top of the blade should extend about 1/8 inch to 1/4 inch above the workpiece. This is often referred to as “just kissing the top.” This helps prevent the blade from grabbing the wood and reduces the chance of kickback. For dado cuts, the blade will be set differently.
- Blade Alignment (Riving Knife/Splitter): A properly aligned riving knife or splitter is non-negotiable for safe operation. It sits directly behind the blade and prevents the kerf (the cut made by the blade) from closing on the blade, which is a primary cause of kickback. Ensure it’s aligned with the blade and set at the correct height.
- Blade Squareness: The blade should be perfectly perpendicular to the table for accurate cuts. You can check this using a combination square. If it’s not square, you’ll need to adjust the trunnions according to your saw’s manual.
H4: Miter Gauge and Rip Fence
- Miter Gauge: The miter gauge slides into the miter slots on the table and is used for making crosscuts or angled cuts. Ensure it slides smoothly and that the detents (preset angles) are accurate if you plan to use them.
- Rip Fence: The rip fence is a guide that runs parallel to the blade and is used for ripping boards to width. It must be perfectly parallel to the blade. Misalignment here will lead to tapered cuts and can also contribute to kickback. Many saws have a mechanism to check and adjust fence alignment.
Table Saw Blade Types: Choosing the Right Cut
The blade you use significantly impacts the quality and type of cut you make. Different blades are designed for different purposes.
H4: General Purpose Blades
- Tooth Count: Typically have 24-40 teeth.
- Best For: General ripping and crosscutting. They offer a good balance between cut speed and finish. A 40-tooth blade is often a good starting point for a beginner.
H4: Ripping Blades
- Tooth Count: Lower tooth count, usually 20-30 teeth.
- Best For: Cutting with the grain of the wood (ripping). The fewer teeth create larger gullets (the space between teeth), which help clear sawdust efficiently and prevent overheating on longer rips.
H4: Crosscut Blades
- Tooth Count: Higher tooth count, typically 60-80 teeth.
- Best For: Cutting across the grain of the wood (crosscutting). The higher tooth count creates a cleaner, smoother cut with less tear-out.
H4: Specialty Blades
- Dado Blades: These are sets of blades and chippers that combine to create wide grooves (dadoes) or rabbets in wood. They require a specific throat plate.
- Fine-Tooth Blades: Similar to crosscut blades, these offer very clean cuts but can be slower.
- Carbide-Tipped Blades: Most modern table saw blades are carbide-tipped, offering much longer life and edge retention than plain steel blades.
Table 1: Blade Characteristics and Uses
| Blade Type | Tooth Count | Primary Use | Cut Finish |
|---|---|---|---|
| General Purpose | 24-40 | Ripping & Crosscutting | Good |
| Ripping | 20-30 | Ripping (with grain) | Fair to Good |
| Crosscut | 60-80 | Crosscutting (across grain) | Excellent |
| Dado | N/A (Set) | Grooves, Rabbets | N/A |
Essential Table Saw Safety Practices
Table saw safety is paramount. A moment of carelessness can lead to severe injury. Always prioritize safety over speed.
H4: Personal Protective Equipment (PPE)
- Safety Glasses: Always wear ANSI-approved safety glasses or a full face shield to protect your eyes from flying sawdust and debris.
- Hearing Protection: Table saws are loud. Wear earplugs or earmuffs to prevent hearing damage.
- Dust Mask/Respirator: Fine wood dust can be harmful. Wear a dust mask or respirator, especially when cutting MDF or other fine materials.
- No Loose Clothing or Jewelry: Anything that can get caught in the blade must be removed. Tie back long hair.
H4: Understanding and Preventing Kickback
Kickback is when the wood is suddenly and violently thrown back towards the operator. It’s one of the most dangerous table saw hazards.
- Causes of Kickback:
- Blade not set correctly (too high).
- Rip fence not parallel to the blade.
- Wood binding on the blade.
- Cutting warped or twisted lumber without proper support.
- Piece binding on the blade as it exits the cut.
- Using the saw without a riving knife or splitter.
- Preventing Kickback:
- Use a Riving Knife/Splitter: This is your first line of defense. Ensure it’s installed, aligned, and at the correct height.
- Keep the Blade Height Correct: Only expose the blade as much as needed for the cut.
- Ensure Fence Parallelism: Always check that your rip fence is perfectly parallel to the blade.
- Use Push Sticks and Push Blocks: These tools keep your hands away from the blade.
- Support Your Material: Use outfeed tables or helpers for long or heavy pieces.
- Never Rip Freehand: Always use the rip fence or a miter gauge for guidance.
- Don’t Cut with the Miter Gauge and Rip Fence Simultaneously: This creates a dangerous binding situation. Use one or the other.
- Clear Small Pieces: Don’t try to cut pieces smaller than what can be safely held with push sticks.
- Watch for Warped Wood: If your wood has a cup or twist, you might need to clamp it to a straight edge for support.
H4: Safe Operating Procedures
- Read the Manual: Every table saw is different. Familiarize yourself with your specific model’s features and safety warnings.
- Never Reach Over the Blade: Always use push sticks or push blocks.
- Keep Hands Away: Maintain a safe distance from the blade at all times.
- Turn Off the Saw When Adjusting: Never make adjustments with the blade spinning.
- Let the Blade Stop Completely: Wait for the blade to stop spinning before removing cut-off pieces or making any adjustments.
- Stand to the Side of the Blade: When starting a cut, stand slightly to the side of the blade’s path, not directly behind it, to avoid kickback.
- Control the Material: Feed the wood smoothly and steadily. Don’t force it.
- Keep the Table Clean: Sawdust can affect accuracy and create tripping hazards.
Basic Table Saw Techniques
Once your saw is set up and you’re confident in your safety knowledge, you can start making cuts.
H4: Ripping a Board
Ripping is cutting a board along its length, parallel to the grain.
- Set the Rip Fence: Measure the desired width and set the rip fence to that dimension. Ensure the fence is parallel to the blade.
- Set Blade Height: Adjust the blade so it extends about 1/8 to 1/4 inch above the workpiece.
- Position the Wood: Place the edge of the board against the rip fence.
- Start the Cut: Turn on the saw and let the blade reach full speed. Gently feed the board into the blade, keeping it firmly against the rip fence.
- Use Push Sticks: As the board gets shorter, use a push stick or push block to push the remaining piece past the blade.
- Manage Cutoffs: Ensure cut-off pieces don’t get trapped between the blade and the fence.
H4: Crosscutting a Board
Crosscutting is cutting a board across its width, perpendicular to the grain.
- Use the Miter Gauge: Place the board against the miter gauge. Ensure the desired length is marked.
- Set Blade Height: Adjust the blade to the correct height.
- Position for Cut: Position the blade at the mark. For best results, the blade should be set so that the teeth just touch the waste side of your cut line.
- Start the Cut: Turn on the saw. Hold the board firmly against the miter gauge and slide them together into the blade.
- Support the Offcut: For longer boards, ensure the offcut piece is supported so it doesn’t drop and pinch the blade.
- Angled Crosscuts: For angled cuts, set the miter gauge to the desired angle and follow the same procedure. Crucially, do NOT use the rip fence when using the miter gauge for crosscuts.
H4: Making Bevel Cuts
Bevel cuts are angled cuts made by tilting the saw blade.
- Tilt the Blade: Use the bevel adjustment wheel to tilt the blade to your desired angle. Check the angle with a protractor or angle finder.
- Adjust Blade Height: Ensure the tilted blade extends the appropriate amount above the workpiece.
- Ripping a Bevel: Set the rip fence and feed the wood as you would for a standard rip cut, keeping the wood against the fence.
- Crosscutting a Bevel: Use the miter gauge, set to the desired angle (or tilt the blade and keep the miter gauge at 90 degrees to the fence), and proceed with the crosscut technique.
Enhancing Your Table Saw Experience: Jigs and Accessories
Table saw jigs and table saw accessories can dramatically improve accuracy, safety, and the range of operations you can perform.
H4: Essential Table Saw Jigs
- Push Stick: A simple, essential tool made from wood or plastic. It keeps your hands away from the blade.
- Push Block: A block with a handle and often a non-slip surface on the bottom. It provides more control and downward pressure than a push stick.
- Crosscut Sled: A jig that slides in the miter slots and has a fence perpendicular to the blade. It provides a stable platform for accurate crosscuts, especially for small pieces.
- Zero-Clearance Insert: A custom throat plate with a slot that precisely matches the kerf of your blade. It supports the wood around the blade, reducing tear-out and preventing small pieces from falling into the saw.
- Tenoning Jig: Used for cutting tenons (the projecting part of a joint that fits into a mortise).
- Dovetail Jig: Used for cutting dovetail joints.
H4: Useful Table Saw Accessories
- Featherboards: These apply gentle, consistent side pressure to the workpiece, keeping it against the rip fence or miter gauge. They are crucial for preventing binding and kickback.
- Mobile Base: If your saw isn’t permanently installed, a mobile base allows you to easily move it around your workshop.
- Outfeed Table/Support: Essential for supporting long boards when ripping or crosscutting to prevent them from dropping and causing the cut to bind.
- Table Saw Stand: A stable platform to elevate the saw to a comfortable working height.
- Blade Storage: Keeps spare blades organized and protected.
- Dust Collection System: Connect a shop vacuum or dust collector to the saw’s dust port.
Table Saw Maintenance: Keeping Your Tool in Top Shape
Regular table saw maintenance is vital for its performance, longevity, and your safety.
H4: Cleaning and Lubrication
- Table Surface: Keep the cast iron table clean and polished to ensure smooth material movement. Use a product like paste wax or specialized table polish.
- Blade and Accessories: Clean sawdust and resin buildup from the blade and other metal parts regularly. A blade cleaner solution can be effective.
- Moving Parts: Lubricate the trunnions, height adjustment mechanism, and tilt mechanism according to your owner’s manual.
- Motor Vents: Keep the motor vents clear of dust to prevent overheating.
H4: Blade Care
- Sharpening: Dull blades make cutting harder, increase the risk of kickback, and produce poor results. Have your blades professionally sharpened or replace them when they dull.
- Inspection: Before each use, inspect the blade for any signs of damage, such as bent teeth or cracks.
H4: Alignment Checks
- Fence Alignment: Periodically re-check that the rip fence is parallel to the blade.
- Blade Alignment: Verify that the blade is square to the table.
- Miter Slot Alignment: Ensure the miter slots are parallel to the blade.
H4: Dust Collection System Maintenance
- Hose and Ports: Keep dust collection hoses and ports clear of blockages.
- Filter/Bag: Empty dust bags or clean filters as needed to maintain good airflow.
Table Saw Calibration: Ensuring Accuracy
Proper table saw calibration is essential for precise woodworking. This often involves checking and adjusting the alignment of the blade relative to the table and fence.
H4: Blade to Miter Slot Alignment
- Insert Gauge: Place a miter gauge into one of the miter slots.
- Check at Front: With the blade lowered, check the gap between the blade teeth and the miter gauge at the front of the slot.
- Check at Back: Raise the blade to its cutting height. Check the gap again at the front and then at the back of the miter slot.
- Adjustment: If there’s a significant difference, you may need to adjust the trunnions (refer to your saw’s manual). Ideally, the gap should be the same at both the front and back, or the back gap should be slightly larger to prevent binding.
H4: Blade to Rip Fence Alignment
- Set Fence: Position the rip fence at a convenient distance from the blade.
- Check at Front: With the blade at full height, measure the distance from the fence to the blade teeth at the front edge of the blade.
- Check at Back: Measure the distance from the fence to the blade teeth at the back edge of the blade.
- Adjustment: The fence should be perfectly parallel to the blade. Most modern table saws have an adjustment mechanism for the rip fence. If the back is slightly closer, it can increase the risk of kickback. If the front is closer, cuts may be slightly tapered.
H4: Blade Squareness to Table
- Insert Square: Use a combination square or a precise metal square.
- Check One Side: Place the square against the blade and the table. The blade should be perfectly flush with the square’s edge.
- Check Other Side: Rotate the blade 180 degrees and check again.
- Adjustment: If the blade is not square, you will need to adjust the trunnions, which control the blade’s tilt. This is often done by accessing the trunnion system from underneath the saw.
Table Saw Troubleshooting: Common Issues and Solutions
Even with the best care, you might encounter some issues. Here’s a look at common table saw troubleshooting scenarios.
H4: Kickback Occurs
- Problem: The wood is violently thrown back at you.
- Solutions:
- Immediately stop the saw and investigate the cause (check fence alignment, blade height, wood condition, use of riving knife and push sticks).
- Ensure you are always standing to the side of the blade.
- Never force the wood.
H4: Poor Cut Quality (Burn Marks, Tear-out)
- Problem: The cut surface is rough, burnt, or has splintering.
- Solutions:
- Burn Marks: Likely caused by the blade dullness or feeding too slowly. Use a sharper blade or feed at a consistent, appropriate speed. Ensure blade height is correct.
- Tear-out: Can be caused by a dull blade, incorrect blade type, or lack of support. Use a sharp blade with a higher tooth count for crosscuts, or a zero-clearance insert. Use tape over the cut line, or a scoring cut first.
H4: Blade Wobbles
- Problem: The blade appears to be unstable or vibrates excessively.
- Solutions:
- Check if the blade is properly secured to the arbor with the washer and flange.
- Inspect the blade for damage or warping.
- Ensure the arbor itself is not damaged.
H4: Fence Won’t Stay Parallel to Blade
- Problem: The rip fence drifts out of alignment.
- Solutions:
- Clean the fence tracks and the table surface.
- Check and tighten any adjustment screws or locking mechanisms for the fence.
- Some fences may require alignment adjustments as detailed in the owner’s manual.
H4: Saw Struggles to Cut Wood
- Problem: The motor bogs down or the blade stalls.
- Solutions:
- Dull Blade: Sharpen or replace the blade.
- Incorrect Blade: Using a blade with too many teeth for ripping can cause this.
- Feeding Too Fast: Reduce your feed rate.
- Dust Buildup: Clean motor vents and ensure good airflow.
- Low Power: Check your power source and circuit.
Table Saw Dust Collection
A good table saw dust collection system is crucial for a clean workshop and your health.
H4: Why Dust Collection Matters
- Health: Wood dust, especially from MDF, can be harmful to your respiratory system.
- Cleanliness: Reduces the mess in your workshop, making it a more pleasant and safer place to work.
- Performance: Dust buildup on the saw can affect its performance and accuracy.
- Fire Hazard: Fine wood dust can be combustible.
H4: Types of Dust Collection
- Shop Vacuum: A good starting point for hobbyists. Most table saws have a dust port designed for a standard shop vacuum hose. Ensure your vacuum has a fine dust filter.
- Dedicated Dust Collector: For more serious woodworkers, a dedicated dust collector with a larger capacity and better filtration is recommended. These often use a cyclone separator to capture the bulk of the dust before it reaches the filter.
- Integrated Systems: Some larger table saws have more robust built-in dust collection systems.
H4: Optimizing Dust Collection
- Connect Everything: Connect your dust collector to the saw’s dust port.
- Zero-Clearance Inserts: These reduce the amount of dust that falls through the throat plate.
- Blade Guard with Dust Port: Many modern blade guards have a dust collection port that captures dust at the source, above the blade.
- Regular Cleaning: Keep hoses and ports clear of dust blockages.
Frequently Asked Questions (FAQ)
Q1: What is the most important safety rule when using a table saw?
A1: The most critical safety rule is to never put your hands near the spinning blade. Always use push sticks, push blocks, and featherboards to keep your hands a safe distance away.
Q2: Can I use the rip fence and the miter gauge at the same time?
A2: No, this is extremely dangerous and can lead to severe kickback. The wood can become trapped between the fence and the blade, forcing it back towards you. Always use one or the other for guidance.
Q3: How high should the table saw blade be set?
A3: For most cuts, the top of the blade should extend just 1/8 to 1/4 inch (about 3-6 mm) above the material being cut. This minimizes the amount of blade exposed, reducing the risk of kickback.
Q4: What is kickback and how can I prevent it?
A4: Kickback is when the wood is violently thrown back towards the operator. You can prevent it by ensuring your riving knife/splitter is installed and aligned, keeping the blade height correct, making sure the rip fence is parallel to the blade, using push sticks and featherboards, and never cutting warped wood without support.
Q5: When should I change my table saw blade?
A5: You should change or sharpen your table saw blade when you notice increased cutting effort, burn marks on your cuts, or excessive tear-out. A dull blade is a significant safety hazard.
Q6: What’s the difference between ripping and crosscutting?
A6: Ripping is cutting a board along its length, parallel to the grain. Crosscutting is cutting a board across its width, perpendicular to the grain. Different blades are optimized for each type of cut.
Q7: Do I need a dust collection system for a table saw?
A7: While not strictly mandatory for occasional use, a dust collection system is highly recommended for your health, workshop cleanliness, and to improve the saw’s performance.
Operating a table saw safely and effectively is a skill that develops with practice and a commitment to safety. By familiarizing yourself with proper table saw setup, table saw maintenance, table saw blade types, safe operating table saw techniques, and the use of table saw jigs and table saw accessories, you can unlock the full potential of this powerful tool while minimizing risks. Remember, table saw safety is not just a set of rules; it’s a mindset. Always prioritize caution and take your time to learn and master each step.