
Image Source: i.ytimg.com
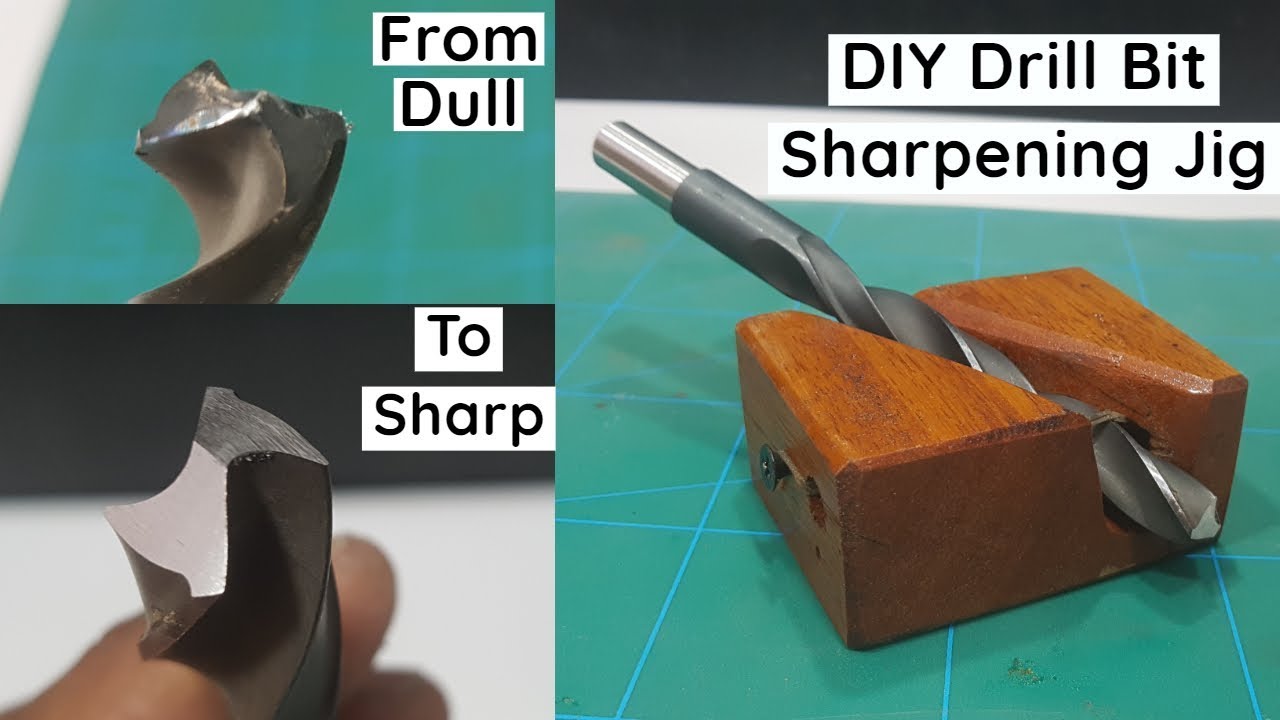
How to Sharpen a Drill Bit: DIY Tool Care
Yes, you can sharpen a drill bit at home to extend its lifespan and improve its cutting performance. Sharpening drill bits is a valuable DIY skill that saves you money and ensures your tools are always ready for action.
Reviving Your Cutting Tools: A Comprehensive Guide to Drill Bit Sharpening
A sharp drill bit is the unsung hero of any DIY project. It glides through materials with ease, creates clean holes, and reduces strain on both your drill and your body. Conversely, a dull drill bit is a frustration waiting to happen. It struggles to penetrate, can overheat, burn the material, and even cause your drill to bind. Thankfully, sharpening drill bits is not an arcane art reserved for seasoned machinists. With the right techniques and a bit of practice, anyone can bring their dull drill bits back to life. This comprehensive guide will walk you through the essential methods for drill bit grinding, drill bit honing, and using various tools to achieve razor-sharp edges.
Why Bother Sharpening Drill Bits?
Before diving into the “how,” let’s establish the “why.” Investing time in drill bit sharpening offers several significant advantages:
- Cost Savings: Drill bits, especially high-quality ones, can be expensive. Regularly sharpening them dramatically extends their useful life, saving you money on replacements.
- Improved Cutting Performance: Sharp bits cut cleanly and efficiently. This means less effort for you, less wear on your drill motor, and cleaner, more precise holes.
- Reduced Heat Buildup: Dull bits generate more friction, leading to excessive heat. This can damage the bit, the material being drilled, and even the drill chuck. Sharp bits dissipate heat more effectively.
- Enhanced Safety: A drill bit that cuts cleanly is less likely to grab or bind unexpectedly, reducing the risk of injury or damage to your workpiece.
- Environmental Friendliness: By extending the life of your tools, you contribute to reducing waste and the environmental impact associated with manufacturing new tools.
The Anatomy of a Drill Bit: Knowing What to Sharpen
To effectively sharpen a drill bit, it’s crucial to understand its key components:
- Point: This is the very tip of the drill bit, responsible for initiating the cut. It consists of two cutting edges.
- Cutting Edges (Lip): These are the primary angled surfaces that actually shave away the material. They are formed at the end of the flutes.
- Chisel Edge: This is the land at the very apex of the point. It’s not a true cutting edge but a leading edge that helps to center the bit and provides some scraping action.
- Flutes: These are the spiral grooves that run along the length of the bit. They channel away chips and allow cutting fluid to reach the cutting edges.
- Web: This is the central part of the bit that separates the flutes.
- Shank: This is the part of the bit that fits into the drill chuck.
When sharpening drill bits, you are primarily concerned with restoring the keenness of the cutting edges.
Methods for Sharpening Drill Bits
There are several effective ways to sharpen drill bits, ranging from simple manual methods to specialized powered tools. The best method for you will depend on the type of drill bit, the material it’s designed for, and the tools you have available.
Manual Sharpening: The Drill Bit Sharpening Stone Approach
For many common metal and wood drill bits, a simple drill bit sharpening stone is an accessible and effective tool. This method requires a steady hand and a bit of practice to achieve consistent results, but it’s incredibly rewarding.
What You’ll Need:
- A good quality sharpening stone (oil stone or diamond stone recommended)
- A vise or clamp to hold the bit securely
- Safety glasses
- A marker pen (optional, for marking the cutting edge)
- Cutting fluid (for metal bits)
Steps for Using a Sharpening Stone:
- Clean the Drill Bit: Ensure the bit is free of dirt, oil, and debris. This will give you a clear view of the cutting edges and prevent contaminants from dulling your stone.
- Secure the Bit: Clamp the shank of the drill bit firmly in a vise. Ensure enough of the cutting end is exposed for comfortable access to the cutting edges.
- Identify the Cutting Edge Angle: Most standard twist drill bits have a point angle of 118 degrees. You’ll want to maintain this angle as closely as possible. Some stones have angle guides, or you can use a protractor to help.
- Position the Stone: Hold the sharpening stone at the correct angle against the cutting edge. Imagine you are trying to recreate the original bevel.
- Sharpening the First Cutting Edge:
- Apply gentle pressure.
- Move the stone in a smooth, sweeping motion along the cutting edge, maintaining the angle.
- Focus on removing a small amount of metal. You’ll feel the stone biting into the metal.
- Sharpen until you feel a slight burr forming on the opposite side of the cutting edge. This indicates you’ve ground through to that side.
- Sharpening the Second Cutting Edge:
- Rotate the drill bit slightly so the other cutting edge is presented to the stone at the same angle.
- Repeat the sharpening motion.
- Aim to achieve a similar bevel and the same burr formation on this side.
- Checking the Point and Relief Angle:
- Once both cutting edges are sharp, you need to address the heel clearance, also known as the clearance angle or relief angle. This prevents the heel from rubbing against the material instead of allowing the cutting edge to do its work.
- Slightly alter the angle of the stone so it only contacts the heel of the cutting edge.
- With very light pressure, hone the heel in a circular or slightly back-and-forth motion, just enough to remove any flat spot or drag.
- The goal is to create a slight concave bevel on the heel, allowing the cutting edge to cut freely.
- Deburring: After sharpening both edges and setting the relief, use a very light touch on the stone to remove any remaining burrs. You can also use a fine sharpening stone or a honing steel.
- Clean and Test: Clean the drill bit thoroughly. It should feel sharp to the touch (be careful!). Test it on a piece of scrap material. A sharp bit will start cutting immediately and require less force.
Tips for Using a Sharpening Stone:
- Consistency is Key: Maintain a consistent angle throughout the sharpening process.
- Light Pressure: Avoid applying too much pressure, which can overheat the bit and damage the temper.
- Cooling: For metal drill bits, use cutting fluid or a light oil to keep the bit and stone cool.
- Practice: It takes practice to develop the feel for the correct angle and pressure. Don’t be discouraged if your first few attempts aren’t perfect.
Using a Portable Drill Sharpener
A portable drill sharpener is a specialized tool designed to simplify the process of sharpening drill bits. These devices typically consist of a motor and a grinding wheel or diamond abrasive, often with guides to help you maintain the correct angles.
Types of Portable Drill Sharpeners:
- Benchtop Grinders with Sharpening Attachments: Many bench grinders come with jigs or attachments that hold the drill bit at the correct angle for sharpening.
- Dedicated Drill Bit Sharpeners: These are self-contained units specifically designed for drill bit grinding. They often feature collets to hold the bit and an abrasive wheel that pivots to create the correct cutting edge.
How to Use a Portable Drill Sharpener:
- Read the Manufacturer’s Instructions: Each portable drill sharpener will have specific operating instructions. Always refer to these first.
- Install the Correct Abrasive: Ensure you have the appropriate grinding wheel or diamond abrasive for the type of drill bit you are sharpening.
- Secure the Drill Bit: Place the drill bit into the designated holder or collet.
- Set the Angle: Most sharpeners have adjustable angle settings to match common drill bit point angles (e.g., 118°, 135°).
- Engage the Abrasive: Turn on the sharpener and carefully bring the drill bit into contact with the spinning abrasive wheel.
- Follow the Sharpening Pattern: Many sharpeners guide you through a specific motion, often involving rocking the bit or rotating it a set amount with each pass. This ensures both cutting edges are sharpened evenly and the relief angle is maintained.
- Sharpen Both Sides: Ensure you sharpen both cutting edges equally.
- Check for Burrs: After sharpening, feel for any burrs. Lightly touch up the heel if necessary.
- Clean and Test: Clean the bit and test its sharpness.
Advantages of Portable Drill Sharpeners:
- Ease of Use: They are generally easier to use than manual sharpening, as the angles are often pre-set.
- Speed: They can sharpen bits more quickly than manual methods.
- Consistency: They can produce more consistent results, especially for those who struggle with maintaining angles manually.
Disadvantages:
- Cost: They are more expensive than a sharpening stone.
- Limited Versatility: Some models are only designed for specific types of drill bits.
- Potential for Overheating: If not used correctly, the faster grinding action can overheat bits.
Using a Grinding Wheel for Drill Bit Grinding
For more aggressive sharpening or when dealing with heavily damaged bits, a bench grinder with a fine-grit grinding wheel can be used. However, this method requires the most skill and care to avoid ruining the drill bit. This is where true grinding metal drill bits happens.
What You’ll Need:
- A bench grinder with a fine-grit aluminum oxide wheel (ideally 60-80 grit)
- A sharpening jig for drill bits (highly recommended)
- Safety glasses and face shield
- Work gloves
- Cutting fluid or water for cooling
Steps for Using a Bench Grinder (with a Jig):
- Set Up the Grinder: Ensure the grinder is stable and the wheel is clean. Adjust the tool rest to the correct height.
- Mount the Sharpening Jig: Attach the sharpening jig for drill bits to the tool rest. These jigs typically have a channel and an adjustable stop that guides the drill bit against the wheel at the correct angle.
- Load the Drill Bit: Place the drill bit into the jig, ensuring it is held securely.
- Set the Angle: Adjust the jig to the desired point angle (e.g., 118° for general purpose).
- Grind the First Cutting Edge:
- Turn on the grinder.
- Carefully bring the drill bit into contact with the grinding wheel.
- Apply light, intermittent pressure.
- Move the bit slightly back and forth along the grinding wheel as you grind to ensure an even bevel.
- Dip the bit in water or apply cutting fluid frequently to prevent overheating.
- Grind until a small burr forms on the opposite cutting edge.
- Grind the Second Cutting Edge:
- Rotate the drill bit in the jig to present the second cutting edge to the wheel at the same angle.
- Repeat the grinding process, aiming to match the first cutting edge.
- Check and Refine the Clearance Angle:
- After sharpening both cutting edges, you may need to adjust the jig or the bit’s position slightly to grind the heel clearance.
- This involves gently brushing the heel of the cutting edge against the wheel to create a slight concave surface.
- Deburr: Remove any burrs by lightly touching the edges to a finer grit stone or a honing steel.
- Clean and Test: Clean the bit thoroughly and test its performance.
Important Considerations for Bench Grinding:
- Overheating: This is the biggest risk. Overheating can “draw the temper” from the steel, making the bit permanently soft and useless. Frequent cooling is essential.
- Jigs are Crucial: Without a jig, it is extremely difficult to maintain the correct angles and achieve a balanced sharpening.
- Wheel Selection: Use a fine-grit wheel for sharpening. Coarse grit will remove too much material and can lead to overheating.
- Start with Less Aggressive Methods: If you’re new to sharpening, start with a sharpening stone or a portable sharpener before attempting bench grinding.
Sharpening Different Types of Drill Bits
The general principles of sharpening apply to most common drill bits, but there are some nuances:
Sharpening Twist Drill Bits
These are the most common types of drill bits used for wood, metal, and plastics. The methods described above are primarily for how to sharpen twist drill bits. The key is to maintain the original point angle and create a proper clearance angle on the heel of the cutting edge.
Sharpening Metal Drill Bits
When sharpening metal drill bits, especially those made from high-speed steel (HSS), keeping them cool is paramount. Overheating can soften the metal. Using cutting fluid or a light oil during grinding is highly recommended. The point angle for metal is typically 118 degrees for softer metals and 135 degrees for harder metals.
Sharpening Wood Bits
Wood bits, such as brad-point bits or spade bits, have different cutting geometries.
- Brad-Point Bits: These have a sharp center spur that helps to prevent “walking” and creates a clean entry point. The spur itself is usually a sharp point, and the main cutting edges are similar to standard twist bits.
- Spade Bits (Paddle Bits): These have a central pilot and two large wings. The wings have sharpened edges that are often beveled. You can sharpen these with a file or a sharpening stone, focusing on the leading edge of the wings.
Sharpening Masonry Bits
Masonry bits have carbide tips brazed onto the shank. These tips are very hard but can chip. Sharpening them is difficult and often not as effective as replacing them. If you must sharpen, use a diamond-coated file or a specialized grinder designed for carbide. The primary goal is to restore the cutting edges of the carbide tip.
Common Sharpening Mistakes to Avoid
- Not Maintaining the Correct Angle: This is the most common mistake. An incorrect angle will result in a bit that doesn’t cut efficiently or even drills an oversized hole.
- Overheating the Bit: As mentioned, this can ruin the temper of the steel.
- Not Creating Enough Clearance Angle: A bit with insufficient clearance will drag, generate heat, and fail to cut properly.
- Sharpening Unevenly: If one cutting edge is longer or at a different angle than the other, the bit will wobble and drill an off-center hole.
- Not Deburring: Leaving a burr on the cutting edge will interfere with its ability to cut cleanly.
- Using the Wrong Abrasive: Using a coarse grit for sharpening can remove too much material and overheat the bit.
When is it Time to Replace a Drill Bit?
While sharpening drill bits can revive many tools, there comes a point when replacement is the better option.
- Cracked or Chipped Carbide Tips: For masonry bits, a chipped or cracked carbide tip is usually a sign that the bit needs replacement.
- Severely Damaged Flutes: If the flutes are significantly damaged or worn down, the bit’s ability to clear chips will be compromised, and it may not be salvageable.
- Bent Shanks: A bent shank will cause the bit to wobble and drill inaccurate holes, and this cannot be corrected by sharpening.
- Worn Cutting Edges Beyond Repair: If a bit has been sharpened so many times that the cutting edges are very short or the web has become excessively thick, it may be beyond effective sharpening.
Maintaining Your Sharpened Drill Bits
Once you’ve invested the time and effort into sharpening your drill bits, it’s important to maintain them properly:
- Store them carefully: Use a drill bit index or case to prevent them from rattling around and dulling each other.
- Keep them clean: Remove any residue from materials you’ve drilled.
- Use them appropriately: Don’t force bits beyond their intended capacity.
By following these guidelines, you can ensure your tools remain in top condition, ready to tackle any drilling task with precision and efficiency. Drill bit honing and sharpening are essential DIY skills that pay dividends in the long run.
Frequently Asked Questions about Sharpening Drill Bits
Q1: Can I sharpen any type of drill bit?
A1: Most common metal and wood twist drill bits can be effectively sharpened. However, specialized bits like carbide-tipped masonry bits, Forstner bits, or certain router bits may require specialized equipment or are often better replaced when dull.
Q2: How often should I sharpen my drill bits?
A2: The frequency depends on how often you use them and the types of materials you drill. If you notice a bit struggling to cut, drilling oversized holes, or creating excessive heat, it’s probably time to sharpen it.
Q3: What is the best angle to sharpen a drill bit?
A3: The most common angle for general-purpose twist drill bits is 118 degrees. For harder metals, a 135-degree angle is often preferred. Always try to match the original angle of the bit.
Q4: How do I know if I’m overheating the drill bit?
A4: You’ll notice the bit changing color, often to blue or purple. This indicates that the metal has become too hot and its temper has been compromised, making it softer. Use coolant and intermittent grinding to prevent this.
Q5: What is a “burr” when sharpening?
A5: A burr is a small, raised edge of metal that forms on the opposite side of the cutting edge when you grind it. A slight burr is a good indicator that you’ve ground through the entire edge. It needs to be removed with a light touch on the stone or a honing steel.
Q6: Can I use a hand file to sharpen a drill bit?
A6: For larger bits or in a pinch, a good quality, fine-cut hand file can be used, especially for touching up the heel or removing minor burrs. However, achieving the precise angles needed for a proper cutting edge with just a file is very challenging. A drill bit sharpening stone or jig is generally preferred.
Q7: How do I sharpen a left-hand drill bit?
A7: Left-hand drill bits are sharpened in the opposite direction of right-hand bits. The process is similar, but you’ll be grinding the edges in the reverse direction relative to the bit’s rotation.
Q8: What is the difference between sharpening and honing?
A8: Sharpening involves removing metal to create a new cutting edge. Honing is a lighter process that refines an existing edge, removes burrs, and realigns the microscopic teeth of the cutting edge to make it sharper and smoother.
Q9: Where can I find a good drill bit sharpening stone?
A9: You can find sharpening stones at most hardware stores, home improvement centers, and online retailers specializing in tools and sharpening supplies. Look for oil stones or diamond stones for best results.
Q10: Are portable drill sharpeners worth the cost?
A10: If you frequently use and dull drill bits, a portable drill sharpener can be a worthwhile investment. They save time, reduce frustration, and can help you achieve more consistent results, especially if manual sharpening is a challenge for you.