
Can you sharpen a drill bit on a bench grinder? Yes, you absolutely can sharpen a drill bit on a bench grinder, and it’s a fantastic way to bring dulled bits back to life, saving you money and ensuring your drilling tasks are efficient. This guide will walk you through the entire process of reconditioning drill bits, focusing on sharpening twist drills and metal bits for optimal performance. We’ll cover everything from essential bench grinder safety tips to the proper grinding technique for achieving that perfect cutting edge.
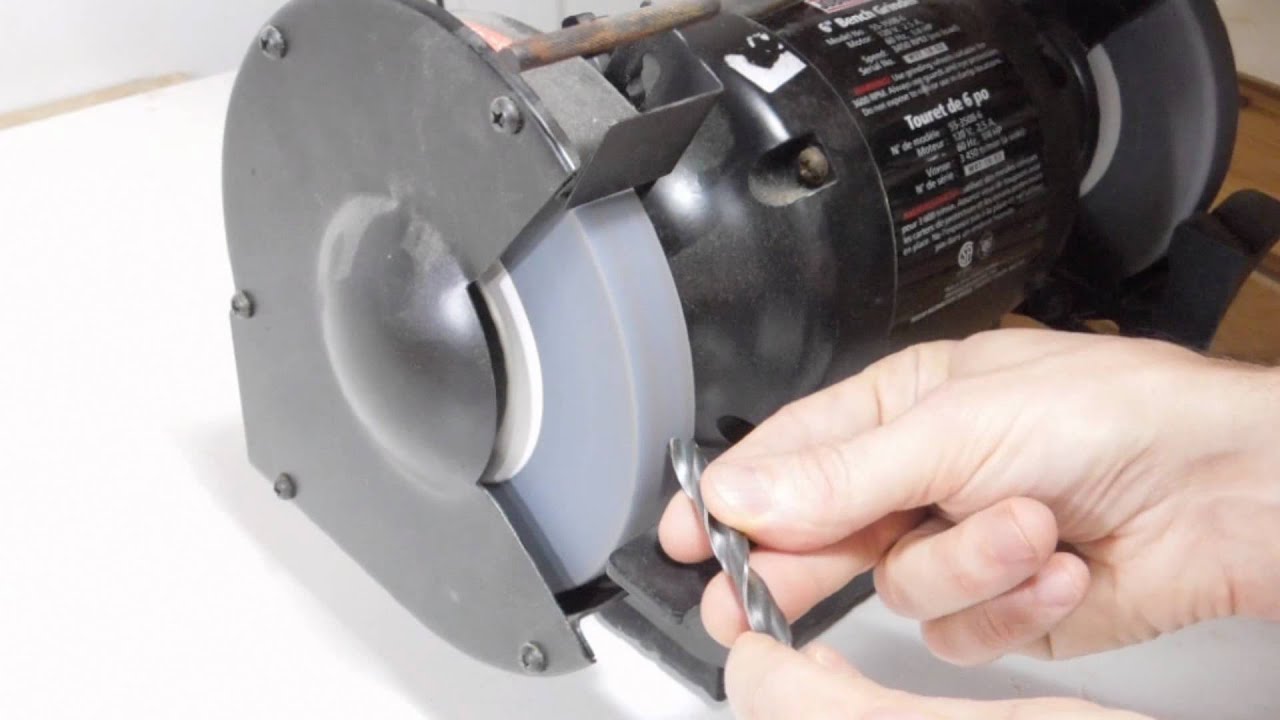
Image Source: i.ytimg.com
Why Sharpen Your Drill Bits?
Drill bits are the workhorses of many DIY projects and professional trades. Over time, even the best drill bits lose their sharpness due to friction and the materials they cut. A dull drill bit doesn’t just make drilling harder; it can lead to several problems:
- Increased Effort: You’ll have to push harder, making drilling a strenuous activity.
- Overheating: Both the drill bit and the material being drilled can overheat, potentially damaging both.
- Poor Hole Quality: Dull bits tear material rather than cutting it cleanly, resulting in ragged holes.
- Motor Strain: Your power drill’s motor works harder, reducing its lifespan.
- Bit Breakage: A stressed and dulled bit is more prone to snapping, especially smaller diameter bits.
Regularly sharpening your drill bits is a crucial part of your tool sharpening process, ensuring precision and extending the life of your valuable drill bit collection.
Essential Bench Grinder Safety Tips
Before we dive into the actual sharpening, safety is paramount. Bench grinders operate at high speeds and can be dangerous if not used correctly. Always follow these bench grinder safety tips:
- Wear Safety Glasses or a Face Shield: This is non-negotiable. Grinding creates sparks and flying debris that can cause serious eye injury.
- Wear Hearing Protection: Bench grinders can be loud. Protect your ears from damage.
- Use Work Gloves: While it might seem counterintuitive for fine work, gloves protect your hands from accidental contact with the spinning wheel and hot metal. Ensure they are snug and won’t get caught.
- Keep Guards in Place: Never operate a bench grinder without its safety guards securely attached.
- Check Wheel Condition: Ensure the grinding wheels are free from cracks or damage. Damaged wheels can shatter. If a wheel looks worn or uneven, consider wheel dressing.
- Maintain Proper Spacing: Adjust the tool rest to be very close to the grinding wheel (about 1/8 inch or 3mm). This prevents the workpiece from getting caught between the rest and the wheel.
- Secure the Grinder: Ensure the bench grinder is firmly mounted to a stable workbench.
- Avoid Loose Clothing and Jewelry: These can get caught in the spinning wheel. Tie back long hair.
- Don’t Force the Bit: Let the grinder do the work. Forcing the bit can cause overheating and damage the bit or the wheel.
- Cool the Bit Regularly: Drill bits can become very hot during grinding. Dip them in water periodically to prevent overheating, which can temper the steel and make it brittle.
Preparing Your Bench Grinder for Sharpening
To achieve perfect results, your bench grinder needs to be properly set up.
Bench Grinder Wheel Dressing
Over time, grinding wheels can become glazed or loaded with metal fragments. This reduces their effectiveness and can lead to uneven grinding. Bench grinder wheel dressing is the process of cleaning and re-profiling the wheel surface.
- Wheel Dresser Tool: You’ll need a specialized wheel dresser. Common types include diamond-coated dressers, abrasive block dressers, or cup wheel dressers.
- Procedure:
- Turn on the grinder and let it reach full speed.
- Gently bring the dresser into contact with the spinning wheel.
- Move the dresser across the face of the wheel, applying light pressure.
- You’ll see sparks and debris being removed. Continue until the wheel surface appears clean and flat.
- For cup wheels, a similar process is used, often with a cup-shaped dresser.
Dressing the wheel ensures a clean, sharp grinding surface, crucial for precise drill bit sharpening.
Selecting the Right Grinding Wheel
While most bench grinders come with general-purpose grinding wheels, for sharpening drill bits, especially metal bits, a finer grit wheel (around 60-80 grit) is often preferred. This allows for more controlled material removal and a smoother finish on the cutting edges. If your grinder has two wheels, consider having one for rough grinding and a finer one for finishing.
The Key to Sharpening: The Drill Bit Grinding Angle
The most critical aspect of sharpening a drill bit is maintaining the correct drill bit grinding angle. For standard twist drills designed for general-purpose drilling in metal and wood, this angle is typically between 118 and 135 degrees.
- 118-degree angle: Best for softer materials like soft metals and plastics. It provides a good balance of cutting efficiency and durability.
- 135-degree angle: Preferred for harder metals like stainless steel and cast iron. The slightly wider angle makes the cutting edges more robust.
Getting this angle consistent on both cutting edges of the drill bit is essential for the bit to cut properly and efficiently. An incorrect or uneven angle will cause the bit to wander, cut inaccurately, and potentially break.
Methods for Sharpening Drill Bits on a Bench Grinder
There are two primary methods for sharpening drill bits on a bench grinder: the freehand method and using a bench grinder drill bit jig.
Method 1: The Freehand Method
This method requires practice and a steady hand to achieve good results. It’s best for larger drill bits initially.
Step-by-Step Guide to Freehand Sharpening:
- Positioning the Bit: Hold the drill bit with your dominant hand controlling the shank and your other hand supporting the body of the bit.
- Initial Contact: Bring the drill bit to the spinning grinding wheel. The goal is to grind the flute of the bit. You want to contact the wheel with the cutting edge at the correct drill bit grinding angle.
- The Grinding Motion:
- Place the drill bit against the tool rest.
- Tilt the bit so that its cutting face is at the desired angle (118-135 degrees) to the face of the grinding wheel.
- Hold the bit firmly and move it slightly from side to side across the wheel to grind evenly along the cutting edge.
- Simultaneously, you need to rotate the bit to grind the clearance angle behind the cutting edge. This is the trickiest part of freehand sharpening.
- As you grind one side, you’ll be creating a new cutting edge and a bevel. You then need to flip the bit over and grind the opposite side to match.
- Grinding the Clearance Angle: This is crucial. The clearance angle allows the cutting edge to actually bite into the material. As you grind the primary bevel (the cutting edge), you also need to allow the heel of the bit to clear the workpiece. This is achieved by slightly twisting the drill bit as you grind.
- Checking for Symmetry: Periodically remove the bit from the grinder and inspect it. Both cutting edges should be the same length and shape. The angles should be consistent.
- Alternating Sides: Grind one side for a few seconds, then switch to the other side. This helps prevent overheating and ensures symmetry. Dip the bit in water frequently.
- Refining the Edge: Once you have established the primary bevel on both sides, you might need to refine the cutting edge to ensure it’s sharp. You can do this by slightly altering the angle to create a smaller, sharper secondary bevel.
- Checking the Point: The point of the drill bit should be centered and sharp. The two cutting edges should meet at the center point.
Tips for Freehand Sharpening:
- Start with a Longer Bit: It’s easier to hold and maneuver.
- Practice on a Scrap Bit: Get a feel for the angles and motions before working on good bits.
- Use a Mark: Some people mark the center of the bit with a marker to help them see when the cutting edges meet.
Method 2: Using a Bench Grinder Drill Bit Jig
For consistent and accurate results, especially for sharpening twist drills of various sizes, a bench grinder drill bit jig is highly recommended. These jigs are designed to hold the drill bit at the correct angles, making the process much easier and more repeatable.
How a Bench Grinder Drill Bit Jig Works:
A drill bit jig typically consists of a base that sits on the grinder’s tool rest and a V-shaped or U-shaped channel that holds the drill bit. It often has a pivoting mechanism or guides that allow you to rotate the bit against the grinding wheel at the precise angle needed for both the cutting edge and the clearance.
Step-by-Step Guide Using a Jig:
- Mount the Jig: Securely place the bench grinder drill bit jig onto the tool rest of your bench grinder. Ensure it’s stable.
- Insert the Drill Bit: Open the jig’s jaws or guides and insert the drill bit. The jig is designed to hold the bit at a specific orientation.
- Set the Angle: Many jigs have adjustable settings for different drill bit sizes and intended angles (e.g., 118-degree or 135-degree points). Consult the jig’s instructions to set it correctly for the bit you are sharpening.
- Grind the First Side: Position the jig and drill bit against the grinding wheel according to the jig’s design. Engage the grinder and slowly rotate the drill bit through the grinding motion as guided by the jig. The jig ensures the correct drill bit grinding angle is maintained.
- Rotate and Grind the Second Side: The jig will usually have a mechanism to flip or rotate the bit to the opposite side, allowing you to grind the second cutting edge to match the first. Some jigs require you to manually reposition the bit within the jig for the second side.
- Alternating Grinding: Even with a jig, it’s good practice to alternate between sides to prevent overheating and ensure even grinding. The jig’s design usually facilitates this.
- Check and Refine: Periodically remove the bit to check your progress. The cutting edges should look symmetrical, and the point should be sharp. Some jigs may allow for minor adjustments to fine-tune the angle.
Benefits of Using a Jig:
- Accuracy: Ensures the correct drill bit grinding angle is maintained on both sides.
- Consistency: Produces identical cutting edges for optimal performance.
- Ease of Use: Significantly simplifies the process, especially for beginners.
- Efficiency: Reduces the time spent on sharpening.
- Reduced Risk: Minimizes the chances of overheating or damaging the bit or yourself.
Sharpening Different Types of Drill Bits
While the principles are the same, specific considerations apply when sharpening metal bits versus other types.
Sharpening Metal Bits
When reconditioning drill bits made of high-speed steel (HSS) or other hard metals, pay close attention to heat management.
- Heat Treatment: Overheating can draw the temper from the steel, making the cutting edges softer and less durable.
- Cooling: Frequent dipping in water is essential. Don’t let the bit glow red.
- Fine Grit Wheel: A finer grit wheel (60-80) is generally better for metal bits to avoid removing too much material too quickly and to achieve a smoother edge.
- Sharpness Test: After grinding, test the sharpness on a piece of wood or soft metal. A sharp bit should bite into the material with moderate pressure.
Sharpening Wood Bits (Less Common on Bench Grinders)
While less common to sharpen on a bench grinder, some wood bits with spurs and reamers can be touched up. The primary cutting edges are usually more complex, and specialized jigs might be needed. The focus here is on maintaining the sharp point of the spurs and the cutting edges of the reamer.
Reconditioning Drill Bits: Beyond the Basic Grind
- Web Thinning: Over time, the “web” (the part in the center of the flutes connecting the cutting edges) can become too thick. A thick web makes drilling harder and generates more heat. Some specialized jigs or techniques allow for “web thinning,” which improves the bit’s cutting action. This is a more advanced technique.
- Grinding the Clearance: Ensure sufficient clearance behind the cutting edges. If the heel of the bit rubs against the material, it won’t cut properly. This is where the subtle twist of the bit during grinding (or the jig’s mechanism) comes into play.
Troubleshooting Common Sharpening Issues
- Uneven Cutting Edges: This usually means you’re not holding the bit at a consistent angle or rotating it evenly. A jig is the best solution.
- Overheated Bit: You’re grinding for too long without cooling. Reduce grinding time per pass and dip more frequently.
- Dull Point: The center point isn’t sharp, or the two cutting edges aren’t meeting at the center. Re-grind the tip carefully.
- Bit Wanders: This is often due to uneven cutting edges or an incorrect point angle. Ensure symmetry.
The Tool Sharpening Process: A Holistic View
Sharpening a drill bit on a bench grinder is part of a broader tool sharpening process. Just as you would maintain chisels, plane blades, or knives, drill bits benefit from regular attention. A sharp tool is a safe tool and an efficient tool. Regularly inspecting your drill bits and sharpening them before they become completely dull will make the job easier and produce better results.
Frequently Asked Questions (FAQ)
Q1: How often should I sharpen my drill bits?
A1: This depends on usage. If you notice bits are struggling to cut, producing ragged holes, or requiring excessive force, it’s time to sharpen. For frequent users, sharpening might be needed weekly or monthly. For occasional users, it could be much less frequent.
Q2: Can I sharpen a drill bit on a grinding wheel that’s too coarse?
A2: Yes, but it’s not ideal. A coarse wheel removes material very quickly, making it harder to control the angles and potentially overheating the bit more easily. It’s also more likely to leave a rougher edge that might not cut as cleanly. A finer grit is generally preferred for drill bits.
Q3: What’s the difference between the cutting angle and the clearance angle?
A3: The cutting angle is the angle of the edge that actually cuts into the material. The clearance angle (or relief angle) is the angle of the surface immediately behind the cutting edge. This clearance prevents the back of the bit from rubbing against the material, allowing the cutting edge to do its job effectively.
Q4: My bench grinder has a wire wheel on one side. Can I sharpen on that?
A4: No. A wire wheel is for cleaning and polishing, not for sharpening. You need an abrasive grinding wheel for the tool sharpening process of drill bits.
Q5: How can I tell if I’ve sharpened the drill bit correctly?
A5: A correctly sharpened drill bit will have two symmetrical cutting edges of equal length that meet at a sharp center point. When you spin it by hand, it should feel sharp to the touch (carefully!) and be able to bite into soft wood or plastic with gentle pressure. The hole it drills should be clean and precise.
By following these steps and prioritizing safety, you can master the art of sharpening metal bits and other drill bits on your bench grinder, ensuring your tools are always ready for action.