
What is the best way to change a blade on a Skil saw? The best way to change a blade on a Skil saw is to follow a clear, step-by-step process that prioritizes safety and ensures the new blade is installed correctly. This guide will walk you through everything you need to know about Skil circular saw blade replacement.
Working with power tools can be exciting, and getting the most out of your Skil circular saw means knowing how to change the blade. Whether you’re switching from a general-purpose blade to one designed for rip cuts or replacing a dull blade, this process is straightforward when done correctly. This article provides an in-depth look at how to replace a Skil circular saw blade safely and efficiently. We’ll cover the tools you’ll need, the steps involved in removing and installing the blade, and some important safety tips to keep in mind.
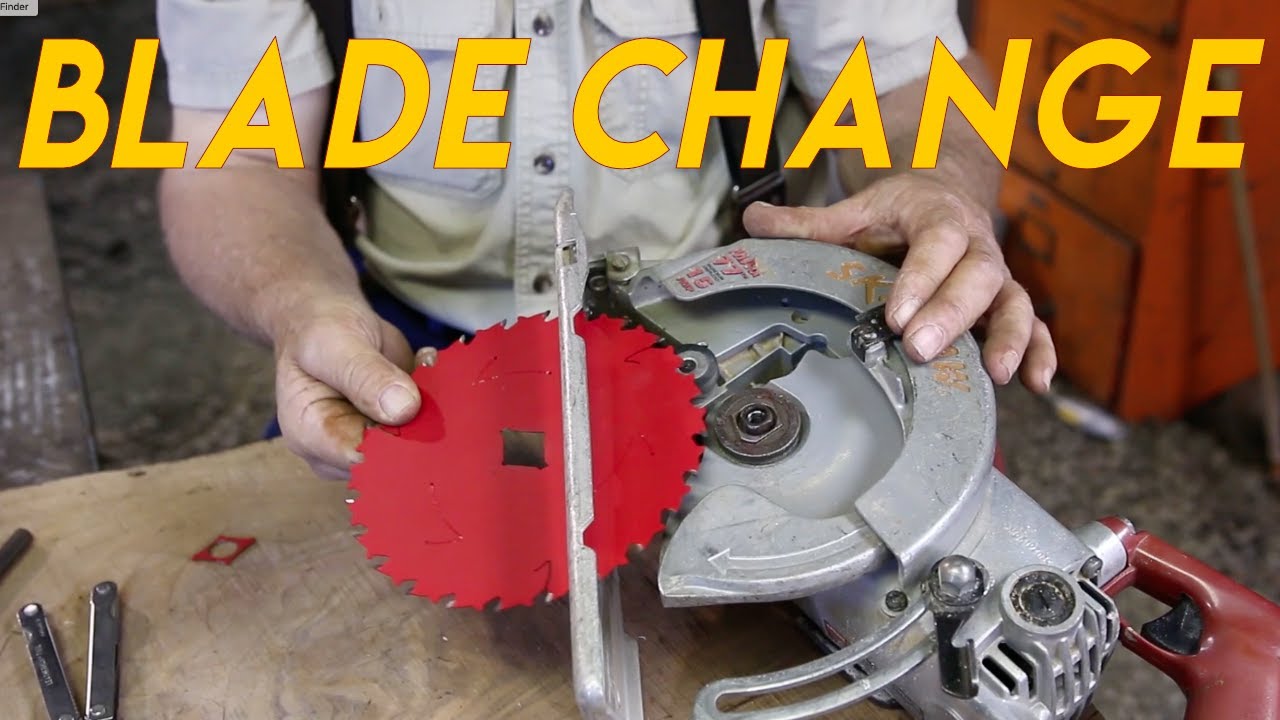
Image Source: i.ytimg.com
Why Changing Your Skil Saw Blade Matters
Over time, saw blades get dull. A dull blade doesn’t cut cleanly. It can also make the saw work harder. This means more effort for you and more strain on the tool. Changing to a sharp blade makes your work easier and safer. It also leads to better results.
Benefits of a Sharp Blade:
- Cleaner Cuts: Sharp blades slice through wood smoothly. This reduces tear-out and splintering.
- Less Effort: A sharp blade requires less force to push through material. This means less fatigue for you.
- Improved Safety: A blade that binds or jumps is dangerous. A sharp blade cuts predictably.
- Longer Tool Life: When the saw motor doesn’t have to struggle, it lasts longer.
Tools and Materials Needed for Skil Saw Blade Change
Before you start, gather what you need. Having everything ready makes the job smooth.
Essential Tools:
- Skil Saw Blade Change Tool: Most Skil saws come with a special tool. This is often a hex wrench or a pin to hold the spindle. If you don’t have it, check your saw’s manual or a hardware store.
- New Skil Saw Blade: Make sure it’s the correct size and type for your saw and your cutting needs.
- Gloves: Work gloves protect your hands from sharp edges and debris.
- Safety Glasses: Crucial for protecting your eyes from dust and metal chips.
- Clean Cloth: For wiping down the blade and the saw.
- Optional: Vice Grips or Pliers: Can be helpful for gripping the spindle if the included tool isn’t enough.
Choosing the Right Blade:
There are many types of Skil circular saw blades. The type you choose depends on the material you’re cutting and the finish you want.
| Blade Type | Teeth Count | Best For | Cut Quality |
|---|---|---|---|
| General Purpose | 24-40 | Rough construction, framing, plywood | Good |
| Fine Finish | 60+ | Trim, cabinetry, hardwoods, smooth finishes | Excellent |
| Rip Blade | 10-20 | Cutting along the grain of wood | Rougher |
| Crosscut Blade | 40-80 | Cutting across the grain of wood | Smoother |
| Plywood/Panel Blade | 60-80 | Plywood, laminates, particleboard | Very Smooth |
| Metal Cutting | Varies | Steel, aluminum, non-ferrous metals (specific blades) | Varies |
| Masonry/Concrete | Diamond Rim | Concrete, brick, stone (specific blades) | N/A (scoring) |
Always ensure the arbor hole on your new blade matches the spindle on your Skil saw.
Step-by-Step Guide to Changing Your Skil Saw Blade
Let’s get to the core of how to change a blade on a Skil saw. Follow these steps carefully for a safe and successful blade swap. This process is also known as changing a Skilsaw blade or how to swap Skilsaw blade.
Step 1: Disconnect Power – The Most Important Step
Before you touch anything, make sure the saw is unplugged. If your Skil saw is corded, unplug it from the power outlet. If it’s a cordless model, remove the battery pack. This is the most critical safety measure when changing a blade. Never attempt to change a blade on a powered tool.
Step 2: Position the Saw and Access the Blade
Lay your Skil circular saw on a flat, stable surface. The best position is usually upside down, with the base plate (or shoe) facing upwards. This gives you clear access to the blade guard and the blade itself.
Step 3: Secure the Blade and Loosen the Arbor Nut
This is where the Skil saw blade change tool comes in handy.
- Locate the Arbor Nut: The blade is held in place by a central nut called the arbor nut. It’s usually located on the side of the saw that faces away from the motor housing.
- Engage the Spindle Lock: Many Skil saws have a spindle lock button or pin. Push this button or pin to prevent the spindle (the shaft the blade attaches to) from turning while you loosen the nut. Some models might require you to hold the spindle with a secondary tool while you turn the arbor nut.
- Loosen the Arbor Nut: Use the appropriate tool (often a hex wrench or a specific socket from your Skil saw blade removal kit) to turn the arbor nut counter-clockwise. Remember, “lefty loosey.” The nut might be on there tightly, so you may need to apply firm pressure. If you have trouble, you can sometimes use a block of wood to gently tap the wrench handle to help break it loose.
Step 4: Remove the Old Blade
Once the arbor nut is loose enough, you can remove it completely.
- Remove the Arbor Nut: Carefully unscrew the nut by hand. Keep track of it, as you’ll need it for the new blade.
- Remove the Outer Flange: There’s usually an outer flange that sits on top of the blade. Lift this off. It might be stuck to the blade with dust or grime.
- Lift Off the Old Blade: Carefully slide the old blade off the spindle. Be mindful of the teeth, even if you think it’s dull.
- Inspect Components: Take this opportunity to check the outer flange and the spindle for any damage or excessive buildup of sawdust. Clean them with your cloth if necessary.
This part of the process is often referred to as Skilsaw blade removal.
Step 5: Install the New Blade
Now it’s time for Skil saw blade installation.
- Orient the New Blade: This is crucial for safety and performance. Look for an arrow on the side of the blade. This arrow indicates the direction of rotation. The arrow on the blade should point in the same direction as the motor spins when the saw is turned on. For most circular saws, this means the teeth of the blade should face forward, away from the motor housing. If you’re unsure, a quick test (with power disconnected) or consulting your saw’s manual can confirm the correct orientation.
- Place the Blade on the Spindle: Slide the new blade onto the spindle, ensuring it sits flush against the inner flange. Make sure the blade is centered and properly seated.
- Reattach the Outer Flange: Place the outer flange back onto the spindle, over the new blade. Ensure it’s seated correctly on the spindle.
- Thread the Arbor Nut: Screw the arbor nut back onto the spindle by hand, turning it clockwise. Make sure it threads on smoothly.
Step 6: Tighten the Arbor Nut
Properly tightening the arbor nut is essential.
- Engage the Spindle Lock Again: Push the spindle lock button or pin to hold the spindle securely.
- Tighten the Arbor Nut: Use your tool to tighten the arbor nut clockwise (“righty tighty”). Tighten it firmly. You want it snug, but don’t overtighten it to the point where you might strip the threads or damage the blade. The arbor nut should be tight enough that the blade doesn’t wobble. Many people use the “snug plus a quarter turn” method.
This completes the process of changing a Skilsaw blade safely.
Step 7: Final Checks and Cleanup
- Spin the Blade Manually: With the arbor nut tightened and the spindle lock released, gently try to spin the blade by hand. It should rotate freely without any wobbling.
- Check Guard Operation: Lift the lower blade guard manually to ensure it moves freely and retracts smoothly. It should spring back into place on its own.
- Clean Up: Wipe away any sawdust or debris from the blade and the saw’s base. Dispose of the old blade properly.
This entire procedure is a vital part of Skilsaw circular saw maintenance.
Safety First: Essential Precautions for Skilsaw Blade Change
Changing a blade on any saw carries inherent risks. Adhering to these safety guidelines is paramount when performing a Skil saw blade change.
Key Safety Practices:
- Always Disconnect Power: This cannot be stressed enough. Unplug corded saws and remove batteries from cordless saws.
- Wear Protective Gear: Safety glasses are non-negotiable. Gloves protect your hands from sharp edges.
- Ensure Blade is Correct: Double-check that the new blade fits your Skil saw model and has the correct arbor size.
- Check Blade Rotation Direction: Install the blade with the teeth pointing in the direction of rotation.
- Use the Correct Tools: Using the wrong tool can damage the saw or cause injury. Utilize the Skil saw blade change tool provided.
- Keep Hands Clear: Never place your hands or fingers near the blade or the blade guard assembly while working.
- Work in a Clean Area: A tidy workspace reduces the risk of tripping or having small parts lost.
- Never Force Anything: If a part is stuck, don’t force it. Try gentle persuasion with the right tools or consult your manual.
- Blade Guard Functionality: Always ensure the blade guard is operating correctly after the change.
By following these practices, you’re ensuring changing a Skilsaw blade safely.
Troubleshooting Common Issues During Blade Replacement
Occasionally, you might encounter a hiccup during the Skil circular saw blade replacement process. Here are some common problems and how to solve them.
Problem: Arbor Nut is Stuck Tight
- Cause: Over-tightening in the past, rust, or accumulated debris.
- Solution:
- Ensure you are using the correct tool for the arbor nut.
- Try a penetrating lubricant (like WD-40) on the threads and let it sit for a few minutes.
- Use a rubber mallet to gently tap the handle of your wrench to break the seal.
- If your saw has a spindle lock, make sure it’s fully engaged.
- Consider using a longer wrench for more leverage, but be careful not to strip the nut or damage the spindle.
Problem: Spindle Lock Won’t Engage or Hold
- Cause: Debris jamming the lock mechanism, worn lock pin, or a damaged spindle.
- Solution:
- Clean the spindle lock area thoroughly with a brush and compressed air.
- Inspect the lock pin for any damage.
- If the lock mechanism appears faulty, it might be time to have the saw serviced. In a pinch, you might try using vice grips on the spindle itself to hold it, but this requires caution.
Problem: New Blade Doesn’t Seem to Fit Correctly
- Cause: Incorrect blade diameter or arbor hole size, or debris on the spindle.
- Solution:
- Double-check that the new blade’s arbor hole matches your Skil saw’s spindle size.
- Ensure the blade is designed for your specific Skil saw model.
- Clean the spindle and the inner flange to remove any dust or residue that might be preventing a flush fit.
Problem: Blade Wobbles After Installation
- Cause: Arbor nut not tightened enough, damaged flange, or a warped blade.
- Solution:
- Re-tighten the arbor nut, ensuring the spindle lock is engaged.
- Inspect the outer flange for any bends or damage. If damaged, it needs replacement.
- Ensure the blade is seated correctly on both flanges.
- If you suspect the blade itself is warped, replace it with a new, quality blade.
Addressing these issues proactively contributes to successful Skilsaw maintenance.
Advanced Tips for Skil Saw Blade Management
Beyond the basic replacement, a few extra tips can help you get the most out of your Skil circular saw and its blades.
Blade Storage:
- Keep Blades Clean: Store blades in their original packaging or in a blade case. This protects them from damage and moisture.
- Avoid Contact: Don’t let blades touch each other or other metal objects, which can dull them prematurely or cause rust.
- Vertical Storage: Storing blades vertically in a rack is often best to prevent warping.
Blade Cleaning:
- Remove Sawdust: Regularly wipe down blades with a dry cloth after use.
- Stubborn Gunk: For more persistent resin or sap buildup, use a blade cleaner specifically designed for saw blades or a mild degreaser. Always follow the cleaner’s instructions and ensure the blade is completely dry before reinstallation.
When to Replace a Blade:
- Visible Damage: Look for chipped teeth, bent blades, or signs of excessive wear.
- Difficulty Cutting: If your saw starts to bog down, make rough cuts, or requires excessive force, the blade is likely dull.
- Overheating: An overly dull blade will cause the saw motor to overheat more quickly.
Maintaining your Skil circular saw properly includes paying attention to the blade’s condition.
Frequently Asked Questions About Skil Saw Blade Changes
Here are some common questions people have about changing a Skil saw blade.
Q1: How often should I change my Skil saw blade?
A1: The frequency depends on how much you use the saw and what you cut. For heavy use, you might need to change a blade every few weeks or months. For occasional use, a blade can last much longer. The best indicator is the quality of your cuts. If they start to degrade, it’s time for a change.
Q2: Can I use a blade from another brand on my Skil saw?
A2: Yes, as long as the blade has the correct diameter and arbor hole size for your specific Skil saw model. Always check the specifications to ensure compatibility.
Q3: What is the Skil saw blade change tool?
A3: It’s usually a hex wrench or a tool with a pin designed to engage the spindle lock and a socket or hex end to loosen the arbor nut. It’s often included with your Skil saw.
Q4: Do I need to lubricate the arbor nut when replacing the blade?
A4: It’s not typically necessary for routine changes. However, if you find the nut is difficult to remove, a small amount of anti-seize compound on the threads can help for future changes, but ensure it doesn’t get on the blade itself.
Q5: My Skil saw has a safety brake. Does this affect how I change the blade?
A5: The safety brake is designed to stop the blade quickly. It doesn’t directly affect the blade changing process itself, but always ensure the saw is completely powered down before you begin.
Conclusion: Mastering Your Skil Saw Blade Swap
Changing the blade on your Skil saw is a fundamental skill for any DIYer or professional. By following these step-by-step instructions and prioritizing safety, you can confidently perform a Skil circular saw blade replacement whenever needed. Remember the importance of disconnecting power, wearing protective gear, and using the right tools. Regular maintenance, including timely blade changes, ensures your Skil saw performs at its best, delivering clean cuts and reliable service for years to come. Whether you’re doing framing, trim work, or custom projects, a sharp, properly installed blade is key to success and safety.