
Can you use a DeWalt sliding miter saw for precise cuts? Yes, absolutely! A DeWalt sliding miter saw is a powerful tool designed for making accurate and repeatable cuts, especially on wider pieces of material. This guide will walk you through everything you need to know to get started, from initial setup to advanced techniques and essential maintenance. Whether you’re a seasoned woodworker or just starting out, this comprehensive guide will help you master your DeWalt sliding miter saw.
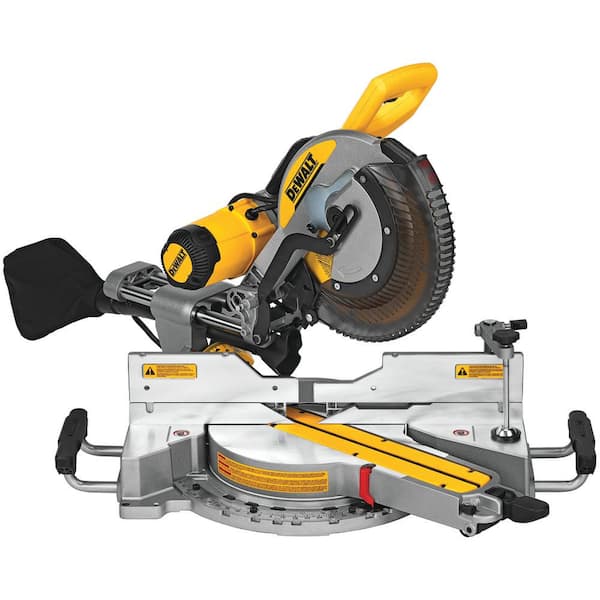
Image Source: images.thdstatic.com
Getting Started with Your DeWalt Miter Saw Setup
The first step to using any power tool effectively is proper setup. A well-configured saw ensures safety and accuracy.
Unpacking and Inspection
Carefully unpack your DeWalt sliding miter saw. Check for any damage that might have occurred during shipping. Ensure all parts are present as per the user manual. Familiarize yourself with the components: the base, the sliding arm, the blade, the fence, the miter and bevel adjustment controls, and the power cord.
Assembling the Stand (If Applicable)
Many DeWalt sliding miter saws come with an optional stand. Follow the manufacturer’s instructions for assembling the stand. A stable stand is crucial for precise work and safety. Ensure all bolts are tightened securely.
Mounting the Saw
If you’re not using a stand, you’ll need to mount the saw to a workbench or a sturdy surface. Use the pre-drilled holes on the saw’s base and appropriate hardware to secure it firmly. This prevents the saw from moving during operation.
Powering Up Safely
Before plugging in the saw, ensure the power switch is in the “off” position. Connect the saw to a properly grounded electrical outlet. If using an extension cord, make sure it’s heavy-duty and rated for the saw’s power requirements.
Making Accurate Cuts: Dewalt Miter Saw Cutting Angles
The hallmark of a sliding miter saw is its ability to make both miter (horizontal) and bevel (vertical) cuts, often at compound angles.
Understanding Miter and Bevel Adjustments
- Miter Adjustment: This controls the horizontal angle of the blade relative to the fence. Most DeWalt saws have a detent system with common angles like 0, 15, 22.5, 31.6, and 45 degrees, but also allow for fine adjustments.
- Bevel Adjustment: This controls the vertical tilt of the blade. Sliding miter saws excel here, allowing for significant bevel angles.
Setting Miter Angles
- Loosen the Miter Lock: Locate the miter lock handle, usually at the front of the saw base.
- Set the Desired Angle: Swing the saw head to the left or right to your desired miter angle. Use the angle scale and indicator for accuracy. Many DeWalt saws have positive stops at common angles.
- Lock the Angle: Tighten the miter lock handle securely to prevent any movement.
- Test the Cut: Make a test cut on scrap wood to confirm the angle is correct.
Setting Bevel Angles
- Loosen the Bevel Lock: Find the bevel lock lever or knob, typically located near the pivot point of the saw head.
- Tilt the Saw Head: Tilt the saw head to the desired bevel angle. Again, use the angle scale.
- Lock the Bevel: Securely tighten the bevel lock to hold the angle in place.
- Compound Cuts: For compound cuts (miter and bevel at the same time), set both the miter and bevel angles independently.
Using the Sliding Feature
The sliding arm allows the blade to travel forward and backward, enabling cuts on wider boards than a standard miter saw.
- Position the Material: Place your workpiece flat against the fence and the saw base.
- Align the Blade: Lower the blade to mark your cut line. The blade should align precisely with where you want the cut to occur.
- Engage the Slide: While holding the saw handle firmly, pull the sliding arm forward until the blade clears the workpiece.
- Make the Cut: Squeeze the trigger to start the saw. Once the blade is at full speed, smoothly push the sliding arm forward through the material.
- Retract and Release: Release the trigger to stop the blade. Wait for the blade to stop completely before retracting the sliding arm.
Essential Safety Precautions: Dewalt Miter Saw Safety Precautions
Safety should always be your top priority when operating any power tool.
Personal Protective Equipment (PPE)
- Safety Glasses: Always wear ANSI-approved safety glasses or a face shield to protect your eyes from flying debris.
- Hearing Protection: Miter saws can be loud. Wear earplugs or earmuffs to prevent hearing damage.
- Dust Mask: Use a dust mask or respirator, especially when cutting MDF or other materials that produce fine dust.
- Gloves: Wear snug-fitting work gloves to improve grip and protect your hands, but avoid loose-fitting gloves that could get caught in the blade.
- Appropriate Clothing: Avoid loose clothing, jewelry, or anything that could snag on the saw. Tie back long hair.
Operating the Saw Safely
- Secure Workpiece: Always clamp your workpiece firmly to the fence and base. Never try to hold small pieces by hand while cutting.
- Keep Hands Clear: Keep your hands well away from the blade path at all times. Use the handle to control the saw.
- Blade Guard: Ensure the blade guard is functioning correctly and always covers the blade when not in use.
- Wait for Full Speed: Always let the blade reach full speed before starting the cut.
- Smooth, Steady Motion: Push and pull the blade smoothly and steadily. Don’t force the cut.
- Clear Debris: Regularly clear sawdust and debris from the saw and the work area.
- Unplug Before Adjustments: Always unplug the saw before changing the blade, making adjustments, or performing maintenance.
- Never Reach Underneath: Do not reach under the saw while it is plugged in or running.
- Know Your Saw: Read the owner’s manual thoroughly before operating your DeWalt sliding miter saw.
Maintaining Your Tool: Dewalt Miter Saw Maintenance
Regular maintenance ensures your saw operates efficiently and safely for years to come.
Blade Care and Replacement
The blade is the most critical part of your saw. A dull or damaged blade can lead to poor cuts and increased safety risks.
How to Replace a DeWalt Miter Saw Blade
- Unplug the Saw: Crucially, disconnect the power.
- Lower the Blade Guard: Lift the blade guard by hand to access the blade. Some guards retract automatically when the blade is lowered, but manual assistance might be needed.
- Access the Arbor Nut: You’ll see a nut holding the blade onto the saw arbor. DeWalt often includes an arbor wrench that fits into a hole on the saw’s motor housing or base to lock the arbor, making it easier to loosen the nut.
- Loosen the Arbor Nut: Use the appropriate wrench (often supplied with the saw or a socket wrench) to loosen and remove the arbor nut. Remember, the nut is usually a standard right-hand thread (tightens clockwise, loosens counter-clockwise).
- Remove the Old Blade: Carefully slide the old blade off the arbor. Note the direction of the teeth.
- Install the New Blade: Place the new blade on the arbor, ensuring the teeth are facing the correct direction (usually indicated on the blade or saw). The teeth should point forward in the direction of the cut.
- Tighten the Arbor Nut: Reinstall the arbor nut and tighten it securely. Use the arbor lock if provided.
- Test the Guard: Lower the blade guard manually to ensure it moves freely and covers the blade properly.
- Plug In and Test: Plug the saw back in and briefly run it to ensure the new blade is installed correctly and spins freely.
Cleaning the Saw
- Sawdust Removal: Regularly brush or vacuum sawdust from the base, fence, sliding mechanism, and motor housing.
- Lubrication: Refer to your owner’s manual for specific lubrication points for the sliding mechanism and pivot points. Use the recommended lubricants.
Sharpening Blades
For optimal performance, consider having your blades professionally sharpened or replace them when they become dull.
Fine-Tuning Your Saw: Dewalt Miter Saw Adjustments
Even with precise factory settings, your saw might need minor adjustments over time or for specific tasks.
Adjusting the Fence
The fence should be perfectly perpendicular to the blade when the miter angle is set to zero.
- Set Miter to 0: Ensure the miter is locked at 0 degrees.
- Check for Squareness: Use a combination square or machinist’s square to check if the fence is 90 degrees to the blade.
- Make Adjustments: Look for adjustment screws or bolts on the fence assembly. These allow you to fine-tune the fence’s angle. Tighten or loosen them as needed.
Aligning the Blade with the Saw Slot
The blade should pass directly through the center of the saw slot on the base.
- Check Alignment: With the saw unplugged, carefully lower the blade and check its alignment with the slot.
- Adjust if Necessary: Some saws have adjustment screws for the pivot point of the arm to correct this alignment. Consult your manual.
Setting Blade Depth (if applicable)
Some models allow you to limit the cutting depth, which can be useful for making grooves or dados without cutting all the way through.
- Locate Depth Stop: Find the depth adjustment knob or screw.
- Set Depth: Lower the blade to the desired depth and lock the adjustment.
Enhancing Your Cutting Experience: Dewalt Miter Saw Accessories
Various accessories can expand the capabilities of your DeWalt sliding miter saw.
Work Supports and Extension Wings
These provide support for long workpieces, ensuring a stable cut and preventing the material from tipping.
Clamps
Forcing cuts or holding small pieces is dangerous. Use the built-in clamp or invest in aftermarket clamps to securely hold your workpiece.
Dust Collection Systems
A good dust collection setup is vital for a clean workspace and improved air quality.
- Dust Port: Most DeWalt saws have a dust port designed to connect to a shop vacuum or dust extractor.
- Dust Bags: Some models come with or can accept dust bags.
- Dust Collection Bags: Ensure your vacuum or dust extractor has sufficient airflow to effectively capture the dust.
Jigs and Fixtures
Custom jigs can be created for repetitive cuts or for holding oddly shaped workpieces.
Laser Guide Systems
Some DeWalt models feature integrated laser guides that project a line onto the workpiece, showing exactly where the blade will cut. This greatly improves accuracy.
Mastering Specific Cuts: Dewalt Miter Saw for Woodworking
Your DeWalt sliding miter saw is incredibly versatile for many woodworking projects.
Crosscuts
These are cuts made across the grain of the wood. Ensure the fence is set at 90 degrees to the blade.
Miter Cuts
Used for creating angles in frames, trim, and other projects. Set the miter angle as needed.
Bevel Cuts
Used for angled joints, especially for trim work where pieces meet at an angle. Set the bevel angle.
Compound Cuts
Combine miter and bevel angles for complex joints, like those found in crown molding.
Cutting Crown Molding
Cutting crown molding can seem daunting, but your sliding miter saw makes it manageable.
- Positioning: For standard 45-degree inside and outside corners, place the molding upside down and against the fence, with its back against the saw base.
- Miter and Bevel Settings: For a typical 38-degree crown molding, you’ll often use a 31.6-degree miter and a 33.9-degree bevel. Always consult your molding manufacturer’s guide or a reliable reference for specific angle settings.
- Test Cuts: Always make test cuts on scrap pieces to verify your settings before cutting the actual molding.
Making Repeat Cuts
Use the miter fence or a stop block clamped to the fence to make identical cuts on multiple pieces of wood.
Troubleshooting Common Issues: Dewalt Miter Saw Troubleshooting
Even with the best tools, you might encounter minor problems.
Blade Wobble
- Cause: Loose arbor nut, damaged arbor, bent blade, or worn bearings.
- Solution: Ensure the arbor nut is tight. Inspect the arbor for damage. Replace the blade if it’s bent. If bearing issues are suspected, professional service may be required.
Inaccurate Angles
- Cause: Loose miter or bevel locks, dirt or debris on adjustment mechanisms, or out-of-alignment saw components.
- Solution: Ensure locks are tightened. Clean adjustment mechanisms. Check and adjust fence and blade alignment as described in the “Dewalt Miter Saw Adjustments” section.
Burning Wood
- Cause: Dull blade, too slow a cutting speed, or feeding the material too slowly.
- Solution: Replace or sharpen the blade. Ensure the saw is at full speed before starting the cut. Increase your feed rate slightly for a cleaner cut.
Excessive Dust
- Cause: Inadequate dust collection system, leaks in the dust hose, or a clogged vacuum.
- Solution: Connect a more powerful shop vac or dust extractor. Seal any leaks in your dust hose. Clean or replace filters in your vacuum.
Understanding Your DeWalt Miter Saw’s Dust Collection
Effective dust collection is crucial for a clean working environment and your health.
How DeWalt Miter Saw Dust Collection Works
The dust port on your DeWalt sliding miter saw is designed to channel sawdust away from the blade and into a connected collection system. The sliding arm movement can sometimes create more dust than a standard miter saw, making good collection even more important.
Optimizing Dust Capture
- Proper Connection: Ensure a tight, secure fit between the saw’s dust port and your vacuum hose. Use adapters if necessary.
- Hose Size: Use a hose diameter recommended by your vacuum or dust extractor manufacturer.
- Vacuum Power: A powerful shop vacuum or dedicated dust extractor will provide the best results.
- Placement: Position your vacuum so the hose has minimal kinks and can follow the saw’s movement smoothly.
- Regular Cleaning: Keep the vacuum’s filter and dust bin clean to maintain optimal suction.
Frequently Asked Questions (FAQ)
Q1: What is the maximum width I can cut with my DeWalt sliding miter saw?
A1: The maximum cutting width depends on the specific model of your DeWalt sliding miter saw. Generally, sliding models can cut much wider pieces than their non-sliding counterparts. Consult your owner’s manual for the precise specifications for your model.
Q2: Can I use a standard miter saw blade on my sliding miter saw?
A2: While the blade diameter might be the same, it’s best to use blades specifically designed for miter saws, especially sliding ones. Blades with a higher tooth count generally provide cleaner cuts, which is desirable for fine woodworking. Always ensure the blade’s arbor size matches your saw’s spindle.
Q3: How often should I replace the blade on my DeWalt miter saw?
A3: You should replace or sharpen your blade when you notice signs of dullness, such as burning wood, rough cuts, or increased effort required to make a cut. For woodworking, a sharp blade is paramount for precision and safety.
Q4: What kind of wood can I cut with a DeWalt sliding miter saw?
A4: You can cut most types of wood, including softwoods (like pine and fir) and hardwoods (like oak and maple). You can also cut some composite materials, plastics, and even non-ferrous metals with the appropriate blade. Always use the correct blade for the material you are cutting.
Q5: My saw is making a lot of noise. What could be the problem?
A5: Excessive noise can be caused by several factors: a dull or damaged blade, loose parts, worn bearings, or even an unbalanced blade. First, check for loose components and ensure the blade is sharp and properly installed. If the noise persists, it might indicate a bearing issue, and you may need to consult a professional or your owner’s manual for further troubleshooting.
By following this comprehensive guide, you’ll be well-equipped to use your DeWalt sliding miter saw safely and effectively for all your woodworking projects. Remember to always prioritize safety, perform regular maintenance, and practice your cuts to achieve the best results.