
Can you drill a hole into plexiglass? Yes, you absolutely can drill a hole into plexiglass, and by following the right steps, you can achieve smooth, clean results without cracking or damaging the material. This guide will walk you through everything you need to know about plexiglass drilling, ensuring your projects turn out perfectly.
Plexiglass, also known by its chemical name acrylic or by brand names like Lucite and Perspex, is a versatile plastic material. It’s clear, strong, and can be shaped easily, making it a favorite for crafters, DIY enthusiasts, and professionals alike. However, its unique properties mean that drilling plastic sheets requires a different approach than drilling wood or metal. Get it wrong, and you might end up with a cracked piece of expensive material. Get it right, and you’ll have smooth, precise holes every time.
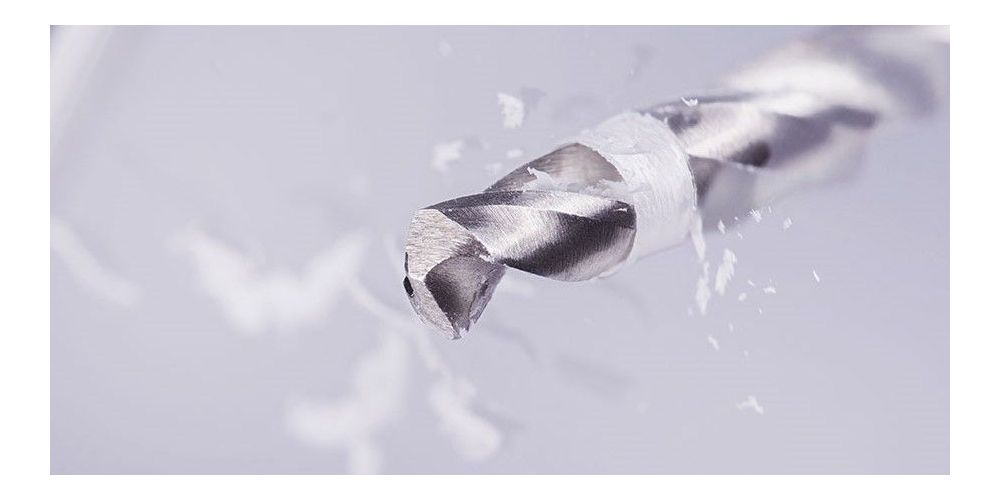
Image Source: www.cutmy.co.uk
Preparing for Plexiglass Drilling
Before you even pick up a drill, proper preparation is key to successful acrylic drilling. This involves gathering the right tools and ensuring your workspace is set up correctly.
Essential Tools and Materials
To drill plexiglass effectively, you’ll need more than just a drill and a bit.
- Drill: A variable-speed drill is ideal. This allows you to control the speed, which is crucial for preventing the plexiglass from melting or cracking. A cordless drill is convenient, but a corded one might offer more consistent power.
- Drill Bits: This is where choosing the right type of bit is paramount. Standard metal drill bits can work, but plastic drill bits designed specifically for plastics are the best option. These bits have a sharper point and a different flute design to help clear chips and prevent melting.
- Standard Bits: If using standard bits, look for sharp, high-speed steel (HSS) bits.
- Specialty Plastic Bits: These often have a split point for better starting and a steeper helix angle.
- Brad-Point Bits: These are also a good choice for woodworking and can work well in acrylic as they help guide the bit and prevent wandering.
- Masking Tape: Painter’s tape or masking tape is essential for protecting the surface of the plexiglass and helping to prevent scratches.
- Clamps: You’ll need clamps to securely hold the plexiglass in place. Never rely on just holding the material with your hands when drilling.
- Scrap Plexiglass: A piece of scrap plexiglass is invaluable for practicing your drilling technique before working on your main project.
- Safety Glasses: Always wear safety glasses to protect your eyes from flying debris.
- Gloves: Wearing gloves can help prevent fingerprints and provide a better grip.
- Marker: For marking the drill point.
- Vacuum Cleaner or Compressed Air: To clear away debris as you drill.
Setting Up Your Workspace
A stable and organized workspace makes the drilling process much safer and more effective.
- Secure Surface: Ensure your workbench or table is sturdy and won’t move during drilling.
- Clear Area: Remove any clutter that could get in the way or become a hazard.
- Good Lighting: Proper lighting helps you see your marks and control the drilling process.
- Ventilation: While acrylic dust isn’t as harmful as some other materials, it’s always good to have some ventilation, especially if drilling large quantities.
Choosing the Right Drill Bits for Plexiglass
The type of drill bit you use significantly impacts the outcome of your plexiglass drilling. Using the wrong bit can lead to melting, chipping, or cracking.
Specialty Plastic Drill Bits
These bits are engineered with specific geometries to tackle plastics like acrylic. They usually feature:
- Steeper Cutting Angles: This helps the bit to bite into the plastic more easily.
- Single or Double Flutes: Designed to efficiently remove melted plastic.
- Split Point Tips: This allows the bit to start drilling without “walking” across the surface.
When looking for plastic drill bits, you might see them labeled as bits for plastic, acrylic, or polycarbonate.
Standard Drill Bits – What to Consider
If specialty bits aren’t available, you can use standard drill bits, but with careful consideration:
- Sharpness is Crucial: Dull bits generate more heat and friction, increasing the risk of melting.
- High-Speed Steel (HSS): HSS bits are a better choice than standard carbon steel bits for plastics.
- Modified Angles: For standard bits, you can sometimes grind a small “web thinning” or “chip breaker” on the cutting edge to help reduce heat buildup and improve chip evacuation. However, this is an advanced technique and might be best left to those with experience.
Hole Saw for Plexiglass
For larger holes, a hole saw plexiglass setup is the way to go.
- Pilot Bit: Ensure the hole saw has a sharp pilot bit.
- Tooth Type: Look for hole saws with fine teeth designed for cutting plastics or a specific “carbide-tipped” hole saw for more aggressive cutting.
- Speed Control: Again, variable speed is critical when using a hole saw on plexiglass.
The Drilling Process: Step-by-Step Guide
Now that you have your tools and workspace ready, let’s get to the actual drilling. Precision and control are your best friends here.
Step 1: Marking the Hole Location
- Clean Surface: Make sure the area where you’ll be drilling is clean and free of dust or debris.
- Apply Masking Tape: Cover the intended drilling area with masking tape. This protects the surface from scratches and helps prevent the drill bit from slipping when you start.
- Mark the Center: Use a marker to accurately mark the exact center of the hole on top of the masking tape. A center punch can be helpful for creating a small indentation for the drill bit to sit in, further preventing slippage, especially with larger bits.
Step 2: Securing the Plexiglass
- Use Clamps: Place your plexiglass on a flat surface. Use clamps to firmly secure it. Make sure the clamps are not directly over the drilling area, but positioned to hold the sheet steady. If you’re drilling through a larger sheet, ensure the area around the hole is well-supported.
- Support for Thin Sheets: For thin sheets of plexiglass, drilling directly on a hard surface can cause the material to flex or crack as the bit exits. Place a piece of scrap wood or a plastic drilling block underneath the plexiglass where the hole will be. This provides support and helps achieve cleaner exit holes.
Step 3: Setting Up Your Drill
- Select the Right Bit: Choose your pre-selected drill bit or hole saw.
- Set the Drill Speed: This is a critical step for drilling plastic sheets. Generally, slower speeds are better for plexiglass.
- Small Bits (up to 1/4 inch): Start around 200-400 RPM.
- Larger Bits (1/4 inch and up): Aim for 100-250 RPM.
- Hole Saws: Even slower, perhaps 50-150 RPM, depending on the size.
- Consult Bit Manufacturer: If your bit comes with recommendations, follow those.
- Variable Speed is Key: If your drill doesn’t have a set speed, practice feathering the trigger on a piece of scrap wood to get a feel for controlling the speed.
Step 4: The Drilling Technique
This is where drilling techniques plastic really come into play to achieve smooth plexiglass holes.
- Start Slow: Begin drilling at a very slow speed.
- Apply Light, Steady Pressure: Don’t force the drill. Let the bit do the work. Excessive pressure will generate heat and increase the risk of cracking.
- Clear Chips Frequently: As you drill, the bit will create plastic chips and dust. Periodically (every few seconds for smaller holes, more often for larger ones), back the drill bit out slightly while it’s still spinning slowly. This clears the flutes of the bit, preventing buildup that can cause overheating and melting.
- Use Coolant (Optional but Recommended): For smoother results and to further reduce heat, you can use a small amount of cutting fluid or even a spritz of water. However, be cautious with water, as it can be messy. A small amount of cutting oil specifically for plastics is often best. Apply it to the bit before drilling and occasionally during the process.
- Listen to Your Drill: If the drill sounds like it’s struggling, you’re pushing too hard or the speed is too high. Back off.
- Watch for Melting: If you see plastic starting to melt and gum up the bit, stop immediately. You’re generating too much heat. Back the bit out, clear the material, and let it cool slightly. This is a sign that your plastic drilling speed might be too high.
Step 5: Exiting the Material
The exit point is often the most vulnerable part of acrylic drilling.
- Maintain Pressure: As the drill bit nears the exit side of the plexiglass, maintain light, consistent pressure.
- Support the Exit: If you’re not using a drilling block, ensure the plexiglass is well-supported right at the exit point.
- Backing Out: Once the bit has fully passed through, don’t pull it away abruptly. Keep the drill spinning slowly as you withdraw it to ensure a clean finish and prevent snagging.
Step 6: Finishing Touches
- Remove Tape: Carefully peel off the masking tape.
- Clean the Hole: Use a soft cloth or brush to remove any remaining dust or plastic shavings. A vacuum cleaner is also excellent for this.
- Deburring (If Necessary): If there are any small burrs or rough edges around the hole, you can gently smooth them with very fine-grit sandpaper (e.g., 400-600 grit) or a deburring tool designed for plastics. Be careful not to scratch the surface.
Troubleshooting Common Plexiglass Drilling Problems
Even with careful preparation, issues can arise. Here’s how to deal with them.
Problem: Melting and Gumming
- Cause: Too much heat, generated by drilling too fast or with too much pressure, or using a dull bit.
- Solution:
- Slow down your plastic drilling speed.
- Reduce drilling pressure.
- Use a sharper bit, preferably a specialty plastic drill bit.
- Clear chips more frequently.
- Consider using a coolant.
Problem: Cracking or Chipping
- Cause: Excessive heat, drilling too fast, too much pressure, lack of support, or using a bit that’s too wide for the thickness of the plexiglass without proper support.
- Solution:
- Ensure the plexiglass is securely clamped.
- Use a drilling block or scrap wood underneath for support, especially for thinner materials.
- Slow down and reduce pressure.
- Use a sharp bit designed for plastics.
- For larger holes, consider using a hole saw plexiglass bit and drilling in stages, backing out to clear chips often.
Problem: Bit Walking and Scratching
- Cause: Starting the drill at too high a speed, or not having a stable starting point.
- Solution:
- Always start drilling at a very slow speed.
- Use masking tape over the drilling area.
- Consider using a center punch to create a small starting indentation.
- Ensure the plexiglass is firmly clamped.
Problem: Uneven or Rough Holes
- Cause: Dull bit, inconsistent speed, or improper pressure.
- Solution:
- Use sharp, high-quality plastic drill bits.
- Maintain a consistent, slow speed and steady pressure.
- Ensure you are clearing chips effectively to prevent the bit from snagging.
Advanced Techniques and Considerations for Plexiglass Fabrication
For more complex projects or when working with very thick plexiglass, a few extra tips can elevate your plexiglass fabrication skills.
Drilling Pilot Holes
When drilling holes larger than 1/4 inch, it’s often beneficial to drill a pilot hole first.
- Size: Choose a pilot bit that is significantly smaller than your final desired hole size (e.g., 1/8 inch or 3/16 inch).
- Benefits: The pilot hole guides the larger bit, reducing the chance of the bit wandering and making it easier to start the larger hole.
Using a Drill Press
A drill press offers superior stability and control compared to a handheld drill, which is ideal for precision acrylic drilling.
- Advantages:
- Consistent Speed: You can set and maintain a precise speed.
- Vertical Accuracy: Ensures the drill bit is perfectly perpendicular to the surface.
- Stable Platform: The workpiece is secured to the press table, providing excellent stability.
- Setup:
- Secure the plexiglass to the drill press table using clamps.
- Set the appropriate slow speed.
- Use a drilling block underneath if necessary.
- Lower the drill bit slowly and steadily.
Drilling Multiple Holes
When drilling several holes in a line or pattern, consistency is key.
- Jigs and Fixtures: For repetitive drilling, consider creating a jig or template. This can be a piece of scrap material with accurate hole locations marked or drilled, which you then clamp onto your project piece to guide your actual drilling. This ensures perfect alignment and spacing.
Drilling Very Thick Plexiglass
Working with thick plexiglass (e.g., 1/2 inch or more) requires extra attention.
- Slower Speeds: You’ll likely need to use even slower speeds than recommended for thinner sheets.
- More Frequent Clearing: Back out the bit very frequently to clear chips and prevent heat buildup.
- Coolant is Highly Recommended: A good coolant will significantly improve results.
- Hole Saw Caution: For very large holes in thick material, a good quality hole saw with a slow and steady approach is essential.
Table: Recommended Speeds for Drilling Plexiglass
The following table provides general guidelines for drill speeds. Always prioritize the recommended speed for your specific drill bit and consult the manufacturer’s guidelines if available.
| Drill Bit Diameter | Recommended Speed (RPM) |
|---|---|
| 1/16″ – 1/4″ | 200 – 400 |
| 1/4″ – 1/2″ | 100 – 250 |
| 1/2″ – 1″ | 50 – 150 |
| Hole Saw (1″ – 2″) | 50 – 150 |
| Hole Saw (2″ +) | 25 – 100 |
Note: These are approximate ranges. Adjust based on your specific drill, bit, and material thickness.
FAQ: Common Questions About Drilling Plexiglass
Here are answers to some frequently asked questions regarding plexiglass drilling.
Q: Can I use a regular wood drill bit to drill plexiglass?
A: Yes, you can, but it’s not ideal. If you must use a wood bit, ensure it is extremely sharp. It’s better to use high-speed steel (HSS) bits or specialty plastic drill bits. If using wood bits, be extra cautious about speed and pressure to avoid melting.
Q: What is the best way to get smooth plexiglass holes?
A: To achieve smooth smooth plexiglass holes, use sharp plastic drill bits, drill at a slow, consistent speed, apply light pressure, and clear chips frequently. A drill press offers more control for a smoother outcome.
Q: What speed should I drill plexiglass at?
A: For most plexiglass drilling, slower speeds are best. Generally, start around 200-400 RPM for smaller bits and go down to 50-150 RPM for larger bits and hole saws. Always adjust based on your drill’s capabilities and the bit you are using.
Q: Do I need a special drill bit for plexiglass?
A: While not strictly mandatory, plastic drill bits are highly recommended. They are designed with specific geometries that reduce heat buildup and improve chip evacuation, leading to cleaner holes and less risk of damage.
Q: How do I prevent plexiglass from cracking when drilling?
A: Prevent cracking by securing the plexiglass firmly with clamps, using a support block underneath, drilling at slow speeds with minimal pressure, and clearing chips regularly. A sharp, appropriate drill bit is also crucial.
Q: Can I use a hole saw to drill plexiglass?
A: Yes, you can use a hole saw plexiglass setup for larger diameter holes. Ensure the hole saw is sharp and designed for cutting plastics. Drill at a very slow speed, with steady pressure, and clear chips frequently.
Conclusion
Drilling plexiglass is a straightforward process when you know the right techniques. By selecting appropriate tools, preparing your workspace meticulously, and employing controlled drilling methods, you can achieve professional-quality results. Remember to prioritize safety, use slow speeds, and manage heat effectively for the smoothest, cleanest holes. With a little practice, you’ll be confidently tackling any plexiglass fabrication project that requires drilling. Happy crafting!