
A Dewalt miter saw is a powerful tool for precise angled cuts, making it a favorite for DIYers and professionals alike. What is a Dewalt miter saw used for? Dewalt miter saws are primarily used for making accurate crosscuts and miter cuts in wood and other materials. Can I use a Dewalt miter saw for metal? While some specialized blades are available for metal cutting, standard miter saws are designed for wood. Always check your saw’s manual for specific material guidelines. Who is a Dewalt miter saw for? They are for anyone needing to make repeatable, precise angled cuts, from framing and trim work to furniture building.
This guide will walk you through everything you need to know to use your Dewalt miter saw safely and effectively, from initial setup to advanced techniques.
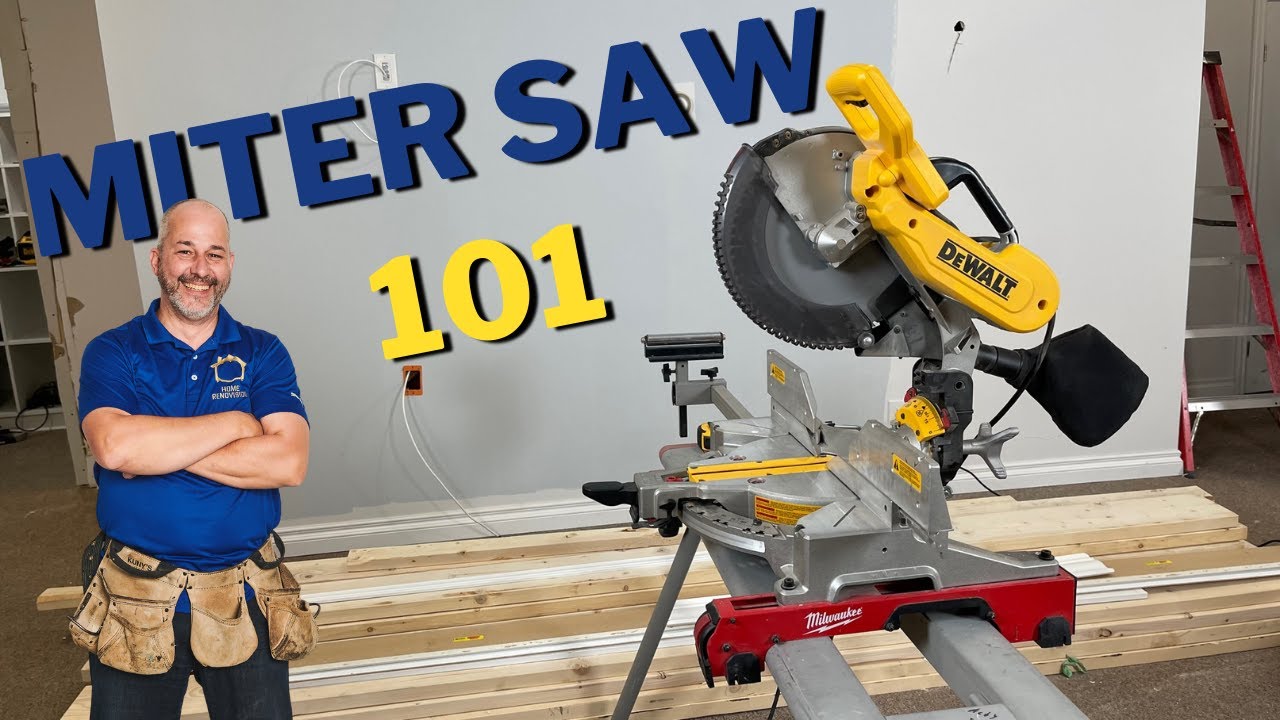
Image Source: i.ytimg.com
Getting Started: Dewalt Miter Saw Setup
Before you even plug in your Dewalt miter saw, proper setup is crucial for both safety and accuracy. A well-prepared workspace and a correctly assembled saw prevent accidents and ensure clean cuts.
Unpacking and Initial Inspection
Carefully unpack your new Dewalt miter saw. Check for any visible damage that might have occurred during shipping. Ensure all parts listed in the manual are present. Familiarize yourself with the different components: the base, the fence, the blade guard, the motor housing, the miter angle adjustment, the bevel angle adjustment, and the trigger switch.
Powering Up: Electrical Safety
- Check the Power Source: Ensure your saw is compatible with your home’s electrical supply. Most Dewalt miter saws use standard household outlets.
- Inspect the Power Cord: Before each use, examine the power cord for any fraying or damage. Never use a saw with a damaged cord.
- Use a GFCI Outlet: For added safety, especially in damp environments like workshops, plug your saw into a Ground Fault Circuit Interrupter (GFCI) outlet.
- Extension Cords: If you must use an extension cord, ensure it’s heavy-duty and rated for the amperage of your saw. An undersized cord can overheat and damage the motor.
Securing Your Saw: Stability is Key
A wobbling saw is a recipe for disaster. Your Dewalt miter saw needs to be securely mounted.
- Benchtop Mounting: Many Dewalt miter saws are designed for benchtop use. Use the pre-drilled holes in the saw’s base to securely bolt it to a sturdy workbench. Ensure the workbench itself is stable.
- Miter Saw Stands: For portability or when a workbench isn’t ideal, a dedicated miter saw stand is an excellent option. Dewalt offers various stands that often include quick-release mechanisms for easy mounting and removal of your saw. Ensure the stand is fully extended and locked in place before attaching the saw.
The Heart of the Cut: Dewalt Miter Saw Blade Installation
The blade is the business end of your miter saw. Proper installation ensures safety and optimal cutting performance.
Choosing the Right Blade
- Tooth Count: For general crosscutting and trim work, a blade with 40-60 teeth is ideal. For finer finishes, opt for more teeth. For rougher cuts or ripping, fewer teeth are better.
- Blade Material: Carbide-tipped blades offer superior durability and edge retention compared to high-speed steel.
- Kerf: The kerf is the width of the cut the blade makes. Thin-kerf blades require less power and produce less waste, but can be more prone to deflection.
Step-by-Step Blade Installation
- Disconnect Power: Crucially, unplug the saw before any maintenance or blade changes.
- Lower the Saw Head: Bring the saw head down to a comfortable working position.
- Engage the Spindle Lock: Most Dewalt miter saws have a spindle lock button or lever. Depress or engage this to prevent the arbor shaft from turning.
- Remove the Blade Guard: You may need to loosen a screw or two to lift or remove the blade guard. Refer to your saw’s manual.
- Loosen the Outer Flange Nut: Use the provided wrench or a socket wrench to loosen and remove the nut holding the outer flange in place. The arbor shaft rotates counter-clockwise to loosen.
- Remove the Old Blade: Carefully slide the old blade off the arbor. Pay attention to the direction of the teeth.
- Install the New Blade: Place the new blade onto the arbor shaft, ensuring the teeth are pointing in the correct direction (typically downward on the front of the saw). The arrow on the blade should also indicate the direction of rotation.
- Replace the Outer Flange: Slide the outer flange back onto the arbor shaft, ensuring it sits flush against the blade.
- Tighten the Outer Flange Nut: Reinstall the nut and tighten it securely using the wrench. Ensure the spindle lock is still engaged.
- Reinstall the Blade Guard: Carefully reattach the blade guard, ensuring it moves freely.
- Plug In and Test: Plug the saw back in and briefly spin the blade to ensure it’s secure and spins freely without wobble.
Table 1: Blade Tooth Count and Application
| Tooth Count | Best For | Cut Quality |
|---|---|---|
| 24-36 | Ripping lumber, rough framing | Rough |
| 40-60 | Crosscutting, trim, general use | Medium |
| 60-80+ | Fine finishes, molding, melamine | Fine |
Mastering Your Dewalt Miter Saw: Dewalt Miter Saw Angle Adjustment
The miter saw’s ability to cut angles is its defining feature. Accurate angle adjustments are key to precise joinery.
Miter Angle Adjustment
The miter angle controls the horizontal rotation of the saw head.
- Loosen the Miter Lock: Locate the miter lock knob or lever, usually at the front of the saw base. Loosen it to allow the saw head to pivot.
- Set the Desired Angle: Many Dewalt miter saws have detents (preset stops) for common angles like 0, 15, 22.5, 30, and 45 degrees. Align the indicator mark on the saw base with the desired angle detent. For custom angles, simply pivot the saw head to the desired position.
- Lock the Miter Angle: Once the correct angle is set, tighten the miter lock knob firmly to prevent any movement during the cut.
- Check the Scale: Always double-check the miter scale to confirm the angle is accurately set.
Bevel Angle Adjustment
The bevel angle controls the vertical tilt of the saw blade, allowing for angled cuts through the thickness of the material.
- Loosen the Bevel Lock: Find the bevel lock knob or lever, typically located on the side of the saw arm. Loosen it to allow the saw head to tilt.
- Set the Desired Angle: Similar to the miter adjustment, detents are often present for common bevel angles (e.g., 0, 15, 30, 45 degrees). For custom bevels, tilt the saw head to the desired angle.
- Lock the Bevel Angle: Tighten the bevel lock knob securely.
- Check the Scale: Verify the bevel angle using the built-in scale.
Dewalt Miter Saw Calibration
Over time, or after rough handling, your saw’s angle settings might need recalibration to ensure accuracy.
- Zeroing the Miter: With the saw head perfectly vertical (0-degree miter), ensure the miter indicator aligns exactly with the 0 mark on the base. If it doesn’t, there’s usually an adjustment screw or mechanism to fine-tune this alignment. Consult your saw’s manual for specific instructions.
- Zeroing the Bevel: Lower the blade so it’s perpendicular to the base (0-degree bevel). Check that the bevel indicator aligns with the 0 mark on the scale. Similar to the miter, a calibration screw should be available for adjustments.
- Squareness Check: Make a 90-degree cut on a piece of scrap wood. Then, flip the piece of wood over and make another 90-degree cut from the opposite side, using the same fence reference. If the cuts are perfectly aligned, your saw is square. If not, recalibrate as described above.
Prioritizing Safety: Dewalt Miter Saw Safety Tips
Safety should always be your top priority when operating any power tool, especially a miter saw.
Personal Protective Equipment (PPE)
- Eye Protection: Always wear safety glasses or a face shield. Wood chips and dust can fly during cutting.
- Hearing Protection: Miter saws can be loud. Use earplugs or earmuffs to protect your hearing.
- Dust Mask or Respirator: Sawdust can be harmful. Wear a dust mask or respirator to avoid inhaling fine particles.
- Gloves: While some prefer not to wear gloves while operating power tools due to the risk of them getting caught, clean, well-fitting work gloves can protect your hands from splinters and abrasions when handling lumber. However, never wear loose-fitting gloves.
Safe Operating Practices
- Read the Manual: Before your first use, thoroughly read the owner’s manual for your specific Dewalt miter saw model.
- Clear the Workspace: Ensure the area around your saw is free of clutter, debris, and tripping hazards.
- Secure the Material: Always firmly hold the workpiece against the fence and table. Never attempt to cut freehand. Use clamps for smaller pieces or when making repetitive cuts.
- Keep Hands Away from Blade: Maintain a safe distance between your hands and the spinning blade at all times. Never reach over or under the blade while it’s in motion.
- Wait for the Blade to Stop: Never attempt to remove the workpiece, adjust settings, or clear debris while the blade is still spinning. Allow the blade to come to a complete stop before taking any action.
- Proper Stance: Stand with a balanced stance, slightly to the side of the blade’s cutting path, not directly in front of it.
- Don’t Force the Cut: Let the saw do the work. Forcing the blade can lead to binding, kickback, or a poor cut.
- Kickback Awareness: Kickback occurs when the blade binds in the wood, causing the workpiece to be violently thrown back towards the operator. This can happen if the wood is not properly supported, the blade is dull, or the wood binds on the blade. Always be aware of this risk.
- Blade Guard Functionality: Ensure the blade guard is always in place and functioning correctly, covering the blade when it’s not in use. Do not disable or remove the blade guard.
- Single Operator: Never allow anyone else to operate the saw while you are in the vicinity.
- Power Off When Not in Use: Always unplug the saw when changing blades, making adjustments, or leaving it unattended.
Enhancing Your Cutting: Dewalt Miter Saw Cutting Techniques
With safety and setup covered, let’s explore how to achieve the best cuts with your Dewalt miter saw.
Basic Crosscuts
This is the most common cut for miter saws, used to shorten pieces of lumber to a desired length.
- Measure and Mark: Accurately measure and mark your cut line on the workpiece.
- Position the Material: Place the workpiece against the fence and align the cut line with the blade. Ensure the material is held firmly against both the fence and the table.
- Set the Miter Angle: Adjust the miter angle to 0 degrees for a straight crosscut.
- Lower the Blade: With the saw off, bring the spinning blade down to just touch the cut line to ensure accurate alignment. Then, raise the blade.
- Make the Cut: Hold the trigger and smoothly bring the spinning blade down through the workpiece. Allow the blade to complete the cut.
- Raise the Blade and Release Trigger: Once the cut is finished, allow the blade to stop spinning completely before raising the saw head. Release the trigger.
- Remove the Workpiece: Carefully remove the cut piece.
Miter Cuts
These cuts are used for joining pieces at angles, such as in picture frames or trim work.
- Set the Miter Angle: Adjust the miter angle to your desired setting (e.g., 45 degrees).
- Position and Secure: Place the workpiece against the fence. For miter cuts, you’ll typically place the material so the cut is made on the waste side of your mark. Ensure it’s held firmly.
- Align and Cut: Lower the spinning blade through the material as described for crosscuts.
- Repeat for Opposite Angle: For a corner joint, you’ll need to set the miter angle to the opposite degree (e.g., -45 degrees) and make a complementary cut on the mating piece.
Bevel Cuts
These cuts are used for creating angled edges or for compound miter cuts.
- Set the Bevel Angle: Adjust the bevel angle to your desired setting (e.g., 45 degrees).
- Position and Secure: Place the workpiece against the fence. The bevel means the blade will tilt through the thickness of the material. Hold the workpiece firmly.
- Align and Cut: Make the cut as usual, letting the spinning blade pass through the material.
Compound Miter Cuts
This is a combination of a miter and a bevel cut, used for intricate trim work like crown molding.
- Identify Cut Angles: The angles for crown molding, for example, are determined by the pitch of the ceiling and wall. These are typically specified by the molding manufacturer or in carpentry guides.
- Set Miter and Bevel: Set both the miter and bevel angles on your saw according to the required angles for your specific molding profile. Modern Dewalt miter saws often have specific detents for common crown molding installations.
- Position and Secure: Place the molding against the fence and saw table in the correct orientation. This is often done with the molding “upside down” and “backwards” compared to how it sits on the wall.
- Align and Cut: Perform the cut carefully, ensuring the material remains stable throughout the process.
Table 2: Common Miter and Bevel Angles for Joinery
| Joint Type | Miter Angle | Bevel Angle | Notes |
|---|---|---|---|
| Square Crosscut | 0° | 0° | Straight cut across the width of lumber |
| 45° Miter Joint | 45° | 0° | For corners, picture frames |
| 22.5° Miter Joint | 22.5° | 0° | For octagonal shapes |
| Bevel Cut | 0° | 45° | Angled cut through the thickness of lumber |
| Crown Molding | Varies | Varies | Typically 31.6° or 38° for standard 45° walls |
Managing Debris: Dewalt Miter Saw Dust Collection
Sawdust is an unavoidable byproduct of cutting wood. Effective dust collection is vital for a clean workspace, improved visibility, and your health.
Understanding Your Saw’s Dust Port
Most Dewalt miter saws come equipped with a dust port, usually located at the rear of the motor housing or blade guard assembly. This port is designed to connect to a dust collection system.
Connecting to a Dust Collector
- Shop Vacuums: For smaller jobs or hobbyist use, a standard shop vacuum with a suitable adapter can be quite effective. Ensure your vacuum has adequate suction power.
- Dedicated Dust Collectors: For more extensive use, a dedicated dust collection system (like a portable dust collector or a whole-shop system) is ideal. These systems offer more robust airflow and collection capacity.
- Dust Bags: Some saws come with a fabric dust bag that attaches to the dust port. While better than nothing, these are generally less effective than connecting to a vacuum or dedicated collector.
Improving Dust Collection Efficiency
- Proper Fit: Ensure the adapter or hose fits snugly to the saw’s dust port to minimize air leakage.
- Hose Diameter: Use a hose diameter that matches your dust collector’s requirements for optimal airflow.
- Keep it Clear: Regularly check the dust port and hose for blockages.
- Blade Guard Design: The effectiveness of dust collection is also heavily influenced by the design of the blade guard. Some guards are better at channeling dust than others.
Maintaining Your Tool: Dewalt Miter Saw Maintenance
Regular maintenance ensures your Dewalt miter saw operates safely and reliably for years to come.
Cleaning Your Saw
After each use, take a few minutes to clean your saw:
- Dust and Debris: Use a brush, compressed air, or a vacuum to remove sawdust and debris from the base, fence, motor housing, and sliding mechanisms (if applicable).
- Blade: If the blade becomes gummed up with sap or pitch, clean it with a specialized blade cleaner or a degreaser. Ensure the blade is completely dry before reinstallation.
Lubrication
- Moving Parts: Check your manual for any specific lubrication points on the miter and bevel adjustment mechanisms, or sliding components. Use the recommended lubricant sparingly. Over-lubrication can attract dust.
Blade Sharpening and Replacement
- Dull Blades: A dull blade will produce rough cuts, require more force, and increase the risk of kickback.
- Sharpening: Blades can be sharpened, but this is a specialized process. For most users, replacing a dull blade is more practical.
- Replacement Schedule: Replace blades when they show signs of wear, chipping, or when you consistently get poor cut quality.
Inspection of Components
- Power Cord: Regularly check the power cord for damage.
- Blade Guard: Ensure the blade guard moves freely and springs back into place correctly.
- Fence and Table: Check for flatness and any damage that could affect accuracy.
- Adjustment Knobs/Levers: Make sure they tighten securely.
Solving Common Issues: Dewalt Miter Saw Troubleshooting
Even with proper maintenance, you might encounter minor issues. Here’s how to address them.
Saw Won’t Start
- Check Power: Ensure the saw is plugged in, the outlet has power, and the circuit breaker hasn’t tripped.
- Safety Lockout: Verify the safety lockout switch or trigger mechanism isn’t engaged.
- Overload Protection: If your saw has thermal overload protection, it might have tripped. Unplug the saw and let it cool down for a few minutes before trying again.
Blade Wobbles or Vibrates Excessively
- Blade Installation: Recheck that the blade is correctly installed, the nut is tight, and the blade is not warped or damaged.
- Arbor Bearings: If the wobble persists, the arbor bearings might be worn. This usually requires professional servicing.
Inaccurate Angle Cuts
- Calibration: Recalibrate the miter and bevel angles as described earlier in the “Dewalt Miter Saw Calibration” section.
- Loose Locks: Ensure the miter and bevel lock mechanisms are tightened securely.
Poor Cut Quality (Rough or Burned Edges)
- Dull Blade: This is the most common cause. Replace or sharpen the blade.
- Blade Speed: Ensure the blade is spinning at the correct RPM for the material being cut (though most miter saws have a fixed speed).
- Forcing the Cut: Let the saw blade do the work. A smooth, steady feed rate is key.
Expanding Capabilities: Dewalt Miter Saw Accessories
Enhance your Dewalt miter saw’s functionality with various accessories.
Stands and Extension Wings
- Portability: Miter saw stands, especially those with wheels, make it easy to move your saw around the workshop or job site.
- Support: Extension wings or outfeed supports are invaluable for cutting longer pieces of lumber, providing stable support.
Clamps
- Material Stability: Integrated or attachable clamps help secure the workpiece to the saw’s fence and table, improving safety and cut accuracy.
Laser Guide Systems
- Cut Line Accuracy: Many Dewalt saws come with or can be fitted with a laser guide. This projects a line onto the workpiece, showing exactly where the blade will cut, improving precision.
Dust Collection Attachments
- Specialized Hoses and Adapters: As discussed, these are crucial for effective dust management.
Specialized Blades
- Metal Cutting Blades: If your saw is rated for it, specialized blades allow for cutting materials like aluminum or steel.
- Nested Flourescent Bulb Recycling Blades: For specific recycling applications.
Frequently Asked Questions (FAQ)
Q1: How do I change the blade on my Dewalt miter saw?
A1: Always unplug the saw first. Use the spindle lock to hold the arbor, loosen the outer flange nut with the provided wrench, remove the old blade, install the new blade with teeth facing the correct direction, replace the outer flange and nut, and tighten securely. Reinstall the blade guard.
Q2: My Dewalt miter saw is cutting at an angle when I set it to 90 degrees. What should I do?
A2: Your saw likely needs calibration. Follow the steps for “Dewalt Miter Saw Calibration” to realign the 0-degree settings for both the miter and bevel angles.
Q3: Can I cut pressure-treated lumber with my Dewalt miter saw?
A3: Yes, you can, but it’s a good idea to use a dedicated blade for treated lumber, as it can be abrasive and dull standard blades faster. Also, ensure good dust collection and wear respiratory protection, as treated wood can release chemicals when cut.
Q4: What is the difference between a miter cut and a bevel cut?
A4: A miter cut is a horizontal angle cut across the width of the material, pivoting the saw head left or right. A bevel cut is a vertical tilt of the blade through the thickness of the material.
Q5: How important is dust collection for a miter saw?
A5: Dust collection is very important for safety, health, and a cleaner workspace. It improves visibility of the cut line and reduces the amount of airborne sawdust, which can be harmful.
By following these guidelines for Dewalt miter saw setup, Dewalt miter saw blade installation, Dewalt miter saw angle adjustment, Dewalt miter saw safety tips, Dewalt miter saw cutting techniques, Dewalt miter saw dust collection, Dewalt miter saw maintenance, Dewalt miter saw troubleshooting, Dewalt miter saw accessories, and Dewalt miter saw calibration, you can use your tool safely and achieve professional-quality results. Happy cutting!