
Can you drill into stone? Yes, you can drill into stone, but it requires the right tools, techniques, and safety precautions. This guide will walk you through how to drill into stone safely and effectively, covering various types of stone and the best approaches for each. Whether you’re looking at stone drilling techniques for a DIY project or a professional task, mastering drilling into rock is essential.
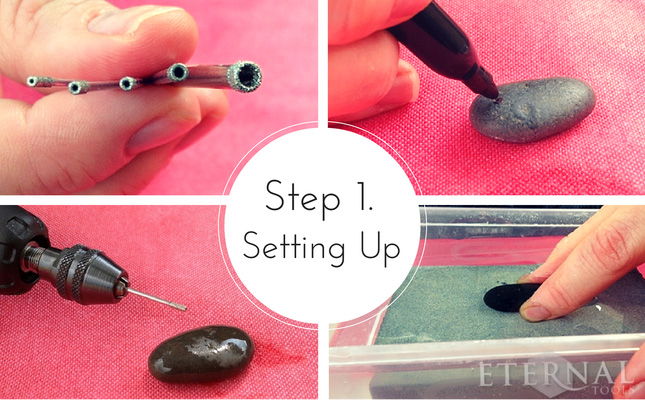
Image Source: theme-assets.ecommercedns.uk
Getting Started: Essential Gear for Stone Drilling
Before you even think about picking up a drill, having the right equipment is crucial for successful and safe stone drilling. This isn’t just about having a drill; it’s about having the right drill and the right accessories.
The Right Drill for the Job
The type of drill you need depends heavily on the material you’re drilling into and the size of the hole you need to create.
- Standard Corded or Cordless Drill: For smaller holes in softer stones or for light-duty masonry drilling, a powerful cordless or corded drill can suffice. Look for models with adjustable speed and torque settings.
- Hammer Drill: This is your go-to for harder materials like concrete and some types of natural stone. A hammer drill has a pulsating action that helps to break up the material as it drills. This is particularly effective when drilling into rock.
- Rotary Hammer Drill: For very hard materials or frequent heavy-duty drilling, a rotary hammer drill offers a more powerful hammering action than a standard hammer drill. This is often the best choice for drilling concrete or very dense stone.
- Core Drill: If you need to create large-diameter holes without compromising the integrity of the stone (e.g., for plumbing or electrical conduit), a core drill with a diamond core bit is the professional standard.
The Best Drill Bits for Stone
The drill bit is arguably the most critical component for effective stone drilling. Using the wrong bit will result in frustration, damaged bits, and potentially a cracked stone.
- Carbide-Tipped Masonry Bits: These are standard for drilling into brick, concrete, and softer stones. They have a sharp carbide tip brazed onto a steel shank. They perform well for masonry drilling tasks.
- Diamond Drill Bits: For the hardest materials like granite, quartz, and very dense marble, diamond drill bits are essential. These bits have diamond particles embedded in the cutting edge.
- Diamond Hole Saws: These are used for creating larger, clean holes, particularly useful for drilling granite or marble for fixtures.
- Diamond-Tipped Drill Bits: These smaller bits are excellent for precision drilling in hard stone.
- Specialized Stone Bits: Some manufacturers offer bits specifically designed for certain types of stone, such as specialized bits for drilling marble or granite.
Safety Gear: Non-Negotiable for Stone Drilling Safety
Stone drilling safety cannot be overstated. The process generates dust, debris, and significant noise.
- Safety Glasses or Goggles: Protect your eyes from flying debris and dust.
- Dust Mask or Respirator: Stone dust, especially from silica-containing materials, can be harmful if inhaled. A high-quality dust mask or respirator is crucial for stone drilling safety.
- Ear Protection: Hammer drills and rotary hammers are loud. Earplugs or earmuffs are essential.
- Work Gloves: Protect your hands from sharp edges and vibrations.
- Sturdy Footwear: Protect your feet from falling objects.
Other Essential Accessories
- Water (or Lubricant): For drilling harder stones like granite and marble, water is crucial for cooling the bit and reducing dust. A spray bottle or a continuous water supply system is needed.
- Drill Stand (Optional but Recommended): For precise, straight holes, especially with heavier drills, a drill stand offers stability and control.
- Chisels and Hammer: For starting a hole or cleaning up edges.
- Marking Tools: Pencil, chalk, or marker to mark your drilling points.
- Painter’s Tape: Applying tape to the drilling surface can help prevent the drill bit from “walking” and can reduce surface chipping.
Preparing Your Workspace and the Stone
Proper preparation is key to a smooth and safe stone drilling experience.
Choosing Your Drilling Location
- Accessibility: Ensure you have enough space to operate the drill comfortably and safely.
- Stability: The surface you are drilling into should be stable and secure.
- Obstructions: Check for hidden pipes, wires, or rebar within the stone before you begin. Use a stud finder or metal detector if necessary.
Preparing the Stone Surface
- Marking the Hole: Use a pencil or chalk to clearly mark the center of where you want to drill. For hard, smooth surfaces like polished granite or marble, use a fine-tip permanent marker or even a diamond scribe.
- Applying Painter’s Tape: For precise drilling, especially on finished surfaces, apply painter’s tape over the marked area. This helps prevent the drill bit from slipping and can reduce chipping on the surface. Draw your mark on the tape.
- Creating a Pilot Mark: For very hard stones or when using larger bits, you might want to create a small indentation at the drill point with a carbide-tipped scribe or a small hammer and chisel. This gives the drill bit a starting point and prevents it from wandering.
Step-by-Step Guide to Drilling Stone
Now that you have your gear and workspace prepared, it’s time to drill. The technique varies slightly depending on the stone and the drill bit.
For Softer Stones and Masonry Drilling (e.g., Brick, Concrete Blocks)
These generally involve carbide-tipped masonry bits and a hammer drill.
- Select the Right Bit: Choose a carbide-tipped masonry bit that matches the diameter of the hole you need.
- Set Your Drill:
- Set your drill to the hammer drill setting.
- Select a medium to high speed.
- Position the Drill: Place the tip of the drill bit directly on your marked spot. Hold the drill perpendicular to the surface.
- Start Slowly: Begin drilling at a slow speed with light pressure. Let the drill bit bite into the surface.
- Increase Pressure and Speed: Once the bit is set, gradually increase pressure and maintain a steady speed.
- Drill in Short Bursts: For deeper holes, drill in short bursts, pulling the drill bit out periodically to clear dust and debris. This also helps to cool the bit.
- Clear the Hole: If dust accumulation is significant, stop drilling and use a brush or compressed air to clear the hole. For deeper holes, a vacuum cleaner can be helpful.
- Continue Drilling: Repeat the process until you reach the desired depth.
For Harder Stones (e.g., Granite, Marble, Hard Rock)
Drilling into granite or marble requires more patience, specific diamond drill bits, and often a water cooling system. This is where specialized stone drilling techniques come into play.
- Choose Diamond Bits: Select a diamond drill bit or diamond hole saw appropriate for the stone type and hole size.
- Set Up Water Cooling:
- For small jobs, a spray bottle filled with water is sufficient. Spray the drilling area generously and frequently.
- For larger jobs or continuous drilling, a dedicated water feed system or a sponge soaked in water placed around the drill point can be used. Water is critical for cooling the diamond bit and preventing it from overheating, which can cause it to lose its cutting ability. It also drastically reduces dust.
- Set Your Drill:
- Turn off the hammer function on your drill. Hammering can chip or break diamond bits, especially on hard materials.
- Set your drill to a slow to medium speed. High speeds can generate too much heat, even with water.
- Position and Start:
- Place the diamond bit on the marked spot.
- If using a core drill or hole saw, ensure it’s centered.
- Start drilling at a very slow speed with minimal pressure. Allow the diamonds to do the cutting.
- Apply Consistent, Light Pressure: Apply steady, light pressure. Let the bit and the stone wear each other down. Avoid forcing the drill.
- Maintain Water Supply: Continuously spray or supply water to the drilling area. If the water turns milky, it means you’re effectively clearing dust and debris.
- Clear Debris Periodically: Even with water, you may need to pull the bit out occasionally to clear any larger fragments or sludge.
- Be Patient: Drilling into hard stone with diamond bits is a slower process. Patience is key to achieving clean, accurate holes without damaging the stone or the bit.
- For Large Holes (Core Drilling):
- Use a core drill with a diamond core bit.
- Ensure the core drill is mounted securely, often with a vacuum base or anchor bolts.
- Start the drill slowly and apply water.
- Once the core bit has started, you can increase the speed slightly.
- Periodically lift the drill to allow water and debris to flush out.
- Continue until the core is cut through.
Specific Stone Types and Their Drilling Considerations
Different stones present unique challenges. Here’s a look at drilling concrete, granite, and marble.
Drilling Concrete
Concrete is a common material for drilling, whether for anchors, plumbing, or electrical work.
- Best Drill: A hammer drill or a rotary hammer drill is highly recommended.
- Best Bits: Carbide-tipped masonry bits are suitable for most concrete drilling. For reinforced concrete with steel rebar, use a robust masonry bit or consider a diamond-tipped bit designed for concrete.
- Technique:
- Use the hammer drill function.
- Start slow, then increase pressure and speed.
- Pull the bit out frequently to clear dust and cool the bit.
- Be aware of rebar; if you hit it, you may need a specialized bit or to adjust your hole location slightly.
Drilling Granite
Granite is one of the hardest natural stones, requiring specific methods.
- Best Drill: A powerful corded drill or a hammer drill (with hammer function OFF for diamond bits). A core drill is best for large holes.
- Best Bits: Diamond drill bits (diamond-tipped bits or diamond hole saws) are essential.
- Technique:
- Crucially, turn OFF the hammer function.
- Use slow to medium speed.
- Maintain a constant flow of water for cooling.
- Apply light, consistent pressure. Patience is vital.
- Start with a smaller pilot hole if using a large hole saw for better accuracy.
Drilling Marble
Marble is softer than granite but can be brittle and prone to chipping.
- Best Drill: A standard corded or cordless drill, or a hammer drill (with hammer function OFF for diamond bits).
- Best Bits: Carbide-tipped bits can work for very light tasks or small holes in softer marble. However, for clean, precise holes and harder marble, diamond drill bits are strongly recommended to minimize chipping and ensure longevity.
- Technique:
- Turn OFF the hammer function to avoid chipping.
- Use slow to medium speed.
- Use water for cooling and dust suppression, especially with diamond bits.
- Apply light, steady pressure.
- Using painter’s tape on the surface can help prevent surface damage and “walking.”
Maintaining Your Tools and Bits
To ensure your tools and bits last and perform effectively, proper maintenance is important.
- Clean Bits: After each use, clean your drill bits to remove dust and debris.
- Inspect Bits: Check bits for wear or damage before and after use. Replace any that are dull, chipped, or broken.
- Cooling: For diamond bits, ensure they don’t overheat. Allow them to cool if you’re not using a water system.
- Drill Maintenance: Follow the manufacturer’s instructions for maintaining your drill, including cleaning vents and checking brushes if applicable.
Troubleshooting Common Stone Drilling Issues
Even with the best preparation, you might encounter problems.
- Drill Bit Not Cutting:
- Cause: The bit may be dull, you might be using the wrong bit for the material, or the speed/pressure is incorrect. For diamond bits, overheating is a common cause of failure.
- Solution: Ensure you’re using the correct bit type (e.g., diamond for granite). Try increasing the speed slightly or applying more consistent, lighter pressure. Ensure adequate water cooling.
- Drill Bit Walking:
- Cause: The bit is slipping on the smooth stone surface before it can bite.
- Solution: Use painter’s tape at the drill point. Create a small pilot indentation with a scribe or chisel. Use a drill stand for better control.
- Excessive Chipping or Cracking:
- Cause: Using the hammer function on brittle stone, too much pressure, or the wrong bit.
- Solution: ALWAYS turn off the hammer function for granite and marble. Use lighter, more consistent pressure. Use diamond bits for hard stones. Start with a pilot hole for larger bits.
- Overheating Bit:
- Cause: Lack of lubrication (water) or drilling too fast/hard.
- Solution: Increase water flow. Reduce drilling pressure and speed. Allow the bit to cool down between drilling sessions.
Stone Drilling Safety: A Recap
Reiterating the importance of stone drilling safety is paramount.
- Eye Protection: Always wear safety glasses or goggles.
- Respiratory Protection: Use a mask or respirator to prevent inhaling stone dust.
- Hearing Protection: Wear ear protection when using hammer drills or rotary hammers.
- Proper Ventilation: Ensure good airflow in your workspace.
- Secure Your Workpiece: If drilling smaller stone pieces, secure them with clamps to prevent movement.
- Water Usage: When using water for cooling, be mindful of electrical cords and ensure your setup is safe. Avoid creating slippery surfaces.
- Know Your Limits: If you’re unsure about a particular stone or technique, consult a professional.
Frequently Asked Questions About Drilling Stone
Q1: What is the easiest way to drill into stone?
The easiest way depends on the stone, but generally, using the correct drill and bit for the material, starting slow, and applying steady pressure makes it easier. For harder stones, diamond bits with water cooling are essential.
Q2: Can I drill into stone with a regular drill?
Yes, you can drill into softer stones or perform light masonry drilling with a regular corded or cordless drill, especially with carbide-tipped masonry bits. However, for harder stones like granite, or for frequent drilling, a hammer drill or a rotary hammer with specialized bits is much more effective and efficient.
Q3: How do I prevent chipping when drilling stone?
To prevent chipping, always turn off the hammer function on your drill when working with delicate or hard stones like marble and granite. Use diamond drill bits, apply light and consistent pressure, start with a pilot hole for larger bits, and use painter’s tape on the surface.
Q4: What speed should I use for drilling stone?
Generally, a slower to medium speed is recommended for drilling stone, especially with diamond bits. High speeds can generate excessive heat, which can damage the bit and the stone. For carbide-tipped bits in softer materials, medium to high speed can be effective.
Q5: How deep can I drill into stone?
The depth you can drill depends on the length of your drill bit and the power of your drill. Ensure the bit is long enough for the desired depth and that your drill can handle the material and depth without overheating. For very deep holes, specialized equipment might be necessary.
By following these guidelines, you can approach stone drilling with confidence, ensuring safety and achieving effective results, whether you’re drilling concrete, granite, marble, or other types of rock. Remember that the right tools and techniques are your best allies in any stone drilling project.