
Can you drill your own well for water? Yes, it is possible for a motivated DIYer with the right knowledge, equipment, and a significant amount of time and effort. Drilling your own well for water, a process often referred to as Well drilling DIY, can be a rewarding way to establish a private water supply and gain control over your home’s water needs. This comprehensive guide will walk you through the essential steps of home well installation, from planning and permitting to drilling, equipping, and maintaining your water source digging project.
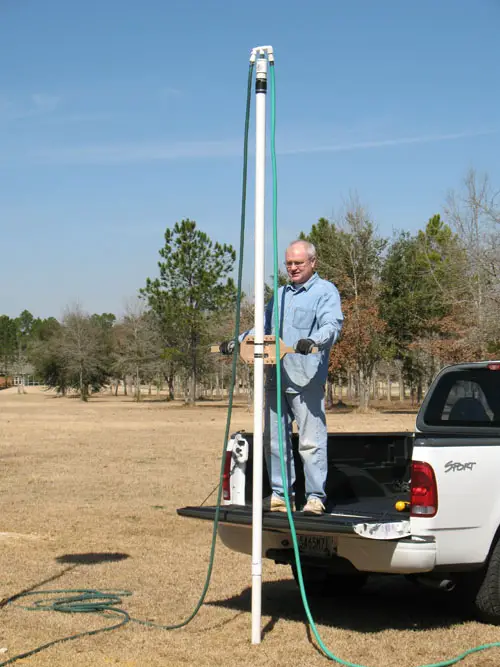
Image Source: drillyourownwell.com
Laying the Groundwork: Planning and Preparation
Before you even think about turning a drill bit, thorough planning and preparation are crucial. This stage is critical for ensuring your project is safe, legal, and ultimately successful.
Securing Permissions and Permits
Residential well drilling is a regulated activity. You absolutely must contact your local health department and/or environmental agency before you begin.
- Local Regulations: Each municipality and county has its own set of rules and regulations regarding private water wells. These often dictate setback distances from property lines, septic systems, and other potential contamination sources.
- Permit Applications: You will likely need to obtain a permit to drill. This process usually involves submitting a detailed site plan showing the proposed well location, along with information about your property and the intended use of the water.
- Water Rights: In some areas, water rights are a consideration. Ensure you have the legal right to access groundwater on your property.
Site Selection: Finding the Best Spot
Choosing the right location for your well is paramount for water quality and yield.
- Geological Surveys: Consult any available local geological surveys or well logs from nearby properties. These can provide valuable information about the depth and type of aquifers in your area.
- Proximity to Use: Position the well as close as practical to where you’ll be using the water to minimize piping costs and pressure loss.
- Contamination Prevention:
- Septic Systems: Maintain a minimum distance from septic tanks and drain fields (typically 50-100 feet or more, check local codes).
- Roads and Driveways: Keep wells away from heavily trafficked areas where road salt or oil spills could occur.
- Livestock Areas: If you have animals, ensure the well is located uphill and a significant distance from pastures and barns.
- Surface Water: Avoid low-lying areas that might flood or collect surface runoff.
- Accessibility: The site must be accessible for drilling equipment, future maintenance, and delivery of supplies.
Assembling Your Well Drilling Equipment
Well drilling equipment is specialized and often expensive to purchase outright. Many DIYers opt to rent or purchase used equipment.
Essential Equipment List:
- Drill Rig: This is the most critical piece of equipment. Options range from truck-mounted rigs to smaller, portable units.
- Drill Bits: Different bits are suited for various soil and rock types (e.g., auger bits for soil, roller cone bits for rock).
- Drill Pipe: Strong, threaded pipes that connect to the drill bit and are lowered into the ground.
- Pump: A submersible pump designed for well depth and desired flow rate.
- Well Casing: Durable pipe (usually PVC or steel) that lines the borehole to prevent collapse and contamination.
- Gravel Pack: Washed gravel used to create a filter around the well screen.
- Well Screen: A perforated section of casing placed in the aquifer to allow water in while keeping out sediment.
- Grouting Materials: Cement or bentonite clay to seal the annular space between the casing and the borehole.
- Water Swivel and Hose: To supply water for flushing cuttings and lubricating the drill bit.
- Safety Gear: Hard hat, safety glasses, steel-toed boots, gloves, ear protection.
- Mud Pump (Optional but recommended): For circulating drilling fluid and removing cuttings.
Well Casing Requirements:
The type and thickness of your well casing are critical for structural integrity and water protection.
- Material:
- PVC (Polyvinyl Chloride): Common, affordable, and resistant to corrosion. Generally used for shallower wells.
- Steel: Stronger and more durable, often preferred for deeper wells or in areas with unstable soil. Requires rust protection.
- Diameter: Typically ranges from 4 to 8 inches, depending on the pump size and water yield required.
- Thickness (Wall Schedule): Schedule 40 or 80 for PVC, and specific wall thicknesses for steel. This determines its strength.
- Length: Must extend from the surface to below the static water level, and often through the aquifer zone.
- Wellhead Cap: A secure, vented cap at the top of the casing prevents contamination.
The Drilling Process: From Surface to Aquifer
This is the core of your water well excavation project. It’s physically demanding and requires patience.
Drilling the Borehole
- Setup: Position the drill rig over the chosen well site. Ensure the rig is stable and level.
- Initial Drilling: Start drilling the initial hole. Water is typically pumped down the drill pipe to lubricate the bit and flush cuttings to the surface.
- Adding Drill Pipe: As the hole deepens, additional sections of drill pipe are added.
- Monitoring Progress: Keep a close eye on the type of material being brought up (cuttings). This helps identify different soil layers and the aquifer.
- Handling Obstructions: You may encounter rocks, boulders, or unconsolidated layers. Adapting your drilling method and bit type is key.
- Reaching the Aquifer: Continue drilling until you reach a sufficient depth within a productive aquifer. This is often indicated by a significant increase in water flow into the borehole.
- Temporary Casing (if needed): In areas with unstable formations, a temporary larger-diameter casing might be driven or drilled to prevent the borehole from collapsing before the permanent casing is installed.
Installing the Well Casing and Screen
Once the borehole reaches the desired depth, the permanent casing and screen are installed.
- Lowering the Casing: The well casing is carefully lowered into the borehole. This might be done in sections, screwed together.
- Setting the Well Screen: The well screen is placed at the bottom of the casing, positioned within the most productive water-bearing zone. This allows water to enter the well while filtering out sand and gravel.
- Gravel Packing: Once the casing and screen are in place, washed gravel is carefully poured into the annular space between the borehole wall and the casing/screen. This gravel acts as a natural filter.
Developing the Well
Well development is a crucial step to improve water flow and remove drilling fines.
- Surging: This involves alternately pushing and pulling water in and out of the well to dislodge fine particles and clear the screen and gravel pack. This can be done using a surge block or by judiciously running and stopping the pump.
- Bailing/Pumping: The well is repeatedly bailed or pumped until the water runs clear, indicating that most of the sediment has been removed.
Grouting and Sealing
This step is critical for protecting your water from surface contamination.
- Grouting the Annular Space: Once the well is developed, the annular space (the gap between the casing and the borehole) is sealed with grout.
- Materials: Typically a cement-based grout or a bentonite clay slurry is used.
- Method: The grout is pumped down the inside of the casing to the bottom, then rises up the annular space. Alternatively, tremie pipes are used to pump grout directly into the annular space from the bottom up.
- Surface Seal: A surface seal of concrete is typically poured around the wellhead to further protect it from surface water infiltration.
Equipping Your Well: The Pump and Beyond
With the well drilled and sealed, it’s time to get the water flowing to your home.
Selecting and Installing the Well Pump
The well pump setup is vital for delivering water reliably.
- Pump Types:
- Submersible Pumps: Most common for private wells. They are placed directly in the well below the water level.
- Jet Pumps: Usually located above ground, drawing water up via suction. Less efficient for deeper wells.
- Pump Sizing:
- Depth to Water: The distance from the surface to the water level in the well.
- Drawdown: The drop in water level when the pump is running.
- Flow Rate (GPM – Gallons Per Minute): Your household’s peak water demand.
- Pressure (PSI – Pounds per Square Inch): The pressure required at your fixtures.
- Consulting a pump supplier or a well professional for sizing is highly recommended.
- Pump Installation:
- Dropping the Pump: The submersible pump is attached to a drop pipe and electrical cable and carefully lowered into the well.
- Securing the Pump: It’s typically suspended at a level that keeps it submerged even during periods of drawdown.
- Electrical Connections: Connect the pump to a power source via a waterproof splice kit and conduit. Ensure all electrical work complies with local codes.
- Pressure Tank and Controls: A pressure tank stores water and maintains system pressure. A pressure switch turns the pump on and off based on pressure.
Connecting to Your Home’s Plumbing
- Trenching: Dig trenches from the wellhead to your house for the water line and electrical conduit. Bury lines below the frost line.
- Water Line: Connect the drop pipe from the pump to the water line leading to your house.
- Electrical Line: Connect the pump’s electrical cable to the power supply in your home, typically through a dedicated breaker.
- Backflow Prevention: Install a backflow preventer on the water line to protect the well from contamination from your home’s plumbing.
Water Quality Testing and Ongoing Maintenance
Your work isn’t done once the water is flowing.
Water Quality Testing
- Initial Testing: Once your well is operational, it’s essential to get your water tested by a certified laboratory. Test for common contaminants like bacteria (coliform, E. coli), nitrates, heavy metals (lead, arsenic), and pH.
- Regular Testing: Test your water annually for bacteria and nitrates, and every few years for other potential contaminants based on your local geology and any identified risks.
Well Maintenance
- Regular Inspections: Visually inspect the wellhead and surrounding area for any signs of damage or contamination.
- Pump Maintenance: Follow the manufacturer’s recommendations for pump maintenance.
- Water Testing: As mentioned, regular testing is key.
- Avoid Contamination: Be mindful of activities on your property that could introduce contaminants into the groundwater.
Factors to Consider for Groundwater Access
Grasping the nuances of groundwater access is fundamental to a successful well project.
Aquifer Types and Yield
- Unconfined Aquifers: These are directly connected to the surface and receive recharge from rainfall. They are generally shallower.
- Confined Aquifers: These are trapped between layers of impermeable rock or clay and are under pressure. They often yield higher quality water but can be deeper.
- Yield: The rate at which an aquifer can supply water. Your well’s yield should be sufficient for your needs.
Depth of the Well
The depth required depends entirely on your local geology and the location of the water-bearing strata.
- Shallow Wells: May tap into unconfined aquifers.
- Deep Wells: Often necessary to reach confined aquifers, offering more consistent water quality and volume.
Geological Formations
- Sedimentary Rocks: Sandstone, limestone, and gravel beds are common sources of groundwater.
- Crystalline Rocks: Harder rocks like granite can yield water from fractures, but drilling can be more challenging.
Challenges and Considerations for DIY Well Drilling
Embarking on a Well drilling DIY project is not for the faint of heart.
Physical Demands
- Heavy Equipment: Operating and moving drilling equipment is physically taxing.
- Manual Labor: Connecting pipe sections, handling cuttings, and performing maintenance requires significant physical effort.
Time Commitment
- Extended Project: Drilling a well can take days or even weeks, depending on the depth, geology, and your experience level.
- Learning Curve: There’s a significant learning curve involved in operating the equipment and troubleshooting issues.
Cost
While DIY can save on labor costs, the initial investment in equipment rental or purchase, materials, and testing can still be substantial.
Risk of Failure
- Hitting Dry Zones: You might drill a well that doesn’t yield enough water.
- Contamination: Improper sealing or construction can lead to contaminated water.
- Equipment Malfunction: Drilling equipment can break down, leading to costly repairs and delays.
Frequently Asked Questions (FAQ)
Q1: How deep do I need to drill for a well?
A1: The depth of your well depends entirely on your local geology and where the reliable water-bearing aquifers are located. Local geological surveys and the depth of neighboring wells are the best indicators.
Q2: What is the average cost of drilling a well?
A2: The cost can vary widely based on depth, location, geology, and whether you hire a professional or do it yourself. Professionally drilled wells can range from $5,000 to $15,000 or more. DIY can reduce labor costs significantly but still involves substantial material and equipment expenses.
Q3: Can I use a hand auger to drill a well?
A3: For very shallow wells (a few feet to perhaps 20-30 feet) in very soft soil or sand, a hand auger might work to create a shallow water source. However, for most potable water needs requiring deeper groundwater access, especially through harder soil or rock, professional drilling equipment is necessary.
Q4: What is the minimum distance a well must be from a septic system?
A4: Local regulations dictate this, but a common minimum is 50 feet from a septic tank and 100 feet from a drain field. Always check your local health department codes.
Q5: How long does it take to drill a well?
A5: For professionals, drilling a typical residential well might take 1-3 days. For a DIYer, it could take significantly longer, from several days to weeks, due to the learning curve, equipment operation, and manual labor involved.
Q6: What kind of pipe is used for well casing?
A6: Common materials are PVC (Schedule 40 or 80) and steel. PVC is lighter and cheaper, while steel is stronger and more durable.
Q7: What happens if my DIY well doesn’t produce enough water?
A7: If the well yield is insufficient, you might need to deepen the well (if feasible), redevelop the existing well to improve flow, or drill a new well in a different location. This is a significant risk in DIY projects.
Q8: Do I need a water well contractor for my project?
A8: While this guide outlines Well drilling DIY, hiring a licensed well contractor is highly recommended for most people due to the complexity, equipment requirements, and potential safety and regulatory issues. If you are set on DIY, ensure you have a solid understanding of all steps and potential risks.
Embarking on Well drilling DIY is a monumental undertaking. While the promise of a private water supply is compelling, the realities of well drilling equipment, the physical labor, and the critical importance of proper construction for water safety cannot be overstated. Thorough research, meticulous planning, and a realistic assessment of your capabilities are essential before you begin this challenging but potentially rewarding journey of home well installation and water source digging.