
Can you drill through porcelain tile? Yes, you absolutely can drill through porcelain tile. The key to successfully drilling through porcelain is using the right tools and techniques. This guide will walk you through exactly how to drill through porcelain safely and with minimal fuss.
Porcelain tile is incredibly durable and beautiful, making it a popular choice for floors, walls, and backsplashes. However, its density means that drilling through it requires a bit more care than drilling through softer materials like ceramic tile or drywall. This guide will cover everything you need to know, from selecting the best drill bit for tile to mastering the techniques that prevent cracking.
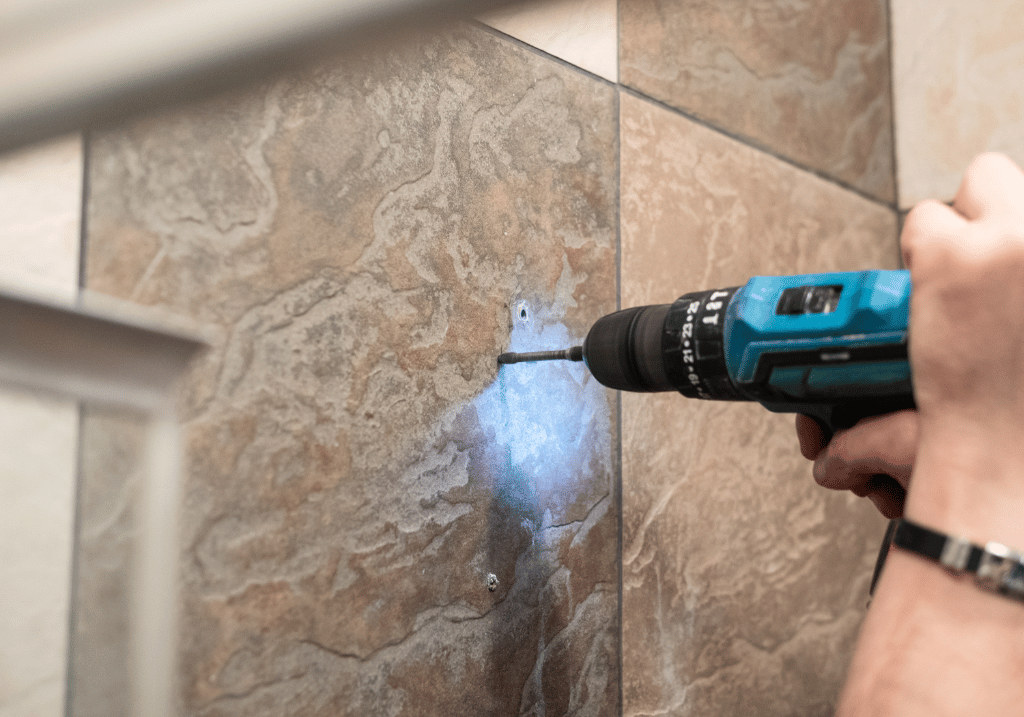
Image Source: ceramiccity.ie
The Right Tools for Porcelain Tile Drilling
Choosing the correct drill bit is the most critical step when drilling porcelain tile. Regular drill bits designed for wood or metal will dull almost instantly and will not penetrate the hard surface of porcelain.
Diamond Drill Bits: Your Porcelain’s Best Friend
For tackling porcelain tile drilling, diamond drill bits are non-negotiable. These bits have a coating of industrial diamonds on their tips, which are the hardest known natural material. This allows them to grind through extremely hard substances like porcelain.
- Types of Diamond Drill Bits:
- Hole Saws: These are circular bits that create larger holes. They are ideal for larger diameter holes where you might be fitting pipes or fixtures.
- Spear-Point or Diamond-Tipped Bits: These look more like traditional drill bits but have a sharp, spear-like tip coated in diamonds. They are perfect for smaller holes, like those needed for mounting shelves or hanging pictures.
What Kind of Drill is Best for Porcelain?
While a powerful hammer drill can be overkill and even damage your tile, a standard cordless or corded drill is usually sufficient. Look for a drill with variable speed settings.
- Cordless Drills: Offer portability and convenience. A 18-volt model is generally recommended for enough power.
- Corded Drills: Provide consistent power, which can be beneficial for longer drilling sessions.
Essential Accessories for Safe Drilling
Beyond the drill and bits, a few other items are crucial:
- Safety Glasses: Always protect your eyes from flying debris.
- Work Gloves: Provide a better grip and protect your hands.
- Mask: To avoid inhaling fine dust particles.
- Painter’s Tape or Masking Tape: To help prevent the drill bit from slipping on the smooth surface.
- Water or Lubricant: Essential for wet drilling tile. This cools the drill bit and the tile, significantly reducing heat buildup and the risk of cracking. A spray bottle filled with water works well.
- Drill Guide or Jigs: For precise hole placement, especially for multiple holes or critical placements.
Preparing for Porcelain Tile Drilling
Proper preparation is key to achieving clean holes without damaging your porcelain tile.
Marking the Drill Spot
Before you start drilling, you need to mark the exact spot where you want the hole.
- Clean the Area: Ensure the tile surface is clean and free of dust or debris.
- Mark with a Pencil: Lightly mark the center of your desired hole with a pencil. For darker tiles, a wax crayon or a china marker might be more visible.
- Apply Tape: Place a piece of painter’s tape or masking tape over the marked spot. This serves two main purposes:
- Prevents Slipping: The slightly rough texture of the tape gives the drill bit a better grip, preventing it from wandering when you start drilling.
- Reduces Chipping: It can help to minimize surface chipping as the drill bit begins to cut.
Setting Up for Wet Drilling
Wet drilling tile is the preferred method for porcelain because it dramatically reduces heat. Heat is the enemy of porcelain when drilling, as it can cause stress and lead to cracks.
- Spray Bottle Method: Keep a spray bottle filled with water handy. As you drill, periodically spray water onto the drilling area.
- Water Dam Method: For larger holes or when drilling vertically, you can create a small dam around the drill site using plumber’s putty or clay. Fill this dam with water to create a small pool that constantly lubricates the drill bit.
The Drilling Process: Step-by-Step
Now that you’re prepared, let’s get to the actual drilling of porcelain.
Step 1: Starting the Hole
- Position the Drill: Place the tip of your diamond drill bit precisely on the mark you made through the tape.
- Initial Pressure: Apply gentle, steady pressure. Don’t force the drill.
- Low Speed Start: Begin drilling at a very slow speed. This is crucial for control and to avoid the bit from skating across the surface.
Step 2: Drilling Through the Porcelain
- Increase Speed Gradually: Once the bit has started to cut into the tile, you can gradually increase the tile drilling speed. However, avoid high speeds. A moderate, consistent speed is best.
- Apply Steady Pressure: Continue to apply steady, even pressure. Let the diamond bit do the work of grinding the porcelain.
- Lubricate Frequently: This is where wet drilling tile is essential. As you drill, keep the area lubricated with water. If using a spray bottle, apply water every 30 seconds to a minute. If you see steam, you’re not using enough water – stop and re-wet.
- Clear Debris: Periodically lift the drill bit slightly out of the hole while it’s still spinning. This helps to clear out the dust and debris, allowing the water to reach the cutting surface more effectively.
- Listen to Your Drill: Pay attention to the sound. If the drill is straining or making a grinding noise, you might be applying too much pressure or the bit is getting too hot. Back off the pressure and add more water.
Step 3: Reaching the Other Side (or Substrate)
- Anticipate Breakthrough: As you approach the other side of the tile, you’ll feel the resistance change. This is the point where you’re about to break through.
- Reduce Pressure: Significantly reduce the pressure you’re applying. This helps prevent chipping or blowout on the exit side of the hole.
- Maintain Lubrication: Keep the water flowing until you’re completely through the tile.
- Continue Carefully: Once you’ve broken through the porcelain, continue with very light pressure until you’ve cleared the tile. If you’re drilling into a substrate like drywall or wood, you might need to switch to a standard drill bit suitable for that material once you’re through the tile. For drilling through mortar or backer board, a masonry bit might be needed after the tile.
Drilling Through Different Types of Porcelain
While the general process is the same, some nuances apply to different types of porcelain.
Glazed vs. Unglazed Porcelain
- Glazed Porcelain: The glaze on porcelain tile is very hard. The diamond bit will need to cut through both the glaze and the porcelain body. The tape method is particularly helpful here to prevent the bit from slipping on the smooth glaze.
- Unglazed Porcelain: This type of porcelain is uniformly dense throughout. The drilling process is similar, but you might find the consistency of resistance slightly more uniform.
Through-Body Porcelain
This is the densest and most durable type of porcelain tile. It’s colored all the way through, meaning scratches are less visible. However, it also makes porcelain tile drilling more challenging due to its extreme hardness. Be extra diligent with lubrication and slow speeds for through-body porcelain.
Textured or Structured Porcelain
Porcelain with raised patterns or textures can present an additional challenge. Ensure your tape adheres well and consider using a drill guide to maintain stability on uneven surfaces.
Common Mistakes to Avoid
Even with the right tools, errors can lead to frustration and damaged tiles.
- Using the Wrong Drill Bit: This is the most common and costly mistake. Always use diamond-tipped bits for porcelain.
- Drilling Too Fast: High speeds generate excessive heat, which is the primary cause of tile cracking. Keep your tile drilling speed moderate to slow.
- Not Using Water/Lubrication: Skipping the lubrication step is a recipe for overheating and cracking. Wet drilling tile is essential.
- Applying Too Much Pressure: Let the diamond bit do the grinding. Forcing the drill will likely result in a cracked tile or a broken bit.
- Not Securing the Tile (if necessary): For very thin tiles or if you’re drilling near an edge, you might need to secure the tile to a backing board to prevent it from shifting or cracking.
Troubleshooting Common Issues
Even with preparation, you might encounter minor problems.
The Drill Bit is Slipping
- Solution: Ensure you’ve applied the painter’s tape correctly. Make sure it’s firmly adhered. Start at the slowest speed and apply gentle pressure until the bit bites. A drill guide can also provide a stable starting point.
The Tile is Getting Too Hot
- Solution: You’re not using enough water. Stop drilling immediately, let it cool, and apply more water. Consider the water dam method for better continuous lubrication. Slow down your drilling speed.
I See a Crack Starting
- Solution: Stop drilling immediately! If the crack is small, you might be able to continue with extremely light pressure and plenty of water, hoping to finish the hole without further damage. However, it’s often best to start with a new tile if a significant crack appears.
Frequently Asked Questions (FAQ)
Q1: Can I drill porcelain tile with a regular drill bit?
A1: No. Regular drill bits designed for wood or metal will not cut through porcelain and will likely be ruined in the process. You must use a diamond-tipped drill bit.
Q2: What speed should I use for drilling porcelain tile?
A2: You should use a slow to moderate tile drilling speed. High speeds generate excessive heat, which can crack the tile. Always start slow and only increase speed slightly if necessary, ensuring you maintain lubrication.
Q3: Do I need a special drill for porcelain tile?
A3: While a powerful drill can be helpful, a standard cordless or corded drill with variable speed settings is usually sufficient. The most important factor is the drill bit.
Q4: How can I prevent porcelain tile from cracking when drilling?
A4: The key is to minimize heat and vibration. Use a diamond drill bit, start slow, apply steady but light pressure, and most importantly, use plenty of water (wet drilling tile). Applying painter’s tape before drilling also helps.
Q5: What is the best drill bit for tile?
A5: For porcelain tile, the best drill bit is a diamond-tipped drill bit. These can be in the form of spear-point bits for smaller holes or diamond-coated hole saws for larger diameters.
Q6: How do I drill a clean hole in porcelain without chipping?
A6: Start with painter’s tape over the marked spot to prevent the bit from slipping. Begin drilling at a very slow speed with light pressure. As you break through the tile, reduce pressure to prevent chipping on the exit side. Continuous lubrication with water is also crucial.
Q7: What are the most important safety precautions for tile drilling?
A7: Always wear safety glasses to protect your eyes from debris. A mask is recommended to avoid inhaling dust. Wear gloves for a better grip and hand protection. Ensure good ventilation, especially if not using water.
Q8: Can I drill through porcelain tile for a faucet or fixture?
A8: Yes, for larger holes like those needed for faucets or plumbing fixtures, you will want to use a diamond-coated hole saw. Follow the same principles of slow speed, steady pressure, and plenty of lubrication.
By following these guidelines, you can confidently approach how to drill holes in porcelain with ease and safety, achieving professional results for your projects. Remember, patience and the right tools are your greatest allies when it comes to porcelain tile drilling and ceramic tile drilling.