
Can you use saw horses safely? Yes, absolutely! By following a few key principles and choosing the right equipment, you can greatly enhance your safety and efficiency when tackling DIY projects. Saw horses are indispensable tools for any builder, carpenter, or DIY enthusiast, providing a stable and elevated platform for cutting, assembling, and working with materials. This guide will delve into the core aspects of using saw horses, covering everything from initial sawhorse setup to advanced sawhorse lumber support techniques, ensuring you can confidently and securely get your projects done.
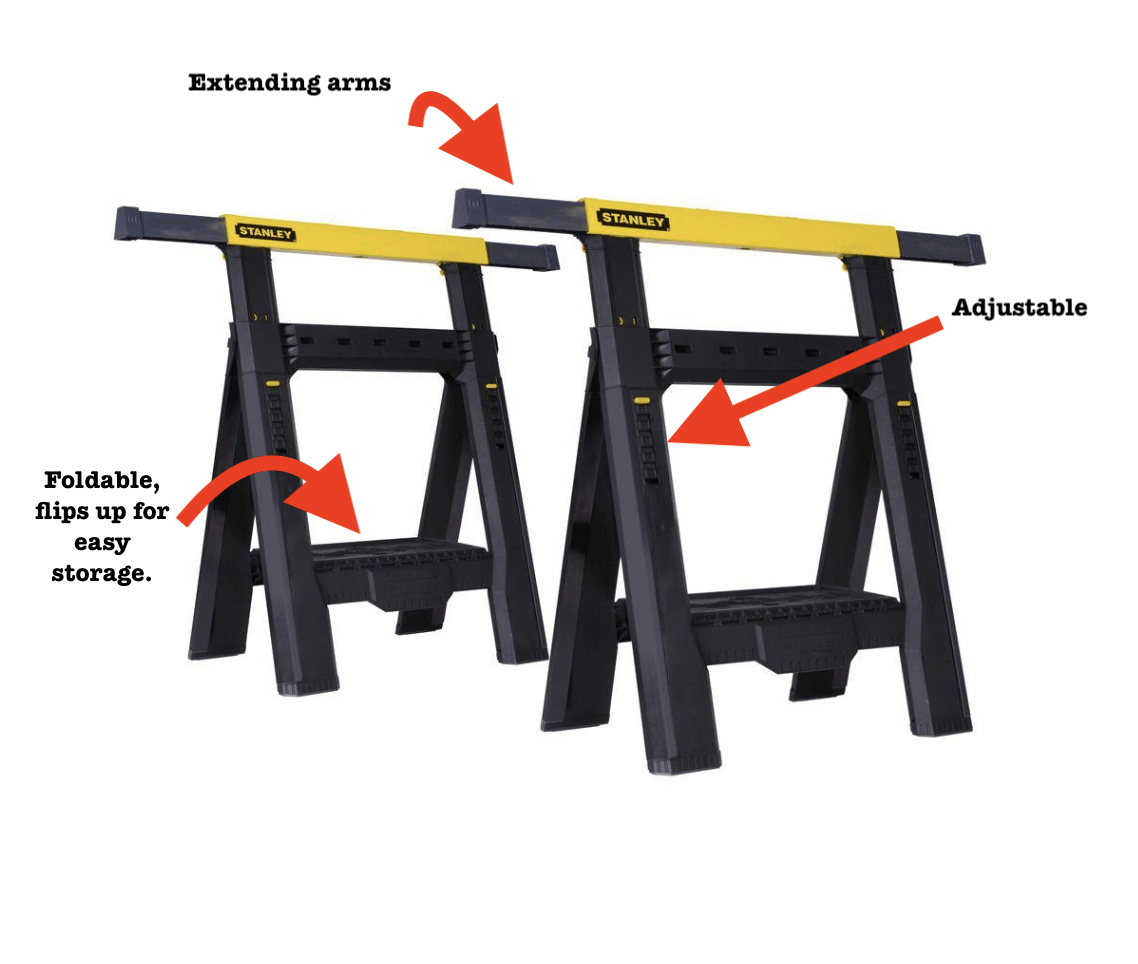
Image Source: thriftdiving.com
Why Saw Horses Are Your Workshop’s Best Friend
Saw horses are more than just simple stands; they are workhorses (pun intended!) that transform your workspace. They elevate your materials, keeping them off the ground and at a comfortable working height. This prevents back strain and allows for cleaner, more accurate cuts. Whether you’re cutting lumber, painting furniture, or assembling a complex structure, saw horses provide the critical support you need. Their versatility makes them a cornerstone of any workshop, from a small garage setup to a professional construction site.
Essential Functions of Saw Horses
- Elevation: They lift materials to a convenient height for cutting, sanding, or assembling.
- Support: They offer a stable base for various materials, preventing wobbling or collapse.
- Work Surface: When paired with plywood or planks, they create a temporary workbench.
- Material Staging: They can hold lumber and other supplies close at hand.
Choosing the Right Saw Horse for Your Needs
The market offers a variety of saw horses, each with its own strengths. From portable sawhorses for on-the-go jobs to robust sawhorse saw stands designed for heavy loads, knowing your options is key.
Types of Saw Horses
1. Traditional Wooden Saw Horses
- Pros: Often the most affordable, can be DIY built, sturdy for general use.
- Cons: Can be heavy, not always easy to store or transport, susceptible to weather damage.
- Best For: Stationary workshops, general DIY tasks.
2. Metal Saw Horses
- Pros: Durable, often have higher weight capacities, resistant to rust and wear.
- Cons: Can be more expensive, may be heavier than plastic options.
- Best For: Heavy-duty work, construction sites, frequent use.
3. Plastic or Composite Saw Horses
- Pros: Lightweight, weather-resistant, often foldable for easy storage and transport, typically more affordable.
- Cons: May have lower weight capacities, can be less stable than metal or sturdy wood options if not properly weighted or secured.
- Best For: Homeowners, occasional DIYers, tasks requiring portability.
4. Folding Saw Horses
- Pros: Excellent for storage and transport, quick to deploy and put away.
- Cons: Some models might sacrifice a bit of stability for foldability.
- Best For: Small workshops, mobile work, limited storage space.
5. Adjustable Saw Horses
- Pros: Height can be changed to suit different tasks and user preferences, versatile for various projects.
- Cons: Often more complex and expensive, moving parts can be a point of failure if not maintained.
- Best For: Projects requiring precise working heights, users of varying statures.
Key Features to Consider
When selecting saw horses, always check the following:
- Sawhorse Weight Capacity: This is crucial. Ensure the saw horses you choose can safely support the weight of the materials you’ll be working with. Overloading can lead to instability and accidents.
- Portability: If you’ll be moving your saw horses frequently, look for lightweight designs with carrying handles or folding mechanisms.
- Stability: The wider the base, generally the more stable the saw horse. Look for features that enhance sawhorse stability, such as rubber feet or non-slip surfaces.
- Height and Adjustability: Consider the typical height of the materials you’ll be using and if you need an adjustable sawhorse for different tasks.
- Material: Metal and sturdy wood offer the most durability, while plastic is best for lighter loads and portability.
Mastering Saw Horse Setup: The Foundation of Safety
Proper sawhorse setup is the first and most critical step in ensuring a safe and effective work session. A poorly set-up saw horse is an invitation to disaster.
Preparing Your Workspace
Before you even bring out your saw horses, take a moment to prepare your work area.
- Clear the Area: Remove any clutter, tools, or debris that could cause a trip hazard or interfere with your work.
- Level Ground: Always place your saw horses on a flat, level surface. Uneven ground can cause the saw horses to wobble or tip. If the ground isn’t perfectly level, you might need to use shims to stabilize them.
- Adequate Lighting: Ensure you have good lighting in your work area so you can clearly see what you’re doing.
Setting Up Your Saw Horses
The number of saw horses you need will depend on the length and weight of the material you are supporting. For most cutting tasks, two saw horses are sufficient. For longer pieces or heavier loads, you might need three or even four.
- Positioning: Place the saw horses a suitable distance apart. This distance should comfortably support the material you are working with, ensuring it doesn’t sag excessively in the middle.
- Height Adjustment (if applicable): If you have an adjustable sawhorse, set it to the desired working height. Ensure all saw horses are set to the same height unless you specifically need a different configuration.
- Stability Check: Once positioned, give each saw horse a gentle push to ensure it is stable and doesn’t rock. Check that any locking mechanisms for folding or adjustable legs are securely engaged.
- Secure Legs (if needed): Some saw horses have pre-drilled holes in their legs. For extra sawhorse stability, especially when working with heavy materials or on slightly uneven surfaces, you can drive stakes through these holes into the ground.
Creating a Sawhorse Workbench
When you need a larger, stable work surface, saw horses are your go-to.
- Use a Flat Surface: A piece of sturdy plywood (at least 3/4 inch thick) or several planks laid side-by-side works best.
- Secure the Surface: Lay your chosen surface material across the top of the saw horses. Ensure it extends sufficiently over the edges of the saw horses for stability. You can use clamps to secure the plywood to the saw horses, preventing it from shifting during use.
- Even Distribution: Distribute the weight evenly across the saw horses. Avoid placing extremely heavy items on one end of the makeshift workbench.
Effective Techniques for Saw Horse Lumber Support
Proper sawhorse lumber support is about more than just placing wood on top. It involves understanding how to distribute weight, prevent movement, and ensure accurate cuts.
Positioning for Cutting
When cutting lumber, the placement of your saw horses is critical for a clean cut.
- Support Close to the Cut Line: Position one saw horse so its top edge is just a few inches away from where you intend to cut. This provides maximum support for the piece you are cutting off and prevents it from falling unexpectedly.
- Support the Main Piece: The other saw horse(s) should support the longer section of the wood, ensuring it remains level and stable.
- Overhang: Allow a slight overhang of the wood over the edge of the saw horse. This provides clearance for your saw blade.
Cutting Techniques
- Clearance for Saw: Make sure there’s enough space between the saw horses and the ground to comfortably maneuver your saw without hitting the sawhorses or the floor.
- Blade Direction: Be mindful of where the blade will exit the material. Ensure there’s no obstruction that could cause kickback or bind the blade.
- Long Materials: For very long pieces of lumber, use additional saw horses to prevent sagging. A good rule of thumb is to place a saw horse for every 6-8 feet of lumber, depending on its thickness and type.
Securing Materials
While gravity often helps keep materials in place, sometimes extra measures are needed.
- Clamps: Use clamps to secure the lumber to the saw horses, especially when doing intricate work or cutting smaller pieces. This prevents the material from shifting under the pressure of your saw or tools.
- Vise Grips: Some saw horse designs incorporate vise grips or clamps to hold lumber firmly in place.
Using Saw Horses for Assembly
Saw horses are also excellent for assembling projects.
- Work Surface: As mentioned, they can form the base of a temporary workbench.
- Holding Pieces: Use them to hold pieces of furniture, frames, or other items at an ideal height and angle while you join them. Clamps are your best friend here for holding components steady while you fasten them.
Sawhorse Safety Tips: Prioritizing Your Well-being
Safety is paramount when working with tools. Following these sawhorse safety tips will help prevent accidents and ensure a productive DIY experience.
Before You Start
- Inspect Your Saw Horses: Always check your saw horses for any damage, such as cracked wood, bent metal, or loose fittings. Do not use damaged saw horses.
- Read the Manual: If your saw horses came with an instruction manual, especially for adjustable sawhorse or folding sawhorse models, read it thoroughly. Pay close attention to the sawhorse weight capacity.
- Wear Appropriate Gear: Always wear safety glasses or goggles to protect your eyes from flying debris. Gloves can protect your hands, and sturdy footwear is essential.
During Use
- Maintain Stability: Never stand on saw horses. They are designed to support materials, not people.
- Even Load Distribution: Ensure the weight of the material is distributed evenly across the saw horses. Avoid placing all the weight on one side.
- Watch for Kickback: Be aware of the potential for saw kickback, especially when using power saws. Maintain a firm grip on your saw and ensure the material is securely supported.
- Keep Work Area Clear: As mentioned earlier, keep your workspace tidy to avoid tripping.
- Don’t Overload: Always respect the sawhorse weight capacity. If you’re unsure, err on the side of caution and use more saw horses or a more robust model.
- Secure the Material: Use clamps to prevent lumber or other materials from shifting during cutting or assembly.
After Use
- Clean Up: Remove any sawdust or debris from the saw horses and your work area.
- Proper Storage: Store your saw horses in a dry place, away from the elements, to prolong their lifespan. If you have folding sawhorse models, ensure they are properly locked when stored to prevent them from unfolding unexpectedly.
Creative DIY Sawhorse Projects
Beyond their primary function, saw horses can be the starting point for many exciting DIY sawhorse projects.
Building Your Own Saw Horses
For the budget-conscious or those who enjoy building, creating your own saw horses can be a rewarding project.
- Material Choice: You can build sturdy saw horses from dimensional lumber (like 2x4s and 2x6s) or even repurposed materials.
- Design: Many plans are available online for simple, robust saw horse designs. Key elements to focus on are strong joints and a wide base for stability.
- Customization: You can customize your DIY sawhorses to include features like tool holders or integrated lumber support notches.
Transforming Saw Horses
Once you have a basic set of saw horses, you can adapt them for a variety of uses.
- Temporary Workbench: Cover them with plywood for an instant, large workspace.
- Paint Stands: Place furniture or other items on them for painting or finishing.
- Garden Bed Supports: Use them to elevate raised garden beds or as a temporary structure for plant support.
- Display Stands: For craft fairs or home décor, they can be painted and used as rustic display stands.
Advanced Techniques and Considerations
As you become more comfortable with saw horses, you can explore advanced applications and tips for even greater efficiency and safety.
Maximizing Sawhorse Stability with Accessories
While good setup is key, certain accessories can further enhance sawhorse stability:
- Rubber Feet: Many modern saw horses come with rubber feet. If yours don’t, you can add them yourself. These provide grip and prevent slippage on smooth surfaces.
- Anti-Slip Mats: Placing a thin rubber mat or even a piece of old carpet on top of the saw horse can add friction and prevent materials from sliding.
- Wheel Kits: For heavy-duty saw horses that need to be moved frequently, consider adding optional wheel kits. Ensure these kits are designed for the sawhorse weight capacity.
Sawhorse Lumber Support for Precision Work
For tasks requiring extreme precision, such as dado cuts or intricate joinery, you might need to go beyond basic lumber support.
- Workbench Setup: For critical tasks, consider using your saw horses to create a robust workbench surface and then clamping your workpiece directly to that surface. This minimizes any chance of movement.
- Material Wedges: For long or heavy pieces, you can use wedges to help cradle and support the wood, adding an extra layer of stability.
Using Saw Horses with Different Materials
- Sheet Goods (Plywood, MDF): These require broad support. Ensure your saw horses are positioned to offer ample contact with the sheet, and consider a full plywood sheet as a stable work surface on top of the sawhorses.
- Round Materials (Pipes, Dowels): These can be prone to rolling. Use V-shaped notches on the top of your saw horses or secure them with straps or clamps to prevent movement.
- Metal Stock: Metal can be heavier and sometimes have sharp edges. Ensure your saw horses have sufficient sawhorse weight capacity and consider padding the tops to prevent scratching.
Frequently Asked Questions (FAQ)
Here are some common questions about using saw horses:
Q1: What is the maximum weight a saw horse can hold?
A1: The sawhorse weight capacity varies greatly by model. Always check the manufacturer’s specifications. Standard residential saw horses might range from 200 to 1000 pounds per pair, while heavy-duty industrial models can hold significantly more.
Q2: Can I stand on a saw horse?
A2: No, you should never stand on a saw horse. They are designed to support materials, not people. Standing on them can cause them to tip or break, leading to injury.
Q3: How far apart should I place my saw horses?
A3: The distance depends on the length and type of material you are supporting. For cutting lumber, position one saw horse near the cut line. For longer pieces, place them roughly every 6-8 feet to prevent sagging. Ensure the material is well-supported and doesn’t flex excessively.
Q4: What is the best way to store portable sawhorses?
A4: For portable sawhorses and folding sawhorse models, the best storage is typically in a folded position, often leaning against a wall or in a designated storage rack. Ensure they are stored in a dry area away from direct sunlight and moisture.
Q5: Can I use saw horses in the rain?
A5: While some saw horses are weather-resistant (especially metal or plastic), it’s generally best to avoid using them in wet conditions. Wet materials can be slippery, and prolonged exposure to moisture can damage wooden saw horses.
Q6: What’s the difference between a saw horse and a saw stand?
A6: While often used interchangeably, a saw horse is a general-purpose support. A sawhorse saw stand is often a more specific term that might refer to a saw horse designed with features to hold a circular saw, miter saw, or other power tools. However, many people use the terms to mean the same thing.
Q7: How can I improve the stability of my sawhorses on concrete?
A7: To improve sawhorse stability on concrete, ensure the concrete surface is clean and free of debris. Use sawhorses with rubber feet or add them yourself. For extra security, you can temporarily secure the legs to the floor using heavy-duty tape or clamps if the sawhorses have appropriate leg features.
By mastering the use of your saw horses, from initial sawhorse setup to advanced sawhorse lumber support, you’ll unlock a new level of efficiency and safety in all your DIY endeavors. Happy building!