
Can you sharpen drill bits with an angle grinder? Yes, you absolutely can sharpen drill bits with an angle grinder, and it can be a very effective method for re-sharpening drill bits grinder when done correctly. Many people wonder about DIY drill bit sharpening, and using an angle grinder is a popular DIY approach. This guide will walk you through the process of drill bit sharpening angle grinder for various types of bits, ensuring your tools stay sharp and ready for action. We’ll cover everything from basic sharpening drill bits grinder techniques to specific tips for metal drill bit sharpening grinder and even sharpening carbide drill bits grinder. You’ll learn how to perform angle grinder drill bit repair to extend the life of your valuable bits.
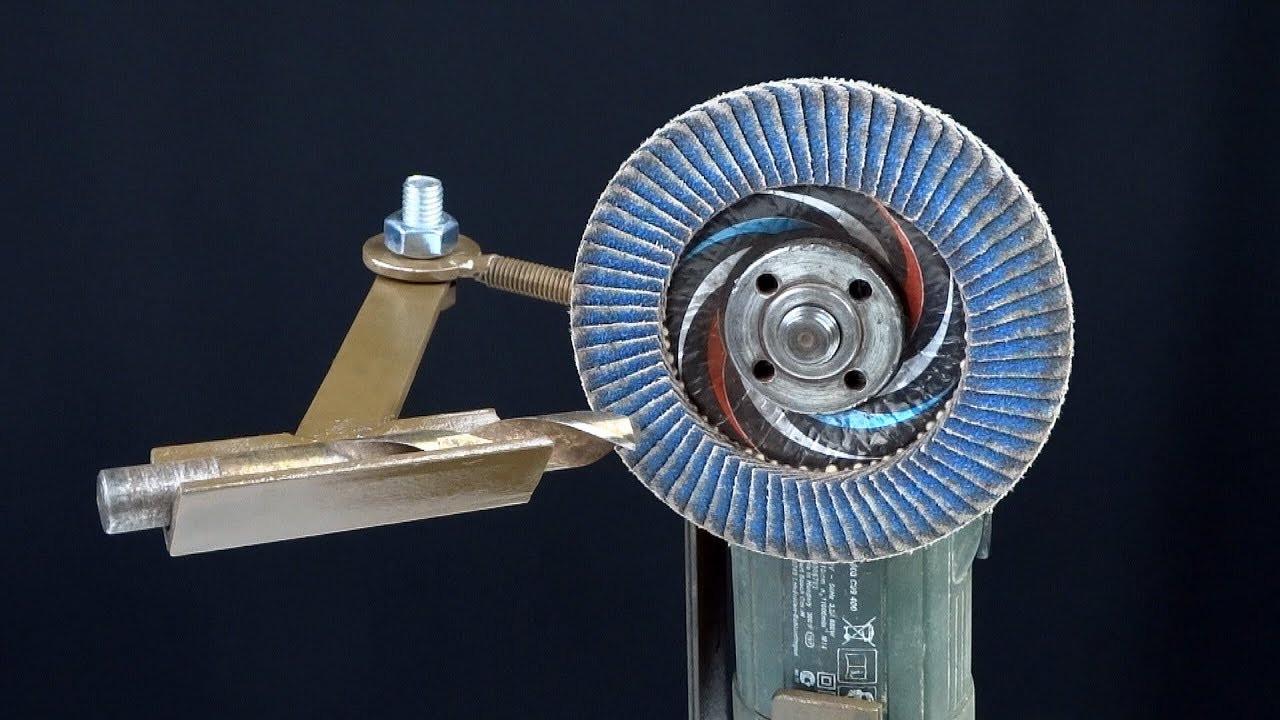
Image Source: binictools.com
Why Sharpen Your Drill Bits?
Over time, even the best drill bits lose their cutting edge. This dullness can lead to several problems:
- Increased Effort: Dull bits require more force to penetrate material, leading to user fatigue and potentially damaging your drill.
- Poor Hole Quality: Instead of clean cuts, dull bits can scrape and tear, resulting in rough, oversized, or even misshapen holes.
- Overheating: When a bit struggles to cut, friction increases, causing both the bit and the workpiece to overheat. This can damage the bit’s temper and the material you’re drilling.
- Reduced Drill Life: Forcing a dull bit puts extra strain on your drill’s motor and chuck, shortening its lifespan.
- Wasted Time and Money: Constantly buying new drill bits is expensive. Sharpening is a cost-effective way to keep your existing tools in good working order.
Choosing the Right Angle Grinder and Accessories
Not all angle grinders are created equal, and the type of wheel you use is crucial for effective grinding drill bits angle grinder.
Angle Grinder Selection
For drill bit sharpening angle grinder, you don’t necessarily need the most powerful or largest angle grinder. A smaller, lighter grinder (around 4.5 inches or 115mm) is often more manageable for the precise movements required. Look for a grinder with variable speed if possible, as this allows for greater control.
Grinding Wheels
This is where careful selection matters most.
- Aluminum Oxide Wheels: These are the most common and suitable for sharpening most metal drill bits. They offer a good balance of aggressiveness and wear resistance.
- Silicon Carbide Wheels: These are harder and more brittle than aluminum oxide. They are excellent for sharpening harder metals and materials like carbide, but they can be more prone to chipping.
- Diamond Wheels: Specifically designed for sharpening carbide drill bits grinder, these wheels have a diamond-impregnated surface. They are the most durable and effective for extremely hard materials but also the most expensive.
Important: Always use a grinding wheel specifically designed for metal sharpening. Do not use cutting discs or flap discs for this purpose. Ensure the grinding wheel you choose has a grit suitable for sharpening – typically a medium grit (around 60-80) is a good starting point.
Safety Gear: Non-Negotiable
Before you even think about touching an angle grinder, ensure you have the proper safety equipment. This is paramount for angle grinder drill bit repair and any grinding task.
- Safety Glasses or Face Shield: Sparks and metal fragments are inevitable. A full face shield offers the best protection.
- Gloves: Thick work gloves protect your hands from heat, sparks, and sharp edges.
- Ear Protection: Angle grinders are loud. Earplugs or earmuffs are essential to prevent hearing damage.
- Dust Mask or Respirator: Grinding metal creates fine dust. A good quality mask prevents inhalation.
- Fire-Resistant Clothing: Wear sturdy, non-synthetic clothing that covers your arms and legs. Keep flammable materials away from your workspace.
Preparing for Drill Bit Sharpening
A bit of preparation goes a long way in making the sharpening twist bits grinder process smoother and more effective.
Cleaning the Drill Bit
Remove any dirt, grease, or residue from the drill bit. A wire brush or a quick soak in a degreaser can do the trick. A clean bit allows for better contact with the grinding wheel and prevents contamination.
Securing Your Workspace
Ensure your angle grinder is unplugged before attaching or changing wheels. Work in a well-lit, well-ventilated area. Secure the drill bit you intend to sharpen. While you can hold it by hand for very brief touches, using a vise is highly recommended for stability and safety, especially when grinding drill bits angle grinder.
Grinder Setup
- Wheel Attachment: Ensure the grinding wheel is securely attached to the grinder according to the manufacturer’s instructions.
- Guard Placement: Always use the grinder’s guard. It’s there for a reason – to protect you from flying debris and accidental contact with the spinning wheel.
The Art of Sharpening Twist Bits with an Angle Grinder
Sharpening a standard twist bit involves restoring the cutting edge at the tip. Here’s how to approach sharpening twist bits grinder:
Grinding Angle and Clearance
This is the most critical part of DIY drill bit sharpening.
- Cutting Lip Angle: The main cutting edge of a twist bit should ideally be ground at an angle of around 118 degrees for general-purpose drilling in softer materials, or 135 degrees for harder materials. While achieving perfect angles with a freehand grinder is challenging, aiming for consistency is key.
- Clearance Angle: Behind the cutting lip, there’s a secondary bevel called the clearance angle. This prevents the heel of the bit from rubbing against the hole wall. You need to maintain a slight clearance angle.
Step-by-Step Sharpening Process
-
Positioning:
- Hold the drill bit firmly. A vise is the safest and most effective way to hold the bit.
- Position the angle grinder at an angle relative to the drill bit.
- The angle of approach for the grinder is crucial. You want to grind the face of the cutting lip.
-
The Grinding Motion:
- Controlled Touch: Bring the spinning grinding wheel to the cutting lip of the drill bit. Use light, controlled pressure. You are not trying to remove a lot of material quickly.
- Angle of Attack: The wheel should meet the cutting lip at an angle. For a typical twist bit, this angle is roughly 10-20 degrees relative to the face of the cutting lip.
- Sweeping Motion: Use a slight sweeping motion as you touch the grinder to the bit. This helps distribute the heat and creates a more consistent bevel. Imagine the grinding wheel “rolling” along the cutting edge.
- One Side at a Time: Focus on sharpening one cutting lip at a time.
-
Checking and Flipping:
- After a brief pass on one side, check the sharpness and the angle. You should see a fresh, shiny bevel forming.
- Rotate the drill bit (or adjust your grip/vise) to the opposite cutting lip.
- Repeat the grinding process, ensuring you apply similar pressure and angle.
-
Achieving Symmetry:
- The goal is to make both cutting lips identical in angle and length. If one side is shorter or ground at a different angle, the bit will wobble and drill an oversized hole.
- Periodically check the symmetry by looking at the tip of the bit from the front. Both cutting lips should appear to be mirror images.
-
Grinding the Web Thinning (Optional but Recommended):
- As a drill bit is resharpened, the central web that supports the cutting lips gets thicker. This increases the “chisel point” effect, making the bit harder to start and prone to “walking.”
- To counter this, you can “thin” the web. This involves grinding a small bevel on each side of the web’s point at the very tip of the bit.
- How to do it: With the grinder angled appropriately, lightly touch the sides of the web’s tip. This is a delicate operation to avoid removing too much material. The goal is to create a slightly more pointed tip.
-
Cooling:
- Metal heats up quickly when ground. Allow the drill bit to cool between passes, especially if you feel it getting too hot. Dipping it in water can help, but be cautious of steam. Overheating can ruin the temper of the bit.
Sharpening Different Types of Drill Bits
While the general principle of sharpening drill bits grinder remains the same, specific bit types require minor adjustments.
Metal Drill Bit Sharpening Grinder
For metal drill bit sharpening grinder, consistency is key. High-speed steel (HSS) bits are common. The angles mentioned earlier (118° for soft metals, 135° for hard metals) are particularly important here. Pay close attention to maintaining the original clearance angle. If you remove too much material from the heel, the bit will chatter and not cut effectively.
Sharpening Carbide Drill Bits Grinder
Carbide bits are extremely hard and brittle. They require a different approach for sharpening carbide drill bits grinder.
- Diamond Wheels are Best: While it’s possible with a very fine silicon carbide wheel, a diamond-impregnated grinding wheel is the most effective and recommended tool.
- Lower Speeds and Light Pressure: Carbide is prone to thermal shock and chipping. Use lower grinder speeds if adjustable, and very light pressure.
- Cooling is Crucial: Frequent cooling with water is essential to prevent the carbide from fracturing due to heat.
- Maintain Original Geometry: Carbide bits often have more complex cutting geometries. Try to replicate the original angles as closely as possible.
Spade Bits and Paddle Bits
These bits are simpler. They have small cutting edges at the wings.
- Focus on the Leading Edge: Identify the leading edge of each wing.
- Angle of Grind: Hold the grinder at an angle that matches the existing bevel on the wing’s cutting edge.
- Light Touch: Grind lightly on the leading edge of each wing until it feels sharp again.
Masonry Bits (Carbide Tipped)
Sharpening masonry bits can be tricky due to the carbide tip.
- Carbide Grinding: You’ll need to use a diamond wheel or a very specific carbide grinding wheel.
- Tip Geometry: These bits have a chisel-like carbide tip. The goal is to sharpen the two main cutting faces of the carbide insert.
- Angle: Maintain the existing bevel angles on the carbide tip.
- Patience: This is a slow process, and it’s easy to damage the carbide if you rush or use too much force.
Using an Angle Grinder Jig for Drill Bits
For more consistent and repeatable results, especially when grinding drill bits angle grinder, an angle grinder jig can be a worthwhile investment or DIY project. These jigs hold the drill bit at a precise angle relative to the grinding wheel.
Benefits of an Angle Grinder Jig
- Consistency: Ensures the same grinding angle on every pass and for every bit.
- Accuracy: Helps achieve the correct cutting and clearance angles more reliably.
- Safety: Provides a more stable platform for holding the drill bit.
- Efficiency: Can speed up the sharpening process once you’re used to it.
Types of Jigs
- Commercial Jigs: Several manufacturers offer specialized jigs designed for sharpening drill bits with angle grinders. These often have adjustable mounts and angle guides.
- DIY Jigs: Many resourceful individuals create their own jigs using vises, metal blocks, and hinges to create adjustable mounts that hold the drill bit at the desired angle. You can find many designs and tutorials online.
How to Use a Jig
The exact operation varies with the jig design, but the general principle involves:
- Securing the Bit: Clamp the drill bit into the jig’s holder.
- Setting the Angle: Adjust the jig to achieve the desired grinding angle.
- Approaching the Wheel: Move the jig and bit assembly towards the spinning angle grinder wheel, guiding the cutting lip into contact.
- Controlled Grinding: Follow the jig’s guides for consistent passes.
Common Mistakes to Avoid in Angle Grinder Sharpening
Even with the best intentions, some mistakes can ruin a drill bit.
- Too Much Pressure: This generates excessive heat and can quickly remove too much material, damaging the bit’s temper.
- Grinding the Wrong Area: Focusing on the shank or the flutes instead of the cutting lip.
- Inconsistent Angles: Leading to the bit wobbling and drilling oversized holes.
- Overheating: Not allowing the bit to cool, leading to softening and reduced lifespan.
- Not Using Safety Gear: The most dangerous mistake of all.
- Using the Wrong Grinding Wheel: Using a cutting disc for grinding, or a coarse wheel for delicate carbide bits.
Maintenance and Testing Your Sharpened Bits
Once you’ve finished sharpening, a few final steps ensure your bits are ready.
Deburring
After grinding, there might be a small burr or wire edge on the cutting lip. Carefully remove this with a light touch of a fine grinding wheel, a sharpening stone, or a fine file.
Testing
The best way to test your sharpened bit is to try it on a piece of scrap material similar to what you typically drill.
- Listen: Does the bit cut smoothly, or does it sound like it’s chattering or struggling?
- Look: Is the hole round and the correct size? Are the chips coming off cleanly?
- Feel: Does the drill require excessive force, or does it feed smoothly?
Angle Grinder Drill Bit Repair: Beyond Sharpening
While angle grinder drill bit repair primarily refers to sharpening, it can also extend to minor fixes like:
- Re-establishing the Tip: If a bit’s tip is severely damaged or chipped, you can grind away the damaged portion and re-establish a new cutting point. This will shorten the bit, but it can save it from being discarded.
- Clearing Bent Shanks: While less common and harder to do perfectly, for very minor bends in the shank (not the cutting end), some gentle grinding might help true it up, but this is a delicate process and often not recommended.
Frequently Asked Questions (FAQ)
Q: Can I sharpen any drill bit with an angle grinder?
A: You can sharpen most common drill bits, especially those made of high-speed steel (HSS) or cobalt. However, for very hard materials like carbide, using a diamond-coated wheel is highly recommended for optimal results and to prevent damage.
Q: How often should I sharpen my drill bits?
A: This depends on how often you use them and the materials you drill. If you notice your drill struggling, the holes are rough, or the bit is overheating, it’s time to sharpen.
Q: What angle should I hold the drill bit at for sharpening?
A: For general-purpose HSS bits, a primary cutting lip angle of around 118 degrees is standard. The angle you hold the grinder to create this bevel is typically around 10-20 degrees relative to the face of the cutting lip. The goal is to grind the beveled face of the cutting lip.
Q: Will sharpening damage my drill bits?
A: Yes, it can if done incorrectly. Overheating, excessive pressure, or grinding the wrong angles can all damage a drill bit. It requires practice and patience.
Q: Is it better to buy new drill bits or sharpen old ones?
A: For frequently used bits or when perfect precision is required, new bits are often best. However, sharpening is a cost-effective way to extend the life of your existing bits and is perfectly viable for many tasks.
Q: Can I use a bench grinder instead of an angle grinder?
A: Yes, a bench grinder with a grinding wheel is often considered a more stable and precise tool for sharpening drill bits. However, an angle grinder is more portable and accessible for many DIYers.
Q: How do I know if I’ve removed too much material?
A: If the cutting lip becomes noticeably shorter than its original length, or if the web at the tip becomes very thin, you’ve likely removed too much material.
By following these guidelines, you can effectively use your angle grinder to keep your drill bits sharp and perform essential angle grinder drill bit repair and maintenance, saving you time and money while ensuring your drilling tasks are completed efficiently. Remember, practice makes perfect, and safety should always be your top priority.