
Can you drill into a stud? Yes, drilling into a stud is the safest and most secure way to hang heavy items on your walls. It provides a strong anchor point that prevents your belongings from falling. This guide will walk you through the process step-by-step.
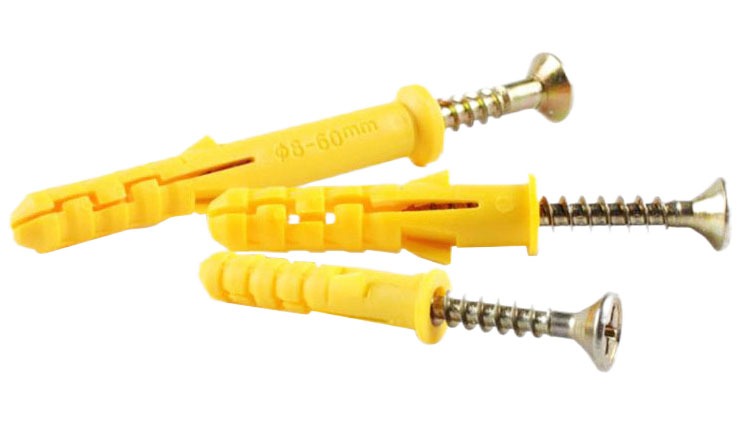
Image Source: www.kenenghardware.com
Why Drilling Into a Stud is Important
When you need to hang something on a wall, the most critical factor is securing it properly. This is especially true for heavier items like shelves, mirrors, television mounts, or cabinets. Simply drilling into drywall isn’t enough. Drywall is brittle and can easily crumble under weight. This can lead to your item falling, potentially causing damage to the item itself, the wall, or even injury.
The Strength of a Stud
Studs are the vertical framing members within your walls. They are typically made of wood (like pine or fir) or metal. These studs form the structural backbone of your house. They provide the solid support needed to hold weight. Drilling into a stud and then using a screw or bolt provides a direct connection to this strong framework. This is far more reliable than relying on drywall alone.
When to Avoid Drywall Anchors
While drywall anchors are useful for lighter items, they have limitations. Many types of drywall anchors rely on expanding behind the drywall to create their hold. This hold is often limited, and over time, the drywall can degrade. For anything that carries significant weight or will experience repeated stress, a stud is always the superior choice. This is particularly true for things like:
- Heavy picture frames: Especially those with glass.
- Mirrors: Large mirrors can be quite heavy.
- Shelving units: Especially when loaded with books or decorative items.
- Television wall mounts: These need a very secure connection.
- Cabinets and bathroom fixtures: These bear significant weight and are often in areas where failure could be dangerous.
Finding Wall Studs: The First Crucial Step
Before you can drill into a stud, you need to know where they are. Walls aren’t solid; they have a framework inside. Studs are typically spaced 16 inches or 24 inches apart, center to center. However, this spacing can vary, especially in older homes or with certain building codes. Relying on standard spacing alone is risky. Here’s how to find them:
Methods for Locating Wooden Studs
There are several reliable ways to find wall studs:
1. Using a Stud Finder
This is the most common and often the easiest method. Stud finders work by detecting changes in density behind the wall.
- Electronic Stud Finders: These are the most popular. They have sensors that detect the edges of studs.
- How to use a stud finder:
- Calibrate: Most electronic stud finders require calibration. Place the finder flat against the wall where you want to start, usually away from a stud. Press and hold the calibration button until it indicates it’s ready (often with a light or beep).
- Scan: Gently slide the stud finder horizontally across the wall.
- Mark: When the stud finder indicates it has found an edge (usually with a light or sound), mark the spot lightly with a pencil. Continue sliding. You’ll typically find a series of “edges” as you scan. The center of the stud is usually halfway between the two outer edge detections.
- Verify: Once you think you’ve found the center, scan vertically to confirm the stud runs straight up and down. You can also try scanning slightly to the left and right of your marked center to ensure you’ve got the widest detection.
- How to use a stud finder:
- Magnetic Stud Finders: These devices detect the small nails or screws used to attach the drywall to the studs. They are simpler to use but can sometimes be fooled by metal pipes or other metal objects.
2. The Knock Test (Auditory Method)
This method relies on sound. You’ll need to develop a feel for it with practice.
- How to perform the knock test:
- Listen: Gently tap on the wall with your knuckle.
- Sound differences: When you tap over an empty space between studs, the sound will be hollow and resonant. When you tap over a stud, the sound will be duller and more solid.
- Marking: Move your hand across the wall, tapping as you go. Mark the spots where the sound changes from hollow to solid. These are likely the edges of your studs.
3. Visual Clues
Sometimes, you can find visual indicators on your wall:
- Electrical Outlets and Light Switches: These are almost always mounted to the side of a stud. If you find an outlet, you can often assume there’s a stud directly to its left or right.
- Baseboards and Trim: The nails used to attach baseboards are usually driven into studs. If you can see nail pops or dimples, they might indicate the location of a stud.
- Cracks in Drywall: Sometimes, hairline cracks in drywall can appear along the seams where drywall sheets meet, which are often aligned with studs.
4. Using a Thin Object (Drill Bit or Awl)
This is a more intrusive but often definitive method.
- How to use this method:
- Select a thin drill bit: Use a very thin drill bit (e.g., 1/16 or 3/32 inch).
- Drill small pilot holes: In an inconspicuous area or where you intend to place your item, drill a series of small pilot holes.
- Feel for resistance: If the drill bit encounters solid wood, you’ve found a stud. If it goes in easily and only through drywall, you’ve missed. This method is best used to confirm findings from other methods.
Tip: It’s always a good idea to confirm the stud location using at least two methods if possible.
Preparing to Drill
Once you’ve located a stud, you need to prepare for drilling. This involves gathering the right tools and understanding the specifics of your wall.
Tools You’ll Need
- Drill: A cordless drill is ideal for portability and power.
- Drill Bits: You’ll need a bit for creating a pilot hole and potentially a larger bit if you’re using specific fasteners like lag bolts.
- Pencil: For marking.
- Measuring Tape: For precise placement.
- Safety Glasses: Crucial for protecting your eyes from dust and debris.
- Stud Finder: As discussed earlier.
- Hammer (optional): To tap in a thin nail for confirmation.
Determining Stud Depth Measurement
The depth of a stud is important for choosing the correct screw or fastener length. Most interior wall studs are made of 2×4 lumber.
- Actual Size of a 2×4: A standard 2×4 is actually 1.5 inches by 3.5 inches.
- Drywall Thickness: Typical drywall is about 1/2 inch thick.
- Calculating Screw Length: To securely fasten into the center of a stud, you need a screw that will go through the drywall and penetrate a good portion of the stud. For a typical 1/2-inch drywall and a 2×4 stud, a screw around 1.5 to 2 inches long is usually sufficient. The screw needs to go at least 1 inch into the stud for a strong hold.
Table: Recommended Screw Lengths for Securing Items to Walls (into studs)
| Item Weight Class | Drywall Thickness | Stud Type | Recommended Screw Length | Notes |
|---|---|---|---|---|
| Light (up to 10 lbs) | 1/2 inch | 2×4 | 1.25 – 1.5 inches | Ensure screw penetrates at least 1 inch into the stud. |
| Medium (10-30 lbs) | 1/2 inch | 2×4 | 1.5 – 2 inches | Aim for good penetration into the stud for a secure hold. |
| Heavy (30-75 lbs) | 1/2 inch | 2×4 | 2 – 2.5 inches | Use thicker gauge screws if possible. Lag bolts may be better for very heavy items. |
| Very Heavy (75+ lbs) | 1/2 inch | 2×4 | 2.5 inches or more | Consider lag bolts or specialized mounting hardware. Consult mounting instructions. |
Note: These are general guidelines. Always refer to the weight limits and recommendations provided by the manufacturer of the item you are mounting.
The Process: Drilling for Screws
With your stud located and tools ready, you’re prepared to drill.
Creating a Pilot Hole
Drilling for screws often requires a pilot hole creation. This is a small hole drilled before the actual screw.
- Why create a pilot hole?
- Prevents wood splitting: Especially in drier wood or near the edge of a stud, drilling a pilot hole reduces the risk of the wood cracking or splitting when the screw is inserted.
- Makes driving easier: A pilot hole guides the screw, making it much easier to drive straight and with less effort.
- Protects screw threads: It prevents the screw threads from stripping the wood prematurely.
- Helps with alignment: It ensures the screw goes exactly where you intend.
Choosing the Right Pilot Hole Size
The size of your pilot hole is critical. It should be smaller than the screw’s core diameter but larger than the screw’s threads.
- General Rule: A good starting point is to choose a drill bit that is about the same diameter as the screw’s “shank” (the smooth part just below the head).
- For Wood Screws: If you’re using a standard wood screw, you can often find charts online that recommend pilot hole sizes based on screw diameter and wood type.
- For Drywall Installation: When you are securing items to walls that have already been drilled for screws into studs, you’ll want a pilot hole that is just slightly smaller than the screw you’ll be using.
Table: Pilot Hole Size Guide (Approximate)
| Screw Shank Diameter | Recommended Pilot Hole Size (for softwoods like pine) | Recommended Pilot Hole Size (for hardwoods) |
|---|---|---|
| 1/8 inch | 3/32 inch | 7/64 inch |
| 3/16 inch | 7/64 inch | 5/32 inch |
| 1/4 inch | 1/8 inch | 9/64 inch |
These are general guidelines. Always test on a scrap piece of wood if possible.
Proper Drilling Technique
Now, let’s focus on the proper drilling technique for creating the pilot hole.
- Mark Your Spot: Use your pencil to mark the exact center of the stud where you want to drill.
- Position the Drill: Hold your drill perpendicular to the wall. A level can help ensure you’re drilling straight.
- Start Slowly: Begin drilling at a slow speed. This helps the bit bite into the wall surface without skipping.
- Apply Steady Pressure: Once the bit has started to grip, apply steady, consistent pressure. You don’t need to force it. Let the drill do the work.
- Drill Through the Drywall: You’ll feel a slight increase in resistance as you break through the drywall.
- Continue into the Stud: Keep drilling until your pilot hole is the desired depth for your fastener. You should feel the drill bit digging into the wood stud.
- Withdraw the Drill: Once you’ve reached the correct depth, release the trigger and slowly pull the drill straight back out. This leaves a clean hole.
Important Considerations:
- Drilling into Drywall: While your primary goal is to hit the stud, the drill bit will first pass through the drywall. Drilling into drywall is simple, but be aware of the dust it creates. Wear your safety glasses and consider a dust collection attachment if you’re doing a lot of drilling.
- Direction: Always drill perpendicular to the wall. Drilling at an angle can make it difficult to insert the screw straight and can weaken the connection.
Securing Items to Walls
With your pilot hole ready, you can now proceed with securing items to walls.
Driving the Screw
- Align the Item: Position the item you want to hang so that the mounting holes align with your pilot hole(s).
- Insert the Screw: Place the screw into the pilot hole and through the mounting bracket or the item itself.
- Drive the Screw:
- Low Speed First: Start driving the screw at a low speed to ensure it enters the pilot hole cleanly and straight.
- Increase Speed: Once the screw has started to catch the wood, you can increase the drill’s speed.
- Do Not Overtighten: Stop driving the screw when it feels snug. Overtightening can strip the threads in the wood, weakening the hold, or can strip the screw head. If using a clutch setting on your drill, set it to a moderate torque.
What If I Missed the Stud?
Mistakes happen! If you drill your pilot hole and don’t feel solid wood, you’ve likely missed the stud.
- Don’t panic: Simply move a few inches to the side (or up/down, if appropriate) and try to locate the stud again. Remember the typical 16-inch or 24-inch spacing, but be prepared for variations.
- If you can’t find a stud: If you’ve searched thoroughly and cannot locate a stud in the desired area, you’ll need to rely on a wall anchor installation. Choose an anchor appropriate for the weight of the item you are hanging. Different types of anchors are suited for different weights and wall materials. For instance, toggle bolts or molly bolts are generally stronger than plastic expansion anchors and are a good option when studs are unavailable.
Frequently Asked Questions (FAQ)
Q1: How do I know if I’ve hit a stud?
You’ll feel a firm resistance as the drill bit enters solid wood. The sound will also change from a hollow echo in the wall cavity to a more solid thud.
Q2: Can I drill into metal studs?
Yes, but you’ll need specific drill bits designed for metal (like cobalt or titanium-coated bits) and a more powerful drill. The process of finding them is similar, but you might need a different type of stud finder or to use a thin metal probe.
Q3: What happens if I drill too deep?
If you drill too deep, you might go through the stud or into a space beyond it. If you go through the stud, you may need to find another spot or use a longer screw/bolt that can still get a good grip.
Q4: Do I need a pilot hole if I’m just hanging a light picture?
For very light items with small nails or screws, you might get away without a pilot hole, but it’s always best practice. It makes the job cleaner and more secure, even for lighter tasks.
Q5: Can I drill into plaster and lath walls?
Yes, but it’s trickier. Plaster can be brittle and prone to cracking. You’ll likely need a masonry drill bit initially to get through the plaster, then a wood bit for the lath and studs. A stud finder may struggle more with these older wall types.
Q6: What’s the difference between drilling for screws and drilling for wall anchors?
When drilling for screws into studs, you create a pilot hole sized for the screw shank to bite into wood. When drilling for wall anchor installation, you drill a hole sized specifically for the anchor itself to be inserted into the wall. The anchor then expands or provides its own grip.
By following these steps, you can confidently and safely drill into studs, ensuring that your belongings are securely mounted to your walls.