
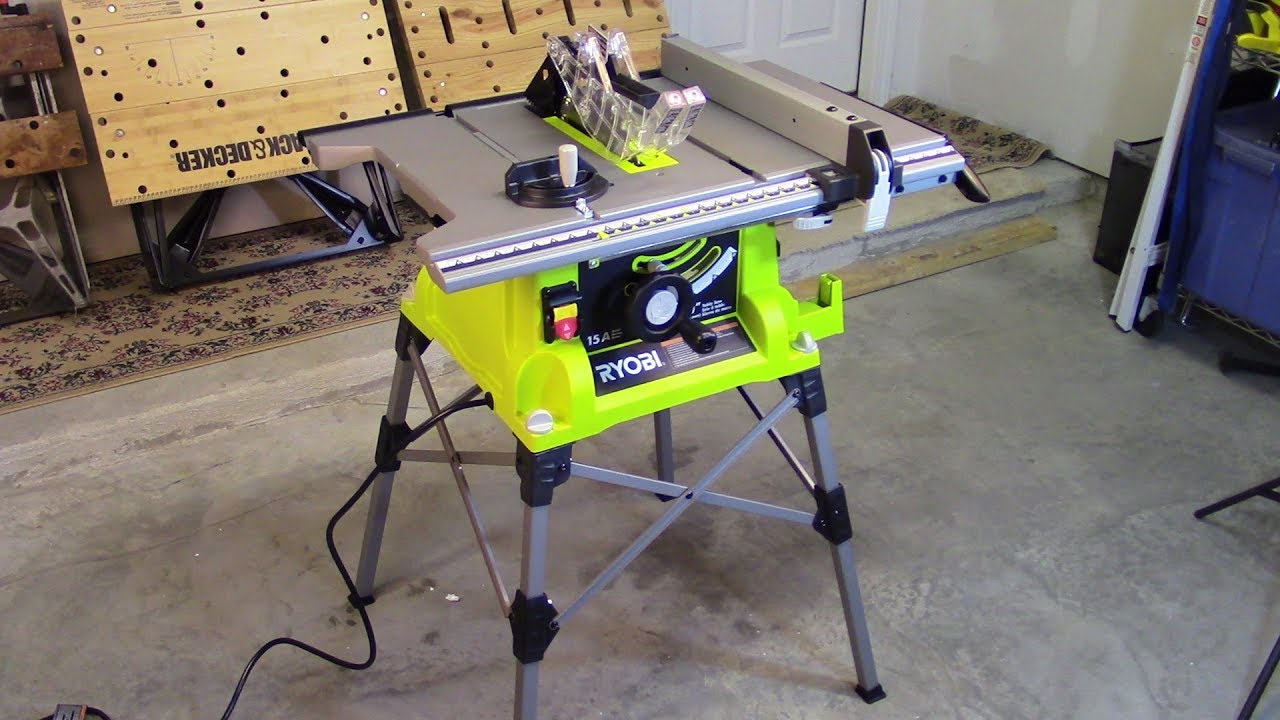
Image Source: i.ytimg.com
How to Use a Ryobi Table Saw: Easy Guide & Essential Skills
Can you use a Ryobi table saw for various woodworking projects? Yes, a Ryobi table saw is a versatile tool for both beginners and experienced woodworkers. This guide will walk you through everything you need to know, from initial setup to advanced techniques, making your woodworking journey safer and more productive.
Getting Started with Your Ryobi Table Saw
So, you’ve got your Ryobi table saw. Before you even think about cutting, proper Ryobi table saw setup is crucial. This isn’t just about convenience; it’s about safety and accuracy. Let’s break down the initial steps to get your saw ready for action.
Unpacking and Initial Assembly
Your Ryobi table saw will likely come in a box, sometimes requiring some assembly. Follow the manufacturer’s instructions carefully. This usually involves attaching legs, connecting dust collection ports, and installing the blade guard assembly. Don’t rush this; ensure all screws are tightened and parts are securely fitted.
Placing Your Saw
Where you place your table saw matters. It needs a stable, level surface. Avoid placing it on uneven ground or a wobbly workbench. Ensure there’s ample space around the saw for you to move freely and for the workpiece to travel safely. You’ll also need space for dust collection and storage of accessories.
Safety First: Mastering Ryobi Table Saw Safety
Ryobi table saw safety is paramount. Table saws are powerful tools, and complacency can lead to serious accidents. Before you make any cuts, familiarize yourself with these essential safety practices.
Personal Protective Equipment (PPE)
Always wear appropriate PPE:
- Safety Glasses: Essential for protecting your eyes from flying sawdust and debris.
- Hearing Protection: Table saws can be loud; earplugs or earmuffs are a must.
- Dust Mask or Respirator: Protect your lungs from fine sawdust particles.
- No Loose Clothing or Jewelry: These can get caught in the blade.
- Closed-Toe Shoes: Protect your feet from dropped objects.
Blade Guard and Riving Knife
- Blade Guard: This is your primary defense against accidental contact with the spinning blade. Always ensure it’s properly installed and functional. If it hinders your cut, don’t remove it; consider using a different type of cut or accessory.
- Riving Knife: This crucial safety feature is positioned behind the blade. It prevents “kickback” by keeping the kerf (the slot the blade makes) from closing and pinching the blade. Ensure your riving knife is aligned with the blade and is the correct thickness for your blade.
Kickback: The Silent Danger
Kickback occurs when the wood being cut is suddenly and violently thrown back towards the operator. This can happen due to:
- Blade pinching in the wood.
- Cutting warped or wet wood.
- Incorrect feeding of the material.
- Lack of proper support for the workpiece.
Ryobi table saw safety protocols are designed to minimize kickback risks. Always maintain a firm grip on the wood, feed it smoothly, and never stand directly behind the blade’s path.
Push Sticks and Push Blocks
These simple but vital accessories help keep your hands safely away from the blade, especially when cutting smaller pieces or making narrow rips. Always use a push stick when your hands would be within 6 inches of the blade.
Powering On and Off
- Ensure the blade is at full speed before starting a cut.
- Never reach under the saw while the blade is spinning.
- Wait for the blade to stop completely before removing cut pieces or making adjustments.
Essential Ryobi Table Saw Skills
Once you’re confident with safety, it’s time to develop the core skills that make your Ryobi table saw a woodworking workhorse.
Ryobi Table Saw Blade Replacement
Changing the blade is a common maintenance task. Here’s how to do it safely:
Tools Needed
- Spanner wrench (usually included with the saw)
- New table saw blade
- Gloves (optional, for better grip)
Steps for Replacement
- Disconnect Power: Absolutely critical. Unplug the saw from the wall.
- Raise the Blade: Use the height adjustment wheel to raise the blade as high as it will go.
- Remove Blade Guard/Riving Knife: Depending on your model, you might need to remove these first.
- Loosen Arbor Nut: Place the spanner wrench on the arbor nut. You’ll likely need to hold the blade from spinning. Many saws have a mechanism to lock the arbor. Turn the nut counter-clockwise to loosen.
- Remove Old Blade: Once the nut is off, carefully lift the old blade off the arbor. Note which side of the blade teeth face forward.
- Install New Blade: Place the new blade onto the arbor, ensuring the teeth are facing the correct direction (forward, towards the front of the saw). Make sure the blade is seated properly against the arbor flange.
- Replace Arbor Nut: Thread the arbor nut back on clockwise and tighten it firmly with the spanner wrench. Again, you might need to hold the arbor to prevent it from spinning.
- Reinstall Guard and Riving Knife: Put back any components you removed.
- Test Spin: Plug the saw back in and briefly run it to ensure the blade spins freely without wobbling.
Ryobi Table Saw Fence Adjustment
The fence is your guide for making straight rip cuts. Accurate Ryobi table saw fence adjustment is key to precise results.
Fence Mechanism
Most Ryobi table saws have a rack-and-pinion or a similar system for moving the fence. There’s usually a lock lever to secure the fence once it’s in position.
Making Adjustments
- Loosen the Lock: Release the lever that locks the fence in place.
- Slide the Fence: Move the fence to your desired measurement. Use the scale on the saw’s rail for reference.
- Check Alignment: This is vital. We’ll cover Ryobi table saw alignment in more detail shortly. Ensure the fence is parallel to the blade.
- Lock the Fence: Securely tighten the lock lever.
- Test Cut (Optional): Make a test cut on a scrap piece of wood to confirm accuracy.
Ryobi Table Saw Alignment: A Critical Check
Proper Ryobi table saw alignment ensures the blade is parallel to the miter slots and the fence is parallel to the blade. Misalignment can lead to inaccurate cuts and dangerous kickback.
Key Alignment Checks
-
Blade to Miter Slot:
- Raise the blade to its full height.
- Rotate the blade so the teeth are facing you.
- Use a ruler or measuring tape to measure the distance from the front edge of a miter slot to the blade.
- Rotate the blade so the back of the teeth face you.
- Measure the distance again.
- The distance should be the same at both the front and back of the blade. If not, you’ll need to adjust the trunnions (mechanisms that hold the motor and blade) – consult your manual for specific instructions, as this can be complex.
-
Fence to Blade:
- With the blade raised and spinning (ensure safety precautions!), lightly touch a non-rotating part of the fence to the blade’s side. This is a rough check.
- A more accurate method: Set your fence a few inches from the blade. Measure the distance from the fence to the blade’s teeth at the front of the saw.
- Now, measure the distance from the fence to the blade’s teeth at the back of the saw.
- The fence should be perfectly parallel to the blade. If not, adjust the fence’s position relative to the rail until it is. Small adjustments are often made at the fence mounting points.
Ryobi Table Saw Miter Gauge
The Ryobi table saw miter gauge is used for making crosscuts (cuts across the width of the wood) at specific angles.
Using the Miter Gauge
- Insert into Miter Slot: Slide the miter gauge into one of the miter slots on the saw’s table.
- Set the Angle: Most miter gauges have a scale with detents (preset stops) for common angles like 0, 22.5, 45, and 90 degrees. Loosen the handle, set your desired angle, and tighten it securely. Many also allow for free movement to set custom angles.
- Position the Wood: Place the wood firmly against the miter gauge’s fence. Ensure the cut line is positioned correctly.
- Make the Cut: Hold the wood firmly against the miter gauge and feed the assembly smoothly into the blade. Keep your hands on the miter gauge handle and the wood, but always ensure they stay behind the blade.
The Ryobi Table Saw Crosscut Sled
For greater accuracy and safety when making crosscuts, especially on wider boards, a Ryobi table saw crosscut sled is an invaluable accessory. You can buy one or build your own.
Benefits of a Crosscut Sled
- Enhanced Accuracy: Provides a perfectly square or angled fence to guide the wood.
- Improved Safety: Your hands are kept further from the blade, and the wood is supported by the sled itself.
- Handles Wider Stock: Can accommodate boards wider than the standard miter gauge.
Basic Construction (DIY)
A simple crosscut sled consists of a base (often plywood) with two runners that fit snugly into your table saw’s miter slots. A fence is attached perpendicularly to the base. For angled cuts, you can create a pivoting fence.
Using a Crosscut Sled
- Insert into Miter Slot: Slide the sled’s runners into the miter slots.
- Align the Fence: For 90-degree cuts, ensure the sled’s fence is perfectly square to the blade. You can use a drafting square or machinist’s square for this. Some sleds are designed with a built-in 45-degree angle.
- Position the Wood: Place your workpiece against the sled’s fence. Mark your cut line on the wood.
- Make the Cut: Hold the wood firmly against the fence and push the sled with the wood into the blade.
Advanced Cuts and Techniques
Once you’re comfortable with the basics, you can explore more advanced cuts.
Ripping Cuts
Rip cuts are made parallel to the grain of the wood.
- Set the Fence: Adjust the Ryobi table saw fence adjustment to the desired width of your rip cut. Ensure the fence is parallel to the blade and locked securely.
- Position the Wood: Place the edge of the wood against the fence.
- Feed the Wood: Start the saw. Once the blade is at full speed, smoothly push the wood through the blade. Use a push stick for the last portion of the cut.
Bevel Cuts
Bevel cuts are made at an angle.
- Adjust Blade Tilt: Use the tilt adjustment wheel on your Ryobi table saw to set the blade to your desired angle (e.g., 45 degrees).
- Make the Cut: You can use either the fence (for ripping at an angle) or the miter gauge/crosscut sled (for crosscutting at an angle).
Dados and Grooves
These are shallower cuts made across the grain to accept other pieces of wood. You’ll need a dado blade set for this, which is a stack of blades and chippers. Check your Ryobi table saw manual to see if it supports dado blades, as not all contractor-style saws do, or if they have specific limitations.
Ryobi Table Saw Dust Collection
Sawdust is not just messy; it’s a health hazard and can interfere with the saw’s performance. Effective Ryobi table saw dust collection is vital.
How it Works
Most Ryobi table saws have a port where you can attach a shop vacuum or a dust collection system. The blade guard often has a dust collection chute.
Tips for Better Dust Collection
- Use a Powerful Vacuum: A shop vac with good suction is essential.
- Keep the Guard Clean: Sawdust buildup on the blade guard can reduce its effectiveness.
- Ensure a Good Seal: Make sure the vacuum hose and adapter create a good seal with the dust port.
- Regularly Empty the Canister: A full vacuum won’t collect effectively.
Ryobi Table Saw Maintenance
Regular Ryobi table saw maintenance ensures your saw runs efficiently and safely.
Cleaning
- Table Surface: Keep the table clean and free of sawdust and pitch buildup. A paste wax can help wood slide smoothly.
- Blade: Clean the blade with a blade cleaner to remove pitch and resin. A clean blade cuts better and safer.
- Internal Components: Periodically vacuum out sawdust from the base and internal mechanisms.
Blade and Insert Plate
- Blade Sharpening: Dull blades are dangerous and produce poor cuts. Get your blades professionally sharpened or replace them when they become dull.
- Insert Plate: Ensure the throat insert (the plate around the blade) is clean and flush with the table surface.
Lubrication
Check your manual for lubrication points. A small amount of lubricant on moving parts can ensure smooth operation.
Ryobi Table Saw Troubleshooting
Even with regular maintenance, you might encounter issues. Here are some common Ryobi table saw troubleshooting tips.
| Problem | Possible Cause | Solution |
|---|---|---|
| Kickback Occurs | Fence not parallel to blade; blade pinching; dull blade | Re-align fence; ensure blade is not pinching; use sharp blades; use push sticks; check riving knife. |
| Inaccurate Cuts | Fence or blade misaligned; loose fence; worn blade | Check and adjust alignment; ensure fence is locked tight; sharpen or replace blade. |
| Saw Not Starting | Power issue; motor overload; thermal cutoff | Check power cord and outlet; allow motor to cool if it’s hot; check circuit breaker. |
| Blade Wobbles | Bent blade; arbor nut loose; damaged arbor | Replace blade; tighten arbor nut; inspect arbor for damage. |
| Excessive Sawdust | Poor dust collection setup; clogged chute | Improve dust collection; clean blade guard and dust chutes; use a more powerful vacuum. |
| Fence Sticks | Debris on rail; bent rail; worn mechanism | Clean the rail; check for damage; lubricate mechanism; inspect for wear. |
Frequently Asked Questions (FAQ)
Q1: Can I use a dado blade with my Ryobi table saw?
A1: Check your Ryobi table saw’s manual. Some models are designed to accept dado blade sets, while others are not or have limitations on the width of the dado you can use.
Q2: How often should I replace my Ryobi table saw blade?
A2: This depends on usage. A good indicator is when you start to see tear-out, burning, or feel excessive resistance when cutting. For most hobbyists, replacing or sharpening blades every 6-12 months is common.
Q3: Is it safe to stand directly behind the Ryobi table saw blade?
A3: No, it is never safe. Always position yourself to the side of the blade’s path to avoid injury from kickback.
Q4: What is the best way to cut very thin strips on a Ryobi table saw?
A4: Use a featherboard and a push stick. A featherboard applies downward and lateral pressure to keep the wood against the fence, while a push stick helps you safely push the wood through the blade. A rip fence with an outfeed support is also beneficial for thin strips.
Q5: How do I adjust the height of the Ryobi table saw blade?
A5: Most Ryobi table saws have a handwheel or crank mechanism on the side of the saw. Turning it one way raises the blade, and the other way lowers it.
By following this comprehensive guide, you’ll be well-equipped to use your Ryobi table saw safely and effectively. Remember that practice, attention to detail, and a commitment to safety are your most important tools. Happy woodworking!