
Can you remove the chuck from a drill press yourself? Yes, you can remove the chuck from a drill press yourself with the right tools and techniques. This guide will walk you through the entire process, ensuring you can perform chuck removal safely and efficiently.
The drill press chuck is a vital component, holding your drill bits securely. Over time, you might need to remove it for various reasons, such as replacing a worn-out chuck, installing a specialized one, or performing essential drill press maintenance. This guide aims to demystify the process of chuck removal, making it accessible even for those less familiar with drill press disassembly. We will cover everything from identifying the types of chucks you might encounter to troubleshooting stubborn removals.
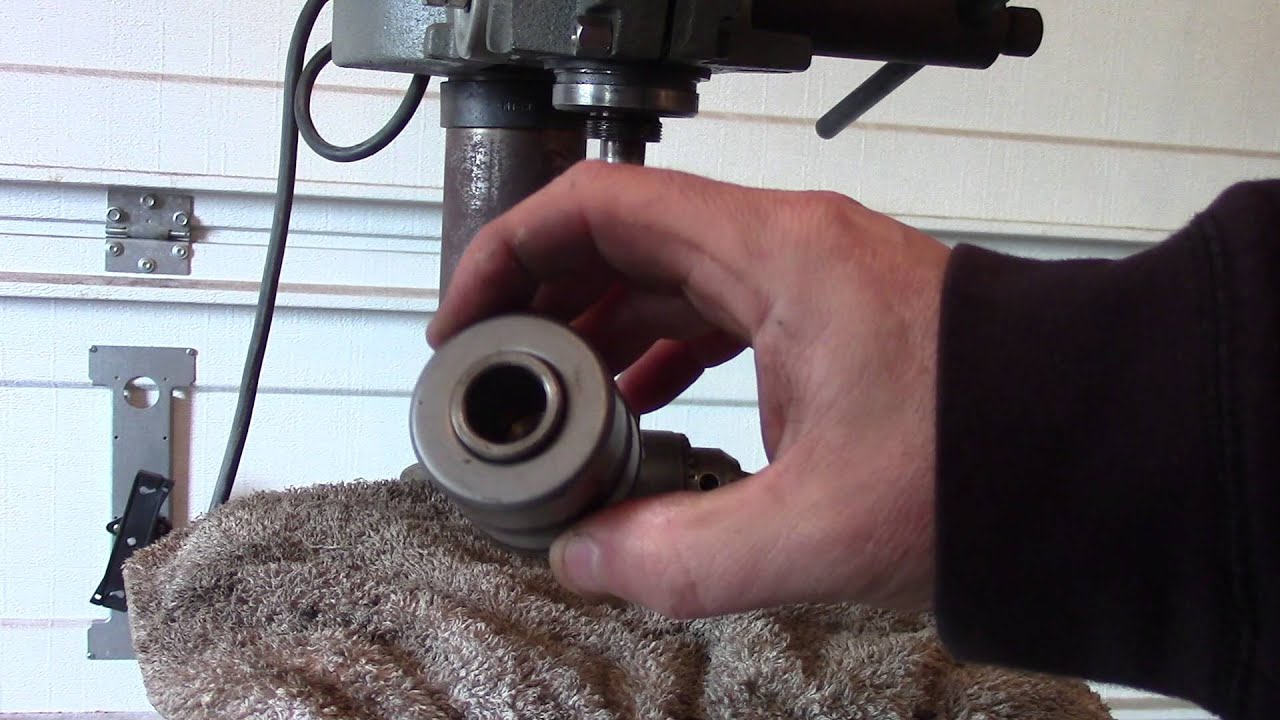
Image Source: i.ytimg.com
Why Remove the Drill Press Chuck?
There are several good reasons why you might need to tackle chuck removal:
- Replacing a Worn or Damaged Chuck: Over time, drill press chucks can wear out. This might manifest as difficulty gripping bits, runout (wobble), or damage to the jaws. A new chuck will restore your drill press’s precision.
- Upgrading Your Chuck: You might want to switch to a higher-quality chuck, a larger capacity chuck, or a keyless chuck for faster bit changes.
- Cleaning and Lubrication: Periodically, the chuck mechanism can benefit from cleaning and re-lubrication to ensure smooth operation and longevity.
- Accessing the Spindle: Sometimes, you need to remove the chuck to access the drill press spindle itself for inspection or repair.
- Morse Taper Systems: If your drill press uses a Morse taper system to hold the chuck, removing the chuck is necessary to change the taper shank.
Types of Drill Press Chucks and Their Mounting
Most modern drill presses use one of two primary methods for attaching the chuck to the drill press spindle:
- Threaded Mount: The chuck screws directly onto a threaded spindle. This is less common on heavier-duty drill presses.
- Morse Taper Mount: The chuck has a tapered shank that fits into a corresponding tapered socket in the drill press spindle. This is the most prevalent and secure mounting method.
Fathoming the Morse Taper System
The Morse taper is a system of standardized, self-holding tapers used for holding tools in a machine’s spindle or tailstock. It’s named after Stephen Albert Morse. The key characteristic of a Morse taper is that it uses friction and the wedging action of the taper to hold the tool securely.
- How it Works: The chuck’s shank has a conical shape that precisely matches a conical socket in the drill press spindle. When the chuck is inserted, the tight fit creates significant friction. A small tang or key at the end of the Morse taper provides a way to eject the chuck when needed.
- Taper Sizes: Morse tapers come in various sizes, denoted by numbers (e.g., MT1, MT2, MT3). The size depends on the drill press’s horsepower and capacity. A common size for benchtop drill presses is MT2.
Identifying Your Chuck Type
Before you begin the chuck removal process, it’s crucial to identify how your chuck is attached.
- Visual Inspection: Look at the connection point between the chuck and the drill press spindle.
- If you see a threaded collar, it’s likely a threaded mount.
- If the chuck’s body seems to seamlessly integrate into the spindle with no visible threads at the connection, it’s very likely a Morse taper mount. You might also see a small slot or tang at the very bottom of the spindle nose where the chuck is seated.
- Consult Your Manual: Your drill press’s owner’s manual is the definitive source of information. It will specify the type of chuck mounting and any special procedures.
Tools You’ll Need for Chuck Removal
Having the right tools makes the job significantly easier and safer.
Essential Tools:
- Drill Press Chuck Key: This is the primary tool for opening and closing the chuck jaws. You’ll need the correct chuck key size. If you’ve lost yours, you may need to measure the chuck’s keyholes to find a replacement.
- Hammer: A rubber mallet or a standard hammer will be needed for the Morse taper removal.
- Wooden Block or Dowel: This is used in conjunction with the hammer to strike the tang or ejector slot on the Morse taper, protecting the chuck and spindle.
- Rag or Shop Towels: For cleaning up any grease or debris.
- Gloves: To protect your hands.
- Safety Glasses: Absolutely essential to protect your eyes from flying debris.
For Stubborn Removals (Morse Taper):
- Brass Punch or Drift: A brass punch is softer than steel and can be used to tap the tang without damaging it.
- Wooden Wedge: Can sometimes be gently tapped into the gap to help loosen a stuck Morse taper.
For Threaded Mount Chucks:
- Adjustable Wrench or Pipe Wrench: To grip the chuck body if it’s too tight to unscrew by hand. Be cautious not to damage the chuck.
- Penetrating Oil (e.g., WD-40): If the chuck is seized on the threads.
Step-by-Step Guide to Removing the Drill Press Chuck
The procedure varies slightly depending on whether you have a Morse taper or a threaded mount.
Part 1: Removing a Chuck with a Morse Taper Mount
This is the most common scenario. The key to removing stuck chuck with a Morse taper is to use the spindle’s ejector mechanism.
Step 1: Safety First!
- Disconnect Power: Always unplug your drill press from the power outlet. Double-check that it’s unplugged.
- Wear Safety Glasses: Protect your eyes.
Step 2: Open the Chuck Jaws
- Using your drill press chuck key, open the chuck jaws as wide as they will go. This retracts the jaws fully into the chuck body, making it less likely to snag on anything during removal and ensuring the taper shank is fully seated.
Step 3: Locate the Ejection Slot/Tang
- Spin the chuck so you can see the bottom of the drill press spindle. You are looking for a small slot or tang that protrudes slightly from the spindle nose, where the chuck’s Morse taper shank fits.
Step 4: Prepare for Ejection
- Place a wooden block or a sturdy wooden dowel against the ejector tang. The block should be positioned so that when you strike it, it pushes the tang upwards, which in turn pushes the chuck’s taper shank out of the spindle.
- Alternatively, some drill presses have a designated ejection slot on the side of the spindle housing where you can insert a wedge or a drift.
Step 5: The Ejection Strike
- With the wooden block firmly against the tang, give the block a sharp, firm tap with your hammer. You don’t need to hit it with all your might; a controlled strike is more effective.
- You might need to reposition the block and strike a few times. Listen for a “pop” or “thunk” sound, which indicates the chuck has loosened.
- If it doesn’t budge, try striking the block from a slightly different angle.
Step 6: Removing the Loosened Chuck
- Once the chuck has released, grasp it firmly with one hand.
- With your other hand, gently wiggle the chuck side-to-side while pulling downwards. The drill press spindle and chuck should now separate.
- If it still feels stuck, you might need to use a brass punch to tap the tang again, or try a very light tap on the sides of the chuck’s taper shank with a rubber mallet. Avoid hitting the chuck jaws directly.
Step 7: Inspection and Cleaning
- Once removed, inspect both the chuck’s Morse taper shank and the drill press spindle’s Morse taper socket for any dirt, rust, or damage.
- Clean both surfaces thoroughly with a clean rag. You can use a bit of mineral spirits or denatured alcohol for stubborn grime.
- Apply a thin layer of light grease or anti-seize compound to the spindle taper for easier future removal, especially if you live in a humid environment.
Part 2: Removing a Chuck with a Threaded Mount
This type of mount is less common but requires a different approach if hand-tightening isn’t enough.
Step 1: Safety First!
- Disconnect Power: Unplug your drill press.
- Wear Safety Glasses: Protect your eyes.
Step 2: Open the Chuck Jaws
- Use your drill press chuck key to open the chuck jaws fully.
Step 3: Attempt Hand Removal
- Grip the chuck firmly and try to unscrew it counter-clockwise. Some chucks might be easily removable by hand.
Step 4: Using a Wrench (If Necessary)
- If the chuck is too tight to unscrew by hand, you’ll need a wrench.
- Protect the Chuck: To avoid damaging the chuck’s jaws or body, it’s best to use a strap wrench or wrap the chuck body with a thick cloth or rubber mat before applying an adjustable wrench or pipe wrench.
- Grip Location: Grip the chuck body just above the jaws, if possible, as this area is usually more robust.
- Apply Steady Pressure: Turn the wrench counter-clockwise. If the chuck is very stubborn, you might need to apply penetrating oil. Spray a small amount around the threaded connection and let it sit for 15-30 minutes before trying again.
Step 5: Addressing a Seized Threaded Chuck
- If penetrating oil doesn’t work after a waiting period, you might need to apply heat. Use extreme caution.
- Low Heat Application: Use a heat gun on a low setting to warm the chuck body around the threads. The expansion from heat can help break the bond. Do NOT use a torch, as excessive heat can warp or damage the chuck or spindle.
- Reapply Penetrating Oil: After heating, try reapplying penetrating oil.
- Gentle Tapping: You can try gently tapping the chuck body with a rubber mallet while applying turning pressure.
Step 6: Cleaning the Threads
- Once the chuck is removed, clean the threads on both the chuck’s shank and the drill press spindle with a wire brush and a clean rag.
- Inspect the threads for any damage.
- Apply a thin layer of anti-seize compound to the threads before reattaching the chuck or a new one.
Reinstalling the Chuck
The process of reinstalling the chuck is essentially the reverse of removal.
For Morse Taper Chucks:
- Clean Spindle and Chuck Taper: Ensure both surfaces are clean and free of debris.
- Align and Insert: Align the chuck’s taper shank with the spindle’s socket.
- Push and Seat: Push the chuck firmly into the spindle socket. You should feel it seat properly. The ejector tang should naturally fall back into place.
- Tap for Security (Optional): Some users give a very light tap with a rubber mallet on the top of the chuck to ensure it’s fully seated. The friction should be enough for most applications.
For Threaded Chucks:
- Clean Threads: Ensure threads on both the spindle and the chuck are clean.
- Apply Anti-Seize: Apply a thin coat of anti-seize compound to the spindle threads.
- Thread On: Carefully thread the chuck onto the spindle counter-clockwise until it’s snug.
- Tighten: Tighten the chuck by hand as much as possible. For most drill presses, hand-tight is sufficient. If your drill press manual specifies a torque, use a torque wrench. Avoid overtightening, which can damage the threads.
Common Problems and Troubleshooting
Even with the best intentions, you might run into issues.
Problem: Chuck Won’t Eject from Morse Taper Spindle
- Cause: Rust, dirt, or wear on the taper surfaces. The ejector tang might not be properly aligned.
- Solution:
- Ensure you’re hitting the ejector tang squarely with the hammer and block.
- Try using a brass punch to get a more precise strike on the tang.
- Clean the spindle socket and chuck taper thoroughly.
- Apply a small amount of penetrating oil into the seam between the chuck and spindle, let it sit, and try ejecting again.
- If it’s still stuck, you might need to gently tap the sides of the chuck’s taper with a rubber mallet while attempting to eject.
- Consider using a wooden wedge carefully inserted into the gap to apply outward pressure.
Problem: Threaded Chuck Won’t Unscrew
- Cause: Corrosion, dirt, or overtightening.
- Solution:
- Use penetrating oil generously and let it soak.
- Apply heat with a heat gun to the chuck body (not the spindle).
- Use a wrench with a good grip on the chuck body, ensuring you protect the chuck’s finish.
- A helper can sometimes provide leverage.
Problem: Chuck Jaws Won’t Open or Close Properly
- Cause: Debris inside the chuck mechanism, worn jaws, or a damaged keyway.
- Solution:
- First, try cleaning the chuck mechanism with compressed air.
- If the chuck is removed, inspect the jaws and the screw mechanism for dirt or damage.
- Lubricate the chuck mechanism with a suitable lubricant.
- If the drill press chuck key itself is damaged or the wrong chuck key size, this can also cause issues. Ensure you have the correct, undamaged key.
- If the chuck is significantly worn or damaged, it’s time for replacement.
Drill Press Maintenance and Chuck Care
Proper drill press maintenance ensures your equipment functions optimally and lasts longer.
- Regular Cleaning: Keep the drill press clean, especially the spindle and chuck area.
- Chuck Lubrication: Periodically lubricate the chuck jaws and mechanism. A light oil or specialized chuck lubricant works well.
- Key Care: Keep your drill press chuck key in a designated spot so you don’t lose it. Ensure it fits the chuck snugly.
- Inspect Chuck: Regularly check your chuck for excessive runout, damage to the jaws, or difficulty in operation.
Frequently Asked Questions (FAQ)
Here are some common questions regarding chuck removal:
Q1: Do I need a special tool to remove a drill press chuck?
A: For a Morse taper chuck, you need a hammer and a wooden block or dowel to use with the spindle’s ejector tang. For threaded chucks, you might need an adjustable wrench or strap wrench if hand-tightening doesn’t suffice. The most crucial tool for operating the chuck itself is the drill press chuck key.
Q2: Can I damage my drill press by removing the chuck incorrectly?
A: Yes, it’s possible. For Morse taper chucks, hitting the spindle spindle spindle or chuck spindle nose directly with a hammer instead of the ejector tang can cause damage. For threaded chucks, using excessive force with a wrench without proper grip or protection can strip threads or deform the chuck. Always prioritize safety and the correct procedure.
Q3: How do I know what size chuck key I need?
A: The chuck key size is determined by the chuck itself. Most chucks have standard keyhole sizes that correspond to specific key designs. If you’ve lost your original key, you can often find replacements by measuring the diameter of the keyhole and looking for chuck keys that fit. Many drill presses come with the correct drill press chuck key included.
Q4: My chuck is really stuck. What else can I try?
A: For Morse taper chucks, try applying penetrating oil to the seam and letting it sit. Gentle tapping on the chuck body with a rubber mallet while trying to eject can also help. For threaded chucks, heating the chuck body (not the spindle) with a heat gun and then applying penetrating oil is often effective. In extreme cases, seeking advice from a machinist or tool repair service might be necessary.
Q5: What is a drill chuck removal tool?
A: While not a universal term, a drill chuck removal tool generally refers to the tools used in the process. For Morse taper, this includes the hammer and block. For threaded mounts, it’s wrenches. Some specialized drill presses might have specific jigs or adapters for chuck removal, but these are less common for standard benchtop models. The core “tool” for a Morse taper is the spindle’s integrated ejector mechanism.
Q6: My drill press has a Jacobs chuck. Does this change the removal process?
A: Jacobs chuck is a brand name, and they make both threaded and Morse taper mounted chucks. The brand of the chuck itself doesn’t change the fundamental removal process, which depends on how it’s attached to the drill press spindle. You still need to identify if it’s threaded or Morse taper.
Q7: Is it safe to do drill press disassembly for chuck removal?
A: Yes, as long as you follow safety precautions like unplugging the machine and wearing safety glasses. Drill press disassembly for routine tasks like chuck removal is generally safe when done carefully and with the correct tools.
By following this comprehensive guide, you should be well-equipped to confidently and safely remove the chuck from your drill press, whether for maintenance, repair, or an upgrade. Remember to always prioritize safety and consult your drill press manual for specific instructions.