
Can you drill for a water well yourself? Yes, with the right knowledge, tools, and permissions, individuals can undertake drilling a well at home, though it’s often a complex and regulated process. This guide will walk you through the essential steps and considerations for drilling a water well, a vital aspect of water source development and groundwater extraction.
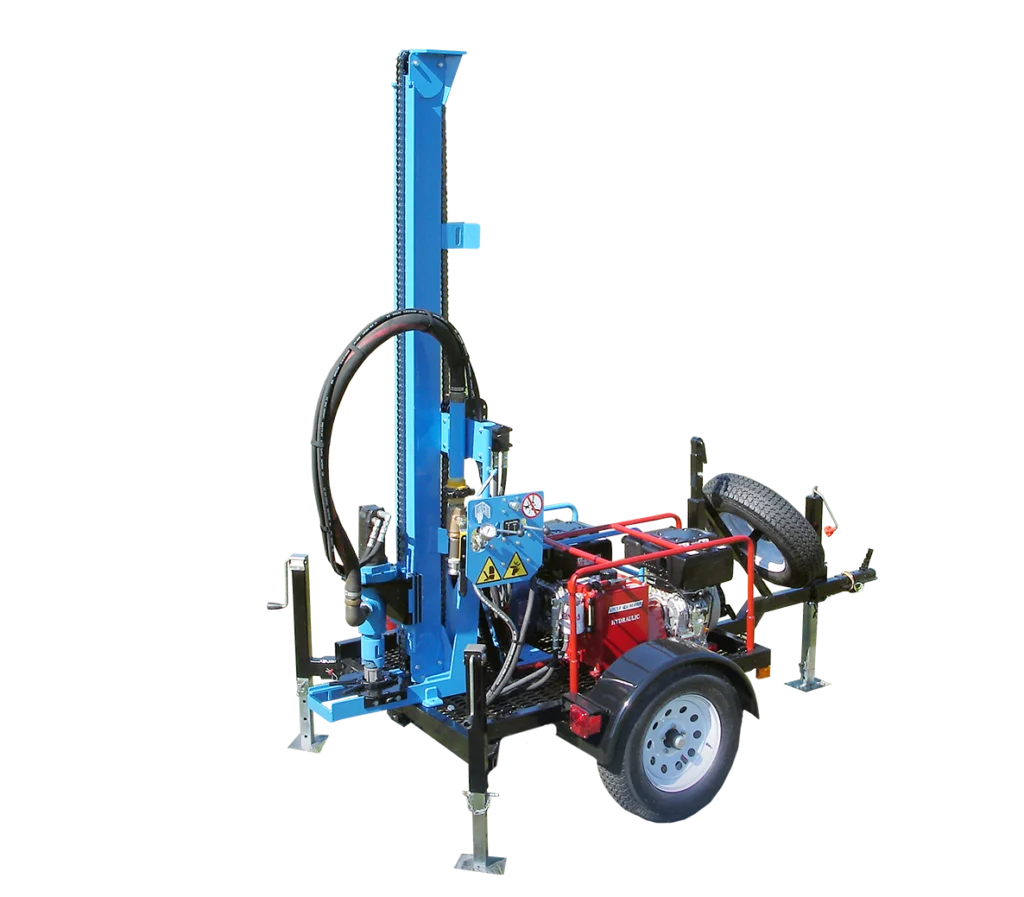
Image Source: www.lonestardrills.com
Securing Permissions and Initial Assessment
Before you even think about a drilling rig, you need to make sure you have the green light. This involves navigating local, state, and sometimes even federal regulations.
Local Regulations and Permits
- Contact your local health department: They are usually the first point of contact for well drilling permits and regulations. They’ll inform you about setback requirements from septic systems, property lines, and other structures, as well as water quality testing protocols.
- County or municipal building department: Zoning laws might also play a role. They can tell you about any restrictions on drilling on your property.
- State environmental protection agency: Many states have specific rules for groundwater extraction and well construction to protect aquifers.
Site Selection for Aquifer Access
Choosing the right spot is crucial for successful aquifer access and long-term water supply.
Geological Surveys and Hydrogeological Reports
- Research existing well logs: Your local geological survey office or water resources department often keeps records of existing wells in your area. These logs can provide valuable information about depth, yield, and the types of aquifers encountered.
- Consider topography: Water naturally flows downhill. Areas with higher elevation, especially those near surface water sources or in known recharge zones, are often good candidates for finding water.
- Look for vegetation: Lush vegetation can indicate the presence of shallow groundwater. Certain plants, like willows and cottonwoods, are often found in areas with high water tables.
- Hydrogeological reports: For more certainty, you might consider hiring a hydrogeologist to assess your property. They can use specialized equipment and knowledge to pinpoint the most promising locations for drilling.
Water Table Depth
- Average depth: Knowing the typical water table depth in your region is essential. This will give you a rough idea of how deep you might need to drill.
- Seasonal variations: Water tables can fluctuate with rainfall and drought. It’s wise to consider the lowest anticipated water table level for a reliable year-round supply.
Understanding Well Drilling Methods
There are several well drilling methods, each suited to different geological conditions and project scopes. The choice of method will significantly influence the type of drilling rig needed.
Cable Tool Drilling
- How it works: This is one of the oldest well drilling methods. A heavy, sharpened bit is repeatedly dropped from a height onto the ground, breaking up the rock and soil. Water is periodically added to the hole to help flush out the cuttings, which are then removed with a bailer.
- Pros: Can be effective in hard rock formations. Relatively simple equipment.
- Cons: Slow process. Can be less precise. May not be suitable for unconsolidated sediments.
Rotary Drilling
- How it works: This is the most common method for water well drilling today. A rotating drill bit cuts through the earth, and a drilling fluid (often water or a mud mixture) is pumped down the drill pipe. This fluid cools the bit, lubricates the hole, and carries the cuttings to the surface through the annular space between the drill pipe and the borehole wall.
- Pros: Faster than cable tool drilling. Can handle a wider range of geological formations. Allows for continuous sample collection.
- Cons: Requires more specialized equipment and skilled operators. Drilling fluid management is important.
Rotary Drilling Variations
- Direct Rotary: The drilling fluid circulates down through the drill pipe and up through the annulus.
- Reverse Rotary: The drilling fluid circulates down through the annulus and up through the drill pipe. This method is often used in areas with unstable formations or to reduce the risk of blowouts.
Air Rotary Drilling (Down-the-Hole Hammer)
- How it works: Similar to rotary drilling, but uses compressed air instead of drilling fluid to flush cuttings. A down-the-hole hammer (DTH) is attached to the drill bit, which strikes the rock with percussive force.
- Pros: Very effective in hard rock. Fast penetration rates. Minimal water usage.
- Cons: Can create significant dust. Not suitable for unconsolidated materials. Requires powerful air compressors.
Augering
- How it works: Large, screw-like augers bore into the ground, bringing the soil to the surface. This method is typically used for shallower wells or in areas with soft, unconsolidated soil.
- Pros: Simple and cost-effective for shallow depths.
- Cons: Limited to soft formations and shallower depths. Not effective for hard rock.
The Drilling Process: Step-by-Step
Once you’ve chosen your method and secured your permits, the actual well digging and drilling can begin. This is where the drilling rig comes into play.
Mobilizing the Drilling Rig and Equipment
- Rig selection: The size and type of drilling rig will depend on the expected depth, geology, and the chosen drilling method. Smaller, portable rigs might be used for home wells, while larger, more powerful rigs are needed for deeper, commercial wells.
- Ancillary equipment: This includes pumps for circulating drilling fluid, mud pits or tanks for fluid management, generators, tools for handling drill pipe, and safety equipment.
Drilling the Borehole
- Setting up: The drilling rig is positioned over the chosen site. Safety protocols are paramount at this stage.
- Starting the hole: The drill bit is lowered, and drilling begins. Water or drilling fluid is introduced as needed.
- Adding drill pipe: As the hole gets deeper, sections of drill pipe are added. This process requires careful coordination and expertise.
- Monitoring progress: Drillers constantly monitor the cuttings, drilling fluid, and rock formations to assess progress and identify any potential issues. This is crucial for effective groundwater extraction.
- Reaching the aquifer: The drilling continues until a productive aquifer is reached. The depth at which water is found is recorded.
Installing the Well Casing
The well casing is a critical component that prevents the borehole from collapsing and seals off undesirable water sources.
- Purpose of well casing: The well casing is a sturdy pipe that lines the borehole. It protects the well from contamination, prevents cave-ins, and provides a conduit for installing the pump.
- Material options: Steel and PVC are the most common materials for well casing. Steel is stronger and more durable but can corrode. PVC is lighter, cheaper, and resistant to corrosion but less strong.
- Installation: The casing is lowered into the drilled borehole. It might be driven, cemented in place, or a combination of both, depending on the geological conditions and local regulations. Proper sealing between the casing and the borehole wall is essential to prevent surface water contamination from entering the aquifer.
Developing the Well
Once the casing is in place, the well needs to be developed to maximize its water yield.
- Purpose of well development: This process cleans out drilling fluids and fine sediment from the well screen and the surrounding aquifer, improving water flow into the well.
- Methods:
- Surging: Alternating pumping and resting the well to create pressure changes that dislodge sediment.
- Bailing: Repeatedly lowering and raising a bailer to remove debris.
- Jetting: Using high-pressure water to clean the well screen and formation.
- Chemical treatment: In some cases, mild acids or other chemicals might be used to dissolve mineral deposits that are restricting water flow.
Installing the Pumping System
A reliable pump is essential for bringing the groundwater to the surface.
Choosing the Right Pump
- Submersible pump: This is the most common type of pump for water wells. It’s placed directly in the well below the water level. They are efficient and quiet.
- Jet pump: These are typically used for shallower wells and are located above ground. They work by creating a vacuum to draw water up.
- Hand pump: A manual option for backup or in areas without electricity.
Factors to Consider for Pump Selection
- Well depth: The depth from which the water needs to be lifted.
- Required flow rate: How much water you need per minute or hour.
- Water pressure: The desired pressure at the point of use.
- Power source: Electricity, solar, or manual.
Pump Installation and Connection
- Setting the pump: The submersible pump is lowered into the well on a drop pipe, attached to an electrical cable and safety rope.
- Connecting to power: The electrical cable is connected to a control box and then to your power supply.
- Piping: The drop pipe connects to the piping system that leads to your home or storage tank.
Water Quality Testing and Maintenance
After drilling, the job isn’t done. Ensuring the water is safe to drink and the well is maintained is crucial.
Water Quality Testing
- Essential step: It’s vital to test your well water for contaminants like bacteria (e.g., E. coli), nitrates, heavy metals, and any other substances that might be present in your local geology.
- Frequency: Test annually for bacteria and nitrates, and every few years for other common contaminants. If you notice any changes in taste, odor, or appearance, test immediately.
Ongoing Well Maintenance
- Regular inspections: Periodically inspect the wellhead for any damage or potential entry points for contaminants.
- Pump maintenance: Follow the manufacturer’s recommendations for pump servicing.
- Protect the wellhead: Ensure the well cap is secure and the area around the wellhead is kept clean and free of debris.
- Avoid contamination: Be mindful of what you store or dispose of on your property, especially near the well. Keep hazardous materials away from the wellhead.
Cost Considerations for Drilling a Water Well
Drilling a water well is a significant investment, and costs can vary widely.
Factors Influencing Cost
- Depth of the well: Deeper wells require more time, materials, and labor.
- Geological conditions: Harder rock formations can increase drilling time and bit wear.
- Location: Accessibility of the site for drilling equipment.
- Casing material and diameter: Different materials and sizes have different costs.
- Pump system: The type and quality of the pump.
- Permit fees: Costs associated with obtaining necessary permits.
- Water quality testing: Expenses for lab analysis.
- Contractor’s rates: Labor and equipment charges.
Estimating Costs
- Per-foot pricing: Many contractors charge a per-foot rate that includes drilling, casing, and basic development.
- Mobilization fees: Some companies charge a fee to bring their equipment to your site.
- Additional services: Costs for hydrogeological surveys, pump installation, and water treatment systems will be separate.
Example Cost Breakdown (Illustrative)
| Item | Estimated Cost Range ($) | Notes |
|---|---|---|
| Permits and Inspections | 100 – 500 | Varies by locality. |
| Drilling (per foot) | 20 – 60+ | Depends on depth and geology. |
| Well Casing (per foot) | 5 – 20 | PVC is generally cheaper than steel. |
| Gravel Pack (if needed) | 500 – 1,500 | For stabilizing the formation around the screen. |
| Well Development | 200 – 800 | Essential for good flow. |
| Submersible Pump System | 1,000 – 4,000+ | Includes pump, pipe, wire, and control box. |
| Water Quality Testing | 100 – 300 | Initial comprehensive testing. |
| Total Estimated Cost | 3,000 – 10,000+ | This is a broad estimate and can be significantly higher. |
Safety Considerations in Well Drilling
Safety is paramount throughout the entire process of water well drilling.
Personal Protective Equipment (PPE)
- Hard hat: Protects from falling objects.
- Safety glasses/goggles: Protects eyes from debris and chemicals.
- Steel-toed boots: Protects feet from heavy equipment and falling tools.
- Gloves: Protects hands from rough materials and chemicals.
- Hearing protection: Essential when operating noisy drilling equipment.
Site Safety
- Securing the work area: Keep unauthorized personnel away from the drilling site.
- Equipment checks: Ensure all machinery is in good working order before operation.
- Electrical safety: Be aware of overhead power lines and proper grounding of equipment.
- Handling materials: Safely manage heavy drill pipe and other materials.
- Awareness of surroundings: Always be conscious of your environment and potential hazards.
Frequently Asked Questions About Drilling a Water Well
Q1: How long does it take to drill a water well?
A1: The time it takes can vary greatly, from a few days to over a week, depending on the depth, the geological formation, the drilling method used, and the availability of crews and equipment.
Q2: What is the average depth of a water well?
A2: The average depth can range from 50 to 300 feet or more. This depends heavily on the local water table and the geological conditions necessary to reach a reliable aquifer.
Q3: Can I drill a water well in my backyard?
A3: You can drill a well at home, but you must first obtain the necessary permits from your local authorities. There are also regulations regarding the placement of wells relative to septic systems, property lines, and other structures.
Q4: What is a drilling rig?
A4: A drilling rig is a large, complex piece of machinery designed to bore holes into the earth’s surface. For water well drilling, it’s used to create the borehole for the well, and it houses the equipment for turning the drill bit, lifting pipes, and managing drilling fluids.
Q5: How do I know if I’m drilling into a good aquifer?
A5: A good aquifer is a layer of rock or sediment that holds and transmits groundwater in sufficient quantities to supply a well. Drillers assess this by observing the water flow into the borehole during drilling, the type of geological material encountered, and often by performing a pump test after installation to measure the well’s yield.
Q6: What is well casing used for?
A6: Well casing is a strong pipe, typically made of steel or PVC, that is installed in the borehole. Its primary purpose is to prevent the borehole walls from collapsing, to keep out unwanted surface water and contaminants, and to provide a secure conduit for installing the pump.
Q7: What is a submersible pump?
A7: A submersible pump is an electric pump designed to be placed directly within the water column of a well. It’s submerged in the water and pushes it upwards to the surface, making it very efficient for lifting water from deep wells.
Q8: What are the main well drilling methods?
A8: The primary well drilling methods include cable tool drilling (using a falling weight), rotary drilling (using a rotating bit and fluid), and air rotary drilling (using a rotating bit and compressed air). The best method depends on the local geology and desired well characteristics.
Q9: What is water source development?
A9: Water source development refers to the entire process of locating, accessing, and preparing a source of water for use. This includes activities like drilling wells, investigating springs, and assessing surface water bodies to ensure a reliable and safe water supply.
Q10: How much does it typically cost to drill a water well?
A10: The cost can vary significantly, generally ranging from $3,000 to $10,000 or more. Key factors include the depth of the well, geological conditions, the type of casing and pump installed, and local labor rates. It’s best to get multiple quotes from reputable local well drillers.