
Can you drill acrylic without it cracking? Yes, you absolutely can drill acrylic without it cracking, but it requires specific techniques and the right tools. Many DIYers and professionals alike struggle with drilling acrylic, leading to frustrating cracks and wasted material. This comprehensive guide will provide you with all the essential knowledge and acrylic drilling tips to achieve clean, precise holes every time, preventing acrylic cracking effectively.
Acrylic, also known as Plexiglas or Lucite, is a versatile plastic prized for its clarity, light weight, and impact resistance. However, it’s also more brittle than many other materials, making it susceptible to cracking and chipping if not handled properly during the drilling process. Whether you’re building a custom display case, a protective shield, or an intricate art piece, mastering acrylic drilling is crucial.
This acrylic sheet drilling guide will cover everything from selecting the best drill bits for acrylic to the proper drilling speed and cooling methods. We’ll delve into the specifics of using a router bit for acrylic for larger holes and discuss the importance of pilot holes acrylic drilling. Furthermore, we’ll touch upon crucial acrylic drilling safety measures to ensure a smooth and secure experience.
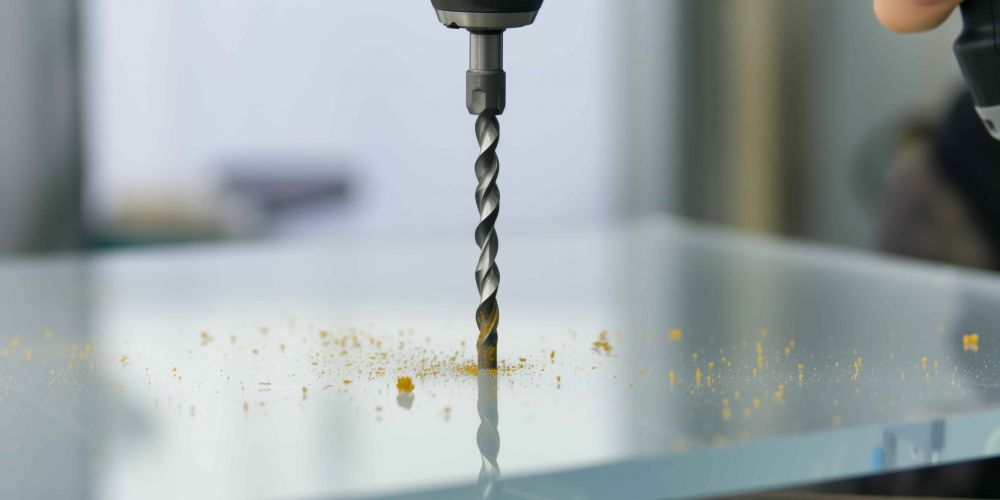
Image Source: www.cutmy.co.uk
Deciphering Acrylic’s Temperament: Why It Cracks
Acrylic, chemically known as polymethyl methacrylate (PMMA), is a thermoplastic polymer. Unlike metals or wood, which can deform or splinter under pressure, acrylic tends to fracture when subjected to stress, especially heat and vibration. When you drill into acrylic, several factors can contribute to cracking:
- Heat Buildup: Friction generated by the drill bit creates heat. If this heat isn’t dissipated effectively, it softens and melts the acrylic around the drill site, which can then rapidly cool and become brittle, leading to cracks.
- Excessive Force: Pushing too hard on the drill will force the bit through the material, creating stress points that propagate into cracks.
- Wrong Drill Bit: Using standard metal or wood drill bits can exert uneven pressure or generate excessive heat, both detrimental to acrylic.
- Vibration: The reciprocating motion of a standard drill, especially at higher speeds, can cause the acrylic to vibrate, leading to stress fractures.
- Sharp Edges: Drill bits with sharp, aggressive cutting edges can “bite” into the acrylic, initiating cracks.
Selecting the Right Tools: The Foundation of Success
Choosing the correct tools is paramount to drilling plexiglass without damage. The market offers specialized tools designed for plastics, and investing in them will save you time, material, and frustration.
The Best Drill Bits for Acrylic
Standard drill bits are often not ideal for acrylic. They are designed to cut through wood or metal, which behave differently. For acrylic, you need bits that cut cleanly and efficiently, minimizing heat buildup and stress.
- Single-Flute Bits (Up-Cut or Down-Cut): These bits are specifically designed for plastics.
- Up-Cut: These bits pull chips up and out of the hole, which is excellent for preventing chip buildup and potential heat. They are a good all-around choice.
- Down-Cut: These bits push chips down and out of the hole. They are particularly useful for preventing the top edge from lifting or chipping, giving a cleaner finish on the entry side.
- O-Flute Bits: Similar to single-flute bits, these have a single spiral flute and are excellent for plastics.
- Specially Coated Bits: Bits with specialized coatings (like titanium or diamond) can reduce friction and heat, improving their performance on acrylic.
- Brad-Point Bits (for Wood): While primarily for wood, brad-point bits can be surprisingly effective for acrylic. The pointed tip helps center the drill bit, reducing wandering and initial stress. Ensure they are sharp and have minimal “hook.”
- Modified Standard Bits: You can sometimes modify standard twist drill bits to make them suitable for acrylic. This involves grinding away some of the flute material to reduce the rake angle and the amount of material the bit cuts at once. This creates a sharper, more plastic-friendly edge.
Modifying a Standard Drill Bit for Acrylic: A Closer Look
If you don’t have specialized bits readily available, you can modify standard bits. This process requires care and a grinder or Dremel tool.
- Reduce the Rake Angle: The rake angle is the angle of the cutting edge. For acrylic, a negative or zero rake angle is preferred. You want the cutting edge to be almost perpendicular to the surface.
- Grind the Clearance Angle: Increase the clearance angle (the angle behind the cutting edge) so that only the very edge of the bit contacts the acrylic. This reduces friction.
- Create a Pointed Tip (Optional but Recommended): A sharp point helps center the bit.
- Polish the Flutes: Smoother flutes help chips escape more easily, reducing heat.
Table 1: Best Drill Bits for Acrylic
| Drill Bit Type | Description | Best For | Considerations |
|---|---|---|---|
| Single-Flute Bits | One spiral flute; pulls chips up or pushes them down. | General purpose drilling, clean holes. | Up-cut for chip evacuation, down-cut for cleaner top edge finish. |
| O-Flute Bits | Similar to single-flute, often with a straighter flute profile. | Plastics, acrylic, polycarbonate. | Excellent chip evacuation. |
| Specially Coated Bits | Bits with titanium, diamond, or other low-friction coatings. | Reducing heat and friction during drilling. | Can extend bit life and improve hole quality. |
| Brad-Point Bits | Wood bits with a sharp center spur. | Starting holes, preventing bit wander, smaller holes. | Ensure minimal hook, sharp edges. |
| Modified Twist Bits | Standard bits with altered rake and clearance angles, often with a pointed tip. | Situations where specialized bits are unavailable. | Requires skill to modify correctly; can be effective if done properly. |
Drill Speed Acrylic: Finding the Sweet Spot
The drill speed acrylic should be drilled at is crucial. Too fast, and you’ll melt the acrylic; too slow, and you risk chipping.
- General Rule: Use a slower drill speed than you would for wood or metal.
- Smaller Holes: Smaller diameter bits require higher speeds than larger diameter bits.
- Larger Holes: Larger diameter bits require significantly slower speeds.
- Variable Speed Drill: A drill with a variable speed setting is highly recommended. Start slow and gradually increase speed if needed, observing the acrylic’s reaction.
- Cordless Drills: Many cordless drills have excellent variable speed control.
A good starting point for a 1/4-inch bit in 1/4-inch acrylic is around 200-300 RPM. For a 1/2-inch bit, you might need to go as low as 50-100 RPM. Experimentation is key, but err on the side of caution – slower is usually better.
When to Consider a Router Bit for Acrylic
For larger holes or clean-edged circles, a router bit for acrylic can be a superior choice to a standard drill. Router bits are designed for continuous cutting and can produce exceptionally smooth holes.
- Straight Router Bits: These are commonly used for straight cuts and simple holes.
- Spiral Router Bits (Up-cut and Down-cut): Similar to drill bits, spiral router bits are excellent for plastics. Up-cut bits pull chips away, while down-cut bits provide a cleaner top edge.
- Compression Bits: These bits have both up-cut and down-cut flutes, offering a clean finish on both the top and bottom surfaces of the acrylic. They are ideal for routing through sheets.
- Hole Saw Bits: While not traditional router bits, specialized plastic hole saws exist. However, these can still generate significant heat and require careful use.
When using a router, a router table or a handheld router with a template guide is best for precision. The slow, controlled rotation of a router, combined with a sharp bit designed for plastics, offers excellent results.
Step-by-Step Guide to Drilling Acrylic Without Cracking
Now that you have a grasp of the tools, let’s walk through the process of drilling acrylic safely and effectively.
Preparation is Key
- Mark Your Hole: Use a grease pencil or a marker that won’t permanently stain the acrylic. For precise placement, you can also use masking tape to mark your drilling point.
- Secure the Acrylic: This is non-negotiable. Acrylic must be firmly secured to prevent movement, vibration, and potential cracking.
- Clamps: Use C-clamps or F-clamps to hold the acrylic sheet to a stable workbench. Place scrap wood or a rubber pad between the clamps and the acrylic to avoid marring the surface.
- Drill Press: A drill press offers superior stability and control for drilling acrylic. It allows for consistent pressure and a straight entry, significantly reducing the risk of cracking.
- Use a Backing Material: Place a piece of scrap wood (plywood is excellent) underneath the acrylic where you intend to drill. This provides support as the drill bit exits the material, preventing blowout and chipping on the backside.
The Drilling Process
1. Drilling Pilot Holes Acrylic Drilling
For holes larger than 1/4 inch, pilot holes acrylic drilling is a highly recommended step.
- Purpose: A pilot hole creates a smaller guide for the larger drill bit to follow. This reduces the initial stress on the acrylic, prevents the bit from wandering, and helps manage heat.
- Size: The pilot hole should be roughly half the diameter of your final hole size.
- Technique: Use a bit suitable for acrylic (as discussed earlier) at a slow speed to drill the pilot hole.
2. Drilling the Main Hole
- Positioning: Place the tip of your drill bit precisely on your marked spot. If using a drill press, ensure the acrylic is securely clamped and aligned.
- Initial Contact: Apply very light pressure to start. Allow the drill bit to bite into the acrylic slowly.
- Drill Speed: Start at a low RPM and gradually increase only if necessary. Listen to the sound of the drill and observe the acrylic. If you hear any squealing or see melting plastic, reduce the speed immediately.
- Pressure: Use steady, gentle pressure. Let the drill bit do the work. Forcing the bit will almost certainly lead to cracks.
- Chip Evacuation: Periodically back the drill bit out of the hole while it’s still spinning slowly. This clears away accumulated chips and helps dissipate heat. Do not pull the bit straight out; retract it while spinning.
- Cooling Acrylic While Drilling: This is a critical aspect of preventing acrylic cracking.
- Drill Coolant/Cutting Fluid: A specialized cutting fluid designed for plastics can be applied to the drill bit or the acrylic surface. These fluids lubricate the bit and help carry away heat.
- Water or Soapy Water: In a pinch, a spray bottle filled with water or a mild soapy water solution can be used. Spray the bit and the acrylic surface intermittently. The evaporation of the water will help cool the area. Be cautious with excess water if using a standard drill, as it can pose an electrical hazard. A drill press offers better control in this regard.
- Compressed Air: A blast of compressed air directed at the drill site can help cool the acrylic.
3. Finishing the Hole
- As the Bit Exits: As the drill bit nears the backing material, reduce pressure further. The backing material will help support the acrylic, preventing the edges from tearing out.
- Clean Up: Once the hole is drilled, slowly retract the spinning drill bit. Remove any burrs or plastic shavings from the hole using a deburring tool or a clean cloth. If there are small plastic burrs inside the hole, you can carefully smooth them with fine-grit sandpaper wrapped around a dowel or a small file.
Drilling Large Holes with a Hole Saw or Forstner Bit
For holes larger than 1 inch, using a hole saw or a Forstner bit designed for plastics is more appropriate than a standard drill bit.
- Hole Saws: These are circular cutting tools.
- Types: Look for hole saws specifically designed for plastics, often featuring aggressive teeth and wider gullets for chip clearance.
- Speed: Use very slow speeds.
- Pressure: Apply even, steady pressure.
- Cooling: Crucial for large diameter holes.
- Forstner Bits: These create clean, flat-bottomed holes.
- Types: Ensure the Forstner bit has sharp spurs and cutting edges.
- Speed: Slow speeds are essential.
- Pilot Hole: Always drill a pilot hole for Forstner bits.
Table 2: Drilling Techniques for Different Hole Sizes
| Hole Size (Diameter) | Recommended Drill Bit Type | Drill Speed (Approximate RPM) | Key Techniques |
|---|---|---|---|
| 1/8″ – 1/4″ | Single-flute bit, O-flute bit, modified twist bit, brad-point | 300 – 600 | Slow speed, gentle pressure, backing material. |
| 1/4″ – 1/2″ | Single-flute bit, O-flute bit, modified twist bit, brad-point | 200 – 400 | Pilot hole recommended, steady pressure, cooling. |
| 1/2″ – 1″ | Single-flute bit, O-flute bit, larger modified bits | 100 – 250 | Pilot hole mandatory, slower speed, consistent cooling, steady pressure. |
| 1″ and Larger | Plastic-specific hole saw, Forstner bit, router bit, core drill | 50 – 150 | Pilot hole essential, very slow speed, significant cooling, firm clamping. |
Note: RPM ranges are approximate and depend on drill power, bit quality, and acrylic thickness.
Acrylic Drilling Safety: Protecting Yourself
Acrylic drilling safety is paramount. Acrylic dust can be an irritant, and flying debris is a hazard.
- Eye Protection: Always wear safety glasses or goggles. Acrylic chips can fly unexpectedly.
- Dust Mask: Wear a dust mask, especially when drilling multiple holes or thicker acrylic. Acrylic dust can be an irritant to the respiratory system.
- Gloves: Consider wearing gloves to protect your hands, although ensure they don’t interfere with your grip on the drill.
- Securing Work: Double-check that the acrylic is securely clamped before you start drilling.
- Electrical Safety: If using liquid coolants, be extremely cautious with electric drills. Ensure the drill and cords are kept away from any pooled liquid. A drill press is generally safer when using coolants.
- Sharp Bits: Handle drill bits with care, as they are sharp.
Troubleshooting Common Acrylic Drilling Issues
Even with the best practices, you might encounter issues. Here’s how to address them:
- Cracks Appearing:
- Cause: Too much speed, too much pressure, wrong bit, insufficient cooling.
- Solution: Slow down the drill speed, use less pressure, ensure you’re using an appropriate bit, and increase cooling.
- Melting and Gumming Up:
- Cause: Drill bit spinning too fast, dull bit, not enough chip evacuation.
- Solution: Reduce drill speed, try a sharper bit, or back the bit out frequently to clear chips. Ensure your bit flutes are clear.
- Chipping on Entry or Exit:
- Cause: Insufficient backing material, bit wandering, too much pressure, dull bit.
- Solution: Use a backing material, drill a pilot hole to guide the bit, use less pressure, and ensure your drill bit is sharp. A down-cut bit can help with top-edge chipping.
Frequently Asked Questions (FAQ)
Q: Can I use a regular drill bit for acrylic?
A: While it’s possible with extreme caution, it’s not recommended. Regular drill bits can easily overheat and crack acrylic. Specially designed bits or modified bits are much safer and more effective.
Q: What is the best drill speed for acrylic?
A: The best drill speed for acrylic is generally slow. It varies depending on the size of the drill bit and the thickness of the acrylic, but starting slow and increasing cautiously is key. A variable speed drill is highly recommended.
Q: Do I need to use coolant when drilling acrylic?
A: Yes, cooling acrylic while drilling is crucial to prevent heat buildup, which is a primary cause of cracking. You can use specialized cutting fluid, water, or soapy water.
Q: What size drill bit should I use for acrylic?
A: The size of the drill bit depends on the desired hole size. However, for holes larger than 1/4 inch, it’s advisable to drill a pilot hole first.
Q: How do I prevent the acrylic from cracking at the exit point?
A: Use a backing material (like scrap wood) underneath the acrylic. This provides support as the drill bit exits, preventing blowout and chipping. Also, reduce pressure as you approach the exit.
Q: Is a drill press better than a handheld drill for acrylic?
A: Yes, a drill press offers significantly better control, stability, and a straighter drilling path, all of which help in preventing acrylic cracking.
Q: What if I don’t have specialized drill bits for acrylic?
A: You can modify standard twist drill bits by grinding away some of the material behind the cutting edge to reduce friction and heat. Ensure the bit is sharp and has a negative or zero rake angle.
Mastering the art of drilling acrylic without cracking is achievable with the right knowledge and approach. By selecting the best drill bits for acrylic, adhering to the correct drill speed acrylic requires, employing effective cooling techniques, and prioritizing acrylic drilling safety, you can confidently create clean, precise holes in your acrylic projects. Remember to be patient, let your tools do the work, and always secure your material properly. Happy drilling!