
What are pocket holes? Pocket holes are angled holes drilled into one piece of wood that allow another piece of wood to be joined to it using screws. Can I use pocket holes for any project? Yes, pocket holes are incredibly versatile and can be used for a wide range of woodworking projects, from simple shelves to complex DIY furniture. Who is pocket hole joinery for? Pocket hole joinery is perfect for hobbyists, DIY enthusiasts, and even professional woodworkers looking for strong, fast, and aesthetically pleasing joinery.
Pocket hole joinery is a game-changer in the world of woodworking. It offers a fast, strong, and relatively simple way to create sturdy woodworking joints without the need for complex tools or extensive experience. Whether you’re building your first piece of DIY furniture or a seasoned pro looking for efficient techniques, mastering how to drill pocket holes will unlock a new level of capability in your projects. This guide will walk you through everything you need to know to confidently drill and utilize pocket holes, making your woodworking journey smoother and more rewarding.
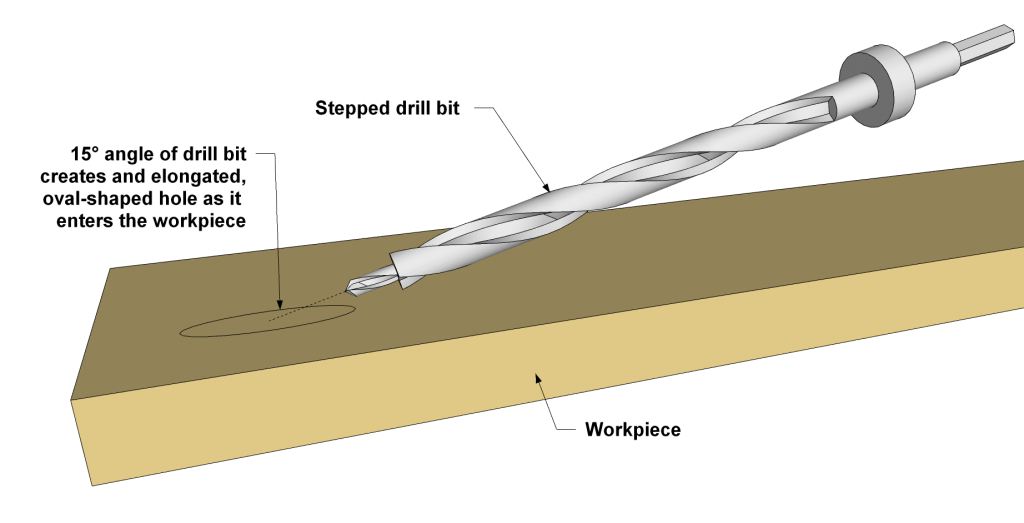
Image Source: learn.kregtool.com
The Allure of Pocket Hole Joinery
Pocket hole joinery has become incredibly popular for several compelling reasons. Its speed and ease of use are primary drivers. Unlike traditional joinery methods like mortise and tenon or dovetails, which require precise measurements, specialized tools, and significant practice, pocket holes can be learned and executed quickly. This makes it an ideal technique for weekend warriors and those who want to complete projects without a huge time investment.
Strength and Durability
Despite its simplicity, pocket hole joinery creates exceptionally strong joints. The angled screw, when properly placed, pulls the two pieces of wood tightly together, creating a robust connection. The screws themselves provide significant holding power. When combined with wood glue, pocket hole joints can be as strong, if not stronger, than many traditional joinery methods. This makes them suitable for furniture that needs to withstand daily use and weight.
Concealed Fasteners
Aesthetically, pocket holes offer a clean look. The holes are drilled at an angle, typically on the underside or inside of a joint, meaning they are largely hidden once the project is assembled. This eliminates the need for visible nails or elaborate plug work, giving your finished pieces a professional and polished appearance.
Versatility for Various Woodworking Joints
The versatility of pocket hole joinery is another major advantage. It’s not limited to simple butt joints. You can use pocket holes to create:
- Face Frames: Ideal for cabinets and furniture with a visible frame.
- Box Construction: Perfect for drawers, boxes, and carcasses.
- Shelf Supports: Easily attach shelves to cabinet sides or uprights.
- Corner Joints: Creating sturdy right-angle connections.
- T-Joints and Lap Joints: With slight modifications, you can achieve various joint types.
Essential Tools for Drilling Pocket Holes
To effectively drill pocket holes, you’ll need a few specialized tools. The most crucial is a Kreg jig or a similar pocket hole jig system.
The Kreg Jig: Your Pocket Hole Companion
The Kreg jig is the most recognized and widely used brand of pocket hole jig. Kreg offers various models, from simple starter kits to more advanced systems, catering to different budgets and project needs. Regardless of the specific model, a pocket hole jig typically includes:
- Drill Guide: This hardened steel bushing guides your drill bit at the precise angle and depth for drilling the pocket hole.
- Adjustable Fence: This piece allows you to set the distance of the drill guide from the edge of your workpiece, ensuring consistent hole placement.
- Stop Collar: This attaches to your drill bit to prevent you from drilling too deep.
- Hex Wrench: For adjusting the jig.
Other Necessary Tools
Beyond the jig itself, you’ll need:
- Drill: A cordless or corded drill is essential. A drill with variable speed and torque control is ideal.
- Pocket Hole Drill Bit: This special bit has a stepped design. The smaller diameter section drills the pilot hole, while the larger diameter section creates the shoulder for the screw head to seat against.
- Clutch Head Screws: Kreg pocket hole screws are designed for this joinery. They have a self-tapping tip and a washer-style head that seats perfectly in the pocket hole. You’ll typically use coarse thread screws for softwoods and fine thread screws for hardwoods.
- Clamp for Pocket Holes: A good quality clamp is absolutely vital. You need to securely hold the workpiece to the jig while drilling. Bar clamps, pipe clamps, or specialized Kreg face clamps work best.
- Measuring Tape and Pencil: For marking your joinery locations.
- Safety Glasses: Always wear safety glasses when drilling and screwing.
Mastering the Process: How to Drill Pocket Holes
Drilling pocket holes is a straightforward process when you have the right tools and follow the correct steps. Let’s break down the pocket hole jig usage to ensure consistent and strong results.
Step-by-Step Guide to Drilling
-
Set Up Your Jig:
- Material Thickness: Most Kreg jigs have an adjustable fence or setting for material thickness. Set this according to the thickness of the wood you are joining. This is crucial for proper screw depth.
- Clamp the Jig: Securely clamp the jig to your workbench or the workpiece itself, depending on the jig model.
- Position the Workpiece: Place the piece of wood into the jig so that the edge where you want to drill the pocket hole is pressed firmly against the jig’s fence.
-
Set Your Drill Bit Depth:
- Insert the Pocket Hole Bit: Place the specialized pocket hole drill bit into your drill.
- Attach the Stop Collar: Slide the stop collar onto the drill bit. Align the stop collar so that it will hit the top of the drill guide just as the tip of the drill bit emerges from the bottom of the guide. Many jigs have a built-in method to help you set this precisely. A common method is to place the drill bit into the jig’s drill guide, slide the stop collar down until it touches the top of the guide, and then tighten the collar.
-
Drill the Pocket Hole:
- Engage the Drill: Start the drill at a medium speed.
- Drill Steadily: Plunge the drill bit into the wood, keeping it straight. The stop collar will prevent you from drilling too deep. You’ll hear a slight change in the drill’s sound as it reaches the set depth.
- Withdraw the Bit: Once the stop collar engages, maintain slight pressure for a moment, then smoothly withdraw the drill bit. This leaves a clean pocket hole.
-
Repeat for All Holes:
- Move the jig along the workpiece, or reposition the workpiece in the jig, to drill additional pocket holes as needed for your joint. For most common joints, two pocket holes are sufficient.
Tips for Perfect Pocket Holes
- Consistency is Key: Ensure all your pocket holes are drilled at the same distance from the edge and at the same depth. This guarantees your pieces will align perfectly.
- Practice on Scrap: Before working on your final project, practice drilling pocket holes on scrap pieces of wood to get a feel for the depth setting and drilling speed.
- Cleanliness Matters: After drilling, use a brush or compressed air to remove any wood dust from the pocket hole and the surrounding surface.
- Glue Application: Apply wood glue to the mating surface of the second piece of wood before assembly. The pocket hole screws create the clamping force to hold the joint while the glue dries.
Assembling with Pocket Hole Joinery
Once you’ve drilled your pocket holes, the assembly process is remarkably quick.
Joining Wood Pieces
- Align the Pieces: Bring the two pieces of wood together, ensuring they are perfectly aligned.
- Secure with a Clamp: Use a clamp for pocket holes to hold the two pieces firmly in place. This is critical. The clamp should hold the pieces tightly together so there’s no gap. Kreg’s face clamps are excellent for this, as they are designed to hold the mating piece against the pocket hole piece without shifting.
- Drive the Screws:
- Insert a pocket hole screw into the drilled pocket hole.
- Using your drill with the appropriate driver bit (usually a square drive or Torx bit), drive the screw through the pocket hole and into the mating piece of wood.
- The screw will go through the angled hole, enter the second piece of wood, and pull the joint tightly together. Drive the screw until the head is seated flush with the bottom of the pocket hole. Be careful not to overtighten, as this can strip the hole or split the wood.
Glue and Screws: The Ultimate Bond
While pocket hole screws provide excellent mechanical strength, adding wood glue to the joint before screwing creates an incredibly durable and long-lasting bond. The clamping action of the pocket hole screws holds the pieces together while the glue cures.
Different Kreg Jig Models and Their Features
Kreg Tool offers a range of jigs to suit every need and budget, making pocket hole jig usage accessible to everyone.
Kreg Jig® Pocket-Hole Jig 320
This is an excellent entry-level jig. It’s simple to use and perfect for beginners or those who tackle occasional projects.
- Key Features:
- Two self-squaring, auto-adjusting clamping lenses.
- Adjustable for material thickness.
- Portable and easy to store.
- Best For: Small furniture, home décor, craft projects.
Kreg Jig® K4 Pocket-Hole System
A popular choice for DIYers and serious hobbyists, the K4 offers more robust features.
- Key Features:
- Three-hole drill guide.
- Adjustable depth stop and fence for precise control.
- Includes a clamp for workpiece stability.
- Work support wings.
- Best For: Furniture building, cabinet making, larger DIY projects.
Kreg Jig® K5 Pocket-Hole System
The K5 is a step up, offering even more convenience and features for frequent users.
- Key Features:
- Front-side clamp handle for easier clamping.
- Wider base for greater stability.
- Adjustable workpiece stop for repeatable hole placement.
- Built-in storage.
- Best For: Woodworkers who build regularly, cabinet makers, those who value efficiency and precision.
Kreg Jig® KMS7200 Mobile Project Center
This is a more advanced system that integrates a table saw extension and a workbench for a complete pocket hole station.
- Key Features:
- All-in-one solution for cutting, drilling, and assembly.
- Heavy-duty construction.
- Designed for precision and efficiency.
- Best For: Serious woodworkers, cabinet shops, those building a dedicated workshop.
Advanced Woodworking Techniques with Pocket Holes
Once you’re comfortable with the basics of drilling pocket holes, you can explore more advanced applications.
Pocket Holes in Frame and Panel Construction
When building doors or cabinet panels, pocket holes can be used to attach the rails and stiles to the center panel, creating a strong and attractive design.
Reinforcing Traditional Joinery
For added strength in critical joints, you can sometimes combine pocket holes with other woodworking joints. For example, you might create a mortise and tenon joint and then add a couple of pocket hole screws for extra reinforcement.
Creating Strong Shelving
When building shelves for bookcases or storage units, using pocket holes to attach the shelf boards to the vertical supports is a fast and robust method.
Building Sturdy Tables and Chairs
Pocket holes are excellent for creating strong and stable table aprons, chair aprons, and other structural components.
Troubleshooting Common Pocket Hole Issues
Even with a great jig, occasional issues can arise. Here’s how to address them:
Screw Head Not Seating Properly
- Cause: Drill bit depth setting is too deep, or the wrong screw length is used.
- Solution:
- Re-check and adjust your drill bit stop collar. Ensure it’s set precisely so the drill bit tip emerges just at the end of the drill guide.
- Verify you are using the correct length of pocket hole screw for your wood thickness. Kreg provides charts for recommended screw lengths.
- Ensure the screw head is seating flush with the bottom of the pocket.
Wood Splitting During Assembly
- Cause: Driving the screw too fast, not pre-drilling a pilot hole (though pocket hole bits do this, sometimes wood is exceptionally prone to splitting), or overtightening the screw.
- Solution:
- Slow down your drill speed when driving screws.
- Use a lower torque setting on your drill.
- Ensure you are using the correct thread type of screw (coarse for softwoods, fine for hardwoods).
- Stop driving the screw as soon as the head is seated.
Joint Not Pulling Tight
- Cause: The pocket holes are too far from the edge, the workpiece isn’t properly clamped, or the screw isn’t long enough.
- Solution:
- Ensure your pocket holes are drilled at the correct distance from the edge as recommended by your jig manufacturer.
- Use a strong clamp for pocket holes to firmly hold the two pieces of wood together before driving the screw.
- Confirm you are using the appropriate length of pocket hole screw.
Pocket Hole Joinery: A Comparison with Other Wood Joinery Methods
Understanding how pocket hole joinery stacks up against other common woodworking joints can help you choose the best method for your specific needs.
| Joinery Method | Ease of Use | Strength | Speed | Tools Required | Visibility of Fasteners |
|---|---|---|---|---|---|
| Pocket Holes | Very Easy | Strong | Very Fast | Kreg jig, drill, pocket hole bit, screws, clamp | Minimal (hidden) |
| Butt Joint (screwed) | Easy | Moderate | Fast | Drill, screws | Visible |
| Dado Joint | Moderate | Strong | Moderate | Router or table saw, chisels (optional) | Hidden |
| Mortise & Tenon | Difficult | Very Strong | Slow | Chisels, saws, mortising machine (optional) | Hidden |
| Dovetail | Very Difficult | Extremely Strong | Very Slow | Chisels, saws, dovetail jig (optional) | Visible (decorative) |
| Biscuit Joint | Moderate | Moderate | Moderate | Biscuit joiner, glue | Hidden |
As you can see, pocket hole joinery strikes an excellent balance between ease of use, speed, and strength, especially for DIYers and those looking for efficient woodworking techniques.
Frequently Asked Questions (FAQ)
Q1: How many pocket holes should I drill for a joint?
A1: For most standard joints, two pocket holes are sufficient. For wider pieces or joints that will experience significant stress, three pocket holes might be beneficial. Always space them evenly.
Q2: What type of wood can I use with pocket holes?
A2: You can use pocket holes with virtually any type of wood, from softwoods like pine and fir to hardwoods like oak and maple. Just ensure you use the correct screw type (coarse for softwoods, fine for hardwoods).
Q3: Do I need to use wood glue with pocket holes?
A3: While pocket hole screws create a strong mechanical joint on their own, using wood glue will create a much stronger and more durable bond. It’s highly recommended for most applications, especially for furniture.
Q4: Can I see the pocket holes on my finished project?
A4: Typically, pocket holes are drilled on the inside or underside of a project, making them largely invisible once assembled. For visible joints, you can fill the pocket holes with wood filler or a plug for a cleaner look.
Q5: What is the difference between coarse and fine thread pocket hole screws?
A5: Coarse thread screws are designed for softwoods, providing better holding power in these less dense materials. Fine thread screws are for hardwoods, where their design prevents the wood from splitting and offers strong adhesion.
Q6: Can I use regular wood screws instead of pocket hole screws?
A6: While you can technically use regular wood screws, pocket hole screws are specifically designed with a self-tapping tip and a washer head that sits flush in the pocket hole, ensuring a tight and clean joint. Using regular screws may lead to splitting or a less secure connection.
Conclusion: Embracing the Pocket Hole Revolution
Mastering how to drill pocket holes is a significant step for any woodworker. The Kreg jig and its associated pocket hole joinery techniques offer a blend of speed, strength, and simplicity that is hard to match. Whether you are embarking on your first DIY furniture project or looking to refine your woodworking techniques, understanding pocket hole jig usage will empower you to create beautiful, durable, and professional-looking pieces with confidence. So grab your jig, your drill, and get ready to join wood pieces in a way that is both efficient and incredibly effective. Happy building!