
Can I drill out my ignition lock cylinder? Yes, you can drill out your ignition lock cylinder if you have the correct tools and knowledge. This guide will walk you through the process.
Losing your car keys or dealing with a stubborn, jammed ignition lock cylinder can be a major headache. When standard methods of ignition cylinder removal fail, drilling out the cylinder becomes a viable, albeit drastic, solution. This process is essential for gaining access to your vehicle’s ignition system when the lock is no longer functional or accessible via a key. While it might sound intimidating, with the right approach and precautions, you can successfully drill out your ignition lock cylinder. This guide provides a detailed, step-by-step process for tackling this automotive repair task.
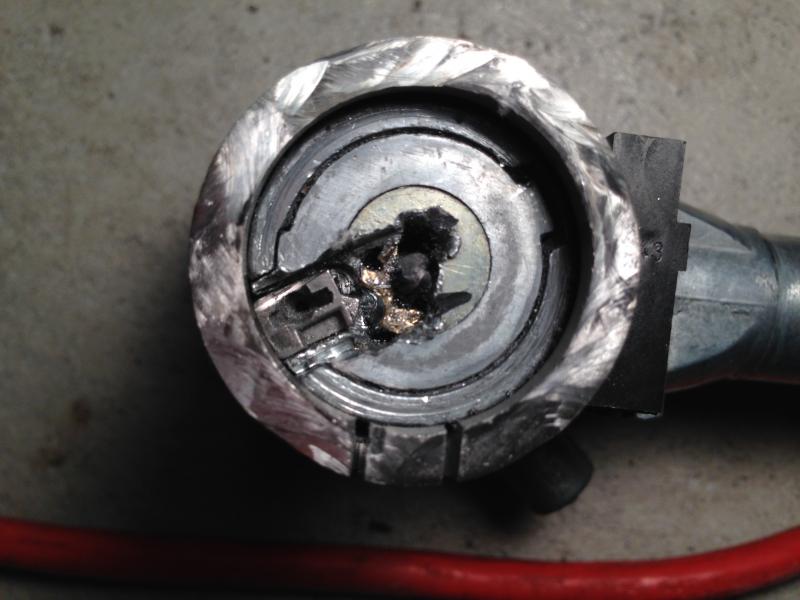
Image Source: www.peachparts.com
When Drilling Becomes Necessary
There are several scenarios where drilling out an ignition lock cylinder is the most practical or only solution. The most common reasons include:
- Lost Keys: If you’ve lost all copies of your car keys and don’t have a spare, the ignition cylinder cannot be operated.
- Damaged Lock Cylinder: Wear and tear, or external tampering, can damage the internal mechanisms of the cylinder, preventing the key from turning or being inserted.
- Seized Ignition Cylinder: Over time, rust, debris, or damage can cause the ignition cylinder to seize, making it impossible to remove with standard tools. Removing seized ignition cylinder often requires more forceful methods.
- Key Broken in the Lock: If a key breaks off inside the ignition, it can block the mechanism and prevent any further operation.
- Bypass Ignition Lock: In emergency situations, or when you need to bypass ignition lock for testing purposes, drilling can be a method to gain immediate access.
It’s important to note that drilling out the ignition cylinder is a destructive process. The cylinder will need to be replaced afterward. If you’re unsure about performing this task, consider consulting a professional locksmith or an automotive ignition repair specialist. They have the expertise and tools to handle car ignition cylinder replacement efficiently and safely.
Tools and Materials You’ll Need
Before you begin, gather all the necessary tools and materials. Having everything ready will streamline the process and minimize frustration.
Essential Tools:
- Power Drill: A variable-speed drill is ideal for controlled drilling.
- Drill Bits: You’ll need a set of high-speed steel (HSS) drill bits. Start with a smaller bit and progressively use larger ones.
- Center Punch: To create a starting point for the drill bit and prevent it from wandering.
- Hammer: To tap the center punch.
- Safety Glasses: Crucial for protecting your eyes from metal shavings.
- Gloves: To protect your hands.
- Penetrating Oil (e.g., WD-40): To help loosen any seized components.
- Screwdriver Set: For removing any surrounding trim panels.
- Pliers: For gripping and removing drilled-out components.
- Vice Grips or Locking Pliers: To grip the remaining cylinder after drilling.
- Replacement Ignition Lock Cylinder: Ensure you have the correct cylinder for your vehicle’s make and model.
- New Keys: Or a plan for how to get new keys for the replacement cylinder.
Optional but Helpful Tools:
- Metal File: To smooth any rough edges.
- Compressed Air: To clean away debris.
- Shop Vacuum: To clean up metal shavings.
Prepping Your Vehicle
Safety and proper preparation are paramount before you start drilling. This ensures minimal damage to your vehicle and protects you from injury.
Step 1: Disconnect the Battery
This is a critical safety step. Disconnecting the negative terminal of your car’s battery will prevent any electrical shorts or accidental activation of vehicle systems while you work.
- Locate your car battery.
- Using a wrench, loosen the nut on the negative (-) terminal.
- Carefully remove the negative cable from the terminal. If it’s stuck, gently wiggle it. Avoid touching the positive terminal.
Step 2: Access the Ignition Lock Cylinder
The ignition lock cylinder is usually located on the steering column. You’ll often need to remove plastic shrouds or covers to get to it.
- Locate Trim Panels: Identify the plastic covers surrounding the steering column.
- Remove Screws: Look for Phillips head or Torx screws securing these panels. These are typically on the underside of the steering column.
- Carefully Pry: Once screws are removed, gently pry the panels apart. Sometimes they are held by clips, so apply steady pressure. Be careful not to force them, as the plastic can be brittle.
- Expose the Cylinder: Once the panels are off, you should have a clear view of the ignition lock cylinder assembly. You might see wires or linkages connected to it.
Step 3: Identify the Cylinder’s Components
Familiarize yourself with the ignition lock cylinder and its housing. You’ll be drilling into the cylinder itself, aiming to destroy the internal locking pins and the shear line. The goal is to break the pins that prevent the cylinder from turning without the key.
The Drilling Process: Step-by-Step
Drilling out an ignition lock cylinder requires precision and patience. Rushing the process can lead to more damage than necessary. This is where the real work of ignition cylinder removal happens.
Step 1: Mark the Drilling Point
- Locate the Shear Line: The shear line is where the pins within the cylinder align with the housing when the correct key is inserted. This is the weakest point. Visually, it’s the point where the cylinder meets the outer housing. You’re essentially trying to drill through the pin chambers.
- Use the Center Punch: Place the tip of the center punch directly on the shear line, ideally near the opening where the key would normally go.
- Tap with Hammer: Gently tap the end of the center punch with a hammer. This creates a small indentation, giving your drill bit a starting point and preventing it from sliding.
Step 2: Start Drilling
- Select the First Drill Bit: Begin with a small-diameter drill bit (e.g., 1/8 inch or 3mm).
- Drill Slowly and Steadily: Place the tip of the drill bit into the indentation you created.
- Maintain Straightness: It’s crucial to drill as straight as possible into the cylinder. Drilling at an angle can damage the surrounding ignition switch or housing.
- Apply Moderate Pressure: Let the drill bit do the work. Excessive pressure can break the bit or overheat the metal.
- Drill Depth: You need to drill deep enough to reach and destroy all the pins within the cylinder. Aim to drill through the entire length of the cylinder where the pins are located.
Step 3: Progress to Larger Bits
- Increase Drill Bit Size: Once you’ve drilled a shallow hole, switch to a slightly larger drill bit (e.g., 1/4 inch or 6mm).
- Drill Through Pins: Continue drilling, focusing on the pin chambers. You may feel some resistance as you break through the pins.
- Repeat as Necessary: You might need to use several progressively larger drill bits (up to about 3/8 inch or 10mm, depending on the cylinder size) to ensure all internal pins are destroyed. This is the core of how to drill out a ignition lock cylinder.
- Clear Debris: Periodically, stop drilling and use compressed air or a brush to clear out metal shavings and debris from the drilled hole. This helps prevent the debris from jamming the drill or cylinder further.
Step 4: Remove the Damaged Cylinder
After drilling, the pins should be broken or dislodged, allowing the cylinder to be rotated.
- Use Vice Grips: Grip the outer edge of the drilled-out ignition lock cylinder with vice grips or locking pliers.
- Apply Torque: Turn the cylinder in the direction the key would normally turn to unlock or start the car. You might need to apply considerable force.
- Listen for Movement: You should feel the internal locking mechanism give way. If it’s still stuck, you might need to drill a bit more, ensuring you’re still on the shear line.
- Remove the Cylinder: Once the cylinder can be turned and it feels free, pull it out of its housing.
Table: Drill Bit Progression Example
| Stage | Drill Bit Size (Imperial) | Drill Bit Size (Metric) | Purpose |
|---|---|---|---|
| 1 | 1/8 inch | 3 mm | Initial pilot hole |
| 2 | 3/16 inch | 5 mm | Start breaking pins |
| 3 | 1/4 inch | 6 mm | Deeper pin destruction |
| 4 | 5/16 inch | 8 mm | Ensure all pins are compromised |
| 5 | 3/8 inch | 10 mm | Final clearing (if needed) |
Note: These are general guidelines. The exact size and number of drill bits may vary depending on the specific vehicle and ignition cylinder.
Post-Drilling Procedures
With the old cylinder out, you’re not quite done. The next steps involve preparing for and installing the new cylinder.
Step 1: Clean the Ignition Housing
- Remove Debris: Use compressed air, a brush, and a vacuum to thoroughly clean the area where the ignition cylinder was seated. Ensure no metal shavings remain.
- Inspect for Damage: Check the ignition switch and housing for any damage caused during the drilling process.
Step 2: Install the New Ignition Lock Cylinder
This is where you install the replacement part. This is a crucial step in car ignition cylinder replacement.
- Align the New Cylinder: Many replacement cylinders come with a specific alignment tab or slot. Match this to the corresponding feature in the ignition housing.
- Insert Gently: Slide the new cylinder into the housing. It should go in smoothly.
- Secure the Cylinder: Some cylinders have a retaining clip or screw that holds them in place. Consult the instructions that came with your new cylinder for specific installation details.
- Test with New Keys: Insert the new keys into the cylinder and test the ignition. Ensure it turns smoothly to all positions (Accessory, Off, On, Start).
Step 3: Reassemble the Steering Column
- Replace Trim Panels: Carefully reattach the plastic shrouds and covers you removed earlier. Make sure all clips snap into place and any screws are reinstalled.
- Reconnect the Battery: Reattach the negative battery cable to the terminal and tighten it securely.
When to Call a Professional
While this guide provides detailed instructions on how to drill out your ignition lock cylinder, there are times when professional help is advisable.
- Lack of Tools or Confidence: If you don’t have the necessary tools or feel uncomfortable with the drilling process, it’s best to let a professional handle it.
- Complex Systems: Some modern vehicles have integrated steering column locks and electronic ignition systems that can be more complex to bypass or replace.
- Damage to Steering Column: If you accidentally damage the steering column or ignition switch during the process, a professional automotive ignition repair technician will be needed.
- If you need ignition cylinder rekeying: If you have the old cylinder and it’s not damaged, a locksmith can often rekey it to new keys. However, if you’re drilling it out, rekeying isn’t an option for the old cylinder.
- Seeking a Locksmith Ignition Cylinder: A good locksmith can often source and replace ignition cylinders, sometimes even without needing to drill if there’s an alternative solution, like decoding the existing lock.
A qualified locksmith or mechanic can perform ignition cylinder removal and replacement efficiently, saving you time and potential further damage. They can also assist with obtaining new keys for your vehicle. Sometimes, a simpler solution like bypass ignition lock might be what a professional recommends, depending on the situation.
Frequently Asked Questions (FAQ)
Q1: Will drilling my ignition cylinder damage my steering wheel?
A1: If done carefully and by targeting only the ignition lock cylinder itself, you should not damage the steering wheel. However, if you drill too wide or at an angle, you could damage the surrounding steering column components.
Q2: How long does it take to drill out an ignition lock cylinder?
A2: For someone experienced, it might take 30-60 minutes. For a first-timer, it could take a couple of hours due to the careful approach required.
Q3: Can I drive my car after drilling out the ignition cylinder?
A3: No, you cannot drive your car after drilling out the cylinder because the ignition mechanism is destroyed. You will need to install a new ignition lock cylinder and have keys made for it before you can start and drive the vehicle.
Q4: What happens if I drill too deep?
A4: Drilling too deep can damage the ignition switch located behind the lock cylinder. This switch is responsible for activating various electrical components of the car. If damaged, you’ll need to replace the ignition switch as well, adding to the cost and complexity of the repair.
Q5: Is there an alternative to drilling ignition cylinder?
A5: If the lock is merely stuck but not destroyed, a locksmith might be able to “pick” the lock or use specialized tools for ignition cylinder removal without drilling. If you lost your keys, getting a new key cut from the VIN or by decoding the existing lock (if accessible) might be an option before resorting to drilling.
Q6: Where can I buy a replacement ignition lock cylinder?
A6: You can purchase replacement ignition lock cylinders from auto parts stores, online automotive retailers, or dealerships. Ensure you get the correct part number for your vehicle’s year, make, and model.
This comprehensive guide should provide you with the knowledge to undertake the task of drilling out your ignition lock cylinder. Remember to prioritize safety, work methodically, and don’t hesitate to seek professional assistance if needed for your automotive ignition repair.