
Can you drill a hole in tile without it cracking? Yes, you absolutely can drill a hole in tile without it cracking, provided you use the right tools, techniques, and take the necessary precautions. This guide will walk you through the process of successful tile drilling.
Drilling into tile can seem daunting. The thought of a beautiful ceramic tile cracking under the pressure of a drill bit is enough to make anyone hesitate. However, with the correct approach, tile drilling is a perfectly manageable DIY task. Whether you’re hanging a shelf, installing a towel bar, or routing a pipe, knowing how to drill through tile safely and effectively is a valuable skill. This comprehensive guide will equip you with the knowledge for drilling through tile, focusing on preventing those dreaded cracks. We’ll cover everything from selecting the right tile drill bit to mastering essential tile drilling techniques.
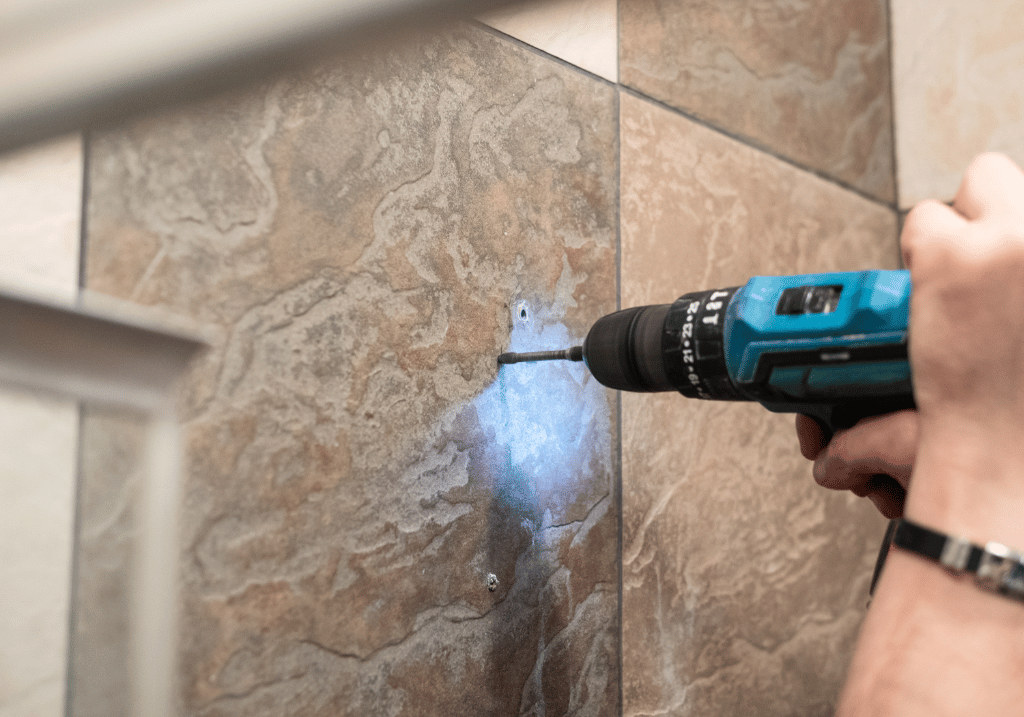
Image Source: ceramiccity.ie
Preparing for Your Tile Drilling Project
Before you even pick up a drill, proper preparation is key to a successful outcome. Rushing this stage is a common pitfall that can lead to cracked tiles and frustration.
Assessing Your Tile Type
The type of tile you are working with significantly impacts the drilling method. Ceramic tile hole drilling differs slightly from the more robust porcelain tile drilling.
- Ceramic Tile: Generally softer than porcelain, ceramic tile is more forgiving. However, it can still chip or crack if not drilled carefully.
- Porcelain Tile: Denser and harder than ceramic, porcelain requires more patience and the correct equipment. Porcelain tile drilling demands a robust approach.
- Natural Stone Tiles (e.g., Marble, Granite): While not strictly ceramic or porcelain, these also require specific diamond bits and techniques.
Gathering Your Tools and Materials
Having the right equipment readily available will make the job much smoother.
- Drill: A corded drill generally offers more consistent power than a cordless one, which is beneficial for harder tiles. A variable speed drill is ideal.
- Tile Drill Bits: The most crucial element. We’ll discuss these in detail shortly.
- Water Source: For cooling the drill bit and tile. This can be a spray bottle, a trickle of water, or even a small pump system.
- Masking Tape or Painter’s Tape: To prevent the drill bit from wandering and to offer some surface protection.
- Safety Glasses: Essential for protecting your eyes from flying debris.
- Gloves: For a better grip and protection.
- Marker or Pencil: For marking your drilling spot.
- Dust Mask: Especially important when drilling dry, though wet drilling minimizes dust.
- Vacuum Cleaner: For cleanup.
- Scrap Tile (Optional but Recommended): For practicing your technique.
Setting Up Your Workspace
Ensure your work area is clean, well-lit, and safe. Clear away any clutter that could obstruct your movement or cause you to stumble. If you’re drilling an installed tile, protect surrounding areas from water and dust.
Selecting the Right Tile Drill Bit
The choice of drill bit is paramount. Using a standard wood or metal bit on tile will almost certainly result in a cracked tile and a dull bit.
Diamond Drill Bits: The Professionals’ Choice
When it comes to tile drilling, a diamond drill bit is king. These bits have a coating of industrial diamond particles on their cutting edge. Diamond is one of the hardest substances known, allowing it to grind through ceramic and porcelain effectively.
- Types of Diamond Bits:
- Spear-Point/Tapered Diamond Bits: These are excellent for starting holes and are commonly used for smaller holes like those needed for screws or anchors. They have a sharp, pointed tip coated with diamonds.
- Hole Saws for Tile: These are cylindrical bits with a diamond-coated edge. They are ideal for drilling larger holes, such as those needed for plumbing fixtures or pipes. A hole saw for tile creates a clean, circular cut.
Other Potential Bits (Use with Caution)
While diamond bits are preferred, some other bits can be used on softer ceramic tiles with extreme care:
- Carbide-Tipped Masonry Bits: These are less effective on harder tiles like porcelain but can sometimes work on softer ceramic tiles for very small holes. They are designed for masonry but their effectiveness on tile is limited. They can also generate more heat.
Table 1: Drill Bit Suitability by Tile Type
| Tile Type | Recommended Drill Bit | Other Options (with caution) | Notes |
|---|---|---|---|
| Ceramic | Diamond-tipped (spear-point or hole saw) | Carbide-tipped masonry (small holes) | Ceramic is softer, but care is still needed. |
| Porcelain | Diamond-tipped (spear-point or hole saw) | None recommended | Porcelain is very hard; diamond is essential. |
| Natural Stone | Diamond-tipped (spear-point or hole saw) | None recommended | Varies by stone type; always check manufacturer recommendations. |
| Glass Tile | Glass and Tile Bits (specialized) | Diamond bits (with extreme care) | Glass is brittle; specialized bits offer better control. |
Bit Size and Shank Type
- Size: Choose a bit size that matches the desired diameter of your hole. For larger holes, a hole saw for tile is necessary.
- Shank Type: Most bits have a round shank for standard drill chucks. Ensure your drill chuck can securely grip the bit.
Mastering Tile Drilling Techniques
Once you have the right bit and your workspace is ready, it’s time to get drilling. Patience and a steady hand are your best allies.
The Importance of Water (Wet Drilling)
Wet tile saw technology is often used for cutting tile, and a similar principle of using water applies to drilling. Water serves several critical functions:
- Cooling: It cools the drill bit and the tile, preventing overheating. Overheating can damage the drill bit’s diamond coating and cause the tile to crack due to thermal stress.
- Lubrication: It lubricates the cutting action, allowing the bit to glide more smoothly.
- Dust Control: It significantly reduces the amount of airborne dust, making the process safer and cleaner.
How to Implement Wet Drilling:
- Spray Bottle Method: Periodically spray water onto the drilling area as you drill. This is suitable for smaller projects.
- Trickle Method: Position a slow, steady stream of water directly onto the drilling spot. You can use a plastic bottle with a small hole in the cap or a specialized water feed attachment.
- Drilling Jig with Water Reservoir: For frequent drilling, a jig with a built-in water reservoir can be very effective.
Step-by-Step Guide to Drilling a Hole in Tile
Follow these steps for precise and crack-free tile drilling:
- Mark the Spot: Use a marker or pencil to clearly mark the center of where you want to drill.
- Apply Tape: Place a piece of masking tape or painter’s tape over the marked spot. This prevents the drill bit from skipping when you start and offers a slight buffer. You can draw a crosshair on the tape to guide your bit.
- Start Slow: Begin drilling at a very low speed. For a ceramic tile hole, you might start at the lowest setting. For porcelain tile drilling, a consistent low speed is crucial.
- Apply Gentle Pressure: Do not force the drill. Let the diamond drill bit do the work. Apply only light, consistent downward pressure. Too much pressure is a primary cause of cracking.
- Maintain a 90-Degree Angle: Keep the drill held perfectly perpendicular to the tile surface. Any angle can put uneven stress on the tile and bit.
- Cool the Bit: Continuously apply water to the drilling area. If using a spray bottle, pause every 15-30 seconds to spray. If using a trickle, ensure it’s constant.
- Listen and Feel: Pay attention to the sound of the drill. If it starts to strain or make a high-pitched squealing noise, ease up on the pressure and ensure adequate water is being used.
- Clear Debris: As you drill, small bits of tile will break away. If you’re not using continuous water, periodically lift the drill bit to clear away the dust and debris. This also helps keep the bit cool.
- Break Through: As you approach the end of the tile, the drill bit might start to grab. Ease up on the pressure and be prepared to support the back of the tile if it’s loose, to prevent blowout.
- Clean Up: Once the hole is complete, turn off the drill and carefully remove it. Clean the area thoroughly.
Special Considerations for Different Hole Sizes
Drilling through tile for different purposes requires adapting your approach.
Smaller Holes (for Anchors, Screws)
- Tool: Use a spear-point diamond drill bit.
- Technique: The step-by-step guide above is ideal. Start slow, maintain a 90-degree angle, and keep the bit cool.
- Tips: For very small holes, you might not need to lift the bit as frequently, but water is still essential.
Larger Holes (for Pipes, Fixtures)
- Tool: Use a hole saw for tile. These are available in various diameters.
- Technique:
- Pilot Hole: Often, a smaller pilot hole is drilled first in the center of the desired large hole using a spear-point diamond bit. This helps guide the hole saw and prevents it from wandering.
- Positioning: Place the pilot bit of the hole saw into the pilot hole.
- Initial Engagement: Start the drill at a very low speed to engage the hole saw. Apply steady, even pressure.
- Gradual Increase: As the hole saw begins to cut, you can slightly increase the speed, but remain in control.
- Constant Cooling: Water is absolutely critical for hole saws, especially on larger diameters, due to the increased friction.
- Clearing Debris: Periodically lift the hole saw to clear the accumulated tile dust and fragments, especially from within the saw itself.
- Support: If drilling through a wall, support the tile from the backside to prevent it from cracking as the hole saw breaks through.
Tile Drilling Tips for Longevity and Precision
To ensure your drill bits last and your holes are clean, consider these advanced tile drilling tips:
- Practice on Scrap: If you’re new to drilling tile, practice on a spare tile first. This helps you get a feel for the pressure and speed required.
- Variable Speed Drill: A drill with variable speed control is invaluable. You can start slow and ramp up as needed.
- “Dry” Start (Very Brief): Some professionals advocate for a very brief “dry” start (no water) just to score the surface and create a slight dimple. Immediately follow this with wet drilling. However, this must be done with extreme care and is often skipped by DIYers who prefer consistent water use from the start.
- Don’t Over-Tighten the Drill Chuck: Ensure the bit is secure but avoid overtightening, which can damage the bit shank.
- Consider a Drill Press: For extremely precise holes or a high volume of drilling, a drill press can offer superior stability and angle control. You’ll still need to manage water effectively.
- Re-sharpening Diamond Bits: Diamond bits don’t truly “sharpen” but can become clogged with debris. Sometimes, drilling into a coarser material like concrete or a piece of pumice can help clean them.
When to Call a Professional or Use Specialized Equipment
While this guide empowers you to drill your own tile, there are situations where professional help or specialized equipment might be wiser.
Using a Wet Tile Saw for Holes
A wet tile saw is primarily for cutting tile, but some models can be adapted for drilling larger holes using a specialized drilling attachment or by carefully maneuvering a hole saw on the blade guard. This is a more advanced technique usually employed by professionals.
What If My Tile is Very Hard or I Need Many Holes?
- Extremely Hard Tiles: If you’re dealing with tiles known for their exceptional hardness (e.g., certain types of porcelain or specialty tiles), and you’re not confident, hiring a professional tile setter or a contractor experienced with these materials is a good idea.
- High Volume Drilling: If you have a large project requiring many holes, investing in a specialized tile drilling system or hiring a professional might be more efficient and cost-effective in the long run.
Troubleshooting Common Tile Drilling Problems
Even with the best intentions, issues can arise. Here’s how to handle them.
Problem: The Drill Bit is Skipping
- Cause: Starting at too high a speed, insufficient tape, or the surface isn’t properly scored.
- Solution: Ensure you have good tape coverage. Start the drill at its lowest speed and apply gentle pressure. Consider a very light initial scoring.
Problem: The Tile is Cracking
- Cause: Too much pressure, drilling too fast, insufficient cooling, or the wrong type of drill bit.
- Solution: Immediately stop drilling. Re-evaluate your technique. Ensure you’re using a diamond bit, drilling slowly, and applying adequate water. Ease up on the pressure.
Problem: The Drill Bit Isn’t Cutting
- Cause: The bit may be worn out or clogged, or the tile is exceptionally hard.
- Solution: Try cleaning the bit by drilling into a coarse material. If it’s a diamond bit that’s simply not cutting anymore, it might be time for a new one. Ensure you’re using the correct bit for the tile type.
Problem: Excessive Heat
- Cause: Insufficient water or drilling too fast.
- Solution: Stop drilling. Increase the water flow or frequency of spraying. Reduce drilling speed. Allow the bit and tile to cool.
Frequently Asked Questions (FAQ)
Q1: Can I use a hammer drill for tile?
A: No, a hammer drill should generally not be used for drilling holes in tile. The hammering action can easily shatter the tile. Use a standard drill or a drill with a “drill only” setting.
Q2: How deep do I need to drill?
A: Drill only as deep as necessary for your anchor or fixture. For standard anchors, typically 1-2 inches is sufficient.
Q3: What is the best drill bit for drilling holes in porcelain tile?
A: The best drill bit for porcelain tile drilling is a high-quality diamond drill bit, typically a spear-point bit for smaller holes or a diamond-coated hole saw for tile for larger ones.
Q4: Can I drill through tile with a regular drill bit?
A: No, a regular drill bit (like those for wood or metal) will not effectively drill through tile and will likely result in the tile cracking or the bit being destroyed.
Q5: How do I prevent dust when drilling tile?
A: The most effective way to prevent dust is through wet drilling, where water is used to cool and lubricate the bit. Using a mask is also recommended, even with wet drilling.
Q6: Do I need a special drill for drilling tile?
A: You do not need a “special” drill, but a corded drill with variable speed control is ideal. A standard cordless drill can work, but ensure it has sufficient power and speed control for the task. Avoid hammer drills.
Q7: How long does a diamond drill bit last?
A: The lifespan of a diamond drill bit depends on the quality of the bit, the type of tile being drilled, and how it’s used. With proper care (using water and appropriate pressure), a good bit can drill many holes.
By following these detailed guidelines and tile drilling tips, you can confidently approach your projects and achieve clean, crack-free holes in your tiles. Remember, patience, the right tools, and a bit of cooling water are your keys to success in drilling through tile.