
Can I drill a hole in my wall? Yes, you can drill a hole in your wall safely and easily with the right tools and techniques. This guide will walk you through the entire process, from preparation to the final touch-up, ensuring you can confidently tackle any drilling task for hanging pictures, shelves, or other items.
Drilling a hole in a wall might seem daunting, but with a bit of preparation and the right approach, it’s a straightforward DIY task. Whether you’re looking to hang a lightweight picture frame or mount a heavier shelf, knowing how to drill a hole safely and effectively is a valuable skill. This comprehensive guide will cover everything you need to know, from choosing the right drill bit to ensuring you don’t hit any hidden dangers. We’ll break down the process into simple, easy-to-follow steps, making it accessible even for beginners.
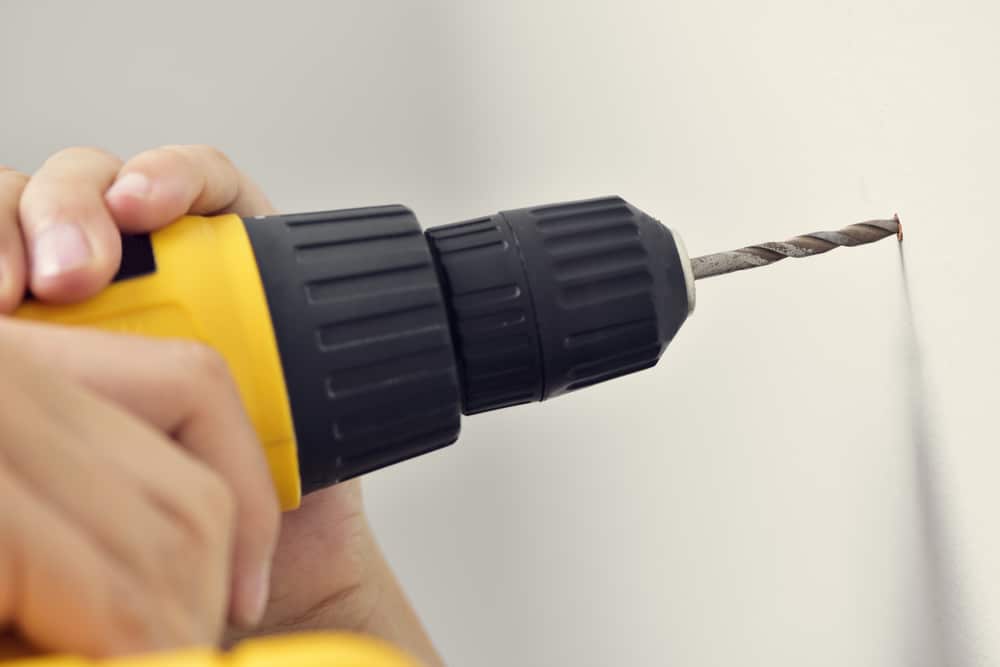
Image Source: www.recommend.my
Preparing for Drilling
Before you even pick up a drill, good preparation is key to a safe and successful outcome. This means gathering your tools, identifying what’s behind the wall, and marking the exact spot where you want to drill.
Gathering Your Tools and Materials
Having the right tools at hand makes the job much easier and safer. Here’s a list of what you’ll typically need:
- Drill: A cordless or corded drill is essential. For tougher materials like concrete, a hammer drill is recommended.
- Drill Bits: You’ll need various sizes. For general drilling drywall, standard twist drill bits work well. For masonry, you’ll need a masonry drill bit.
- Stud Finder: This is crucial for locating wall studs or pipes and electrical wires.
- Pencil: For marking the drilling location.
- Tape Measure: To ensure accurate placement.
- Safety Glasses: To protect your eyes from dust and debris.
- Dust Mask: To avoid inhaling dust.
- Drop Cloth or Newspaper: To catch falling dust and debris.
- Wall Anchor (if needed): For supporting heavier items.
- Vacuum Cleaner (with brush attachment): For cleaning up dust.
- Screwdriver: To insert screws into anchors.
- Level: To ensure your mounted item is straight.
Locating What’s Behind Your Wall
This is perhaps the most critical step for safety. Drilling into an electrical wire or a water pipe can lead to serious hazards and costly repairs.
Using a Stud Finder
A stud finder is your best friend for this task. Most modern stud finders use electronic sensors to detect changes in density behind the wall surface.
- How to Use a Stud Finder:
- Calibrate the stud finder according to its instructions. This usually involves holding it against a clear section of the wall.
- Slowly slide the stud finder horizontally across the wall where you plan to drill.
- When the stud finder indicates a stud or a change in density, mark the spot with your pencil.
- Continue scanning to find the edges of the stud. Most studs are 1.5 inches wide.
- If you are drilling a small hole for a screw or nail and are not mounting anything heavy, drilling directly into a stud is often the most secure method.
- However, if you need to drill in a specific spot that isn’t a stud, or if you’re mounting something heavier, you’ll likely need a wall anchor installation.
Identifying Potential Hazards
Even with a stud finder, it’s wise to be aware of potential hazards:
- Electrical Wires: These are usually run vertically or horizontally from outlets and switches. Avoid drilling directly above or below electrical fixtures.
- Plumbing Pipes: Water pipes are often located near bathrooms, kitchens, and sinks. They can be copper or plastic.
- HVAC Ducts: Air conditioning or heating ducts are also present within walls.
If your stud finder indicates something other than a stud (like a metallic reading that could be a pipe or wire), it’s best to choose a different location or consult a professional.
Marking the Drilling Spot
Once you’ve determined a safe and suitable location:
- Hold your item against the wall or use your tape measure to mark the precise spot for your hole.
- Use a pencil to make a clear mark. If you’re hanging something that needs to be level, use a level to ensure your mark is accurate.
Choosing the Right Drill Bit and Drill
The type of drill bit and drill you use depends on the material of your wall and the size of the hole you need to create.
Drill Bit Types
- Twist Drill Bits: These are the most common and are suitable for drilling drywall, wood, and some plastics. They have a spiral flute that removes material as it drills.
- Masonry Drill Bits: These are designed for drilling into brick, concrete, and stone. They have a hardened tip, often carbide-tipped, that can withstand the abrasive nature of these materials. They often have a wider flute to help clear dust.
- Spade Bits (Paddle Bits): Used for larger holes in wood, not typically for walls.
- Hole Saws: For very large, circular holes, like for installing doorknobs or vents.
Drill Types
- Cordless Drill/Driver: The most versatile for general DIY tasks. They are portable and come with rechargeable batteries. Most have a clutch that helps prevent overtightening screws.
- Corded Drill: Offers consistent power but is limited by the cord’s reach.
- Hammer Drill: Essential for concrete drilling and other hard masonry. It combines rotation with a percussive hammering action, which breaks up hard materials more effectively.
Selecting the Correct Drill Bit Size
The size of your drill bit should match the size of the screw, nail, or wall anchor you plan to use.
- For Screws: A good rule of thumb is to use a drill bit that is slightly smaller than the screw’s shank (the smooth part below the threads). This allows the screw threads to bite into the wall material for a secure hold.
- For Wall Anchors: Most wall anchors come with specific instructions on the required drill bit size. This information is usually printed on the packaging. Always check the anchor’s specifications.
The Drilling Process: Step-by-Step
Now that you’re prepared, let’s get to the actual drilling.
Step 1: Setting Up for Safety and Cleanliness
- Wear Safety Gear: Put on your safety glasses and dust mask.
- Protect the Area: Lay down a drop cloth or newspaper below your drilling spot to catch falling dust.
- Clear Obstructions: Ensure there’s nothing flammable near your drilling area.
Step 2: Drilling the Hole
For Drywall
Drywall is relatively soft, making it easy to drill.
- Select the Right Bit: Choose a sharp twist drill bit of the appropriate size.
- Position the Drill: Place the tip of the drill bit firmly against your pencil mark. Hold the drill perpendicular to the wall.
- Start Slowly: Begin drilling at a slow speed. This helps prevent the drill bit from wandering and creating a larger or uneven hole.
- Apply Steady Pressure: Gradually increase pressure as the bit starts to cut. Let the drill do the work.
- Drill Through: Continue drilling until you’ve gone through the drywall. You’ll feel less resistance when you break through the back of the drywall.
- Withdraw the Bit: Once you’ve reached the desired depth, stop the drill and slowly pull the bit straight out. This helps create a cleaner hole.
For Masonry (Brick, Concrete)
This requires more power and specific techniques.
- Use a Hammer Drill and Masonry Bit: Ensure you have a hammer drill and a masonry drill bit.
- Set Drill to Hammer Mode: Activate the hammer function on your drill.
- Start with a Pilot Hole (Optional but Recommended): For larger holes or harder materials, it’s often beneficial to start with a smaller pilot hole. Use a smaller masonry bit to drill a shallow hole first. This helps guide the larger bit and reduces the chance of it slipping.
- Position and Drill: Place the tip of the masonry bit on your mark. Start the drill slowly, keeping it perpendicular to the wall.
- Apply Firm Pressure: Once the bit bites, apply firm, consistent pressure. The hammer action will do most of the work breaking up the material.
- Clear Dust Regularly: Periodically pull the drill bit out of the hole while it’s still spinning slowly. This helps clear out the dust and debris, preventing the bit from overheating and allowing it to cut more effectively.
- Drill to Depth: Continue drilling until you reach the required depth.
- Withdraw the Bit: Slowly withdraw the spinning drill bit from the hole.
Step 3: Cleaning Up
- Vacuum the Dust: Use your vacuum cleaner to suck up any remaining dust from the hole and the surrounding area.
- Wipe Down: Wipe the wall with a damp cloth to remove any fine dust residue.
Installing Wall Anchors for Secure Mounting
If you are hanging anything heavier than a small picture, you’ll likely need to use a wall anchor installation. Anchors provide a secure point in the wall that can bear more weight than drywall alone.
Types of Wall Anchors
There are several common types of wall anchors, each suited for different weight capacities and wall materials.
| Anchor Type | Description | Weight Capacity (Typical) | Best For |
|---|---|---|---|
| Plastic Expansion Anchors | Simple plastic sleeves that expand as a screw is driven into them. | Light (5-15 lbs) | Drywall, plaster, lightweight items |
| Self-Drilling Anchors (Threaded Drywall Anchors) | These anchors screw directly into drywall without needing a pilot hole, and have threads that grip the drywall. | Medium (20-50 lbs) | Drywall, medium-weight items (shelves, small cabinets) |
| Toggle Bolts | Have spring-loaded wings that open up behind the wall to distribute weight over a larger area. | Heavy (50-100+ lbs) | Drywall, hollow walls, heavy items (large mirrors, TV mounts) |
| Molly Bolts | Metal anchors with a sleeve that expands and grips the back of the drywall or plaster as the screw is tightened. | Medium to Heavy | Drywall, plaster, heavier items (curtain rods, light fixtures) |
| Masonry Anchors (Sleeve Anchors, Wedge Anchors) | Designed for brick and concrete. The sleeve expands against the sides of the drilled hole. | Heavy | Brick, concrete, heavy items (outdoor lights, heavy shelving) |
Installing a Wall Anchor
The process varies slightly depending on the anchor type. Always refer to the manufacturer’s instructions. Here are general steps for common types:
For Plastic Expansion Anchors
- Drill the Hole: Drill a hole using the size specified on the anchor packaging.
- Insert the Anchor: Push the plastic anchor into the hole until it’s flush with the wall surface. If it’s tight, you might need to tap it gently with a hammer.
- Drive the Screw: Insert the screw provided or recommended for the anchor. As you drive the screw, the anchor will expand and grip the wall.
For Self-Drilling Anchors
- Position and Screw: Place the anchor’s tip against the wall at your marked spot.
- Drill/Screw In: Use your drill or a screwdriver to drive the anchor directly into the drywall. The anchor will cut its own threads.
- Insert Screw: Once the anchor is fully seated, insert your screw into the anchor’s opening.
For Toggle Bolts
- Drill a Larger Hole: Toggle bolts usually require a larger hole to allow the spring-loaded wings to pass through. Check the packaging for the correct drill bit size.
- Insert the Toggle: Remove the screw, collapse the wings, and push the toggle mechanism through the hole.
- Re-insert the Screw: Once the toggle is behind the wall, screw it back into the anchor body. The wings will spring open.
- Tighten: Tighten the screw. The wings will pull against the back of the drywall, securing the anchor.
For Masonry Anchors
- Drill the Hole: Use a masonry drill bit and your hammer drill to create a hole of the specified depth and diameter.
- Clean the Hole: Thoroughly clean the hole of all dust using a brush or vacuum.
- Insert the Anchor: Tap the masonry anchor (e.g., a plastic sleeve anchor) into the hole until it’s flush with the surface.
- Insert the Screw: Drive the appropriate screw into the anchor. As you tighten it, the anchor will expand and grip the masonry.
Common Drilling Mistakes and How to Avoid Them
Even with careful preparation, mistakes can happen. Here are some common issues and how to prevent them.
Gouged Walls or Enlarged Holes
- Cause: Using a dull drill bit, drilling too fast, or not starting with a pilot hole on harder materials.
- Solution: Ensure your drill bits are sharp. Start drilling slowly and increase speed gradually. For drywall, a gentle, steady pressure is usually sufficient.
Stripped Screw Holes
- Cause: Using a drill bit that is too large for the screw or anchor, or overtightening the screw.
- Solution: Always use the drill bit size recommended for your screw or anchor. Use the clutch setting on your drill to avoid overtightening. If a hole becomes stripped, you may need to use a larger anchor or repair the hole and start again.
Hitting Unexpected Obstructions
- Cause: Not using a stud finder or misinterpreting its readings.
- Solution: Always use a reliable stud finder and scan the area thoroughly. If you suspect you might hit something, stop drilling immediately and investigate.
Drilling at an Angle
- Cause: Not holding the drill steady or perpendicular to the wall.
- Solution: Focus on keeping the drill straight and perpendicular to the wall surface. Using a level can help guide your drilling angle for critical placements.
DIY Wall Repair After Drilling
Sometimes, despite best efforts, you might end up with a slightly imperfect hole or a small dent in the wall. Here’s how to fix it.
Patching Small Holes and Dents
For small imperfections, a bit of spackle or joint compound is usually all you need.
- Clean the Area: Remove any loose debris around the hole.
- Apply Spackle: Use a putty knife to apply a small amount of spackle or joint compound to fill the hole. Smooth it flush with the wall surface.
- Let it Dry: Allow the spackle to dry completely according to the product instructions.
- Sand Smooth: Lightly sand the dried spackle with fine-grit sandpaper until it’s perfectly smooth and level with the wall.
- Prime and Paint: Apply a coat of primer to the patched area, and once dry, paint it to match the rest of the wall.
Repairing Larger or Messy Holes
If you’ve made a larger hole or a mess, you might need a drywall patch kit.
- Use a Drywall Patch: These kits typically include a mesh or metal patch that adheres to the wall around the hole.
- Apply Joint Compound: Apply joint compound over the patch and feather the edges to blend it with the surrounding wall.
- Multiple Coats: You may need two or three coats of joint compound, allowing each to dry and sanding lightly in between.
- Prime and Paint: Once smooth and dry, prime and paint the area.
This process of DIY wall repair is essential for maintaining a clean and professional finish after your drilling project.
Frequently Asked Questions (FAQ)
Q1: What is the best way to drill into a wall with wires?
A: You should avoid drilling into walls where you suspect electrical wires are present. Always use a stud finder that can detect live AC wires. If you cannot avoid drilling in an area with suspected wires, consult a qualified electrician.
Q2: Can I drill into a wall with pipes?
A: Similar to wires, it’s best to avoid drilling near suspected water pipes. A stud finder may help, but visual cues (like proximity to sinks, toilets, or radiators) are also important. If unsure, choose a different location or proceed with extreme caution, using a small drill bit and stopping if you encounter resistance or moisture.
Q3: What size drill bit should I use for a wall anchor?
A: The required drill bit size will be specified on the wall anchor’s packaging. Always check this information before drilling. Using the wrong size can result in an anchor that is too loose or too difficult to install.
Q4: Do I need a hammer drill for drywall?
A: No, a standard corded or cordless drill is perfectly adequate for drilling drywall. A hammer drill is specifically for harder materials like concrete or masonry.
Q5: How do I know if my wall is drywall or plaster?
A: Drywall is typically a smoother, more uniform material. Plaster walls are often harder and may have a slightly textured or irregular surface. If you tap on the wall, drywall often sounds hollower than plaster. You can also drill a very small test hole in an inconspicuous area. Drywall will crumble easily, while plaster will be harder and might produce dust or small chips.
Q6: What if I drill too deep?
A: If you drill too deep and go through the wall, you’ll need to repair the hole using spackle or joint compound, as described in the DIY wall repair section. For most wall mounting tasks, a hole that’s slightly too deep isn’t a major issue as long as your screw or anchor can still achieve a secure hold.
Q7: How do I ensure my shelf is mounted straight?
A: Use a level! Once you’ve marked the drilling spot, place the level against the wall to ensure your mark is straight. After drilling and installing the anchor, place the shelf or bracket against the wall and use the level again to check its alignment before screwing it in.
By following these guidelines, you can confidently drill holes in your walls for any project, ensuring safety and a professional finish. Remember, preparation and the right tools are the keys to success in any DIY wall repair or mounting endeavor.