
Can you cut plexiglass with a regular circular saw? Yes, you can cut plexiglass with a circular saw, but it requires specific blades and techniques to avoid cracking or melting the material. This guide will walk you through the process of cutting plexiglass with a circular saw, ensuring a clean and smooth finish.
Plexiglass, also known as acrylic or by its brand name Plexiglas®, is a versatile and durable plastic that’s often used as a lighter, shatter-resistant alternative to glass. Whether you’re a DIY enthusiast working on a home project or a professional needing precise cuts, knowing how to cut acrylic sheet effectively is crucial. Using a circular saw can be a quick and efficient way to achieve these cuts, but it’s not as straightforward as cutting wood. Without the right approach, you risk chipping, melting, or cracking the material. This guide will equip you with the knowledge to safely and successfully cut plexiglass using a circular saw.
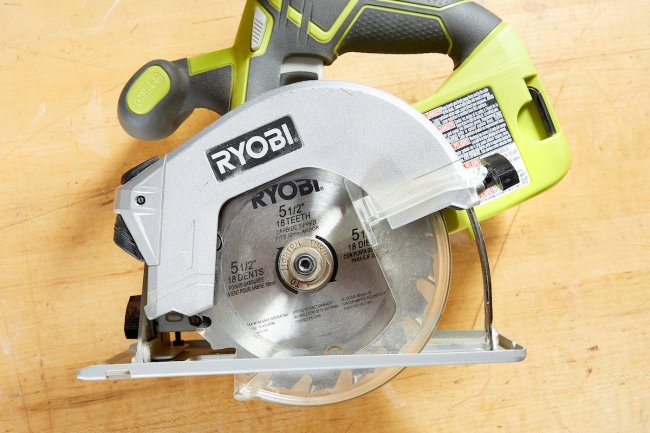
Image Source: www.bobvila.com
Why Choose a Circular Saw for Cutting Acrylic?
Circular saws are powerful tools that excel at making straight, long cuts. When it comes to cutting acrylic sheet, a circular saw offers several advantages:
- Speed: Circular saws can make quick work of even thick acrylic panels.
- Precision: With the right guide and technique, you can achieve very straight and accurate cuts.
- Versatility: A circular saw can handle various thicknesses of plexiglass, from thin sheets to thicker panels.
- Accessibility: Many people already own a circular saw, making it a readily available tool for acrylic cutting.
However, it’s important to remember that a circular saw is designed for wood. Using it on plastic requires careful consideration of the circular saw settings for plastic and the appropriate plexiglass circular saw blade.
Selecting the Right Plexiglass Circular Saw Blade
This is arguably the most critical step in safe plexiglass cutting. Using the wrong blade is a surefire way to end up with a mess.
The Best Blade for Plexiglass
For cutting acrylic sheet, you need a specialized blade. Standard wood-cutting blades will generate too much heat, causing the acrylic to melt and gum up the blade, leading to chipping and cracking.
- Blade Material: Look for blades made of high-speed steel (HSS) or carbide-tipped blades designed for plastic. Carbide tips are generally preferred for their durability and ability to maintain a sharp edge.
- Tooth Count: This is crucial. You want a blade with a low tooth count and large gullets (the space between teeth). A typical recommendation is a blade with 24 to 40 teeth for a 7-1/4 inch blade. More teeth mean more friction and heat, which is what we want to avoid.
- Tooth Geometry: The teeth should be flat-top ground (FTG) or have a high-alternate top bevel (ATB). A negative or zero hook angle is also beneficial as it helps to push the material away from the blade, reducing heat buildup. Avoid blades with a positive hook angle.
- Blade Thickness: Thinner kerf blades can also help reduce heat and material waste.
Table: Recommended Blade Specifications for Cutting Acrylic
| Feature | Recommendation | Why |
|---|---|---|
| Material | Carbide-tipped or High-Speed Steel (HSS) | Durability and sharpness for clean cuts. |
| Tooth Count | Low (e.g., 24-40 teeth for a 7.25″ blade) | Minimizes friction and heat buildup. |
| Tooth Style | Flat-Top Ground (FTG) or High-Alternate Top Bevel (ATB) | Reduces chipping and melting. |
| Hook Angle | Negative or Zero | Pushes material away, reducing heat and tear-out. |
| Kerf | Thin | Reduces friction and material waste. |
| Blade Diameter | Match your saw’s capability | Standard sizes are common (7-1/4″, 10″). |
When you’re looking for the best blade for plexiglass, read the packaging carefully. Manufacturers often specify if a blade is suitable for cutting plastics and acrylics. Sometimes, these blades are specifically labeled as “plastic cutting blades” or “acrylic cutting blades.”
Preparing Your Workspace and Plexiglass
Proper preparation is key to safe plexiglass cutting and achieving professional results.
Setting Up Your Work Area
- Ventilation: While not as hazardous as wood dust, acrylic dust can be an irritant. Ensure you have good ventilation, especially if working in an enclosed space.
- Lighting: Good lighting will help you see your cut line clearly.
- Stable Surface: Work on a sturdy, flat surface. Sawhorses or a workbench are ideal. Ensure the plexiglass is well-supported to prevent flexing during the cut.
Preparing the Plexiglass
- Remove Protective Film: Plexiglass usually comes with a protective film on both sides. Leave this film on during the cutting process. It helps prevent scratches and also provides some protection against chipping. You’ll peel it off after the cut.
- Marking Your Cut Line: Use a fine-tip permanent marker or a grease pencil to mark your cut line. Avoid using chalk, as it can be difficult to see and can smudge. A ruler or a straight edge is essential for accurate marking.
- Scoring Plexiglass (Optional but Recommended): For very clean cuts, especially on thicker acrylic, you can pre-score the cut line.
- Use a sharp utility knife or a specialized scoring tool.
- Draw the knife firmly along your marked line multiple times.
- This creates a weak point that helps the saw blade start cleanly and reduces the chance of chipping.
Support and Securing the Material
- Clamps: Use C-clamps or F-clamps to securely fasten the plexiglass to your workbench or sawhorse.
- Support Underneath: Ensure the plexiglass is supported along its entire length, especially on both sides of the cut line. Use scrap wood or additional sawhorses to prevent sagging.
- Overhang: Allow the piece you are cutting off to overhang the edge of your work surface. This prevents the offcut from binding against the blade or the saw.
Mastering the Cut: Circular Saw Settings and Techniques
Now that you have the right blade and your workspace is prepared, let’s get to the actual cutting.
Adjusting Your Circular Saw
This is where circular saw settings for plastic come into play.
- Blade Depth: Set the blade depth so that it extends just slightly below the plexiglass. A good rule of thumb is to have the tips of the teeth extend about 1/8 inch to 1/4 inch below the plastic. Too much blade exposure increases the risk of binding and chipping.
- Speed (If Adjustable): If your circular saw has variable speed settings, aim for a medium to high speed. However, if you notice melting, you might need to slow it down slightly, but generally, a faster speed helps clear material quickly and reduce heat.
Using a Guide for Straight Cuts
A wobbly cut is an unprofessional cut.
- Rip Fence: Your circular saw likely came with a rip fence. This attaches to the saw and rides along the edge of your material to guide the cut. Ensure it’s set precisely to your marked line.
- Straight Edge Guide: For longer cuts or when the rip fence isn’t sufficient, use a clamped-on straight edge (like a piece of wood or an aluminum level). Ensure the guide is parallel to your cut line and the edge of the plexiglass. The distance from the saw’s base plate to the blade is critical, so measure carefully.
The Cutting Process
- Double-Check Everything: Ensure the plexiglass is securely clamped and supported. Your blade is set correctly. Your guide is in place.
- Position the Saw: Place the circular saw so the blade is just behind your marked cut line. The edge of the saw’s base plate should be aligned with your marked line.
- Start the Saw: Turn on the circular saw and let it reach full speed before it contacts the plexiglass.
- Begin the Cut: Gently feed the saw into the plexiglass. Let the blade do the work; don’t force it. A steady, consistent feed rate is key to preventing melting and cracking.
- Maintain Contact: Keep the saw’s base plate firmly against the straight edge guide throughout the cut.
- Complete the Cut: Continue feeding the saw until the cut is complete. Let the blade stop spinning before you lift the saw away from the plexiglass.
- Clear the Sawdust/Shavings: Acrylic shavings can build up. You might want to use a brush or a shop vac to clear them away periodically, especially on long cuts.
Preventing Plexiglass Cracking
Cracking is the most common issue when cutting acrylic. Here’s how to prevent it:
- Use the Correct Blade: As emphasized, this is paramount.
- Slow Feed Rate (Initially): Start the cut with a slightly slower, controlled feed rate. Once the blade is fully engaged, you can increase to a steady, consistent speed.
- Avoid Stopping Mid-Cut: If possible, complete the cut in one pass. Stopping and starting can create stress points that lead to cracks.
- Support is Key: Ensure the plexiglass is supported on both sides of the blade. Any flexing or vibration can cause cracks.
- Proper Blade Depth: As mentioned, too much blade exposed increases the risk of binding.
- Scoring: Pre-scoring the line can make a significant difference.
Minimizing Melting and Gumming
Melting occurs when the blade generates too much friction and heat.
- Blade Quality: A sharp, high-quality blade designed for plastic is your best defense.
- Feed Rate: A consistent, smooth feed rate is crucial. Too slow can cause melting; too fast can cause chipping. Find the sweet spot where the shavings are clear and not melted.
- Blade Depth: A shallower blade depth generates less heat.
- Coolant (Advanced): For very long or difficult cuts, some professionals use a light spray of water or a specialized cutting fluid. However, be cautious with liquids around power tools. Ensure the fluid is safe for plastics and your saw.
Alternative Techniques and Considerations
While a circular saw is a great tool, other methods can be useful for specific situations.
Jigsaw for Curved Cuts
If your project requires curved cuts in plexiglass, a jigsaw is a better choice than a circular saw.
- Blade: Use a specialized plastic-cutting blade for your jigsaw.
- Speed: Use a slower speed setting.
- Technique: Move the jigsaw slowly and steadily along your curve.
Table Saw for Long Straight Cuts
A table saw can also be effective for straight cuts in plexiglass, offering excellent stability.
- Blade: Use the same type of specialized blade recommended for circular saws.
- Technique: Feed the plexiglass smoothly and steadily into the blade, ensuring it remains against the fence.
Drilling Holes in Plexiglass
Before cutting, you might need to drill holes.
- Drill Bits: Use bits specifically designed for plastic. These often have a sharper point and a more aggressive angle.
- Speed: Drill at a slower speed.
- Backing Material: Place a piece of scrap wood behind the plexiglass to support it and prevent blow-out.
- Pecking: Drill in short bursts, withdrawing the bit to clear shavings and allow cooling.
Safety First: Essential Precautions
Working with power tools and sharp materials requires strict adherence to safety guidelines.
Personal Protective Equipment (PPE)
- Safety Glasses: Always wear ANSI-approved safety glasses or goggles to protect your eyes from flying debris.
- Gloves: Wear work gloves to protect your hands from sharp edges and to improve grip.
- Dust Mask/Respirator: Consider wearing a dust mask or respirator, especially if working in a poorly ventilated area, to avoid inhaling acrylic dust.
- Hearing Protection: Circular saws can be loud. Wear earplugs or earmuffs.
Tool Safety
- Read Your Saw’s Manual: Familiarize yourself with the specific operation and safety features of your circular saw.
- Blade Guard: Never remove or disable the blade guard. It’s a critical safety feature.
- Unplug When Changing Blades: Always disconnect the power before changing blades or making any adjustments to the saw.
- Keep Hands Clear: Maintain a safe distance between your hands and the blade at all times.
- Be Aware of Kickback: While less common with plastic than wood, kickback can still occur if the blade binds. Maintain a firm grip and proper stance.
Post-Cut Finishing
Once you’ve successfully cut your plexiglass, a few finishing touches can enhance the appearance.
Removing the Protective Film
Carefully peel off the protective film from both sides of the cut plexiglass. Do this slowly to avoid static electricity, which can attract dust.
Deburring the Edges
Even with the best techniques, you might get a slight burr or rough edge.
- Fine-Grit Sandpaper: Use fine-grit sandpaper (e.g., 220-grit or higher) to gently sand the cut edge.
- Sanding Block: Use a sanding block for a flat surface.
- Flame Polishing (Advanced): For a perfectly smooth, glass-like edge, flame polishing can be used by professionals. This involves briefly passing a propane torch flame along the edge. However, this technique requires significant practice and is not recommended for beginners due to the risk of melting or damaging the acrylic.
Cleaning the Plexiglass
Use a soft, lint-free cloth and a mild soap and water solution or an acrylic cleaner. Avoid abrasive cleaners or paper towels, which can scratch the surface.
Common Problems and Troubleshooting
Even with careful preparation, you might encounter issues.
Problem: Melted Edge
- Cause: Blade too dull, wrong blade type, blade depth too shallow, feed rate too slow.
- Solution: Ensure you’re using the best blade for plexiglass with a sharp edge. Try a slightly faster, consistent feed rate. Double-check blade depth.
Problem: Chipped or Jagged Edge
- Cause: Blade too aggressive (too many teeth), dull blade, insufficient support, forcing the cut, starting cut too quickly.
- Solution: Use a blade with fewer teeth. Ensure the blade is sharp. Provide ample support to the plexiglass. Score the line. Start the cut smoothly.
Problem: Cracking During the Cut
- Cause: Insufficient support, blade binding, forcing the cut, improper blade depth.
- Solution: Reinforce support. Ensure the blade is sharp and appropriate. Maintain a steady feed rate. Check blade depth. Pre-score the line.
Problem: Saw Binding or Stalling
- Cause: Blade rubbing against the cut, material flexing, poor support.
- Solution: Ensure adequate support and that the offcut piece is free to fall away. Use the correct blade depth and a sharp blade.
Frequently Asked Questions (FAQ)
Q1: Can I use a wood blade to cut plexiglass?
A1: It is strongly discouraged. Wood blades create excessive heat, leading to melting, gumming, and chipping of the plexiglass. Always use a blade specifically designed for plastics or acrylic.
Q2: What is the best type of blade for cutting acrylic sheet with a circular saw?
A2: The best blade is typically a carbide-tipped blade with a low tooth count (24-40 teeth for a 7.25″ blade) and a flat-top ground (FTG) or high-alternate top bevel (ATB) tooth design. A negative hook angle is also beneficial.
Q3: How deep should the blade be when cutting plexiglass?
A3: Set the blade depth so that the teeth extend just slightly below the plexiglass, typically about 1/8 inch to 1/4 inch. This minimizes binding and heat buildup.
Q4: How do I prevent plexiglass from cracking when cutting?
A4: Ensure proper support, use the correct blade, maintain a steady feed rate, avoid stopping mid-cut, and consider scoring the cut line before cutting.
Q5: Is it okay to leave the protective film on while cutting?
A5: Yes, it’s highly recommended to leave the protective film on during cutting. It helps prevent scratches and provides some protection against chipping.
Q6: What are the best circular saw settings for plastic?
A6: While specific settings vary by saw model, focus on blade depth (just below the material) and, if available, a medium to high speed. The most critical setting is the blade type.
Q7: Can I use a circular saw for curved cuts in plexiglass?
A7: No, a circular saw is designed for straight cuts. For curved cuts, a jigsaw with a plastic-cutting blade is the appropriate tool.
By following this comprehensive guide, you should be well-equipped to tackle your plexiglass cutting projects with confidence. Remember, patience, the right tools, and safety precautions are your keys to success when using a circular saw for acrylic. Enjoy your project!