
Can you mix thinset without a drill? Yes, you absolutely can mix thinset without a drill, and it’s a very achievable task for most DIYers. What is thinset? Thinset is a cement-based mortar used to adhere tiles to surfaces like floors and walls. It’s a crucial component in tiling projects, ensuring a strong and lasting bond.
For many tiling jobs, especially smaller ones, the idea of using a power drill with a mixing paddle might seem like the only way to get the job done right. However, the reality is that making thinset without a drill is not only possible but also a time-tested method. This guide will walk you through the process of manual thinset mixing, showing you how to achieve the perfect consistency for your tiling needs using simple tools and techniques. We’ll cover everything from choosing the right tools to achieving that ideal thinset paste manually. Whether you’re a seasoned DIYer or a complete beginner, this guide will empower you to tackle basic thinset preparation with confidence, even without a power mixer.
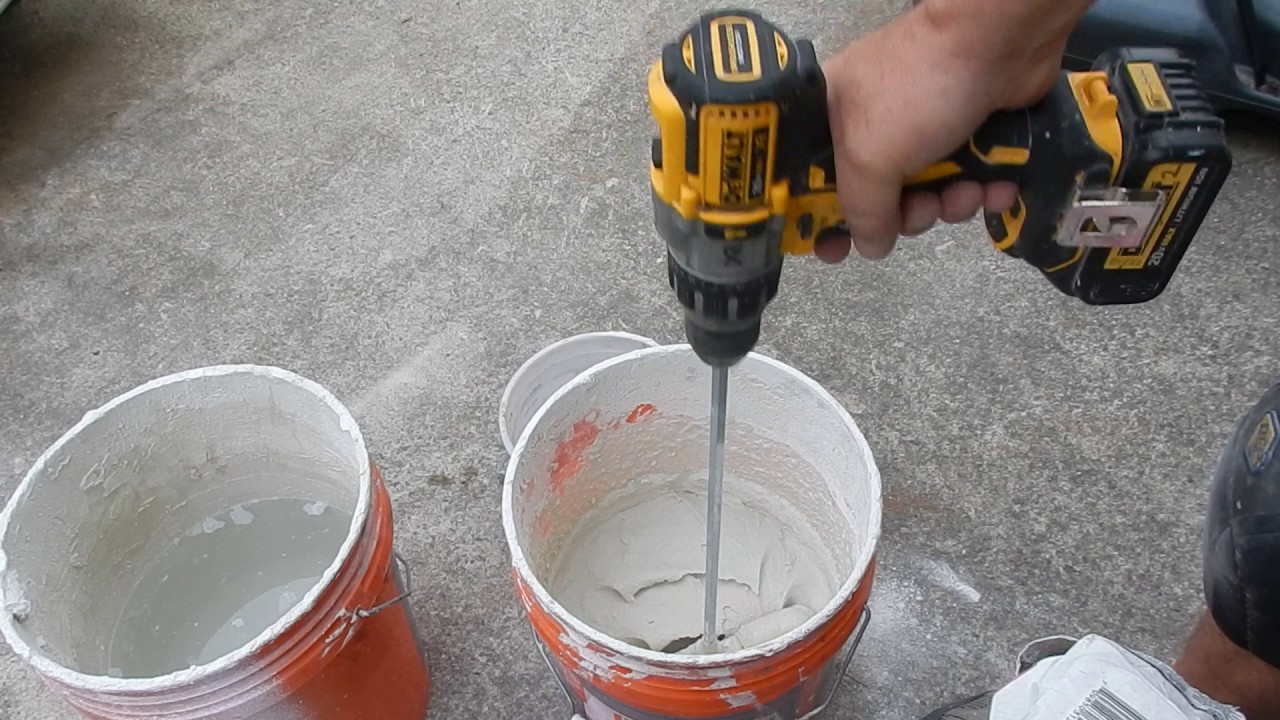
Image Source: i.ytimg.com
The Tools You’ll Need for Manual Thinset Mixing
To successfully mix thinset by hand, you won’t need any specialized power equipment. The beauty of mortar mixing by hand lies in its simplicity and accessibility. Here’s a breakdown of the essential tools:
- Mixing Bucket: A sturdy, clean plastic bucket is your best friend here. Opt for a 5-gallon bucket, as it provides ample space for mixing and prevents overflow. Make sure it’s free from any debris or chemicals that could affect the thinset.
- Trowel or Mixing Stick: This is your primary mixing tool. A sturdy margin trowel or a dedicated mortar mixing stick works perfectly. The trowel is particularly effective for scraping the sides and bottom of the bucket, ensuring all the powder is incorporated. A strong piece of wood can also serve as a mixing stick.
- Measuring Cup or Container: Accurate measurement of water is key to achieving the correct thinset consistency. Use a measuring cup or a dedicated container to measure the water precisely.
- Water Source: Access to clean, fresh water is essential.
- Thinset Mortar: Of course, you’ll need your thinset powder. Always check the manufacturer’s instructions on the bag for specific water-to-powder ratios.
- Gloves and Eye Protection: While not tools for mixing, safety gear is crucial. Thinset is alkaline and can irritate skin and eyes. Always wear gloves and safety glasses.
Why These Tools Work for Stirring Thinset Without a Mixer
Each of these tools plays a vital role in the hand mixing thinset process.
- The Bucket: Its depth and width allow for vigorous mixing without spilling. It also keeps everything contained, making cleanup easier.
- The Trowel/Stick: These tools allow you to physically agitate the water and powder, breaking up clumps and creating a smooth mixture. The flat surface of a trowel is excellent for scooping and folding, much like how a drill mixer would work, but with manual effort.
Step-by-Step Guide to Hand Mixing Thinset
Mixing thinset for tiling by hand requires a methodical approach. Follow these steps for optimal results:
Step 1: Read the Thinset Bag
Before you even open the bag, take a moment to read the manufacturer’s instructions. This is the most critical step. Different brands and types of thinset have specific water-to-powder ratios and mixing instructions. Ignoring this can lead to thinset that is too wet, too dry, or doesn’t cure properly, jeopardizing your tiling project.
Step 2: Measure Your Water
Based on the thinset bag’s instructions, pour the recommended amount of clean, fresh water into your mixing bucket. It’s generally better to start with slightly less water than the maximum recommended amount. You can always add more if needed, but it’s very difficult to correct thinset that is too watery.
Step 3: Gradually Add Thinset Powder
Slowly begin adding the thinset powder to the water. Don’t dump the entire bag in at once. As you add the powder, start to gently stir with your trowel or mixing stick. This gradual addition helps prevent the formation of large dry clumps and makes the initial mixing easier.
Step 4: The Initial Stirring and Clump Breaking
Once you have a good amount of powder in the water, begin a more vigorous stirring motion. Your goal is to wet all the powder. At this stage, the mixture will likely be lumpy and thick. Use your trowel to scrape the sides and bottom of the bucket, ensuring no dry powder remains stuck. This is where manual thinset mixing really begins.
Step 5: Achieve a Paste-Like Consistency
Continue stirring, breaking up any lumps you encounter. The goal is to create a smooth, paste-like consistency. Think of it like thick pancake batter or peanut butter. If the mixture is too dry and crumbly, add a small amount of water. If it seems too wet and runny, add a little more thinset powder. This fine-tuning is a key part of creating thinset paste manually.
Table 1: Consistency Guide for Hand-Mixed Thinset
| Appearance | What it Means | Action to Take |
|---|---|---|
| Crumbly, won’t hold shape | Too dry | Add a small amount of water, mix thoroughly. |
| Like thin soup or milk | Too wet | Add a small amount of thinset powder, mix thoroughly. |
| Smooth, holds shape, like peanut butter | Ideal consistency | Ready to use! |
| Stiff, difficult to spread | Slightly too dry, but usable with effort | Add a tiny bit more water, mix well. |
| Too watery, drips off trowel | Too wet | Add a small amount of thinset powder, mix well. |
Step 6: The Slump Test (Optional but Recommended)
A simple way to check your thinset’s consistency is the “slump test.” Take a trowel full of the mixed thinset and hold it over the bucket. Let it slide off. If it slides off in a thick, cohesive mass that holds its shape reasonably well, it’s likely good. If it spreads out too quickly and thinly, it’s too wet. If it stays clumpy and barely moves, it’s too dry.
Step 7: Let it Slake
Most thinset manufacturers recommend a “slake” period. This is a resting period, usually 5-10 minutes, after the initial mixing. During this time, the chemicals in the thinset hydrate fully, resulting in a more workable and stronger mortar. After slaking, give the thinset another quick stir. This final stir is crucial for ensuring uniform consistency and is a key part of stirring thinset without a mixer.
Tips for Successful Manual Thinset Mixing
Mixing thinset by hand can be physically demanding, but with these tips, you can make the process smoother and more effective:
- Mix in Batches: Don’t try to mix a whole bag at once if you’re new to manual mixing. Start with a portion of the bag (e.g., half or a quarter) to get a feel for the process and the amount of water needed. You can always mix more as you go. This approach makes basic thinset preparation less overwhelming.
- The “Dry-Fit” First: Before adding water, you can measure out your thinset powder into the bucket. This helps you visualize the quantity and ensure you’re not using too much for your job.
- Work in a Cool Environment: High temperatures can cause thinset to dry out too quickly, making it difficult to work with. If it’s hot, work in a shaded area or during cooler parts of the day.
- Clean Your Tools Immediately: Thinset dries hard and becomes very difficult to remove once set. Wash your bucket and trowel thoroughly with water as soon as you’re finished.
- Don’t Over-Mix: Once you reach the correct consistency, avoid excessive mixing. Over-mixing can incorporate too much air into the thinset, potentially weakening the bond.
- Use the Right Ratio: Always prioritize the water-to-powder ratio specified on the thinset bag. This is the most important factor for achieving the correct consistency.
- Don’t Add Too Much Water: It’s a common mistake to add too much water to make mixing easier. This weakens the thinset and can lead to efflorescence (white powdery deposits) and cracking. Remember, you’re aiming for a stiff, workable paste, not a liquid.
- Stirring Thinset Without a Mixer requires Arm Strength: Be prepared for a bit of a workout. Hand mixing thinset will definitely give your arms a good exercise! Pace yourself and take short breaks if needed.
Common Challenges and How to Overcome Them
Even with careful attention, you might encounter a few common issues when making thinset without a drill:
Lumpy Thinset
Problem: Dry pockets of powder remain even after mixing.
Solution: This is common with manual mixing. Keep scraping the sides and bottom of the bucket with your trowel. Focus on breaking up the lumps by pressing them against the side of the bucket. The slake period and subsequent stir also help to smooth out minor lumps.
Too Dry Thinset
Problem: The mixture is crumbly and won’t hold its shape.
Solution: Add water very slowly, a tablespoon at a time, and mix thoroughly after each addition. It’s easy to add too much, so be conservative.
Too Wet Thinset
Problem: The mixture is runny and won’t hold its shape on the trowel.
Solution: Add thinset powder very slowly, a tablespoon at a time, and mix thoroughly. This is more forgiving than adding too much water, but still requires care.
Inconsistent Mixing
Problem: Some areas of the mix are thicker than others.
Solution: Ensure you are thoroughly scraping the sides and bottom of the bucket. The final stir after the slake period is crucial for evening out consistency.
Why Mixing Thinset by Hand is a Valid Option
Hand mixing thinset is a perfectly viable method, especially for smaller tiling projects. Here’s why it’s a good choice:
- Cost-Effective: You don’t need to invest in a power drill and a mixing paddle, saving money.
- Portability: You can mix thinset anywhere without needing access to electricity. This is ideal for remote locations or for small repairs.
- Control: Many feel that manual mixing offers greater control over the consistency of the thinset. You can feel the mixture and adjust it precisely as needed, which is a key aspect of creating thinset paste manually.
- Simplicity: The process is straightforward and doesn’t require learning to operate power tools. This makes making thinset without a drill very accessible to beginners.
- Practice: It’s an excellent way to get a feel for the material and develop a better sense of its properties, which benefits your overall mixing thinset for tiling skills.
When You Might Consider a Drill Mixer
While manual thinset mixing is effective, there are times when a drill mixer might be beneficial:
- Large Tiling Projects: For extensive flooring or wall tiling, mixing large quantities of thinset can be very labor-intensive by hand. A drill mixer can significantly speed up the process.
- Heavy-Duty Thinset: Some specialized thinsets are very dense and can be challenging to mix manually to the perfect consistency.
- Arm Fatigue: If you have physical limitations or are concerned about arm fatigue, a drill mixer is a good alternative.
However, for standard wall and floor tiling in average-sized rooms, stirring thinset without a mixer is perfectly adequate.
The Final Consistency Check: What to Look For
After your final stir, the thinset should have a consistency that allows it to be spread smoothly with your trowel. It should stick to the notches of the trowel when you hold it upside down, but slide off with a gentle tap. It should not be so stiff that it tears the surface, nor so fluid that it runs off the trowel like water. Achieving this perfect texture is the goal of creating thinset paste manually. This careful balance is what ensures your tiles are set correctly.
Conclusion
Mixing thinset by hand is a fundamental skill for anyone undertaking a tiling project. It’s a testament to the fact that you don’t always need fancy tools to achieve professional results. With the right approach, a sturdy bucket, and a reliable mixing tool, you can successfully prepare thinset for your tiling needs. Remember to always follow the manufacturer’s instructions, work methodically, and prioritize safety. So, the next time you have a tiling job, don’t let the lack of a drill stop you – embrace the art of manual thinset mixing and lay those tiles with confidence! Mortar mixing by hand is a skill that will serve you well in various DIY projects.
Frequently Asked Questions (FAQ)
Q1: How much water do I add to thinset?
A1: Always refer to the thinset manufacturer’s instructions on the bag. The exact amount of water varies depending on the brand and type of thinset. It’s generally recommended to start with slightly less water than the maximum specified and add more gradually as needed.
Q2: Can I use a shovel to mix thinset?
A2: While a shovel can be used in a pinch, it’s not ideal. A margin trowel or a dedicated mixing stick is much more effective for scraping the sides and bottom of the bucket and breaking up clumps, ensuring a smoother, more consistent mix. Stirring thinset without a mixer is best done with a tool designed for that purpose.
Q3: How long does mixed thinset last?
A3: Once mixed, thinset has a limited working time, typically between 30 minutes to 2 hours, depending on the temperature and humidity. Once it starts to thicken or skin over, it’s best to discard it and mix a fresh batch. Don’t try to re-water thinset that has started to set.
Q4: What happens if I use too much water in my thinset?
A4: Using too much water weakens the thinset mortar, making it less durable and prone to cracking or de-lamination. It can also lead to efflorescence (white powdery deposits) on the grout lines. This is why precise basic thinset preparation is crucial.
Q5: How do I know if my thinset is the right consistency for tiling?
A5: The ideal consistency is often described as being like peanut butter or thick cake batter. It should be smooth, easy to spread with a trowel, and hold its shape on the trowel’s face when held upside down, but slide off with a gentle tap. It shouldn’t be too stiff or too runny. This is the key to successful mixing thinset for tiling.
Q6: Can I add anything to thinset to make it easier to mix by hand?
A6: No. Thinset is a precisely formulated product. Adding extra ingredients can compromise its integrity and performance. Stick to the manufacturer’s recommended water-to-powder ratio for the best results. Making thinset without a drill relies on technique, not additives.